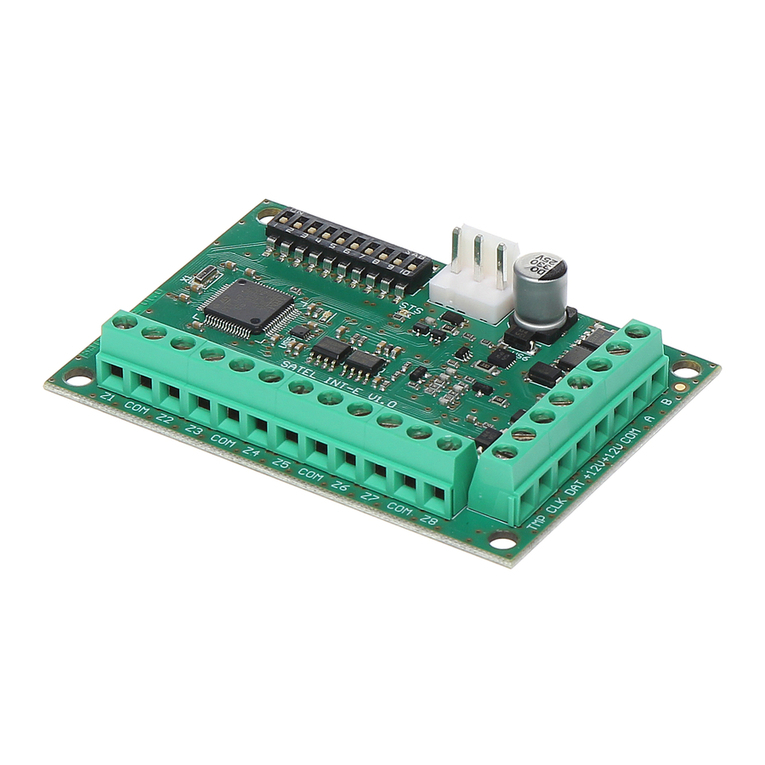
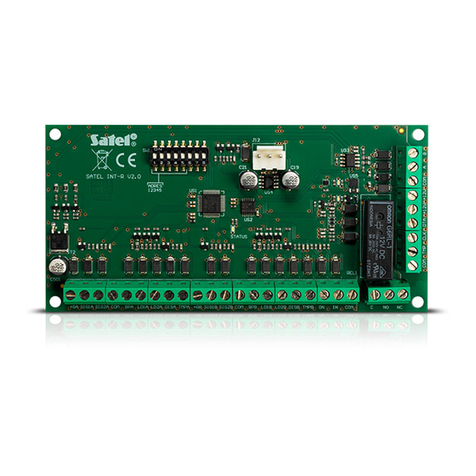
Satel INT-R User manual

®
UNIVERSAL EXPANDER
FOR CARD / CHIP READERS
INT-R
int-r_en 09/11
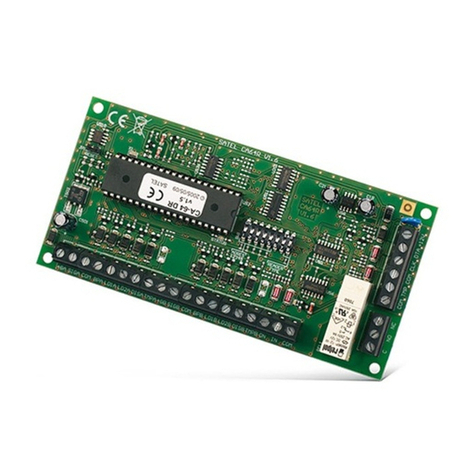
The INT-R expander interfaces with the INTEGRA and CA-64 alarm control panels, replacing
the previously offered CA-64 SR and CA-64 DR expanders. This manual applies to the
expander with electronics version 2.0 and firmware version 3.00 (or later).
1. Features
•Support for two proximity card / DALLAS chip readers.
•Support for WIEGAND 26 interface readers.
•Capability to arm / disarm and clear alarm by using the readers.
•Capability to implement access control function – control of a single door.
•Relay to control the electromagnetic door lock.
•Input for door status control.
•Input for door unlocking with a button.
•Capability to automatically unlock the door in case of fire alarm.
•Additional NC type tamper input.
2. Installation and start-up
Disconnect power before making any electrical connections.
The expander is designed for indoor installation, in spaces with normal air humidity.
1. Secure the expander board in its enclosure.
2. Determine the expander operating mode (see: SELECTING THE EXPANDER OPERATING
MODE).
3. With the DIP-switches, set the appropriate expander address. To set an address, use the
switches 1-5. The address must be different from that in the other modules connected to
the expander bus. The address is the sum of numerical values set on the switches 1-5
(see Table 1).
Switch number 1 2 3 4 5
Numerical value 1 2 4 8 16
Table 1. Numerical values corresponding to the switches set to ON position (in the OFF
position, the value 0 is assigned to each switch)
4. Connect the CLK, DTA and COM terminals with wires to the appropriate terminals of the
control panel expander bus. To make a connection, it is recommended to use an
unscreened straight-through cable. When using the twisted-pair type of cable, the CLK
(clock) and DTA (data) signals must not be sent through one twisted pair. The wires must
be run in one cable. The cable length should not exceed 1000 m. If it exceeds 300
meters, it may be necessary to use several wires connected in parallel for each signal.
5. Connect readers to the respective terminals (see: CONNECTING THE READERS).
6. Connect the door status control detector to the IN and COM terminals.

2 INT-R SATEL
7. Connect the electromagnetic door lock to the relay terminals.
8. If the door is to be unlocked by means of a monostable switch, connect the switch button
to the ON and COM terminals.
9. Connect the enclosure tamper switch wires to the TMP and COM terminals (or short-
circuit the TMP terminal to the COM terminal).
10.Connect the power leads to the +12V and COM terminals. If the distance to the control
panel is less than 300 meters, the expander can be supplied directly from the control
panel. If the distance to the control panel is higher, the expander must be supplied from
another power source, which is located at a closer distance (a power supply unit or an
expander with power supply).
11.Turn on the power.
12.Start the identification function in the control panel. Depending on the selected operating
mode, the expander will be identified as CA-64 SR (expander for proximity card readers)
or CA-64 DR (expander for DALLAS chip readers).
2.1 Electronics board
Fig. 1. View of the electronics board.
Explanations for Fig. 1:
1 - DIP-switch package for setting an individual module address.
2 - LED indicator of communication with the control panel:
−blinking – data exchange with the control panel;
−steady light – no communication with the control panel.
3 - connector for future applications.
4 - LED indicator of the relay status (lit when the relay is active).
5 - LED indicator of power supply presence.

SATEL INT-R 3
6 - terminals to connect the reader A (see: CONNECTING THE READERS).
7 - terminals to connect the reader B (see: CONNECTING THE READERS).
8 - NO type input for relay control (enables the door to be unlocked without using a reader).
9 - NC type input for door status control (if not used, it should be shorted to the common
ground).
10 - common ground..
11 - relay terminals:
C- common terminal;
NO - normally open terminal;
NC - normally closed terminal.
12 - tamper circuit terminals. The terminals should be short-circuited, if no tamper circuit is
connected to them.
13 - communication bus terminals.
14 - +12 V DC inputs / outputs.
15 - common ground..
16 - RS-485 bus terminals.
2.2 Selecting the expander operating mode
The device can operate as:
I - CA-64 SR expander, supporting the CZ-EMM readers (CZ-EMM, CZ-EMM2, CZ-EMM3
and CZ-EMM4) manufactured from May 2005 factory default setting;
II - CA-64 SR expander, supporting the CZ-EMM readers manufactured until May 2005;
III - CA-64 SR expander, supporting the WIEGAND 26 interface readers;
IV - CA-64 DR expander, supporting the DALLAS chip readers.
In order to change the expander operating mode, do as follows:
1. Turn the expander power off, if it is turned on.
2. Set the DIP-switches as required for the selected operating mode (see: Fig. 2).
Fig. 2. The way of setting DIP-switches for the operating modes described above.
3. Short-circuit the CLK and DTA terminals.
4. Turn on the module power (connect the power supply wires to +12V and COM terminals).
Saving the settings will be confirmed by slow blinking of the STATUS LED.
5. Turn off the module power.

4 INT-R SATEL
6. Open the CLK and DTA terminals. Install the expander in the alarm system in accordance
with the recommendations set out above.
Note: WIEGAND 26 interface readers, CZ-EMM series readers and keypads with readers
can be used in the alarm system. Note, however, that the proximity card assigned to
the user by means of a WIEGAND 26 interface reader will not be supported by readers
which cannot work in this format. On the other hand, the WIEGAND 26 interface
readers will not support cards assigned to the users by means of readers which cannot
work in this format.
2.3 Connecting the readers
The length of the cable connecting the reader and the expander should not exceed 30 m.
Connecting the proximity card readers
Connect the proximity card reader manufactured by SATEL to the expander terminals as
displayed in Table 2.
Expander terminal
Reader A Reader B Terminal description Color of reader wire
+GA +GB +12 V DC power supply red
SIG1A SIG1B data (0) green
SIG2A SIG2B data (1) black
COM COM common ground blue
BPA BPB sound control (BEEPER) yellow
LD1A LD1B green LED control pink
LD2A LD2B red LED control gray
DISA DISB disabling reader operation (HOLD) brown
TMPA TMPB reader availability control white
Table 2. The way of connecting wires of proximity card reader to terminals.
Notes:
•In case of CZ-EMM3 and CZ-EMM4 readers the brown wire must be connected to the
module.
•The black wire, which is available in the CZ-EMM3 and CZ-EMM4 readers, must be
connected only when the expander and readers are to work in the WIEGAND 26 mode.
Connecting the DALLAS chip readers
Connect the DALLAS chip reader to the expander terminals as displayed in Table 3.
Expander terminal
Reader A Reader B Terminal description Color of reader wire
SIG1A SIG1B data (0) white
gray
COM COM common ground yellow
LD1A LD1B green LED control green
LD2A LD2B red LED control brown
Table 3. The way of connecting wires of DALLAS chip reader to terminals.

SATEL INT-R 5
3. Programming the expander
The expander can be programmed using:
−LCD keypad: XSERVICE MODE XSTRUCTURE XHARDWARE XEXPANDERS XSETTINGS
X[module name];
−computer running DLOADX or DLOAD64 program: "Structure" window Æ"Hardware" tab
Æ"Expansion modules" branch Æmodule name.
3.1 Parameters and options
Given in square brackets are the names shown on the LCD keypad display.
Note: Some parameters and options are not available in case of the expander operation with
the CA-64 control panel.
Name – individual name of the expander (up to 16 characters). In the LCD keypad, the name
is programmed in the NAMES submenu (XSERVICE MODE XSTRUCTURE XHARDWARE
XEXPANDERS XNAMES X[module selection from list]).
Partition – selection of the partition to which the expander is to belong (alarms from
expander will be reported in this partition).
Lock [Lock feature] – the module can perform access control functions. After activating the
option, define how the door lock control relay is to operate:
ON if partition armed [On if part. armed] – the relay will be turned on when the partition to
which the expander belongs is armed. The relay will be turned off after:
– the partition is disarmed by means of the reader;
– the partition is disarmed by other means and the reader reads out the code of
proximity card / DALLAS chip of an authorized user (see: ADMINISTRATORS /USERS).
Fixed ON time [ON time] – after reading the code of proximity card / DALLAS chip, the
relay is active for the RELAY ON TIME.
Fixed ON time – OFF if door open [ON, open->off] – after reading the code of proximity
card / DALLAS chip, the relay is active until the door is opened (the IN input is
disconnected from the common ground), but not longer than for the RELAY ON TIME.
Fixed ON time – OFF if door closed [ON, close->off] – after reading the code of proximity
card / DALLAS chip, the relay is active until the door is closed (the IN input is
reconnected to the common ground), but not longer than for the RELAY ON TIME.
Relay ON time – the time period during which the relay is active.
Max. door open time [Max. door open] – the maximum time period during which the door
can remain open. If the door is open for a longer time, appropriate information will be
written into the event log of the control panel (the proximity card readers will audibly signal
the long opened door). Setting the value 0 means that the door opening time control is
disabled.
Dependent on door 1 [Dependent door1] / Dependent on door 2 [Dependent door2] – you
can indicate which door must be closed so that the door supervised by the expander can
be opened (activation of the relay). The function allows a "sluice" type door to be created.
You can indicate a door supervised by another expander or an alarm system zone
programmed as the 57. TECHNICAL –DOOR OPEN type.
No auto-disarm [Code*not dis.] – when this option is enabled, presenting the card to /
touching the reader with DALLAS chip will neither disarm the partition, nor activate the
relay (the door will not open). In order to disarm the partition, hold the card / chip at the
reader.

6 INT-R SATEL
Access if armed [Code*in arm] – this option is available when the NO AUTO-DISARM option is
enabled. If both options are enabled, presenting the card to / touching the reader with
DALLAS chip will make it possible to activate the relay (open the door) even when the
partition is armed (partition will not been disarmed).
Fig. 3. Setting parameters and options for the expander identified as CA-64 SR in
the DLOADX program.
Authorization control [Unauth. event] – if this option is enabled, opening the door without
reading in the card / chip will result in appropriate information being written into the control
panel event log. This event can also be signaled on the 93. UNAUTHORIZED ACCESS type
output.
Alarm on unauth. access [Unauth. alarm] – this option is available when the AUTHORIZATION
CONTROL is enabled. If both options are enabled and the partition to which the expander
belongs is armed, opening the door without reading in the card / chip will trigger alarm.
Master users / Users – indicate the administrators (master users) and users who will be
authorized to use the readers connected to the expander.
Reader control (Reader A) [Reader A] / Reader control (Reader B) [Reader B] – options
available in the expander identified as CA-64 SR. The expander can control the reader
presence. Lack of the reader will generate a trouble (see also the READER TAMPER ALARM
option). The reader presence control can be effected if the reader is provided with a
presence control circuit (the white wire in proximity card readers manufactured by SATEL).

SATEL INT-R 7
Confirmation: Sound (Reader A) [Reader A sound] / Confirmation: Sound (Reader B)
[Reader B sound] – after reading the card code and its verification by the panel, the reader
can inform the user by means of sounds whether the requested function will be executed
or not (see: ACOUSTIC SIGNALING).
Confirmation: LED (Reader A) [Reader A LED] / Confirmation: LED (Reader B) [Reader B
LED] – after reading the card / chip code and its verification by the panel, the reader can
inform the user by means of LEDs whether the requested function will be executed or not
(see: OPTICAL SIGNALING).
Arm (Reader A) [Reader A arms] / Arm (Reader B) [Reader B arms] – if this option is
enabled, the reader can be used for arming the partition to which the expander belongs.
No disarming [C.long not dis] – if this option is enabled, disarming by means of readers is
impossible.
Reader tamper alarm [Al.rdrs tamper] – option available in the expander identified as
CA-64 SR when the READER CONTROL option is enabled for reader A or B. If the option is
enabled, lack of the reader will trigger tamper alarm.
Sign. card (hardware) [Hardw.signal.] – when this option is enabled, the reader will signal
audibly the card code readout. This kind of signaling is useful, if there is a time lag
between reading the card code and generating sound information after verification of the
card code by the control panel.
Alarm 3 incorrect codes [3 wrong codes] – if the option is enabled, three times reading the
code of an unknown card / chip will trigger the alarm.
Control BI output [BI outs ctrl.] – using the card / chip assigned to a code of the BI OUTPUTS
type you can control the outputs of 25. BI SWITCH type.
Control MONO output [MONO outs ctr.] – using the card / chip assigned to a code of the
MONO OUTPUTS type you can activate the 24. MONO SWITCH type outputs.
Partition blocking [Part.blocking] – enabling the option allow to block the partition to which
the expander belongs, by means of readers. You can only block the partition which is
armed. When the partition is blocked, its zones will not trigger the intruder alarm. The
blocking time is defined individually for each user with the TEMPORARY PARTITION BLOCKING
type of code and for the partition (BLOCKED FOR GUARD ROUND). The blocking will be
activated after reading the code of card / chip of the user who uses the code type:
– TEMPORARY PARTITION BLOCKING;
– GUARD (if not authorized to disarm the partition).
Guard round control [Guard control] – reading the code of card / chip of the user who uses
a code of the GUARD type can be interpreted as completion of the round.
Alarm signal [Alarm (time)] – the reader can audibly signal alarms throughout the GLOBAL
ALARM TIME.
Alarm signal until canceled [Alarm (latch)] – the reader can audibly signal the alarm
memory.
Sign. entry delay [Entry time] – the reader can audibly signal the entry delay countdown in
the partition to which the expander belongs.
Sign. exit delay [Exit time] – the reader can audibly signal the exit delay countdown in the
partition to which the expander belongs.
Auto-Arm delay countdown [Auto-arm delay] – the reader can audibly signal the auto-
arming delay countdown in the partition to which the expander belongs.
CHIME [Chime zones] – the reader can audibly signal the violation of zones with enabled
CHIME IN MODULE option. This applies to the zones belonging to the same partition as the
module.
8 INT-R SATEL
No auto-reset after 3 tamp. [No autorst.3t.] – it is possible to disable the feature limiting the
number of tamper alarms from the expander to three (this feature prevents the same
events from being repeatedly recorded and applies to consecutive, non-cleared alarms).
Unlock door if fire [Doors on fire] – define whether the fire alarm is to have an effect on the
relay status:
no – the fire alarm has no effect on the relay status – the door will remain locked;
part. fire alarm – fire alarm in the partition to which the expander belongs will activate the
relay – the door will unlock;
object fire alarm – fire alarm in the object to which the expander belongs will activate the
relay – the door will unlock;
fire alarm – fire alarm in the system will activate the relay – the door will unlock.
4. Using the readers
Description of adding proximity cards and DALLAS chips to the users can be found in the
control panel user manual.
Functions that can be realized by the reader depend on the expander settings, alarm system
status and user rights. It also depends on the expander settings whether the function will be
performed after presenting the card to / touching the reader with the chip, or after holding the
card / chip (the WIEGAND 26 interface readers do not support the card holding function).
When read out, the card / chip code is transmitted through the expander to the control panel.
It is the control panel that decides whether and which function is to be performed. After
receiving feedback from the panel, the reader can signal by means of LEDs or sounds
whether the desired function will be executed or not.
By presenting the card to / touching the reader with the chip you can:
−activate the relay (unlock the door);
−disarm the partition to which the expander belongs
−clear alarm in the partition to which the expander belongs;
−activate the output type 24. MONO SWITCH;
−control the output type 25. BI SWITCH;
−confirm the guard round;
−temporarily block the partition to which the expander belongs, if the given partition is
armed.
By holding the card / chip at the reader you can:
−activate the relay (unlock the door);
−arm the partition to which the expander belongs;
−disarm the partition to which the expander belongs
−clear alarm in the partition to which the expander belongs;
−confirm the guard round;
−temporarily block the partition to which the expander belongs, if the given partition is
armed.
Note: When you activate the relay with the reader A, the "User access" event will be saved
to the control panel memory. If the reader B is used to activate the relay, the "User
exit" event will be saved.

SATEL INT-R 9
4.1 Optical signaling
The readers offered by SATEL come with one bicolor LED (emitting red and green light) or
two LEDs (red and green).
Information on partition and expander status
The LEDs indicate status of the partition to which expander belongs, as well as lack of
communication between the expander and the control panel.
Green LED lit – partition disarmed.
Green and red LED blinking alternately – alarm.
Red LED lit – partition armed.
Red LED blinking with increasing frequency – exit delay countdown.
Red LED blinking steadily – no communication between the expander and the control
panel.
Signaling after readout of the card / chip code
The signaling is provided by the LED which at the particular moment does not present
information on the partition status, i.e. it can be either the green LED or the red one,
depending on the circumstances.
2 short blinks repeated three times – the user of the given card / chip should change the
code.
3 short blinks – depending on the current partition status:
– starting the arming procedure (which is equivalent to arming if no exit delay has been
programmed for the partition),
– disarming and/or alarm clearing.
4 short blinks and 1 long blink – confirmation of:
– turning on the relay (which can be accompanied by disarming / alarm clearing);
– turning off the relay;
– activating the 24. MONO SWITCH type output;
– switching over the 25. BI SWITCH type output;
– guard round;
– temporarily blocking the armed partition.
1 long blink – refusal of arming (the installer can configure the alarm system so that the
arming is impossible when e.g. a zone is violated in the partition, or a failure has
occurred).
2 long blinks – unknown card / chip.
3 long blinks – refusal to execute the function.
4.2 Acoustic signaling
The proximity card readers offered by SATEL are equipped with a sounder. When using
readers which have no sound signaling capability, you can connect an external piezoelectric
transducer (5 V) to the expander for each reader (BPA and COM terminals for reader A, BPB
and COM terminals for reader B).
Information on events
Sounds can be used to transmit information on events in the partition to which the expander
belongs, as well as on a long open door.
5 short beeps – zone violation (CHIME).

10 INT-R SATEL
1 long beep every 3 seconds, followed by a series of short beeps for 10 seconds
and 1 long beep – exit delay countdown (if the delay time is shorter than 10 seconds, only
the final sequence of short beeps will be generated).
A sequence of 7 beeps of diminishing duration, repeated every few seconds – auto-
arming delay countdown.
1 short beep every 150 ms – long open door.
2 short beeps every second – entry delay countdown.
Continuous beep – alarm.
1 long beep every second – fire alarm.
Note: If the device is working as the CA-64 SR expander, which supports the CZ-EMM
readers manufactured until May 2005, the alarm will be signaled in the same way as
the fire alarm, i.e. by a long beep every second.
Beeps generated after reading the card / chip code
1 short beep – confirmation of the card / chip code readout.
2 short beeps repeated three times – the user of the given card / chip should change the
code.
3 short beeps – depending on the current partition status:
– starting the arming procedure (which is equivalent to arming if no exit delay has been
programmed for the partition),
– disarming and/or alarm clearing.
4 short beeps and 1 long beep – confirmation of:
– turning on the relay (which can be accompanied by disarming / alarm clearing);
– turning off the relay;
– activating the 24. MONO SWITCH type output;
– switching over the 25. BI SWITCH type output;
– guard round;
– temporarily blocking the armed partition.
1 long beep – refusal of arming (the installer can configure the alarm system so that the
arming is impossible when e.g. a zone is violated in the partition, or a failure has
occurred).
2 long beeps – unknown card / chip.
3 long beeps – refusal to execute the function.
5. Specifications
Supply voltage ................................................................................................... 12 V DC ±15%
Standby current consumption ........................................................................................110 mA
Maximum current consumption ......................................................................................150 mA
Relay contacts rating (resistive load) ................................................................... 5 A / 30 V DC
Environmental class.................................................................................................................II
Operating temperature range.............................................................................-10 °C...+55 °C
Maximum humidity ..........................................................................................................93±3%
Dimensions ........................................................................................................... 140 x 68 mm
Weight.................................................................................................................................80 g

The declaration of conformity may be consulted at www.satel.eu/ce
SATEL sp. z o.o.
ul. Schuberta 79
80-172 Gdańsk
POLAND
tel. + 48 58 320 94 00
www.satel.pl
Other manuals for INT-R
1
Table of contents
Other Satel Extender manuals

Satel
Satel CA-64 EPS User manual

Satel
Satel INT-IORS User manual

Satel
Satel CA-64 EPS User manual

Satel
Satel CA-64 O-OC User manual

Satel
Satel CA-64 DR User manual

Satel
Satel ACX-220 User manual

Satel
Satel CA-64 OPS-OC User manual

Satel
Satel CA-64 ADR User manual

Satel
Satel CA-64 SR User manual

Satel
Satel INT-PP User manual