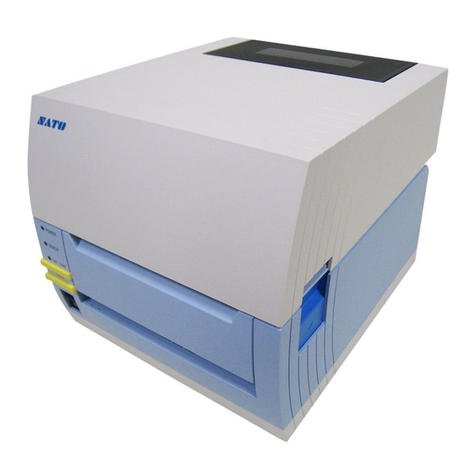
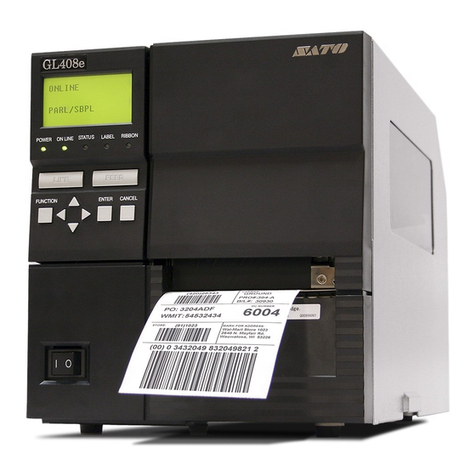
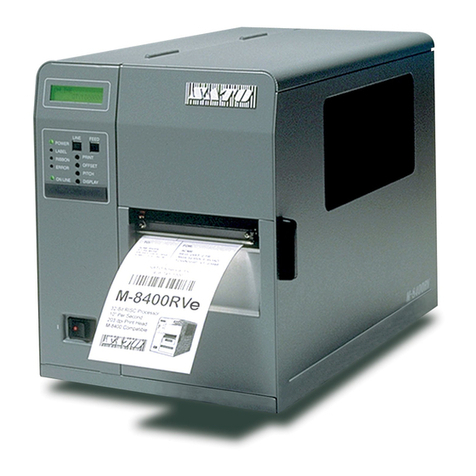
SATO GL 4xxe Series User manual

PN: 9001163B
GL4xxe Operator’s Manual
GL4xxeseries
Read thisOperator’s Manual before and during the servicing of the
above product. Keep this document handy for future reference.

PN: 9001163B
SATO International Pte Ltd
438A Alexandra Road
#05-01/02
Alexandra Technopark
Singapore 119967
Tel: (65) 6271 2122
Fax: (65) 6271 2151
Email: customerservi[email protected]
Be sure to ask your dealer about our maintenance contracts
to ensure peace of mind during your usage of SATO products
Version: SI-GL4xxe-01rB-11-11-OM
© Copyright 1994 – 2007
SATO International Pte Ltd
Warning: This equipment complies with the requirements in Part 15 of FCC rules for a Class A
computing device. Operation of this equipment in a residential area may cause unacceptable
interference to radio and TV reception requiring the operator to take whatever steps are necessary to
correct the interference.
All rights reserved. No part of this document may be reproduced or issued to third parties in any form
whatsoever without the express permission of SATO. The materials in this document are provided for
general information and are subject to change without notice. SATO assumes no responsibilities for any
errors that may appear.

PN: 9001163B
Worldwide Contact Details
International Headquarters Americas
SATO INTERNATIONAL PTE. LTD
438A Alexandra Road #05-01/04,
Alexandra Technopark, Singapore 119967
Phone: 65-6271-2122 Fax: 65-6271-2151
Email: sales@sato-int.com
SATO INTERNATIONAL AMERICA, INC.
(Regional HQ)
10350 Nations Ford Road Suite A,
Charlotte, NC 28273
Phone: 1-704-644-1650 Fax: 1-704-644-1662
Email: satosales@satoamerica.com
Americas
SATO AMERICA, INC.
10350 Nations Ford Road Suite A,
Charlotte, NC 28273
Phone: 1-704-644-1650 Fax: 1-704-644-1662
Email: satosales@satoamerica.com
SATO LABELING SOLUTIONS AMERICA, INC.
1140 Windham Parkway, Romeoville, Illinois 60446
Phone: 630-771-4200 Fax : 630-771-4210
Email: sales@satolabeling.com
Horticultural Division
930 Jimmy Ann Drive
Daytona Beach, FL 32117
Phone: 1-386-274-5566 Fax: 1-386-274-5599
Europe
SATO INTERNATIONAL EUROPE N.V.
(Regional HQ)
Leuvensesteenweg 369, 1932 Sint-Stevens-Woluwe, Brussels, Belgium
Phone:32(0)-2-788-80-00 Fax:32(0)-2-788-80-80
Email: info@be.sato-europe.com
SATO UK LTD
Valley Road, Harwich, Essex England Co12 4RR,
United Kingdom
Phone:44-1255-240000 Fax : 44-1255-240111
Email : enquiries@satouk.com
SATOLABELLING SOLUTIONS EUROPE GmbH
Ersheimer Straße 71,
69434 Hirschhorn, Germany
Phone: 49-6272-9201-324 Fax: 49-6272-9201-399
SATO POLSKA SP Z O.O.
Ul. Wroclawska 123, 55-015 Radwanice
K/Wroclawia, Poland
Phone: 48-71-381-03-60 Fax:48-71-381-03-68
Email: info@sato-europe.com
SATO FRANCE SAS
Parc D'Activities - Rue Jacques Messager - 59175 Templemars, France
Phone: 33-3-20-62-96-40 Fax: 33-3-20-62-96-55
SATO IBERIA S.A.
Dels Corrals Nous, 35-39, Pol. Can Roqueta,
08202 - Sabadell, Barcelona, Spain
Phone: 34-93-492-5750 Fax : 34-93-786-3451
Asia Pacific & Oceania
SATO INTERNATIONAL ASIA PACIFIC PTE. LTD.
(Regional HQ)
438A Alexandra Road #05-01/04,
Alexandra Technopark, Singapore 119967
Phone: 65-6271-5300 Fax: 65-6273-6011
Email: sales@sato-int.com
SATO AUTO-ID MALAYSIA SDN. BHD.
No.25, Jalan Pemberita U1/49,
Temasya Industrial Park
Section U1, 40150 Shah Alam,
Selangor Darul Ehsan, Malaysia
Phone: 60-3-7620-8901 Fax: 60-3-5569-4977
Email: sales@satosms.com.my
SATO ASIA PACIFIC PTE. LTD.
438A Alexandra Road #05-01/04,Alexandra Technopark, Singapore 119967
Phone: 65-6271-5300 Fax: 65-6273-6011
Email: sales@satoasiapacific.com
SATO AUTO-ID (THAILAND) CO., LTD.
292/1 Moo 1 Theparak Road, TumbolTheparak,
Amphur Muang, Samutprakarn 10270
Phone: 662-736-4460 Fax: 662-736-4461
SATO SHANGHAI CO., LTD.
307 Haining Road, ACE Bldg, 10th Floor,
Hongkou Area,
Shanghai, China 200080
Phone: (86) 021- 63068899 Fax: (86) 021- 63091318
SATO AUSTRALIA PTY LTD.
1/1 Nursery Avenue, Clayton Business Park (1508 Centre Road) Clayton
VIC3168,Melbourne,Australia
Phone: 61-3-8814-5330 Fax: 61-3-8814-5335
SATO NEW ZEALAND LTD
30 Apollo Drive, Mairangi Bay
PO Box 305-031, North Shore, Auckland, New Zealand
Phone: 64-9-477-2222 Fax: 64-9-477-2228
For a full list of all SATO offices,
refer to www.satoworldwide.com
GL408-412e Operator’s Manual
TABLE OF CONTENTS
INTRODUCTION
About This Manual 1-2
General Description 1-3
Control Features 1-4
TECHNICAL DATA
Physical Characteristics 2-2
Enviromental 2-2
Power 2-2
Processing 2-2
Command 2-2
Interface Modules 2-2
Print 2-2
Sensing 2-3
Media 2-3
Ribbon 2-3
Regulatory 2-3
Character Font Capabilities 2-4
Barcode Capabilities 2-5
INSTALLATION
Unpacking & Parts Identification 3-2
Printer Installation 3-3
Site Location 3-3
Cable Connection 3-3
Media Selection 3-4
Media & Ribbon Loading 3-4
Operational Mode Selection 3-6
Continuous Mode 3-6
Tear-Off Mode 3-6
Cutter Mode 3-6
Dispense Mode 3-6
Linerless Mode 3-6
Interface Selection 3-8
RS232C High-Speed Serial Interface 3-8
IEEE1284 Parallel Interface 3-10
Universal Serial BUS (USB) Adapter 3-11
Local Area Network (LAN) Ethernet 3-11
802.11G Wireless 3-12
All Interfaces 3-14
Accessories Installation 3-22
Interface Installation 3-22
Flash Memory Card 3-22

GL408-412e Operator’s Manual
PRINTER CONFIGURATION
Printer Configuration 4-2
Configuration Modes 4-3
User Mode 4-3
Configuration Mode 4-4
Advanced Mode 4-5
Serial Interface Mode 4-7
Parallel Interface Mode 4-8
Centronics Interface Mode 4-9
Universal Serial BUS (USB) Interface Mode 4-10
Local Area Network (LAN) Interface Mode 4-11
Wirerless Local Area Network (WLAN) Interface Mode 4-12
PGL Emulation Mode 4-13
ZGL Emulation Mode 4-14
DGL Emulation Mode 4-15
TGL Emulation Mode 4-16
IGL Emulation Mode 4-17
Diagnostics Mode 4-18
Printer Management Mode 4-19
Misc Quick Menus 4-20
Display Intensity Adjustment 4-20
Buffer Clear 4-20
Soft Reset 4-21
Key Lock/Unlock 4-21
Menu Definition Tables 4-22
User Mode 4-22
Configuration Mode 4-26
Advanced Mode 4-29
Serial Interface Mode 4-39
Parallel Interface Mode 4-44
Centronics Interface Mode 4-47
Universal Serial BUS (USB) Interface Mode 4-50
Local Area Network (LAN) Interface Mode 4-52
Wirerless Local Area Network (WLAN) Interface Mode 4-56
PGL Emulation Mode 4-63
ZGL Emulation Mode 4-69
DGL Emulation Mode 4-72
TGL Emulation Mode 4-75
IGL Emulation Mode 4-78
Diagnostics Mode 4-82
Printer Management Mode 4-85
Misc Quick Menus 4-88
Display Intensity Adjustment 4-88
Buffer Clear 4-88
Soft Reset 4-88
Key Lock/Unlock 4-88

GL408-412e Operator’s Manual
TROUBLESHOOTING
Error Signal Troubleshooting 5-2
Troubleshooting Table 5-8
Interface Troubleshooting 5-10
Parallel Interface 5-10
RS232 Serial Interface 5-10
Universal Serial Bus (USB) Interface 5-10
LAN Ethernet Interface 5-11
802.11G Wireless Interface 5-11
Centronics Interface 5-11
Test Print Troubleshooting 5-12
Hex Dump Mode 5-12
Test Label Printing 5-12
Sample Test Label 5-13
MAINTENANCE
Cleaning Procedures 6-2
Replacement Procedures 6-3
Print Head 6-3
Fuse 6-4
Media Platen Roller 6-5
Adjustment Procedures 6-6
Label Sensor Positioning 6-6
Print Head Balance 6-7
Print Head Pressure 6-8
Print Head Alignment 6-9
Ribbon Guide 6-10
Ribbon Roller Alignment 6-11

Unit 1: Introduction
GL408-412e Operator Manual 1-1
INTRODUCTION
• About This Manual
• General Description
• Control Features

Unit 1: Introduction
GL408-412e Operator Manual 1-2
ABOUT THIS MANUAL
This manual is laid out consistent with the product discussed and provides all of the information required for printer
installation, configuration, operation, and light maintenance. Refer to this product’s Programming Reference
document for instructions on printer programming through a host system.
This manual also incorporates the use of special information boxes. Examples of these boxes and the type of
information provided in each, are below.
A comprehensive Table Of Contents provided at the front of this manual facilitates rapid movement within. The
contents identify the different Units, Chapters, and some Sections. Each references the page number of their
commencement.
The pages of this manual have embedded headers and footers to assist the user in identifying his or her exact
position within the manual. The header provides the unit number followed by its name. The footer identifies the
product on the left, the page number in the center, and the manual’s part number to the right side of the page.
Page enumeration is two-part with each separated by a hyphen. The first character set references the Unit and the
second identifies the page number within that unit. Page numbers begin with the numeral one (1) at the beginning
of a new unit and ascend sequentially.
WARNING: PROVIDES INFORMATION THAT, IF UNHEEDED, MAY RESULT IN
PERSONAL INJURY.
CAUTION: PROVIDES INFORMATION THAT, IF UNHEEDED, MAY RESULT IN
EQUIPMENT DAMAGE.
ATTENTION: Provides information that is deemed of special importance but will not
result in personal injury or product damage if unheeded.
NOTE: Provides helpful hints to assist in performing the tasks at hand.
LCD DISPLAY: Provides the specific display that should be visible on the LCD at that
point.

Unit 1: Introduction
GL408-412e Operator Manual 1-3
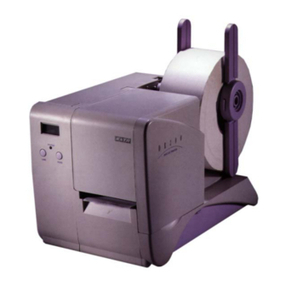
GENERAL DESCRIPTION
The GL4e Series printers are specifically designed for use in high-volume, labeling applications demanding great
reliability and around the clock operation. It’s aluminum chassis provides the needed corrosion resistance
demanded by some industrial applications. The coated interior frame provides strength and stability.
The stylish front housing cover and operator panel are both molded of extra-durable, black ABS plastic to not only
provide protection against corrosive chemicals; but to also provide a low-show, easy clean surface for unsightly
grim.
This printer model has the attractiveness desired for commercial applications coupled with the muscle expected of
an industrial printer.
Figure 1-1, Primary Components
Upper Print Assy
Rear Housing Cover
Front Housing Cover
Left Housing Cover
Lower Print Assy
Media Holder
Media Guide
Print Head Latch
Media Platen Roller
Ribbon Platen Roller
Ribbon Guide
Label Sensor
Expanded Memory Cover
Media Damper
Ribbon Supply Spindle
Ribbon Rewind Spindle
Right Housing Cover

Unit 1: Introduction
GL408-412e Operator Manual 1-4
CONTROL FEATURES
This chapter identifies the interactive control features of the printer. These functions are defined generally here.
More specific explanations will be found throughout this manual on how to use them.
Figure 1-2, Operator Panel
POWER ON LINE STATUS LABEL RIBBON
CANCEL
ENTERFUNCTION
LED Indicators
POWER
Illuminates when the power on.
ONLINE
Illuminates when communication is available.
Flashes when fails.
STATUS
Flashes when an error occurs. Flashes when
sending/receiving data.
LABEL
Flashes when paper error occurs.
RIBBON
Flashes when ribbon error occurs.
LCD Display
Communicates operational conditions via the use
of icons and text.
Maintenance Panel
FUNCTION
Allows movement through the various menus
and modes.
Permits the movement of the cursor for input.
ENTER
Allows the selection of an option.
CANCEL
Cancels a print job. Allows return to the previous
screen when moving through the menus.
Operator Buttons
FEED
Feeds the equivalent of a sheet of paper when
pressed once. Positions paper if misaligned.
LINE
Starts and stops printing and transmission of
data.
Power Switch
Breaks the circuit providing power to the printer.
LINE FEED

Unit 2: Technical Data
GL408-412e Operator’s Manual 2-1
TECHNICAL DATA
• Physical Characteristics
• Environmental
•Power
• Processing
•Command
• Interface Modules
•Print
• Sensing
•Media
• Ribbon
• Regulatory Approvals
• Character Font Capabilities
• Barcode Capabilities

Unit 2: Technical Data
GL408-412e Operator’s Manual 2-2
PHYSICAL CHARACTERISTICS
Width 10.75 Inches (271 mm)
Height 12.00 Inches (305 mm)
Depth 18.00 Inches (455 mm)
Weight 33 Pounds (15 Kg)
ENVIRONMENTAL
Operating Temperature 41 to 104°F (5° to 40°C)
Storage Temperature -4 to 140°F (-20° to 60°C)
Storage Humidity 15 to 85% RH Non-Condensing
Operating Humidity 15 to 85% RH Non-Condensing
POWER
Input Voltage 100-120/200-240 Volts AC +/- 10%, 50/60 Hertz +/-5%
Consumption Voltage Maximum: 222 Volts AC, 219 Watts (when print ratio is 50%)
Standby: 22.3 Volts AC, 20.6 Watts
PROCESSING
CPU 32 Bit RISC
Flash ROM 8 Megabytes
Receive Buffer 2.95 Megabytes maximum, 0.95 Megabytes near full
COMMAND
Standard SATO Barcode Printer Language (SBPL)
Intelligent Command
Non-Standard N/A
INTERFACE MODULES
Enhanced Parallel Port IEEE1284 (EPC compatible)
Serial Port 9-Pin RS232C
Universal Serial Bus (USB) USB Adapter (480 Mbps)
Local Area Network (LAN) 10BASE-T/100BASE-TX Automatic Switching
Ethernet (Wireless LAN) 802.11g Wireless Wi-Fi
PRINT
Method Direct Thermal / Thermal Transfer
Maximum Speed (selectable) 2, 3, 4, 5, 6, 7, 8, 9, 10 Inches Per Second (50.8 - 254 mm)
Print Module (dot size) .0049 Inches (.125 mm)
Resolution GL408e: 203 Dots Per Inch (8 dpmm)
GL412e: 305 Dots Per Inch (12 dpmm)
Maximum Print Width 4.09 Inches (104 mm)
Maximum Print Length 98.98 Inches (2514 mm)

Unit 2: Technical Data
GL408-412e Operator’s Manual 2-3
SENSING
Gap Position & Sensitivity Adjustable
Reflective Eye-Mark Position & Sensitivity Adjustable
Ribbon Near End Fixed (enabled/disabled)
Media Out Fixed (always enabled)
Ribbon Out Fixed (always enabled)
Cover Open Fixed (always enabled)
MEDIA
Width Media Width: 0.87 to 5.04 Inches (22 - 128mm)
Media Width with Backing Paper: 0.98 to 5.16 Inches (25 - 131mm)
Length (Continous) Media Length: 0.24 to 15.63 Inches (6 - 397mm)
Media Length with Backing Paper: 0.35 to 15.75 Inches (9 - 400mm)
Length (Tear-Off) Media Length: 0.67 to 15.63 Inches (17 - 397mm)
Media Length with Backing Paper: 0.79 to 15.75 Inches (20 - 400mm)
Type Roll or Fan-Fold
Eye-Mark or Gap
Direct Thermal or Thermal Transfer
Thickness 0.002 to 0.010 Inches ( 0.06 - 0.268 mm)
Roll Diameter Maximum: 10.43 Inches (265mm)
Core Diameter 1.5 to 4.0 Inches (38.1 - 101.6mm)
Wind Direction Face In, Face Out (linerless only)
Fan-Fold Height Maximum: 7.87 Inches (200mm)
RIBBON
Width Maximum: 5.04 Inches (128mm)
Length 1476 Feet (450M)
Wound Face In, Face Out
Core Diameter 1.00 Inch (25.6 mm)
Roll Diameter Maximum: 3.35 Inches (85 mm)
REGULATORY
Radiation Noise FCC Part 15, Subpart B, Class B
EN55022 Class B
Static Electricity IEC61000-4-2, Level 3
AC Line Noise Above: 1000Vp-p
Packing Drop Standard ISTA-2A
Environmental (RoHS)
Chromium: below 0.1%
Lead: below 0.1%
Mercury: below 0.1%
Cadmium: below 0.01%
Polybrominated Bipheny (PBB): below 0.1%
Polybrominated Diphenyl Ether (PBDE): below 0.1%

Unit 2: Technical Data
GL408-412e Operator’s Manual 2-4
CHARACTER FONT CAPABILITIES
MATRIX FONTS
XU 5 dots W x 9 dots H (Helvetica)
XS 17 dots W x 17 dots H (Univers Condensed Bold)
XM 24 dots W x 24 dots H (Univers Condensed Bold)
OA Font (OCR-A) GL408e: 15 dots W x 22 dots H
GL412e: 22 dots W x 33 dots H
OB Font (OCR-B) GL408e: 20 dots W x 24 dots H
GL412e: 30 dots W x 36 dots H
AUTO SMOOTHING FONTS
XB 48 dots W x 48 dots H (Univers Condensed Bold)
XL 48 dots W x 48 dots H (Sans Serif)
VECTOR FONT
Proportional or Fixed Spacing
Font Size 50 x 50 dots to 999 x 999 dots
Helvetica, 10 Font Variations
AGFA RASTER FONTS
A Font CG Times, 8 to 72 pt.
B Font CG Triumvirate, 8 to 72 pt.
DOWNLOADABLE FONTS
N/A
CHARACTER CONTROL
Expansion up to 12 x in either the X or Y coordinates.
Character Pitch Control
Line Space Control
Journal Print Facility
0, 90, 180, and 270 Degree Rotation

Unit 2: Technical Data
GL408-412e Operator’s Manual 2-5
BARCODE CAPABILTIES
Linear Bar Codes
UPC A/E
JAN 8/13
EAN 8/13
Code 39
Code 93
Code 128
Interleaved 2 of 5
Industrial 2 of 5
Matrix 2 of 5
Bookland
NW-7
MSI
RSS-14
POSTNET
UCC/EAN 128
Customer Barcode
Two Dimemsional
QR Code
Data Matrix
Maxi Code
PDF417
Micor PDF417
Synthetic Symbol
Ratios 1:2, 1:3, 2:5, User definable bar widths
Bar Height 4 to 999 dots, User progammable
Rotation 0, 90, 180, and 270 Degrees
Sequential Numbering Sequential numbering of both numerics and bar codes
Expansion Ratio of Character Height: 1 to 12 times, Width: 1 to 12 times
Graphics Full dot addressable graphics, SATO Hex/Binary, BMP or PCX formats
Form Overlay Form overlay for high-speed editing of complex formats

Unit 3: Installation
GL408-412e Operator’s Manual 3-1
INSTALLATION
• Unpacking & Parts Identification
• Printer Installation
• Operational Mode Selection
• Interface Selection
• Accessories Installation

Unit 3: Installation
GL408-412e Operator’s Manual 3-2
UNPACKING & PARTS IDENTIFICATION
Unpack the printer as directed in the following procedure.
1 Place the shipping container (box) upright on a soid, flat surface.
2 Open the box, remove any loose items and the first layer of packing material.
3 Carefully lift the printer and accessories from the box and place them on a solid flat surface.

4 Remove the plastic covers from the packed items and visually inspect for physical damage.
5 Ensure all components are present as dictated on the Packing List.
6 Report damaged property.
Figure 3-1, Unpacking & Parts Identification
Accessory Box
Printer
Shipping Container
Cushion

Unit 3: Installation
GL408-412e Operator’s Manual 3-3
PRINTER INSTALLATION
This chapter provides guidance on how to station, connect, and load the printer once unpacked. Following printer
setup, procede to the next chapter for information on interface selection.
SITE LOCATION
• Stationed on a solid flat surface.
• Stationed away from hazardous materials.
• Stationed within operational distance of the host based on interface specifications.
CABLE CONNECTION
The diagram below (Figure 3-2) displays the printer’s connectors and ports for power supply and host interfacing.
For interfacing, choose the desired method and connect it’s respective cable as indicated.
All interface boards are integrated except the LAN/WLAN board. This will have to be installed as shown.
When the interface cable is connected, or the board is installed, the interface option will display in the configuration
menus of the operator panel. Refer to the Configuration unit of this manual to configure the printer for host
computer interfacing.
Figure 3-2, Cable Connection Diagram
NOTE: Multiple interface options may display in the printer’s LCD menus, the
desired option must be chosen.
Printer
Power ReceptaclePower Cord
Interface Cable Interface Board
Serial Connector
Parallel Connector
LAN/WLAN Port
USB Connector
Host Computer

Unit 3: Installation
GL408-412e Operator’s Manual 3-4
MEDIA SELECTION
The size and type of the labels or tags to be printed should have been taken into consideration before printer
purchase. Ideally, the media width will be equal to, or just narrower than, the print head. Using media that does not
cover the print head will allow the platen roller to tread on it and wear it out. The media edge will also wear a groove
in the platen roller affecting print quality.
MEDIA & RIBBON LOADING
There are two general media types that may be loaded and used; rolled and fan-folded. Each of those types may
again be defined by whether their print application is direct thermal or thermal transfer. Those factors determine
how the media is loaded and if ribbon stock is loaded at all.
Thermal transfer media requires the use of ribbon stock for print application. In such a scenario, it is the ribbon
stock (carbon paper) that contains the ink that will be transfered to the media.
Direct thermal media has a coating on the surface that is made visible through the application of heat from the print
head.
Rolled media of standard diameter is loaded within the printer and suspended by the media holder. Larger, non-
standard rolled media would be suspended outside the printer at its rear and fed inward. Fan-folded media would
also be fed inward from the rear over the rear housing cover, but is stacked as opposed to suspended.
Refer to Figures 3-3a and 3-3b for proper media routing relative to the type to be used. If that to be used is direct
thermal, ignore the ribbon stock in the figures and do not load.
Ribbon can be wound in or wound out.
Figure 3-3a, Rolled Media Loading
Rolled Media
Media Damper
Media Holder
Media Guide
Lower Print Assy
Label Sensor

Unit 3: Installation
GL408-412e Operator’s Manual 3-5
Figure 3-3b, Fan-fold Media Loading
Figure 3-3c, Ribbon Loading
Media Guide
Media Holder
Lower Print Assy
Fan-Fold Media
Media Damper
Media Sensor
Rear Housing Cover
Ribbon Stock
Ribbon Rewind Spindle
Ribbon Supply Spindle
Upper Print Assy
Ribbon Core
Other manuals for GL 4xxe Series
2
This manual suits for next models
3
Table of contents
Other SATO Barcode Reader manuals

SATO
SATO CL6NX User manual

SATO
SATO CT4-LX1 User manual

SATO
SATO MB200 User manual

SATO
SATO SG112-ex User manual

SATO
SATO Argox P4 Series User manual

SATO
SATO PV4 User manual

SATO
SATO GT4e User manual

SATO
SATO ARGOX AS-9400DC User manual

SATO
SATO Argox OS-2130D User manual

SATO
SATO Argox D4 Series User manual

SATO
SATO MB 200i User manual

SATO
SATO CG412DT User manual

SATO
SATO TC408 User manual

SATO
SATO CL4NX RIDF User manual

SATO
SATO Argox AI-6800 User manual

SATO
SATO S8400 User manual

SATO
SATO ARGOX AS-9400 User manual

SATO
SATO iGT400 Series User manual

SATO
SATO CL4NX RIDF User manual

SATO
SATO CL4e Series User manual