SATO iGT400 Series User manual


Safety precautions
This chapter describes safety measures in using the printer.
Please read carefully before using the printer.
▲About the pictograms
This instruction manual uses various pictograms so that you can operate the printer safely, and prevent
damage or injury. The indications and meanings are as follows. Please understand the description
before reading the instruction.
It indicates a case where neglecting this indication and erroneous use may
lead to death or serious injuries.
It indicates a case where neglecting this indication and erroneous use may
lead to injuries or only to property damage.
The sign means “what to be careful about.” Specific point to be careful about is described
in the sign (the sign on the left cautions for electric shock).
This sign means “what must not be done.” The specific prohibited point is described in or
near the sign (the sign on the left prohibits disassembly).
The sign means “what must be done.” The specific point to heed is described in the sign
(the sign on the left tells you to pull out the plug from the outlet).
Warning
Caution
Examples of the indications
Warning
• Do not put it in unstable places such as
shaky table, slanting or vibrating place.
It may cause the equipment to drop or
fall, leading to injuries.
• Do not put containers such as a vase or
glass, holding water or chemicals, or small
metals around the printer. In case water
should be spilled or a metal should fall
inside, immediately turn off the power,
pull out the plug of the power cable from
the outlet, and contact a sales outlet,
dealer, or service center. In this case,
continued use of the printer may cause a
fire or electric shocks..
■Do not put it in an unstable place
■Do not put containers holding water, etc.
• Do not insert or drop anything metallic or
flammable into the openings of the printer
(the cable outlet or mounting hole of the
memory cartridge). In case a foreign
object should get inside, immediately turn
off the power, pull out the plug of the
power cable from the outlet, and contact a
sales outlet, dealer, or service center. In
this case, continued use of the printer may
cause a fire or electric shocks.
• Do not use any other voltage but the
specified power voltage (AC240V).
Otherwise, it may cause a fire or electric
shocks.
■Do not put foreign objects inside
■Use it only in the specified voltage
First edition: August 1, 2004 Q00937000
C2004 Sato Corporation
サトー取説_E 04.8.17 6:21 PM ページ a

Warning
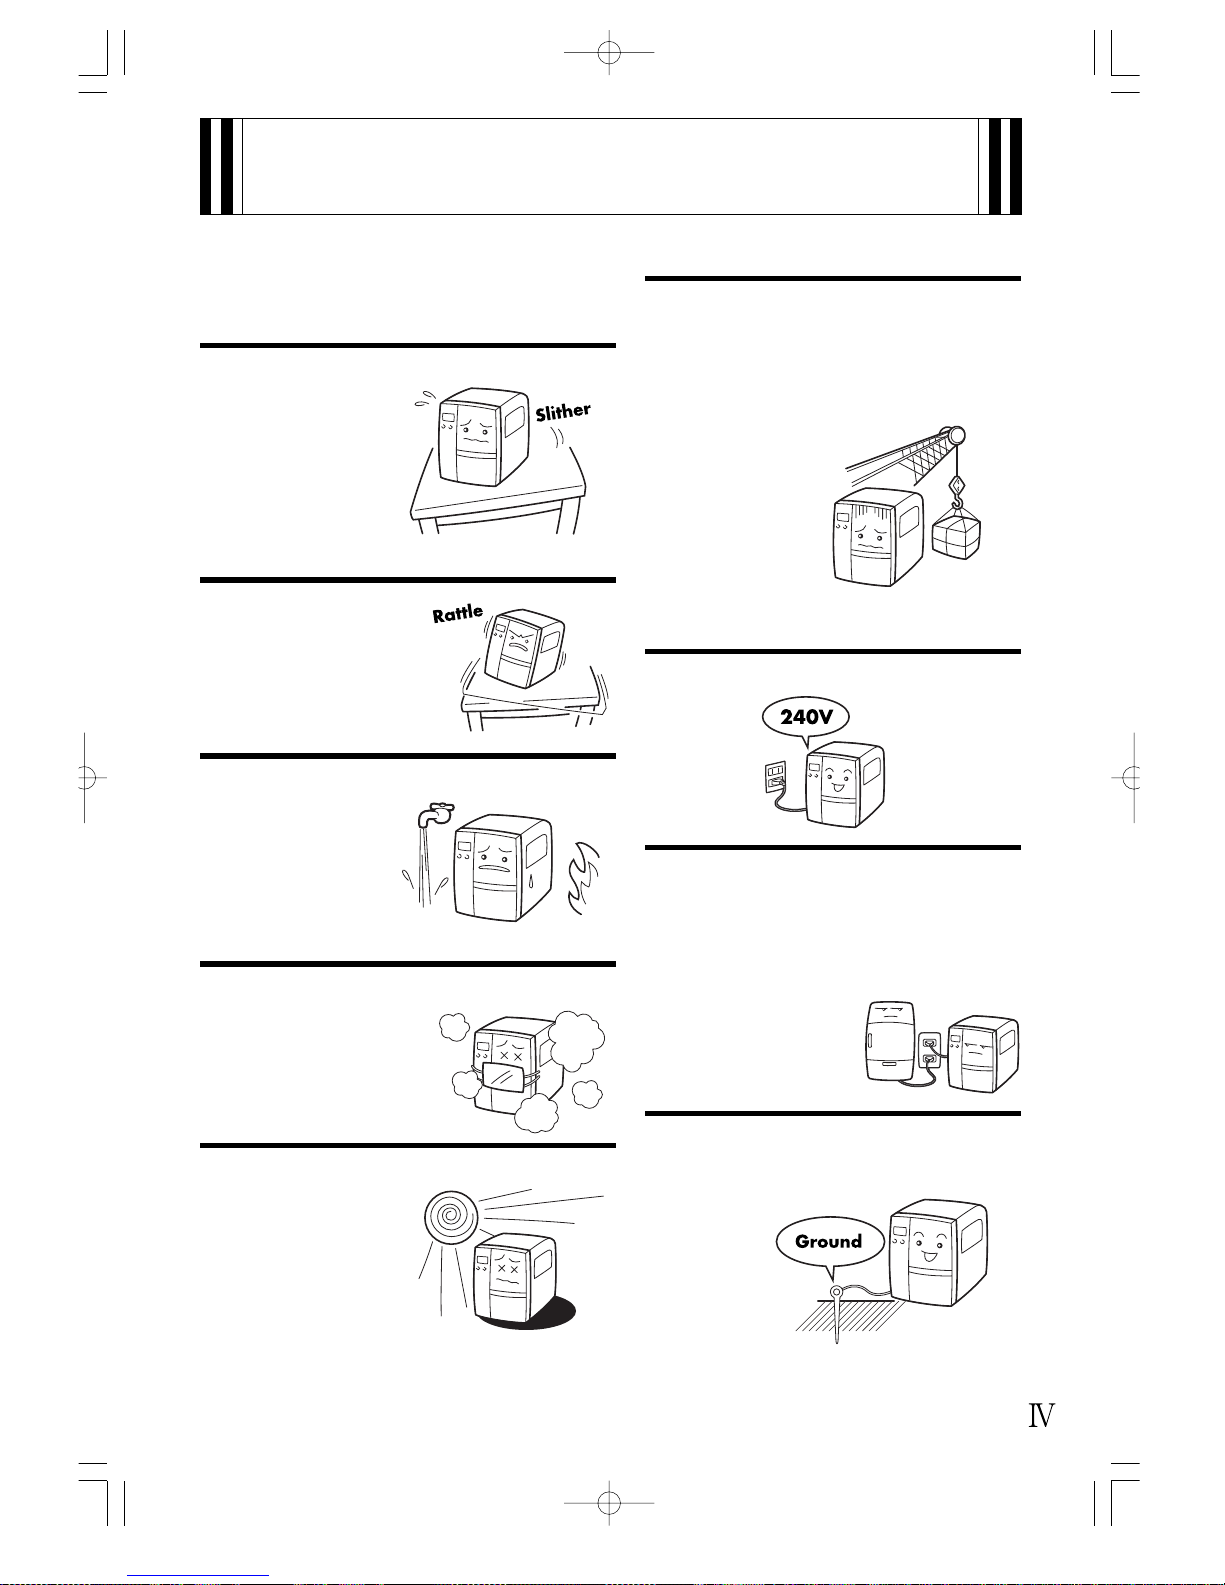
• Be sure to connect the ground cable to the
ground of the printer. If the ground cable
is not connected, the printer may cause
electric shocks.
• Do not damage, break, or process the
power cable. Also, putting heavy objects
on it, heating or pulling it may damage
the power cable and cause a fire or
electric shocks.
• When the power cable is damaged
(exposure of cable conductors,
disconnection, etc.), contact a sales outlet,
dealer, or service center. In this case,
continued use of the printer may cause a
fire or electric shocks.
• Do not process, forcibly bend, twist, or
pull the power cable. If you keep using it,
it may cause a fire or electric shocks.
• When the printer is dropped or damaged,
immediately turn off the power, pull out
the plug of the power cable from the
outlet, and contact a sales outlet, dealer,
or service center. In this case, continued
use of the printer may cause a fire or
electric shocks.
■Be sure to ground
■How to handle the power cable
■When it is dropped or damaged
• If abnormality such as smoke or peculiar
smell from the printer should occur,
continued use of the printer may cause a
fire or electric shocks. Immediately turn
off the power, pull out the plug of the
power cable from the outlet, and seek
service from a sales outlet, dealer or
service center. Customers should never
try to fix it on their own, because it is
dangerous.
• Do not disassemble or alter the printer.
It may cause a fire or electric shocks.
Ask a sales outlet, dealer, or service
center for checking, adjusting, or
repairing the inside of the printer.
• Do not insert a hand or objects to the
cutter. It may cause injuries.
• The head cleaning liquid is flammable.
Never heat it or throw it in fire.
• Keep it out of children’s reach to avoid
accidental consumption. Should this
occur, consult a doctor immediately.
■
Do not use the printer when it is in trouble
■Do not disassemble it
■Cutter
■Handling head cleaning liquid
Caution
• Do not put the printer in a humid or
condensing place. If condensation forms,
immediately turn off the power, and do
not use it until the condensation
disappears. If you use it with
condensation, it may cause electric
shocks.
■Avoid humid storage areas
• When moving the printer, be sure to pull
out the plug of the power cable from the
outlet, and check that the external cable
has been disconnected. Moving the
printer with the cable connected may
damage the cables, and cause a fire or
electric shocks.
• Do not move the printer with the paper
set. The paper may fall, leading to injuries.
• When putting the printer on the floor or a
table, be careful not to catch your foot or
fingers under the printer.
■When moving the printer
サトー取説_E 04.8.17 6:21 PM ページ b

Caution
Caution
• Do not operate the power switch or
handle the power cable with a wet hand.
Operating or handling with a wet hand
may cause electric shocks.
• Do not put heating equipment close to the
power cable. Otherwise, the coating of
the power cable may melt and cause a fire
or electric shocks.
• When pulling out the power cable from
the outlet, be sure to hold the plug.
Pulling it out by holding the power cable
may result in exposure of the cable
conductor or disconnection, and cause a
fire or electric shocks.
• When opening/closing the cover, beware
of getting your fingers caught. Also, hold
the opening/closing cover well so that it
may not slip and fall.
• After printing, the printer head is hot.
When replacing paper or cleaning
immediately after printing, be careful not
to burn yourself.
• Touching the edge of the printer head
may cause injuries. When replacing paper
or cleaning, be careful not to hurt
yourself.
• Beware of injuries, burn injuries, or
electric shocks when replacing the printer
head.
■Power supply
■Power cable
■Cover
■Printer head
• When opening/closing the printer head,
be careful not to catch any other foreign
objects but paper. It may cause injuries or
damage to the printer.
• When setting the roll paper, be careful not
to catch your fingers between the paper
and the feed.
• Be careful not to hurt yourself when
detaching the back cover of the fanfold
through hole and attaching it.
• Simplified cutter is structured as a blade.
Be careful not to cut yourself.
• If the printer is not used for extended
periods of time, disconnect the power
cable for safety.
• When maintaining or cleaning the printer,
first disconnect the power cable for
safety.
■Opening/closing the printer head
■Setting the paper
■During extended periods of non usage
■Simplified cutter
■Maintaining/cleaning
(1)
(2)
(3)
(4)
Reproduction of a part or the whole of this manual without permission is prohibited.
The content of this manual may be changed without prior notice.
The content of this manual has been prepared with utmost care, but if you find any suspicious points,
errors, or omissions, please contact the sales outlet or dealer from which you bought the product.
This equipment is a Class B information technology equipment based on the standards of the Voluntary
Control Council for Interference by Information Technology Equipment (VCCI). Although this equipment
is for use in home environment, if it is used close to a radio or television set, it may cause poor
reception.
Handle it properly in accordance with the content from the instruction manual.
サトー取説_E 04.8.17 6:21 PM ページ c

Notes on installation and handling
When installing and handling the printer, note the following points.
▲Installation Tips
Place the printer in a level place
If installed in a rough
or slanting place,
quality printing will not
be available. It may
cause malfunction and
shorten the life of the
printer.
Do not place it near cranes or
compressors
Equipment using large capacity of electricity, such
as cranes and pressing machines, may cause
electric noise or undervoltage. Since it may cause
malfunction, do not place this
product near that kind of
equipment.
Use a stable platform
Use a stable platform.
Also, do not carry the
printer with the roll
paper set, and do not
rock the printer.
Avoid high heat and humidity
Do not install it in a place
where it is high in
temperature and humidity.
High temperature and
humidity may cause
malfunction.
Avoid direct sunlight
Since this product is
installed with optical
sensors, direct sunlight
may cause erroneous
operation. Ensure that the
cover is closed when
printing.
Avoid dust
Dust may deteriorate the
quality of printing.
It may not only cause
malfunction but shorten
the life of the printer.
When installing this product, note the following points.
Always connect the ground cable
If there is not a grounding facility, please have it
installed.
Supply electricity from the source
Do not supply electricity from the same power
source as electric appliances, which consume a
lot of power, such as a heater or refrigerator, or a
power source nearby. It may cause malfunction
due to undervoltage of the
power supply.
This product requires the alternator
of AC240V.
▲Power supply
サトー取説_E 04.8.17 6:21 PM ページ d

Accessory box
Printer
Cushion
Box
Unpacking the printer
This section describes the contents of the product.
First, unpack the printer and check the contents.
* The shape of cushioning material (cushion holding the printer)
may be different.
1
サトー取説_E 04.8.17 6:21 PM ページ 1

Global warranty documents Cleaning set
Instruction manuala (this
booklet) and setup guide
Head cleaning sheet
(wrapping sheet)
Maintenance guide and
List of service centers
Two-pole adaptor
Power cable
Labels and ribbon for testing
Guarantee
Guarantee
Instruction
manual
Setup guide
Setup and Documentation
CD-ROM
Attached when the ribbon is paper
tube winding type (optional).
Included Accessories
When opening the box, check if the following accessories are complete.
If there is anything lacking, please inquire the sales outlet or dealer you bought the product from.
For malfunction under normal use, this product will be repaired
free of charge for six months from the date of delivery. When
requesting repairs, user registration by the attached warranty is
required. Keep the warranty carefully. Please note that we will
charge for repairs, if lost.
▲Keep the warranty and the box
Additionally, please retain the printer packing box and
cushioning material. You will be required to package this product
in this box when you ask us for a repair.
2
サトー取説_E 04.8.17 6:21 PM ページ 2

Names of various parts
▲Printer main body
Operation panel
There are a display to show
messages, two buttons for
operation, and five LEDs
showing the condition of
the printer.
Operation panel cover
There are various operation
buttons, adjusting volumes,
etc. inside.
Roll paper feeder
Roll guide lever
Roll guide
Main cover
Main cover
Front cover
Ribbon take-up reel
Front cover
Power switch
Used to turn on/off the
power. Pushing the I side
turns on the power, and
pushing the ○side turns
off the power.
Head close lever
Ribbon feeder
Head open lever
Head pressure
adjustment knob
3
サトー取説_E 04.8.17 6:21 PM ページ 3

Mini LAN interface
card (optional)
AC input power terminal
(Power supply connector)
Insert the power cable to supply power to the printer.
Interface card (optional)
Select one from IEEE 1284,
fast RS-232C, USB, LAN,
and wireless LAN.
EXT connector (optional)
External signal interface
Power cable hook
A groove for hooking the
power cable.
How to remove the cable cover
Press the catch of the cable cover,
slide it sideways, and remove.
Cable cover
4
サトー取説_E 04.8.17 6:21 PM ページ 4

Head close lever
Label guide handle
Head open lever Fanfold cover
Label guide
Maintenance
screw
Stopper
screw
Label guide handle
Label damper
Paper sensor
Label damper
stopper
Memory cartridge
Tilt the knob of the
memory cartridge cover
inside and remove the
memory cartridge cover.
For details, see
“Attaching and removing
the memory cartridge.” →
Page 88
Printer head (consumable)
The component that transfers
heat to the ribbon or media for
printing. Maintain periodically.
Platen roller (consumable)
Feeds the paper.
Maintain periodically.
5
サトー取説_E 04.8.17 6:21 PM ページ 5

Screwdriver for adjusting
the volume
▲Operation panel
Icons, operation messages, and error messages are displayed.
LED
The status of the printer is shown.
POWER
Lights up when the power is on.
ONLINE
Lights up when communication
is available. Flashes when
communication fails.
STATUS
When an error occurs, it lights
up and flashes. When the printer
is receiving/sending data, the
Status LED flashes.
LABEL
When a paper error occurs, this
indicator lights up and flashes.
RIBBON
When a ribbon error occurs, this
indicator lights up and flashes.
・ ・ ・
Operation buttons
The status of the printer is shown.
FUNCTION
With each setting mode, you
can return to the mode selection
screen.
In each setting mode, values are
input, and the cursor moves.
ENTER
Confirms the choice of a
selection or value.
CANCEL
Cancels printing data. In each
setting mode, you can return to
the previous setting item.
Display
Icons, operation messages, and error
messages are displayed.
LINE button
For switching between start/stop of printing and
on/off of data receiving/sending.
FEED button
For feeding of paper. When it is pressed once,
equivalent of a sheet of paper is sent out.
*There are times when the paper is not aligned to
the proper position, such as when the power is
turned on or the paper is set. At this time, always
press the FEED button to align the paper to the
proper position.
Adjustment volume
Volume for service adjustment.
Unless otherwise specified, do
not change it.
Buzzer volume
For buzzer volume adjustment
PITCH
For adjusting print position
OFFSET
For adjusting the stop
positions of the cutter, peeling,
and tear off.
DARKNESS
For adjusting printing density.
6
サトー取説_E 04.8.17 6:21 PM ページ 6

Feeding
direction
Feeding
direction
Feeding
direction
Feeding
direction
Front side
Back side
Front side
Back side
3 mm 1.5 mm
Front side
Back side
Folding
perforation
I-mark
Folding
perforation
I-mark
I-mark
I-mark
Front side
Back side
Setting the paper
This printer can print on roll paper and fanfold paper.
The method of setting paper is different with roll paper and fanfold paper.
This printer provides appropriate printing by detecting the I-mark.
For printing with this printer, please use our products.
Do not use other paper than the international standards.
Roll paper
Fanfold paper
Label
Cardboard
Label
Cardboard
7
サトー取説_E 04.8.17 6:21 PM ページ 7

Setting roll paper
1
2
3
Lift up the main cover.
As you pull down the roll guide lever, move the roll guide to the edge, and tilt it.
Set the paper to the roll paper feeder.
Raise the roll guide and adjust it so that the roll will not move.
Lower the head-open lever
(purple)( ).
The printer head will open.
Main cover
Printer head
Roll guide
Head-open
lever (purple)
Roll paper feeder
Roll guide lever
Roll guide Roll guide lever
When opening the main cover, open it fully to the top so that it will not close
after it is opened half way.
Caution
8
サトー取説_E 04.8.17 6:21 PM ページ 8

4
5
Loosen the label guide knob and set it forward.
Pull up the label damper.
Pass the paper under the label guide and paper sensor.
When the knob of the label damper is pulled forward, the label damper will
return to the original position.
Label guide knob Label damper
Label
guide
Label
damper
Paper
sensor
Label damper
1
2
• Immediately after printing, the printer head and the surrounding area are hot. When you replace the paper
immediately after printing, be careful not to burn yourself.
• If you touch the edge of the printer head with bare hands, you may be injured.
Caution
9
サトー取説_E 04.8.17 6:22 PM ページ 9

6
7
8
Loosen the label guide knob, and adjust the slide guide so that it lightly touches
the edge of the paper, and fasten the label guide knob tightly.
Turn the head close lever
(purple / CLOSE ) in the
direction of the arrow, and close
the printer head.
Close the printer head tightly
until it locks.
Close the main cover.
Label guideLabel guide knob
Printer head Head close
lever
1
2
3
• When closing the main cover, be careful not to have your fingers caught.
Caution
10
サトー取説_E 04.8.17 6:22 PM ページ 10

Basically, this printer is adjusted so that quality printing is obtained with no adjustment, but depending
on the width of the paper to use, there may be cases where quality printing is not obtained.
▲Adjusting for the paper width
Adjust by turning the head pressure knob to the scale marks of the head pressure balance for the
paper width.
The scale marks of the head pressure balance for
paper widths are just guides. If quality printing is
obtained, do not adjust the pressure.
How to adjust for the paper width
1
2
3
4
5
Scale marks of the
head pressure balance Paper width
25〜42mm
42〜59mm
59〜78mm
78〜95mm
95〜131mm
Head pressure knob
11
サトー取説_E 04.8.17 6:22 PM ページ 11

4Align the stack of fanfold paper
to the factory-imprinted line
that is visible when the back
cover is laid down flat.
Setting fanfold paper
2Remove the screw to the back
cover.
Keep the screw so that it will
not be lost.
3
Tilt the back cover as shown in
the figure.
Load the fanfold paper up to
20 cm or less.
1Lift up the main cover.
Do as described in Step 1 of “Setting roll paper.”
When placing the fanfold paper behind the printer
Back cover screw
Back cover
Back cover
Fanfold paper
Back cover
12
サトー取説_E 04.8.17 6:22 PM ページ 12

6
7
5
Pass the paper from behind to
the roll paper feeder.
Adjust the roll guide so that it
slightly touches the side of the
paper and that the paper will
not move.
Loosen the label guide knob and set it forward.
Pull up the label damper.
Roll guide
Roll paper feeder
Label damperLabel guide knob
Head open
lever (purple)
Printer head
Lower the head open lever
(purple / OPEN).
The printer head will open.
13
サトー取説_E 04.8.17 6:22 PM ページ 13

9
8
10
Loosen the label guide knob, and adjust the slide guide so that it lightly touches
the edge of the paper, and fasten the label guide knob tightly.
Turn the head close lever
(purple / CLOSE ) in the
direction of the arrow, and
close the printer head.
Close the printer head tightly
until it locks.
Pass the paper under the label guide and paper sensor.
When the knob of the label damper is pulled forward, the label damper will
return to the original position.
• Immediately after printing, the printer head and the surrounding area are hot. When
you replace the paper immediately after printing, be careful not to burn yourself.
• If you touch the edge of the printer head with bare hands, you may be injured.
Label guide knob
Head close lever
Printer head
Label damperPaper sensor Label guide
Caution
1
3
2
14
サトー取説_E 04.8.17 6:22 PM ページ 14

Close the main cover.
Do as described in Step 8 of “Setting roll paper.”
11
When closing the main cover, be careful not to have your fingers caught.
1Lift up the main cover.
Do as described in Step 1 of “Setting roll paper.”
2
Remove the screw to the fanfold cover.
Keep the removed fanfold cover and the screw so that they will not be lost.
3
When placing the fanfold paper under the printer
Lower the head open lever
(purple / OPEN).
The printer head will open.
Caution
Fanfold cover
screw
Fanfold cover
Printer head Head open lever
Fanfold cover
loading slot
15
サトー取説_E 04.8.17 6:22 PM ページ 15
Table of contents
Other SATO Barcode Reader manuals

SATO
SATO Argox D4 Series User manual

SATO
SATO CL4NX Plus User manual

SATO
SATO ARGOX AS-9400 User manual

SATO
SATO PV4 User manual

SATO
SATO ARGOX AS-9400BT User manual

SATO
SATO PV3 Instruction manual

SATO
SATO MB400 User manual

SATO
SATO MB200 User manual

SATO
SATO CT408i DT User manual

SATO
SATO MB 200i User manual