manuals.online logo
Brands
  1. Home
  2. •
  3. Brands
  4. •
  5. Sauder
  6. •
  7. Indoor Furnishing
  8. •
  9. Sauder 422197 User manual

Sauder 422197 User manual

Need help? Visit Sauder.com to view video assembly tips or chat with a live rep.
Prefer the phone? Call 1-800-523-3987.
Share your journey!
sauder.com
NOTE: THIS INSTRUCTION
BOOKLET CONTAINS IMPORTANT
SAFETY INFORMATION.
PLEASE READ AND KEEP FOR
FUTURE REFERENCE.
English pg 1-19
Français pg 20-22
Español pg 23-25
Lot # 505854 07/06/17
Purchased: __________________
Be sure to give us a ring before
making any returns. 1-800-523-3987
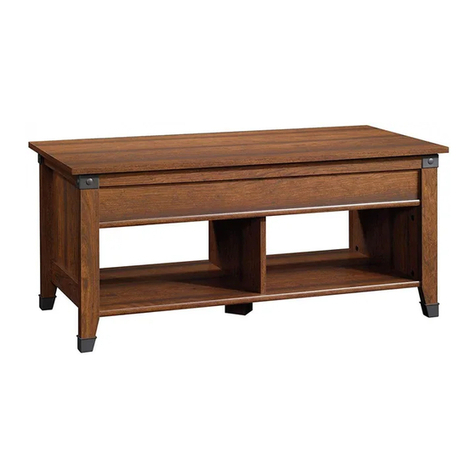
Lift-Top Coee Table
Shoal Creek Collection | Model 422197
Guaranteed to hold
other beverages, too.
Table of Contents Assembly Tools Required
Part Identification
Hardware Identification
Assembly Steps
Français
Español
Safety
Warranty
No. 2 Phillips Screwdriver
Tip Shown Actual Size
Hammer
Not actual size
Skip the power trip.
This time.
2-3
4
5-19
20-22
23-25
26
27
422197 www.sauder.com/servicesPage 2
Now you know
our ABCs.
Part Identification
åWhile not all parts are labeled, some of the parts will have a label or an inked letter on the edge
to help distinguish similar parts from each other. Use this part identification to help identify similar parts.
A RIGHT END (1)
B LEFT END (1)
C BOTTOM (1)
D UPRIGHT (1)
E SHELF (1)
F LEFT FRONT/RIGHT REAR LEG (2)
G RIGHT FRONT/LEFT REAR LEG (2)
H STRETCHER (1)
I TOP (1)
J FRONT PANEL (2)
K END MOLDING (2)
Short Screwdriver
Adjustable Wrench
Part Identification
422197www.sauder.com/services Page 3
A
B
C
D
E
F
G
H
I
J
K
JK
F
G
Hardware Identification
åScrews are shown actual size. You may receive extra hardware with your unit.
422197 www.sauder.com/servicesPage 4
23M LIFT TABLE
MECHANISM SET - 1
SUPPORT BRACKET - 2
37G
NUT - 8
24M
WASHER - 8
13M
BLACK 9/16" LARGE HEAD SCREW - 16
1S
CAM COVER - 8
12P
7F TWIST-LOCK®FASTENER - 10
SCREW COVER - 14
20P
BLACK 3/4" PAN HEAD SCREW - 2
85S
BLACK 9/16" FLAT HEAD SCREW - 4
32S
CAM SCREW -8
8F
BUMPER - 6
2M
WOOD DOWEL - 8
15F
HIDDEN CAM - 8
1F
BLACK 3/4" MACHINE SCREW - 4
92S
BLACK 1-1/4" MACHINE SCREW - 4
93S
GLUE - 1
54M
BLACK 1-15/16" FLAT HEAD SCREW - 20
113S
BUSHING - 2
91M
Step 1 Look for this icon. It means a
video assembly tip is available at
www.sauder.com/services/tips
å Assemble your unit on a carpeted floor or on the empty
carton to avoid scratching your unit or the floor.
å To begin assembly, push a SAUDER TWIST-LOCK®
FASTENER (7F) into the large holes in the SHELF (E) and
FRONT PANELS (J).
422197www.sauder.com/services Page 5
Do not tighten the TWIST-LOCK® FASTENERS in this step.
7F
7F
E
J
J
Step 2
422197 www.sauder.com/servicesPage 6
8F
å Turn eight CAM SCREWS (8F) into exact holes shown in
the LEGS (F and G).
å Push eight HIDDEN CAMS (1F) into the exact holes shown
in the ENDS (A and B).
Arrow
Arrow
1F
The arrow in the HIDDEN
CAM must point toward the
hole in the edge of the board.
Hole
1F
Arrow
(8 used)
A
B
(8 used)
F
F
G
G
å Fasten the SHELF (E) to the FRONT PANELS (J). Use
eight BLACK 1-15/16" FLAT HEAD SCREWS (113S).
å NOTE: You may want to start each SCREW a few turns
before completely tightening any of them.
Step 3
422197www.sauder.com/services Page 7
BLACK 1-15/16" FLAT HEAD SCREW
(8 used in this step)
113S
E
J
J
Surface without
TWIST-LOCK®
FASTENERS
Surface with
TWIST-LOCK®
FASTENERS
Surface with
TWIST-LOCK®
FASTENERS
Edge with holes
Edge with holes
Remember:
Righty tighty.
Lefty loosey.
Step 4
422197 www.sauder.com/servicesPage 8
å Fasten the LEFT END (B) to the SHELF (E) and FRONT
PANELS (J). Tighten five TWIST-LOCK® FASTENERS.
å Fasten the UPRIGHT (D) to the SHELF (E). Use three
BLACK 1-15/16" FLAT HEAD SCREWS (113S).
How to use the SAUDER TWIST-LOCK® FASTENER
1. Insert the dowel end of the FASTENER into the
hole of the adjoining part.
NOTE: The dowel end of the FASTENER must
remain fully inserted in the hole of the adjoining
part while locking the FASTENER.
2. Tighten the FASTENER with a Phillips
screwdriver as tight as possible.
Dowel end
E
J
J
D
B
Surface without
HIDDEN CAMS
Surface with
TWIST-LOCK®
FASTENERS
BLACK 1-15/16" FLAT HEAD SCREW
(3 used in this step)
113S
These holes
must be here.
Step 5
422197www.sauder.com/services Page 9
Fill the holes 1/4 to 1/2 full with GLUE.
Inspect the parts thoroughly before
assembling. Disassembly of glued
parts is extremely dicult.
Caution
!
54M
15F
å First, fill the exact holes shown in the BOTTOM (C) 1/4 to
1/2 full with GLUE (54M). Then, insert four WOOD
DOWELS (15F) into the holes. Wipe away the excess GLUE.
å Now, fill the holes in the LEFT END (B) 1/4 to 1/2 full with
GLUE. Then, insert the WOOD DOWELS in the BOTTOM (C)
into these holes. Wipe away the excess GLUE.
å Fasten the BOTTOM (C) to the LEFT END (B) and UPRIGHT (D).
Use six BLACK 1-15/16" FLAT HEAD SCREWS (113S).
B
D
C
15F
BLACK 1-15/16" FLAT HEAD SCREW
(6 used in this step)
113S
å NOTE: You may want to use a SHORT SCREWDRIVER in this step.
å Fill the holes in the RIGHT END (A) 1/4 to 1/2 full with GLUE (54M).
å Fasten the RIGHT END (A) to the SHELF (E) and FRONT
PANELS (J). Tighten five TWIST-LOCK® FASTENERS.
å NOTE: Be sure the WOOD DOWELS in the BOTTOM (C) insert into
the holes in the RIGHT END. Wipe away the excess GLUE.
å Fasten the RIGHT END (A) to the BOTTOM (C). Use three BLACK
1-15/16" FLAT HEAD SCREWS (113S).
Step 6
422197 www.sauder.com/servicesPage 10
Fill the holes 1/4 to 1/2 full with GLUE.
Inspect the parts thoroughly before
assembling. Disassembly of glued
parts is extremely dicult.
Caution
!
54M
C
E
J
A
Surface with
HIDDEN CAMS
BLACK 1-15/16" FLAT HEAD SCREW
(3 used in this step)
113S
J
Step 7
422197www.sauder.com/services Page 11
å Turn four BLACK 9/16" FLAT HEAD SCREWS (32S) into the ENDS (A and B) until the shoulders of the SCREWS rest on
the surfaces of the ENDS.
å NOTE: Do not overtighten the SCREWS.
å Slide the END MOLDINGS (K) onto the ENDS (A and B). Line up the grooves in the MOLDINGS over the heads of the
SCREWS in the ENDS.
å NOTE: The MOLDINGS should be even on both edges of the ENDS.
å NOTE: If the MOLDING comes up o of the SCREWS, remove it and slide it on again.
Shoulder
Apply pressure with your hands
as you guide the MOLDINGS over
the SCREWS and onto the ENDS.
A
B
K
K
BLACK 9/16" FLAT HEAD SCREW
(4 used in this step)
32S
Step 8
422197 www.sauder.com/servicesPage 12
Fill the holes 1/4 to 1/2 full with GLUE.
Inspect the parts thoroughly before
assembling. Disassembly of glued
parts is extremely dicult.
Caution
!
54M
15F
å Carefully turn your unit onto its top edges.
å First, fill the holes in the LEGS (F and G) 1/4 to 1/2 full with
GLUE (54M). Then, insert the WOOD DOWELS (15F) into
the holes. Wipe away the excess GLUE.
å Now, fill the holes in the ENDS (A and B) 1/4 to 1/2 full with
GLUE. Then, insert the WOOD DOWELS in the LEGS (F
and G) into these holes. Wipe away the excess GLUE.
å Fasten the LEGS (F and G) to the ENDS (A and B). Tighten
the upper four HIDDEN CAMS.
å NOTE: You will tighten the lower HIDDEN CAMS in the
next step.
1
2
A
B
F
F
G
G
15F
å Carefully stand your unit upright.
å Tighten the four HIDDEN CAMS in the ENDS (A and B) at
this time.
å Center a SCREW COVER (20P) over the head of each
visible SCREW and gently tap in with your hammer.
å Using your hammer, gently tap a CAM COVER (12P) onto
each HIDDEN CAM in the ENDS (A and B).
Step 9
422197www.sauder.com/services Page 13
Pro Tip: Lift with your
legs. And, you know,
your arms.
12P
To cover HIDDEN CAMS
(8 used)
(14 used)
To cover screws
20P
A
B
Tighten the HIDDEN
CAMS in the ENDS.
Step 10
422197 www.sauder.com/servicesPage 14
å Fasten the LIFT TABLE MECHANISMS (23M) to the TOP (I).
Use six BLACK 9/16" LARGE HEAD SCREWS (1S).
å NOTE: Be sure to position the LIFT TABLE MECHANISMS on
the TOP exactly as shown.
å Push six BUMPERS (2M) into the holes in the TOP (I).
23M
23M
I
BLACK 9/16" LARGE HEAD SCREW
(6 used in this step)
1S
The holes are closer to this edge.
2M
(6 used)
Step 11
422197www.sauder.com/services Page 15
å Fasten the SUPPORT BRACKETS (37G) to the LIFT
TABLE MECHANISMS (23M). Use four WASHERS (13M),
NUTS (24M), and BLACK 3/4" MACHINE SCREWS (92S).
å NOTE: Use the adjustable wrench in this step.
37G
13M
24M
37G
24M 13M
23M
23M
I
BLACK 3/4" MACHINE SCREW
(4 used in this step)
92S
Step 12
422197 www.sauder.com/servicesPage 16
å IMPORTANT: You will need someone's help in this step.
å Fasten the TOP (I) to the ENDS (A and B). Use ten BLACK 9/16" LARGE HEAD SCREWS (1S) through the LIFT TABLE
MECHANISMS (23M) and into the holes in the ENDS.
å NOTE: Be careful when lining up the holes in the MECHANISMS with the holes in the ENDS as to not damage any parts.
You should start each SCREW a few turns before completely tightening any of them.
23M
23M
I
B
A
BLACK 9/16" LARGE HEAD SCREW
(10 used in this step)
1S
These four holes
must be here.
Do not insert
SCREWS into
these holes.
Do not insert
SCREWS into
these holes.
å Fasten the TOP (I) to the ENDS (A and B). Use two
BUSHINGS (91M) and two BLACK 3/4" PAN HEAD
SCREWS (85S) through the exact holes shown in the LIFT
TABLE MECHANISMS (23M) and into the holes in the ENDS.
å NOTE: Do not overtighten the SCREWS (85S).
Step 13
422197www.sauder.com/services Page 17
91M
BLACK 3/4" PAN HEAD SCREW
(2 used for the BUSHINGS)
85S
85S
91M
B
A
23M
I
23M
Step 14
422197 www.sauder.com/servicesPage 18
å Fasten the STRETCHER (H) to the SUPPORT BRACKETS (37G) on
the LIFT TABLE MECHANISMS (23M). Use four WASHERS (13M),
NUTS (24M), and BLACK 1-1/4" MACHINE SCREWS (93S).
å NOTE: Use the adjustable wrench in this step.
23M
23M
13M
H24M
24M
13M
37G
37G
BLACK 1-1/4" MACHINE SCREW
(4 used in this step)
93S
If you're doing this to
help a friend, don't
leave without a bite.
Step 15
422197www.sauder.com/services Page 19
å IMPORTANT: Do not place valuables in the storage space.
å NOTE: Please read the back pages of the instruction booklet for important safety information.
å This completes assembly. Clean with your favorite furniture polish or a damp cloth. Wipe dry.
And to celebrate, why not share your success story?
50 lbs.
25 lbs.
40 lbs. total
A l’usage exclusif du
Canada Noter la date
d’achat de cet élément
et conserver le livret
pour future référence.
Pour contacter Sauder
en ce qui concerne cet
élément, faire référence
au numéro de lot et
numéro de modèle en
appelant notre numéro
sans frais.
Lot nº : ____________
Date de
l’achat: ____________
LISTE DE PIÈCES
REFERENCE DESCRIPTION QUANTITÉ
LISTE DE PIÈCES
REFERENCE DESCRIPTION QUANTITÉ
NOUS SOMMES LA POUR VOUS AIDER!
Nous faisons de notre mieux pour nous assurer que votre meuble
arrive dans d’excellentes conditions. Nos représentants du service
Clientèle sont aimables et prêts à vous aider au cas où une pièce
aurait été endommagée ou manquerait (ou si vous aviez besoin
d’aide pour l’assemblage). NE RAMENEZ PAS LE MEUBLE AU
MAGASIN. Au Canada, composez ce numéro d’appel gratuit:
1-800-523-3987
Du lundi au vendredi, de 9 heures du matin à
5:30 heures du soir (horaire Côte Est)
(sauf jours fériés)
Si une pièce a besoin d’être remplacée, la pièce de remplacement
sera envoyée dans les 48 heures. (Sauf week-ends et jours fériés)
Utilisez les instructions d’assemblage en français avec les
schémas étape par étape du manuel d’instruction en anglais.
Chaque étape en français correspond à la même étape
en anglais. La pièce devant être attachée à l’élément est
représentée en gris sur les schémas de chaque étape pour plus
de précision. Comparer la “Liste de pièces” ci-dessous avec
la “PART IDENTIFICATION” du manuel en anglais pour vous
familiariser avec les pièces avant l’assemblage.
REMARQUE : CE MANUEL D’INSTRUCTIONS CONTIENT
D’IMPORTANTES INFORMATIONS RELATIVES À LA SÉCURITÉ.
À LIRE ET CONSERVER POUR TOUTE RÉFÉRENCE FUTURE.
1F EXCENTRIQUE ESCAMOTABLE.....................8
7F FIXATION TWIST-LOCK®....................................10
8F VIS D'EXCENTRIQUE ...............................................8
15F CHEVILLE EN BOIS...................................................8
37G CONSOLE DE SUPPORT......................................2
2M TAMPON............................................................................6
13M RONDELLE.......................................................................8
23M ENSEMBLE DE MÉCANISMES
DE LEVAGE DE TABLE.............................................1
24M ÉCROU ................................................................................8
54M COLLE...................................................................................1
91M MANCHON.......................................................................2
12P COUVERCLE D'EXCENTRIQUE.......................8
20P CACHE-VIS ....................................................................14
1S VIS TÊTE LARGE 14 mm NOIRE..................16
32S VIS TÊTE PLATE 14 mm NOIRE......................4
85S VIS TÊTE GOUTTE DE SUIF
19 mm NOIRE................................................................2
92S VIS À MÉTAUX 19 mm NOIRE..........................4
93S VIS À MÉTAUX 32 mm NOIRE.........................4
113S VIS TÊTE PLATE 49 mm NOIRE.................20
A EXTRÉMITÉ DROITE..................................................1
B EXTRÉMITÉ GAUCHE...............................................1
C DESSOUS...........................................................................1
D MONTANT..........................................................................1
E TABLETTE..........................................................................1
F PIED AVANT GAUCHE/ARRIÈRE DROIT.............2
G PIED AVANT DROIT/ARRIÈRE GAUCHE.............2
H BARRE...................................................................................1
I DESSUS...............................................................................1
J PANNEAU AVANT.......................................................2
K MOULURE D’EXTRÉMITÉ.....................................2
Table basse à dessus relevableModèle 422197
422197 www.sauder.com/servicesPage 20

Other Sauder Indoor Furnishing manuals
Sauder Craft Armoire User manual

Sauder

Sauder Craft Armoire User manual

Sauder 423493 User manual

Sauder

Sauder 423493 User manual

Sauder Palladia 420613 User manual

Sauder

Sauder Palladia 420613 User manual

Sauder Harbor View 158015 User manual

Sauder

Sauder Harbor View 158015 User manual

Sauder Night Stand 423434 User manual

Sauder

Sauder Night Stand 423434 User manual

Sauder Dakota Pass Armoire 419077 User manual

Sauder

Sauder Dakota Pass Armoire 419077 User manual

Sauder Pinwheel 421886 User manual

Sauder

Sauder Pinwheel 421886 User manual

Sauder Whitaker Point 429374 User manual

Sauder

Sauder Whitaker Point 429374 User manual

Sauder Costa L-Desk 419956 User manual

Sauder

Sauder Costa L-Desk 419956 User manual

Sauder Office Works Affirm 426307 User manual
Sauder

Sauder Office Works Affirm 426307 User manual

Sauder Shoal Creek 410287 User manual

Sauder

Sauder Shoal Creek 410287 User manual

Sauder WoodTrac422452 User manual

Sauder

Sauder WoodTrac422452 User manual

Sauder Soft Modern 414978 User manual

Sauder

Sauder Soft Modern 414978 User manual

Sauder HomePlus Collection 411967 User manual

Sauder

Sauder HomePlus Collection 411967 User manual

Sauder Primary Street 417912 User manual

Sauder

Sauder Primary Street 417912 User manual

Sauder 109830 User manual

Sauder

Sauder 109830 User manual

Sauder worksense BERGEN CIRCLE 427464 User manual

Sauder

Sauder worksense BERGEN CIRCLE 427464 User manual

Sauder Barrister Lane 414720 User manual

Sauder

Sauder Barrister Lane 414720 User manual

Sauder Office Works Affirm 431916 User manual

Sauder

Sauder Office Works Affirm 431916 User manual

Sauder Shoal Creek 408920 User manual

Sauder

Sauder Shoal Creek 408920 User manual

Sauder 414686 User manual

Sauder

Sauder 414686 User manual

Sauder 408951 User manual

Sauder

Sauder 408951 User manual

Sauder 403785 User manual

Sauder

Sauder 403785 User manual

Sauder Registry Row 412922 User manual

Sauder

Sauder Registry Row 412922 User manual

Popular Indoor Furnishing manuals by other brands

B. JORGSEN & CO MALIBU WHITE DC224WH Assembly instructions

B. JORGSEN & CO

B. JORGSEN & CO MALIBU WHITE DC224WH Assembly instructions

Weelko Support 1018A instruction manual

Weelko

Weelko Support 1018A instruction manual

Whalen Barkston Lane Desk with Hutch instruction manual

Whalen

Whalen Barkston Lane Desk with Hutch instruction manual

Alinea SOHO PLUS Assembly And Instructions

Alinea

Alinea SOHO PLUS Assembly And Instructions

Manhattan Comfort 400200 Assembly instructions

Manhattan Comfort

Manhattan Comfort 400200 Assembly instructions

BROSA Baker Wide Sideboard Assembly guide

BROSA

BROSA Baker Wide Sideboard Assembly guide

eliving FURNITURE KONA Series Assembly instructions

eliving FURNITURE

eliving FURNITURE KONA Series Assembly instructions

Forte HVNS823 Assembling Instruction

Forte

Forte HVNS823 Assembling Instruction

HJH office NESTORA 760019 Assembly instructions

HJH office

HJH office NESTORA 760019 Assembly instructions

Monarch Specialties I 7166 Assembly instructions

Monarch Specialties

Monarch Specialties I 7166 Assembly instructions

KÖHL MULTIPLO Assembly instructions

KÖHL

KÖHL MULTIPLO Assembly instructions

rgs REGENCY Prestige TVBC7236 Series quick start guide

rgs

rgs REGENCY Prestige TVBC7236 Series quick start guide

Atlantic Furniture 84” HARVARD BOOK SHELF Assembly instructions

Atlantic Furniture

Atlantic Furniture 84” HARVARD BOOK SHELF Assembly instructions

Furniture of America Knighton CM7528M Assembly instructions

Furniture of America

Furniture of America Knighton CM7528M Assembly instructions

DR. SAFE CCH016 Assembly instructions

DR. SAFE

DR. SAFE CCH016 Assembly instructions

InstaHANGER AH12 installation instructions

InstaHANGER

InstaHANGER AH12 installation instructions

ROOMS TO GO 25067946 Assembly instruction

ROOMS TO GO

ROOMS TO GO 25067946 Assembly instruction

GENC AG 0330100129348 Assembly and user's manual

GENC

GENC AG 0330100129348 Assembly and user's manual

manuals.online logo
manuals.online logoBrands
  • About & Mission
  • Contact us
  • Privacy Policy
  • Terms and Conditions

Copyright 2025 Manuals.Online. All Rights Reserved.