manuals.online logo
Brands
  1. Home
  2. •
  3. Brands
  4. •
  5. Sauder
  6. •
  7. Indoor Furnishing
  8. •
  9. Sauder 401822 User manual

Sauder 401822 User manual

NOTE: THIS INSTRUCTION
BOOKLET CONTAINS IMPORTANT
SAFETY INFORMATION.
PLEASE READ AND KEEP FOR
FUTURE REFERENCE.
English pg 1-28
Français pg 29-32
Español pg 33-36
Lot # 386787 11/30/15
Purchased: __________________
Be sure to give us a ring before
making any returns. 1-800-523-3987
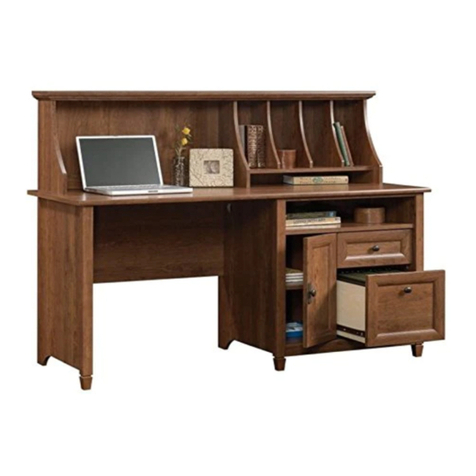
Executive Desk
Orchard Hills Collection | Model 401822
Need help? Visit Sauder.com to view video assembly tips or chat with a live rep.
Prefer the phone? Call 1-800-523-3987.
Share your journey!
sauder.com
Business or pleasure.
Works both ways.
Table of Contents Assembly Tools Required
3-4
5-6
7-28
29-32
33-36
37-38
39
Part Identification
Hardware Identification
Assembly Steps
Français
Español
Safety
Warranty
Hammer
Not actual size
No. 2 Phillips Screwdriver
Tip Shown Actual Size
Skip the power trip.
This time.
401822 www.sauder.com/servicesPage 2
Part Identification
åWhile not all parts are labeled, some of the parts will have a label or an inked letter on the edge
to help distinguish similar parts from each other. Use this part identification to help identify similar parts.
A RIGHT END (1)
B LEFT END (1)
C RIGHT UPRIGHT (1)
D LEFT UPRIGHT (1)
E TOP (1)
F MODESTY PANEL (1)
G BACK (2)
H BRACE (4)
I KEYBOARD FRONT (1)
J KEYBOARD BACK (1)
K KEYBOARD SIDE (2)
L KEYBOARD SHELF (1)
EE LONG MOLDING (2)
FF SHORT MOLDING (2)
GG BASE (4)
Now you know
our ABCs.
401822www.sauder.com/services Page 3
A
B
C
D
E
F
GH
I
J
K
L
EE
FF
GG
EE
FF
G
GG
GG
GG
H
H
H
K
Part Identification
åWhile not all parts are labeled, some of the parts will have a label or an inked letter on the edge
to help distinguish similar parts from each other. Use this part identification to help identify similar parts.
M FILE DRAWER FRONT (2)
R UPPER DRAWER FRONT (1)
W MIDDLE DRAWER FRONT (1)
AA SMALL DRAWER FRONT (1)
D10 MIDDLE DRAWER RIGHT SIDE (1)
D11 MIDDLE DRAWER LEFT SIDE (1)
D34 SMALL DRAWER RIGHT SIDE (1)
D35 SMALL DRAWER LEFT SIDE (1)
D74 SMALL DRAWER BACK (1)
D77 UPPER DRAWER BACK (1)
D78 FILE DRAWER BACK (2)
D86 MIDDLE DRAWER BACK (1)
D87 FILE DRAWER RIGHT SIDE (2)
D88 FILE DRAWER LEFT SIDE (2)
D132 UPPER DRAWER RIGHT SIDE (1)
D138 UPPER DRAWER LEFT SIDE (1)
D707 DRAWER BOTTOM (2)
D708 LARGE DRAWER BOTTOM (2)
D716 SMALL DRAWER BOTTOM (1)
Now you know
our ABCs.
401822 www.sauder.com/servicesPage 4
M
D87
D78
D88
D708
M
D87
D78
D88
D708
W
D10
D86
D11
D707
AA
D34
D74
D35
D716
R
D132
D77
D138
D707
Hardware Identification
401822www.sauder.com/services Page 5
(EXTENSION SET SHOWN SEPARATED)
EXTENSION RAIL - 4
LL EXTENSION SLIDE - 4
MM
35DA CABINET RIGHT - 1 35DB CABINET LEFT - 1 35DC DRAWER RIGHT - 1 35DD DRAWER LEFT - 1
RR LONG RIGHT
CABINET RAIL - 2 SS LONG LEFT
CABINET RAIL - 2 UU LONG LEFT
DRAWER SLIDE - 2
TT LONG RIGHT
DRAWER SLIDE - 2
FILE ROD - 4
8B
FILE GLIDE - 4
6B
40AW CABINET RIGHT - 1 40AX CABINET LEFT - 1 40AY DRAWER RIGHT - 1 40AZ DRAWER LEFT - 1
Hardware Identification
åScrews are shown actual size. You may receive extra hardware with your unit.
401822 www.sauder.com/servicesPage 6
HIDDEN CAM - 24
1F CAM DOWEL - 24
2F
METAL
BRACKET - 24
4G
MOLDING
CONNECTOR - 4
19F
MAGNETIC
CATCH - 2
2I
GROMMET - 2
7P GROMMET CAP- 2
8P
HINGE - 2
16H STRIKE PLATE - 2
6I
PULL - 8
10K PULL MOUNT - 16
11K
10A SLIDE CAM - 8
BLACK 1-7/8" FLAT HEAD SCREW - 6
2S
BLACK 1-1/4" FLAT HEAD SCREW - 6
7S SILVER 1-1/8" FLAT HEAD SCREW - 16
10S
18S BROWN 1" FLAT HEAD SCREW - 4
BLACK 9/16" LARGE HEAD SCREW - 50
1S
BLACK 1/2" FLAT HEAD SCREW - 2
11S
BROWN 7/16" LARGE HEAD SCREW - 8
6S3S GOLD 5/16" FLAT HEAD SCREW - 44
DRAWER FRONT
BRACKET - 1
6G
30S BLACK 1-9/16" FLAT HEAD SCREW - 20
SILVER 3/4" MACHINE SCREW - 16
20S
Step 1 Look for this icon. It means a
video assembly tip is available at
www.sauder.com/services/tips
å Assemble your unit on a carpeted floor or on the empty
carton to avoid scratching your unit or the floor.
å Push twenty-four HIDDEN CAMS (1F) into the ENDS (A
and B), UPRIGHTS (C and D), and BRACES (H). Then,
insert the metal end of a CAM DOWEL (2F) into each
HIDDEN CAM.
401822www.sauder.com/services Page 7
Arrow
1F
2F
(24 used)
Arrow
1F
2F
Insert the metal end of the CAM
DOWEL into the HIDDEN CAM.
Arrow
Do not tighten the HIDDEN CAMS in this step.
A
B
C
D
H
H
H
H
Step 2
å Tap four MOLDING CONNECTORS (19F) into the notches
in the MOLDINGS (EE and FF).
401822 www.sauder.com/servicesPage 8
Flat end
Use your hammer to tap four MOLDING CONNECTORS (19F) into the notches in the MOLDINGS .
Flat end
19F
FF
19F
EE
FF
EE
å Fasten the MOLDINGS (EE and FF) to the TOP (E). Use
sixteen SILVER 1-1/8" FLAT HEAD SCREWS (10S).
å NOTE: Do not overtighten the SCREWS into the TOP.
Step 3
401822www.sauder.com/services Page 9
FF
EE
FF
EE
E
Finished surface
SILVER 1-1/8" FLAT HEAD SCREW
(16 used in this step)
10S
Remember:
Righty tighty.
Lefty loosey.
Do not overtighten
the SCREWS (10S).
Step 4
å Separate the EXTENSION SLIDES (MM) from the
EXTENSION RAILS (LL) as shown in the upper diagram
below. Be prepared, the parts are greasy.
å Fasten an EXTENSION RAIL (LL) to each END (A and B)
and UPRIGHT (C and D). Use eight GOLD 5/16" FLAT
HEAD SCREWS (3S).
å NOTE: For each EXTENSION RAIL, turn a SCREW into the
hole shown in the enlarged diagram. Then, slide the inner
cartridge of the EXTENSION RAIL out to find the other
hole that lines up with the hole in the END. Turn a SCREW
into this hole.
401822 www.sauder.com/servicesPage 10
Pull down on the blue lever and pull the SLIDE from the RAIL.
Open end
Surface with
HIDDEN CAMS
Open end
Open end
Open end
LL
D
LL
LL
LL
C
A
B
Surface with
HIDDEN CAMS
Surface with
HIDDEN CAMS
Surface with
HIDDEN CAMS
LL
MM
GOLD 5/16" FLAT HEAD SCREW
(8 used in this step)
3S
Hole
å Fasten the CABINET RIGHT (35DA) and CABINET LEFT (35DB)
and the LONG CABINET RAILS (SS and RR) to the ENDS (A
and B) and UPRIGHTS (C and D). Use twelve GOLD 5/16" FLAT
HEAD SCREWS (3S).
Step 5
401822www.sauder.com/services Page 11
35DA
35DA
35DB
35DB
Roller end
Roller end
Roller end
Roller end
GOLD 5/16" FLAT HEAD SCREW
(12 used in this step)
3S
RR
A
RR
SS
SS
D
C
B
Step 6
å Fasten the CABINET RIGHT (40AW) to the RIGHT UPRIGHT (C)
and the CABINET LEFT (40AX) to the LEFT UPRIGHT (D). Use
four GOLD 5/16" FLAT HEAD SCREWS (3S).
å NOTE: The CABINET RAILS are marked "CABINET RIGHT" and
"CABINET LEFT" for easy identification.
401822 www.sauder.com/servicesPage 12
GOLD 5/16" FLAT HEAD SCREW
(4 used in this step)
3S
D
C
Surface without
HIDDEN CAMS
Surface without
HIDDEN CAMS
Roller end
Roller end
40AW
40AW
40AX
40AX
å Fasten the UPRIGHTS (C and D) to the TOP (E). Tighten
four HIDDEN CAMS.
Step 7
401822www.sauder.com/services Page 13
D
C
Surface without
HIDDEN CAMS
Surface with
HIDDEN CAMS
E
Start Tighten
Arrow
Minimum
190 degrees
Caution
Risk of damage or
injury. HIDDEN CAMS
must be completely
tightened. HIDDEN
CAMS that are not
completely tightened
may loosen, and parts
may separate. To
completely tighten:
Arrow
Maximum
210 degrees
Large hole
Step 8
å Fasten the MODESTY PANEL (F) to the UPRIGHTS (C and D).
Use six BLACK 1-7/8" FLAT HEAD SCREWS (2S).
401822 www.sauder.com/servicesPage 14
D
C
F
BLACK 1-7/8" FLAT HEAD SCREW
(6 used in this step)
2S
å Fasten four BRACES (H) to the UPRIGHTS (C and D).
Tighten eight HIDDEN CAMS.
å Fasten the ENDS (A and B) to the TOP (E) and the
BRACES (H). Tighten twelve HIDDEN CAMS.
Step 9
401822www.sauder.com/services Page 15
Arrow
Minimum
190 degrees
Maximum
210 degrees
Surface
with
HIDDEN
CAMS
This hole
must be here.
A
D
C
B
Surface without
HIDDEN CAMS
H
H
This hole
must be here.
H
H
E
Step 10
å Fasten twenty-four METAL BRACKETS (4G) to the ENDS (A
and B), UPRIGHTS (C and D), and BRACES (H). Use
twenty-four BLACK 9/16" LARGE HEAD SCREWS (1S).
å Fasten the BASES (GG) to the ENDS (A and B),
UPRIGHTS (C and D), and BRACES (H). Use twelve
BLACK 9/16" LARGE HEAD SCREWS (1S).
å Fasten the BACKS (G) to the ENDS (A and B) and
UPRIGHTS (C and D). Use twelve BLACK 9/16"
LARGE HEAD SCREWS (1S).
401822 www.sauder.com/servicesPage 16
BLACK 9/16" LARGE HEAD SCREW
(48 used in this step)
1S
(24 used)
GG
A
GG
GG
GG
C
D
B
G
G
H
H
H
H
4G
4G
4G
4G
4G
4G
å Press two MAGNETIC CATCHES (2I) into the large holes
of the KEYBOARD SIDES (K).
Step 11
401822www.sauder.com/services Page 17
K
2I
K
Finished edge
Finished edge
For adjustment, turn
barrel counter-clockwise.
Step 12
å Fasten the KEYBOARD SIDES (K) to the KEYBOARD
BACK (J) and then to the KEYBOARD SHELF (L). Use six
BLACK 1-1/4" FLAT HEAD SCREWS (7S).
å NOTE: You should start each SCREW a few turns before
completely tightening any of them.
401822 www.sauder.com/servicesPage 18
K
K
L
J
Long finished edge
Finished surface
These surfaces should be the same finish.
BLACK 1-1/4" FLAT HEAD SCREW
(6 used in this step)
7S
Don't worry. It isn't
Rome. This can be built
in a day.
å Fasten two STRIKE PLATES (6I) to the KEYBOARD
FRONT (I). Use two BLACK 1/2" FLAT
HEAD SCREWS (11S).
å Fasten the KEYBOARD FRONT (I) to the
KEYBOARD SHELF (L). Use eight BROWN 7/16"
LARGE HEAD SCREWS (6S) and
two HINGES (16H).
Step 13
401822www.sauder.com/services Page 19
BLACK 1/2" FLAT HEAD SCREW
(2 used for the STRIKE PLATES)
11S
BROWN 7/16" LARGE HEAD SCREW
(8 used for the HINGES)
6S
16H
6I
6I
I
L
I
Step 14
å Fasten the DRAWER RIGHT (40AY) and the DRAWER
LEFT (40AZ) to the KEYBOARD SHELF (L). Use four
BROWN 1" FLAT HEAD SCREWS (18S).
å NOTE: The DRAWER SLIDES are marked "DRAWER
RIGHT" and "DRAWER LEFT" for easy identification.
401822 www.sauder.com/servicesPage 20
L
Roller end
BROWN 1" FLAT HEAD SCREW
(4 used in this step)
18S
Roller end
40AZ
40AZ
40AY
40AY

Other Sauder Indoor Furnishing manuals
Sauder Avenue Eight 416514 User manual

Sauder

Sauder Avenue Eight 416514 User manual

Sauder Jaclyn Smith 416404 User manual

Sauder

Sauder Jaclyn Smith 416404 User manual

Sauder Studio RTA 408531 User manual

Sauder

Sauder Studio RTA 408531 User manual

Sauder HomePlus 411963 User manual

Sauder

Sauder HomePlus 411963 User manual

Sauder Boulevard Cafe 420650 User manual

Sauder

Sauder Boulevard Cafe 420650 User manual

Sauder Beginnings 413037 User manual

Sauder

Sauder Beginnings 413037 User manual

Sauder Pinwheel Collection 422600 User manual

Sauder

Sauder Pinwheel Collection 422600 User manual

Sauder Harbor View 8070-297 User manual

Sauder

Sauder Harbor View 8070-297 User manual

Sauder Soft Modern 414978 User manual

Sauder

Sauder Soft Modern 414978 User manual

Sauder 433242 User manual

Sauder

Sauder 433242 User manual

Sauder 404958 User manual

Sauder

Sauder 404958 User manual

Sauder Harbor View 400742 User manual

Sauder

Sauder Harbor View 400742 User manual

Sauder Summit Station 427287 User manual

Sauder

Sauder Summit Station 427287 User manual

Sauder Carson Forge Series User manual

Sauder

Sauder Carson Forge Series User manual

Sauder Via 401446 User manual

Sauder

Sauder Via 401446 User manual

Sauder OfficeWorks AFFIRM 427444 User manual

Sauder

Sauder OfficeWorks AFFIRM 427444 User manual

Sauder Tremont Row 427971 User manual

Sauder

Sauder Tremont Row 427971 User manual
Sauder Credenza Soft Modern 414986 User manual

Sauder

Sauder Credenza Soft Modern 414986 User manual

Sauder 415421 User manual

Sauder

Sauder 415421 User manual

Sauder 419954 User manual

Sauder

Sauder 419954 User manual

Sauder 414443 User manual

Sauder

Sauder 414443 User manual

Sauder Steel River 427855 User manual

Sauder

Sauder Steel River 427855 User manual

Sauder Office Works Affirm 426274 User manual

Sauder

Sauder Office Works Affirm 426274 User manual

Sauder Harbor View 417586 User manual

Sauder

Sauder Harbor View 417586 User manual

Popular Indoor Furnishing manuals by other brands

Regency LWMS3015 Assembly instructions

Regency

Regency LWMS3015 Assembly instructions

Furniture of America CM7751C Assembly instructions

Furniture of America

Furniture of America CM7751C Assembly instructions

Safavieh Furniture Estella CNS5731 manual

Safavieh Furniture

Safavieh Furniture Estella CNS5731 manual

PLACES OF STYLE Ovalfuss Assembly instruction

PLACES OF STYLE

PLACES OF STYLE Ovalfuss Assembly instruction

Trasman 1138 Bo1 Assembly manual

Trasman

Trasman 1138 Bo1 Assembly manual

Costway JV10856 manual

Costway

Costway JV10856 manual
moss DESIGN Caisson Credenza Assembly instructions

moss DESIGN

moss DESIGN Caisson Credenza Assembly instructions

Aquaglide FULL DECK 15.0 owner's manual

Aquaglide

Aquaglide FULL DECK 15.0 owner's manual

AREBOS AR-HE-SW30 user manual

AREBOS

AREBOS AR-HE-SW30 user manual

Till-Hilft Fulda 87005.330 Assembly instructions

Till-Hilft

Till-Hilft Fulda 87005.330 Assembly instructions

Twoey Outside 2010 quick start guide

Twoey Outside

Twoey Outside 2010 quick start guide

Hettich Easys 200 operating instructions

Hettich

Hettich Easys 200 operating instructions

The bedboss RELAX 404 Series owner's manual

The bedboss

The bedboss RELAX 404 Series owner's manual

Oeseder Möbelindustrie Bern 991 720 Assembly instructions

Oeseder Möbelindustrie

Oeseder Möbelindustrie Bern 991 720 Assembly instructions

Costway HW68469 user manual

Costway

Costway HW68469 user manual

Next ALIX A27743 Assembly instructions

Next

Next ALIX A27743 Assembly instructions

BROSA Hans Assembly guide

BROSA

BROSA Hans Assembly guide

Prodigg MINIKA PBA015T-FUR installation manual

Prodigg

Prodigg MINIKA PBA015T-FUR installation manual

manuals.online logo
manuals.online logoBrands
  • About & Mission
  • Contact us
  • Privacy Policy
  • Terms and Conditions

Copyright 2025 Manuals.Online. All Rights Reserved.