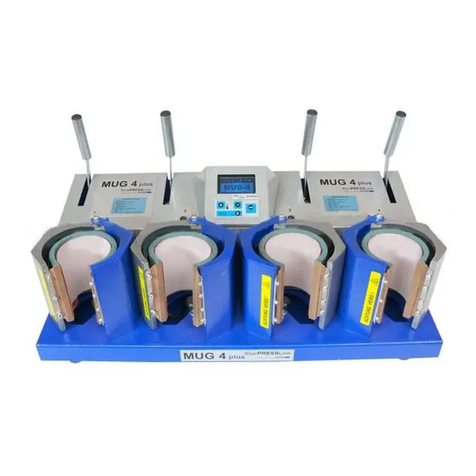
Schulze BluePRESSLine Mug 4 User manual

Instruction manual
Version 10.01
Heat press
BluePRESSLine
Mug 4
Version 10.01
1/11

1. Introduction
1.1 Content
1. Introduction 02
1.1 Content 02
1.2 Illustration of the heat press 03
1.3 Technical Data 03
1.4 Exchan eable heatin element 03
1.5 Safety arran ements of the heat plate 03
1.6 Safety arran ements at the workspace 04
2. Initiation 04
2.1 Tips for transport 04
2.2 Installation of the heat press 04
2.3 Power supply 04
2.4 Initiation of the heat press 04
3. Working wit t e eat press 05
3.1 Pro rammin of electronic devices 05
3.2 Bu fixin of the electronic devices 05
3.3 Application ran e and sample adjustments of the heat press 05
3.4 Apply a transfer film to a cup 06
3.5 Pressure Settin s 06
3.6 Exchan e the heatin band 07
4. Maintenance 08
4.1 Maintenance 08
4.2 Replacin the main fuse 08
4.3 Replacin electronic devices 08
4.4 Troubleshootin 09
4.5 Connection dia ram 10
4.6 Testin Report 11
4.7 EC-Conformance declaration 11
Version 10.01
2/11

1.2 Illustration of t e eat press
1. Power cable with connector
2. Main fuse
3. Electronic devices
4. Main switch
5. Pressure lever with rubber rip
6. Movable Part
7. Heatin band
8. Fixation of the heatin element
9. Contact pressure adjustment
1.3 Tec nical Data
Dimensions of the press: ................................. 73 x 35 x 27 cm
Wei ht: ...............................................................................26 k
Operatin volta e: ...................................................... 230 VAC
Rated power: .................................................................. 300 W
Fuse: ....................................................................................10A
Max. temperature: ......................................................... 200°C
Temperature ran e: .................................................90 – 200°C
Time settim sŁ ................................................ 1sek – 19:59 Min
Heatin band: ..................................................... 105 x 230 mm
Max. pressure area: ............................................. 80 x 180 mm
Diameter of the cup: ............................................... 72 - 82 mm
1.4 Exc angeable eating element
There are different hot plates for this heat press.
The instruction manual for exchan in the heatin element is
written in chapter 3.6.
•heatin element for a pitcher: diameter 95 mm
1.5 Safety arrangements of t e eat press
The BluePRESSLine MUG 4 is equipped with different safety arran ements, to make a safe usa e possible.
Main fuse 10A
The 10A fuse is located on the left side of the press. In Falleeiner con estion, protects the press from an injury.
If this backup enabled, it must be replaced. The manual for the replacement can be found in 4.2
Acoustic signal
3 Seconds before the end of the pressin process an acoustic si nal will sound.
Version 10.01
3/11

1.6 Safety arrangements at t e workspace
Testing t e eat press
After a correct installation of the press it is important to ensure that the press works properly, isn't dama ed and has no safety defects. The
testin can only be done by the employer or other authorized persons and is mandatory to uarantee correct installation and safe usa e of
the press.
If any irre ularities re ardin functionality or safety are found durin the testin , these have to been noted and reported to Walter Schulze
GmbH in written form within 7 days. Until clarification the press can not be used.
Information and Education
Accordin to § 81 industrial relations law and § 14 employment protection law the employer has to make arran ements to ive all
information about the function and the ran e of application to the user.
In particular the user needs to be acquainted with the complete manual and be explicitly informed of the dan ers of workin with the press.
The details have to be explained in a coherent form and lan ua e.
Safety distance and ventilation
The press has to be installed at a place which ives enou h space on both sides to put the material on.
The space in front of the press has to be wide enou h to let nothin disturb the user at work.
Usin the press with certain materials may create a stron smell. That’s why the user should evaluate the need for a ventilation system at
the workplace.
Safety instruction:
•The press should only be used by trained personal after notice of this manual
•Only one person is allowed to work on the press at a time.
•Beware of heatin plate – risk of burns.
•The plu has to be pulled out of the power outlet while maintenance.
2. Initiation
2.1 Tips for transport
The BluePRESSLine MUG 4 is covered with a cardboard for transport. Ri ht after the receivin you should check if the cardboard and the
press are in ood condition. Later on, if you have to send the press somewhere, we ask you to cover the press with the same cardboard
and in the same way. The press has to be cold and the pressure lever has to be pulled down.
2.2 Installation of t e eat press
The press is delivered in a cardboard. After unpackin and connectin , you can work with the press. The BluePRESSLine MUG 4 doesn't
need any other monta e or installation
2.3 Power supply
The BluePRESSLine MUG 4 has to be connected to a volta e of 230VAC/ 50Hz. The press is equipped with a plu . Make sure that the
power outlet is in the ri ht condition and that the roundin is connected to the power outlet.
2.4 Initiation of t e eat press
While powerin up the press, the movable part has to be in the upper position, which means that the press has to be open. The press also
has to be open while heatin up. The press can be turned on with the reen switch. If the reen switch lows the press heats up to the
adjusted temperature. After finishin the work with the press the switch has to be turned off and the plu has to be pulled out.
Version 10.01
4/11

3. Working wit t e eat press
3.1 Programming electronic devices
After switchin on the press, the current temperature is
shown on the display and the press heats up. To chan e the
settin s,
1. Pro rammin mode shows up when you press the
setup button about 5 seconds, until the LED 1 blinks.
2. The pro rammed temperature is shown on the display.
The pro rammin mode is activated.
3. With the buttons – or + you can adjust the disired
print temperature.
4. Press the setup button shortly. Now you can see the pro
time. With the buttons – or + you can adjust the disired
time.
5. To leave the pro rammin mode press the setup button
All settin s ared saved.
Control of adjusted temperature
If you want to check up the adjusted temperature press the +
button
.
Control of adjusted time
If you want to check upp the adjusted time press the - button
3.2 Bugfixing of t e electronic devices
The electronic devices of the BluePRESSLine MUG 4 heat press control the main functions of the press.
Here is a list of possible messa es:
ERR.1 – No connection of the electronic devices to the temperature sensor, (Temperature sensor defect/ cable not connected)
ERR.2 – Connection of electronic devices and temperature sensor bypassed , (Temperature sensor defect/)
ERR.3 – Resistor of temperature sensor too low. The temperature ran e of the electronic devices is deceeded.
ERR.4 – Resistor of temperature sensor too hi h. The temperature ran e of the electronic devices exceeded.
ERR.5 – No temperature rise within 3 minutes even if heatin element is switched on. (Temperature fuse is defect)
ERR.6 – No reduction of the temperature within 3 minutes even if heatin element is turned off. (Power relay CRYDOM is defect)
ERR.7 – Temperature too hi h, over 230°C (Power relay CRYDOM is defect)
ERR.3 and ERR.4 can occur if the electronic devices are not pro rammed properly.
3.3 Application range and sample adjustments of t e eat press
This heat press is made for transfers to cups and pitchers. Here are some settin s.
Settin s sublimation to a cup (Example):
–Print temperature 180°C
–Time 4 minutes
You must never close t e eat press wit out a cup inside!
Version 10.01
5/11

3.4 Apply a transfer film to a cup
Insert the cup with the transfer film
into the press.
Press the cup into the heatin
element.
Continue to press the cup down while
closin the press with the lever. The
press will heat up to the pro rammed
temprature and the count the preset time
down. After the lapse of time a acustic
si nal will sound. Open the press and
take the cup out.
3.5 Pressure settings
The contact pressure settin screw is placed at the front of the heat press. To adjust the settin s, the heat press must be open. The
contact pressure should not be too hi h, otherwise there could be a partial dama e. After every modification you have to test the new
settin s.
Damage, w ic is made by an excessive pressure setting, is not covered by t e warranty.
If you want to make the pressure settin s, please follow this
description:
1. Place the cup in the heat press.
2. Close the heat press to check up the contact pressure.
3. Open the heat press.
4. To raise the contact pressure twirl the screw to the left
(+).
5. To downsize the contact pressure twirl the screw to
the ri ht (-).
Version 10.01
6/11

3.6 Exc ange t e eating band
Before you can chan e the heatin band, switch off the heat press and pull out the plu . The heatin band must be cool. Put the first press
to the side (p oto 1). Unscrew the cover (p oto 1 and 2). Pull out the power (p oto 3). Screw the fixation of the heatin element (p oto
4). Pull the cable clamp (P oto 5). Take out the heatin band and install the new heatin band (p oto 6-7)
Check if the heat press is ready to work.
Version 10.01
7/11

4. Maintenance
4.1 Maintenance
If it is necessary you can rease the movable elements
Before you can start reasin the heat press must be deactivated and cool. Pull out the plu . You can use a usual car rease.
4.2 Replacing t e main fuse
If the heat press do not work and the main switch is lowin , check the main fuse. The main fuse 10A is placed at the left side of the heat
press (p oto 1). To chan e the main fuse switch off the heat press and disconnect it from electricity. Screw out the fuse bracket (p oto 1),
chan e the fuse (p oto 2 & 3) and screw in the bracket.
4.3 Replacing electronic devices
The electronic devices are placed inside the heat press, which are re ulatin the time and the temperature. To chan e the electronic
devices switch out the heat press and take the electronics with the screwdriver to (p oto 1). Pull it aut (p oto 2) and disconnect the
reen plu (p oto 3). Put in the new electronic devices, fix it and connect it with the reen plu . Fixin the cap is the last step you have to
do.
Version 10.01
8/11

4.4 Troubles ooting
Version 10.01
9/11
Problem Cause Debu in
Grüner Schalter leuchtet aber: main f use 10 A ist def ect Exchan e main f use 10 A
display doesn´t low if the main f use is okay, than the electronic dev ices are def ect Exchan e electronic dev ices
heat plate doesn´t f uel
Display shows Err 1, temeperature sensor is def ect or cable is broken chack temperature connection
no temperatue or time ran e or chan e temeperature sensor
Af ter closin the heat press the time is not countin an el at the START-button bent Bent the an el while pushin START – button
START-button is def ect exchan e START - button if time doesn't count
down while pressin the start button
No acoustic si nal af ter end of pressin beeper is def ect Exchan e electronic dev ices
temperature rises more than adjusted
althou h the red diode do not low on the display
Example: temperature was adjusted
Temperature rises to 180 °C – red diode lows breakdown of electronic dev ices Exchan e electronic dev ices
af ter reachin 180°C red diode lapse
Temperature rises more than 220°C, than sinkin
display shows Err 6
buttons on the electronic dev ices def ect settin buttons are def ect Exchan e electronic dev ices
no settin s f or time and temperature possible
real temperature doesn´t match witch temperature breakdown of electronic dev ices reset electronic dev ices
shown on the display – temperature too hi h/ low

4.5 Connection diagram
Version 10.01
10/11

4.6 Testing Report
final check of the heat press:
o- base, paint
o- reasin of the waves
o- heatin plate and baseplate, silicon, teflon
o- electronic connection, safety wire, power cable
o- electronic, max. temperature 220°C
o- check of all functions
o- workin time at 180°C . . . . . . . hours
o- temperature tolernace at 180°C . . . . . . -/ . . . . . .+°C
o- workin time at 180°C . . . . . . . .hours
o- test with a transfer film
o- caution labels
Serial number . . . . . . . . . . . . . . . . . . Date . . . . . . . . . . . . . . . . . . . . Si nature . . . . . . . . . . . . . . . . . . . . . . . . . . .
4.7 EC-Conformance-Declaration after EC- guideline for mac ines 2006/46 EC
The Walter Schulze GmbH
Schmalenbachstraße 15
12057 Berlin
as European representative of the manufacturer company ROMANIK hereby declares that the followin machine:
Heat press . . . . . . . . . . . . . . . Serial number . . . . . . . . . . . .
is compliant with the specifications of the followin EC directives:
Machinery ( 2006/46)
Low Volta e (2006/95)
EMC (2004/108)
used norms and technical specifications:
EN 292-1 EN 292-2 safety of machines
EN 60204-1 electrical equipment of machines
Berlin , . . . . . . .
_____________________________
Peter Meidin er
President
All SCHULZE heat presses are exempt from the waste disposal law under re . no. DE 231060054.
Version 10.01
11/11
Table of contents
Other Schulze Power Tools manuals

Schulze
Schulze Pneu Press User manual

Schulze
Schulze AirPress4 Quick guide

Schulze
Schulze Cap Press User manual

Schulze
Schulze E-Power Duo Press User manual

Schulze
Schulze DTG Press User manual

Schulze
Schulze BluePRESSLine Size 3-S User manual

Schulze
Schulze Air press-4 X User manual

Schulze
Schulze BluePRESSLine DTG-4-S User manual

Schulze
Schulze Big-O-Matic 90130 User manual

Schulze
Schulze Swing S Duo pneu User manual