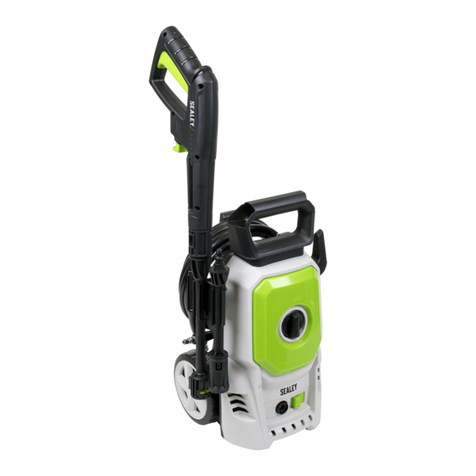
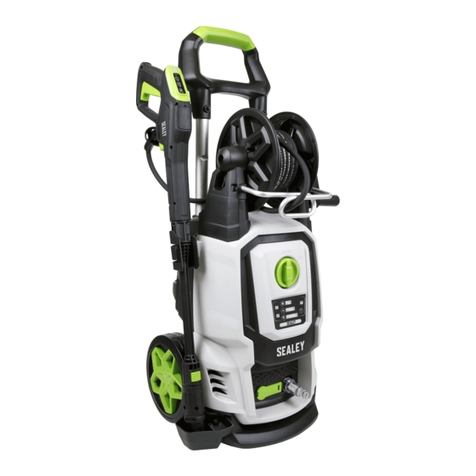
Sealey PC1950 User manual

PC1950 - 1 - 190105
1.1 ELECTRICAL SAFETY
p WARNING! It is the responsibility of the owner and the operator to read, understand and comply with the following:
You must check all electrical products, before use, to ensure that they are safe. You must inspect power cables, plugs, sockets and any other
connectors for wear or damage. You must ensure that the risk of electric shock is minimised by the installation of appropriate safety devices. A
Residual Current Circuit Breaker (RCCB) should be incorporated in the main distribution board. We also recommend that a Residual Current
Device (RCD) is used. It is particularly important to use an RCD with portable products that are plugged into a supply which is not protected by
an RCCB. If in any doubt consult a qualified electrician. You may obtain a Residual Current Device by contacting your Sealey dealer.
You must also read and understand the following instructions concerning electrical safety.
1.1.1 The Electricity at Work Act 1989 requires all portable electrical appliances, if used on business premises, to be tested by a qualified
electrician, using a Portable Appliance Tester (PAT), at least once a year.
1.1.2 The Health & Safety at Work Act 1974 makes owners of electrical appliances responsible for the safe condition of those appliances
and the safety of the appliance operators. If in any doubt about electrical safety, contact a qualified electrician.
1.1.3 Ensure that the insulation on all cables and on the appliance is safe before connecting it to the power supply. See 1.1.1. and 1.1.2.
and use a Portable Appliance Tester.
1.1.4 Ensure that cables are always protected against short circuit and overload.
1.1.5 Regularly inspect power supply cables and plugs for wear or damage and check all
connections to ensure that none is loose.
1.1.6 Important: Ensure that the voltage marked on the appliance matches the power supply
to be used and that the plug is fitted with the correct fuse - see fuse rating at right.
1.1.7 DO NOT pull or carry the appliance by the power cable.
1.1.8 DO NOT pull the plug from the socket by the cable.
1.1.9 DO NOT use worn or damaged cables, plugs or connectors. Immediately have any faulty
item repaired or replaced by a qualified electrician. When an ASTA/BS approved UK
3 pin plug is damaged, cut the cable just above the plug and dispose of the plug safely.
Fit a new plug according to the following instructions (UK only).
a) Connect the GREEN/YELLOW earth wire to the earth terminal E.
b) Connect the BROWN live wire to the live terminal L.
c) Connect the BLUE neutral wire to the neutral terminal N.
d) After wiring, check that there are no bare wires, that all wires have been correctly
connected, that the cable outer insulation extends beyond the cable restraint and that the restraint is tight.
Double insulated products, which are always marked with this symbol , are fitted with live (brown) and neutral (blue) wires only.
To rewire, connect the wires as indicated above - DO NOT connect either wire to the earth terminal.
1.1.10 Products which require more than 13 amps are supplied without a plug. In this case you must contact a qualified electrician to ensure
that a 30 amp supply is available. We recommend that you discuss the installation of an industrial round pin plug and socket with your
electrician.
1.1.11 If an extension reel is used it should be fully unwound before connection. A reel with an RCD fitted is preferred since any appliance
plugged into it will be protected. The cable core section is important and should be at least 1.5mm², but to be absolutely sure that the
capacity of the reel is suitable for this product and for others which may be used in the other output sockets, we recommend the use
of 2.5mm² section cable.
1.2 GENERAL SAFETY
pWARNING! Water and electricity are dangerous partners. Be extremely cautious and always be aware that this device uses an
electric motor. Always plug into a RCD (See electrical safety above). Unplug from mains before changing accessories or servicing.
pWARNING! DO NOT USE the washer if any part of the unit, gun, nozzle, detergent tank, hose or cables is damaged. Replace or
repair using genuine parts only. Unauthorised parts may be dangerous and will invalidate your warranty. Always check connections
are correctly secured and not cracked or damaged in any way before using the machine.
pWARNING! Use washer on a flat, levelled surface, in an upright position. Failure to do so will invalidate your warranty.
NEVER lay the washer down during use.
4Ensue you comply with all local water supply regulations. Power washers may only be connected to mains drinking water supply if a
back flow preventer valve is installed in the supply hose, or at the tap outlet.
4The supply hose must must be reinforced, and have an internal diameter of 1/2. The water supply must be at least equal to the
cleaner capacity. The water temperature must NOT exceed 122°F (50°C). The water supply pressure must NOT exceed 6 bar.
4Always be aware of the hazards that may occur during use. Study all applications and limitations of the washer before use.
4Use where air can freely circulate around the washer to avoid the machine overheating.
4Keep the washer in good condition. Use an authorised service agent to service the unit.
4Wear adequate protective clothing, goggles and anti-slip rubber soled footwear.
4Position the washer as near to the water supply as possible.
pWARNING! Ensure all persons and animals keep at a minimum distance of 16 yards (15mtr) from the washer when in use.
pWARNING! The pressure washer must only be used with clean water. Unfiltered water or corrosive chemicals must not be used as
these will damage the cleaner.
4Ensure the nozzle is aimed correctly at the work surface before switching on the machine.
1. SAFETY INSTRUCTIONS
FUSE RATING 13 AMP
Blue
Neutral
Wire
Yellow & Green
Earth Wire
Cable
Restraint
Brown
Live
Wire
INSTRUCTIONS FOR:
PRESSURE WASHER
1450PSI
MODEL: PC1950
Thank you for purchasing a Sealey product. Manufactured to a high standard this product will, if used
according to these instructions and properly maintained, give you years of trouble free performance.
IMPORTANT: PLEASE READ THESE INSTRUCTIONS CAREFULLY. NOTE THE SAFE OPERATIONAL REQUIREMENTS, WARNINGS, AND
CAUTIONS. USE THIS PRODUCT CORRECTLY, AND WITH CARE FOR THE PURPOSE FOR WHICH IT IS INTENDED. FAILURE TO DO SO
MAY CAUSE DAMAGE AND/OR PERSONAL INJURY AND WILL INVALIDATE THE WARRANTY.
4Before activating the trigger, GRIP the gun firmly to counteract the recoil from the high pressure water jet.
pWARNING! Avoid sudden bursts of water as these will cause water pressure to drop and put extreme pressure on hoses and connectors.
4If, during operation, power failure occurs turn the electricity and water off for safety reasons, (see note c at end of Section 5).
pWARNING! The high pressure jet will cause loose particles to be propelled at high speed, which may cause serious injury.
pWARNING! DO NOT operate the machine without a water supply. Dry running can seriously damage the unit.
pWARNING! DO NOT leave the washer switched on for more than 1-2 minutes without operating the trigger.
8DO NOT obstruct ventilation grills during operation.
8DO NOT use the washer with flammable or toxic liquids or any other product. Use only recommended detergent. Unapproved
detergents may corrode the machine cover and accessories.
8DO NOT jam the trigger in the operating position.
8DO NOT adjust any internal control valves, as they have been factory set.
8DO NOT connect other appliances to the machine inlet or outlet.
8DO NOT use in damp or wet weather conditions.
8DO NOT move the unit by pulling the hoses or electrical cables. Use the handle.
8DO NOT touch plug with wet hands. To avoid the risk of electrocution keep all connections dry and off the ground.
8DO NOT direct jet against yourself, other persons, animals, electrical equipment or the machine itself.
8DO NOT use washer if you are tired or under the influence of alcohol, drugs or intoxicating medication.
8DO NOT allow children or untrained persons to operate the washer.
pWARNING! Discharge residual pressure before disconnecting the washer hose. Pressure left in unit may cause injury.
4After use, disconnect washer from electrical mains and water supply and store in a safe, dry, childproof area.
Manifold Pressure: . . . . . . . . . . . . . . 65bar
Max Pressure: . . . . . . . . . . . . . . . . . 100bar
Effective Cleaning Power: . . . . . . . 1450psi
Water Flow: . . . . . . . . . . . . . . . . . . . . . . . .
300ltr/hrMotor Power: . . . . . . . . . . . 1200W
Input: . . . . . . . . . . . . . . . . . . . . 230V - 5.2A
Hose Length: . . . . . . . . . . . . . . . . . . . 3mtr
Weight: . . . . . . . . . . . . . . . . . . . . . . . . . 6kg
3. CONTENTS
1 Lance
2Gun
3 High pressure hose
4ON/OFF Switch
5 High pressure hose connector
6Water inlet (at rear)
7 Detergent dispenser
Unpack the product and check contents against the list below. Also check that the machine has an identification plate or label. If label or parts
are damaged or missing contact your supplier immediately.
PC1950 - 1 - 190105
Portable and reliable unit ideal for occasional leisure use or as back-up machine. Includes 3mtr hose, lance and foam applicator for pre-wash.
Packed in handy blow mould case with space for all accessories, offering protection and long term storage.
2. INTRODUCTION & SPECIFICATION

4. SET-UP
4.1 CONNECTING THE WATER SUPPLY
Use a reinforced hose pipe with an internal diameter of 1/2 and screw a push fit hose connector to the water inlet on the machine
(fig 1). Connect hose to the mains water supply as indicated in (fig 2).
4.2 CONNECTING THE HIGH PRESSURE HOSE
Remove and discard the transit plug from the water out connector on the lower front of the machine (fig 3). Attach the high pressure
hose to the pressure washer (fig 4) ensuring that the connector is tight. Turn on the water supply.
4.3 ASSEMBLING THE LANCE OR DETERGENT DISPENSER
Push the lance/dispenser onto the gun (fig 5) and turn through 90O until it clicks into place.
PC1950 - 1 - 190105

p
p
WARNING! Ensure you read, understand and apply Section 1 safety instructions.
p
p
WARNING! Dry running can seriously damage the unit.
p
p
WARNING! DO NOT leave washer switched on for more than 15 minutes without operating trigger.
Important! The washer motor will stop as soon as the gun trigger is released and will restart when the trigger is squeezed. Always
allow at least 5 seconds between releasing the trigger and restarting.
5.1 PRIMARY CHECKS
5.1.1 Check that the inlet filter is clean; pump delivery and pressure will be reduced if blocked.
5.1.2 Never use the machine without a filter (which is fitted inside the hose connector, see contents, item 6).
5.1.3 Ensure that the water supply, high pressure hose and gun are correctly connected, and that air can freely circulate around the washer.
5.2 OPERATION OF SAFETY CATCH
5.2.1 To prevent inadvertent operation of the unit the safety catch should always be engaged when the gun is not in use.
5.2.2 To activate the safety catch, ensure trigger is released and slide the safety button across (fig 9).
5.2.3 To release simply press button in the opposite direction.
5.3 OPERATING THE MACHINE
5.3.1 Hold the spray gun firmly to counteract the recoil caused by the high pressure of the water.
5.3.2 Before switching on ensure that the lance is not directed at people, objects or animals prior to being directed at the object to be
cleaned. It is recommended that the trigger is depressed before switching on the unit before every use. This reduces the back pressure
and amperage draw which prevents fuses blowing.
5.3.3 Turn on the water supply (fig 7).
5.3.4 Switch the machine on by pressing the button marked I (fig 8).
5.3.5 Release the safety catch (fig 9).
5.3.6 Point the lance at the object to be cleaned and fully depress the trigger.
5.4 USING THE DETERGENT DISPENSER (see contents, item 7)
5.4.1 Use only detergents approved for use in pressure washers.
5.4.2 Unscrew the detergent bottle from the detergent dispenser.
5.4.3 Fill the detergent bottle with soap or wax and screw back onto the detergent dispenser.
5.4.4 Attach the detergent dispenser (fig 10).
5.4.4 The chemical will be automatically mixed with the water and discharged through the nozzle.
5.4.5 Dirt is dissolved by applying detergent to the dry surface. On vertical surfaces, work from the bottom upwards.
5.4.6 Leave the detergent to act for 1 - 2 minutes, but DO NOT allow the surface to dry out.
5.4.7 To wash down, install the lance and use to clean the surface.
5.5 WHEN WASHING IS COMPLETED
5.5.1 Switch the power supply off by pressing the button marked O (fig 8).
5.5.2 Turn off the water supply tap.
5.5.3 Discharge residual pressure by pressing the trigger until no more water comes out of the nozzle.
5.5.4 Engage the trigger safety catch and unplug the machine from the electrical mains power supply.
5.5.5 Wipe the machine clean and dry and store in the blow mould case supplied.
NOTE: a) DO NOT leave motor switched on for more than 1-2 minutes without operating trigger.
b) If the water pressure drops (i.e. someone else using the same water supply), the washer will not operate correctly.
Immediately switch off the motor and wait until the pressure is restored.
c) Should the motor stop and fail to restart, the built in thermal cut-out may have tripped. Check to ensure that the washer is
connected correctly to electrical and water supplies (also see Section 6 Troubleshooting). Wait 5 minutes for the cut-out to reset
and re-start the motor. If the motor continues to cut out contact your authorised service agent.
d) If storing the washer for a long period during winter, operate the washer with a non-corrosive, non-toxic anti-freeze before
storage.
Store detergents according to instructions on the container label.
5. OPERATION
PC1950 - 1 - 190105
4.4 USING AN RCD (Residual Current Device)
It is recommended that you use an RCD with this product.
Plug the RCD into the mains supply (fig 6), then insert the pressure washers mains plug into the RCD.

6. TROUBLESHOOTING GUIDE
SYMPTOMS REASON REMEDY
Pump does not reach required pressure. Nozzle incorrect or worn. Replace the lance.
Dirty filter. Clean or replace filter.
Air being sucked into the system. Check that hoses and fittings are air tight.
Water pressure low. Check that hoses/fittings are water tight and tap is fully open.
Worn seals. Contact Authorised Service Agent.
Fluctuating pressure. Nozzle worn or blocked. Replace the lance or clear nozzle.
Water too hot. Reduce temperature.
Pump sucking air. Check that hoses and fittings are air tight.
Water or oil leaks. Seals worn. Contact Authorised Service Agent.
Motor does not start when switched on No electrical power.Check plug connections and mains power supply is active.
Automatic cut-off system fault. Contact Authorised Service Agent.
Motor hums but does not start Unsuitable mains voltage. Check for adequate power supply and cable condition.
when switched on. Motor/pump jammed. Contact Authorised Service Agent.
Pump frozen. Leave unit to thaw naturally. The pressure washer should be
protected from the threat of freezing. Extensive pump damage
could otherwise occur (see end of Section 4).
Incorrect extension cable. Use a suitable extension cable. See Section 1 Elect. Safety.
The motor stops. Tripped thermal cut-out due to Check that the mains voltage matches the specifications.
overheating. Switch off the motor and let machine cool for 5 minutes.
No detergent. Detergent container is empty. Refill detergent container.
Detergent pick up body clogged. Clear blockage.
Injector clogged. Clean injector.
Jet is ineffective,ragged or unsteady. Nozzle clogged. Clean nozzle.
Fuse blows in plug. Back pressure build up of water Depress trigger before switching on the machine.
causes machine to draw
high amperage.
PC1950 - 1 - 190105

PC1950 - 1 - 190105
www.sealey.co.uk
01284 757500 01284 703534 sales@sealey.co.uk
Web email
Sole UK Distributor, Sealey Group, Bury St. Edmunds, Suffolk.
Declaration of Conformity We, the sole importer into the UK, declare that the product listed here is in conformity with the following standards and directives.
The construction file for this product is held by the Manufacturer and may be inspected, by a
national authority, upon request to Jack Sealey Ltd. For Jack Sealey Ltd.
Sole importer into the UK
of Sealey Power Products.
Signed by Mark Sweetman 19th January 2005
PRESSURE WASHER - 1450PSI
Model: PC1950
89/392/EEC Machine Directive
73/23/EEC Low Voltage Directive
89/336/EEC EMC Directive
2000/14/EC Sound Pressure Directive
93/68/EEC Marking Directive
pWARNING! Ensure the pressure washer is switched off and unplugged from the mains electrical power supply and turned off at the
mains water tap before performing any maintenance tasks.
7.1 REGULAR MAINTENANCE
7.1.1 Check, clean or renew the inlet filter (which is fitted inside the hose connector, see contents, item 6) after every 50 hours of use.
7.1.2 Ensure that both nozzles are kept clean and free of debris.
7.1.3 Check unit, lance, detergent bottle, hose, connections and cables for damage. Immediately replace or repair with genuine parts.
7.2 STORAGE
7.2.1 Store unit in blow mould case provided.
7.2.2 Do not store the unit in premises subject to freezing conditions. If this cannot be guaranteed then the unit should have a
glycol based antifreeze run through it.
7.2.3 Immerse the water supply pipe into a container of antifreeze.
Immerse the lance into the same container (without the nozzle attached).
Hold the gun trigger open and start the unit.
The antifreeze will be drawn into the unit by suction. When an even, bubble free flow is obtained switch the unit off.
7. MAINTENANCE

PC1950 - 1 - 190105
www.sealey.co.uk
01284 757500 01284 703534 sales@sealey.co.uk
Web email
Sole UK Distributor, Sealey Group, Bury St. Edmunds, Suffolk.
NOTE: It is our policy to continually improve products and as such
we reserve the right to alter data, specifications and component
arts without prior notice. IMPORTANT: No liability is accepted for
incorrect use of this equipment. WARRANTY: Guarantee is 12
months from purchase date, proof of which will be required for any
claim. INFORMATION: For a copy of our latest catalogue and
promotions call us on 01284 757525 and leave your full name and
address, including postcode.
PARTS LIST FOR:
PRESSURE WASHER
1450PSI
MODEL: PC1950
Issue: 2
Issue Date: 130605
KIT PART NO. DESCRIPTION
0. PC1950/KIT 0MAIN ASSY (NOT SHOWN)
01. PC1950/KIT 1MOTOR PUMP ASSY
02. PC1950/KIT 2MOTOR COVER ASSY
03. PC1950/KIT 3PUMP ASSY
04. PC1950/KIT 4PUMP PEDESTAL ASSY
05. PC1950/KIT 5THRUST BEARING
06. PC1950/KIT 6PISTON BODY ASSY
07. PC1950/KIT 7PISTON ASSY
08. PC1950/KIT 8PUMP BODY ASSY
09. PC1950/KIT 9SPILL VALVE ASSY
10. PC1950/KIT 10 CHECK VALVE ASSY
11. PC1950/KIT 11 INLET PIPE ASSY
12. PC1950/KIT 12 INLET PIPE CONNECTION ASSY
13. PC1950/KIT 13 OUTLET BODY ASSY
-FNA.10020300 GUN
-FNA.42025200 HOSE
Table of contents
Other Sealey Pressure Washer manuals

Sealey
Sealey PWM2500SP.V2 User manual

Sealey
Sealey PC3455.V2 User manual

Sealey
Sealey PWDM3600 User manual

Sealey
Sealey POWER PRODUCTS PC2701 User manual

Sealey
Sealey PW1600 User manual

Sealey
Sealey PCM1500.V2 User manual

Sealey
Sealey PW1850 User manual

Sealey
Sealey PW1860 User manual

Sealey
Sealey PW2400 User manual

Sealey
Sealey PC1750 User manual

Sealey
Sealey PW2012R User manual

Sealey
Sealey PW1850 User manual

Sealey
Sealey PC2150 User manual

Sealey
Sealey PC3150 User manual

Sealey
Sealey PW2500HW User manual

Sealey
Sealey PC2950.V5 User manual

Sealey
Sealey PC2950.V3 User manual

Sealey
Sealey PW1610 User manual

Sealey
Sealey PCM2500.V2 User manual

Sealey
Sealey PC2950 User manual