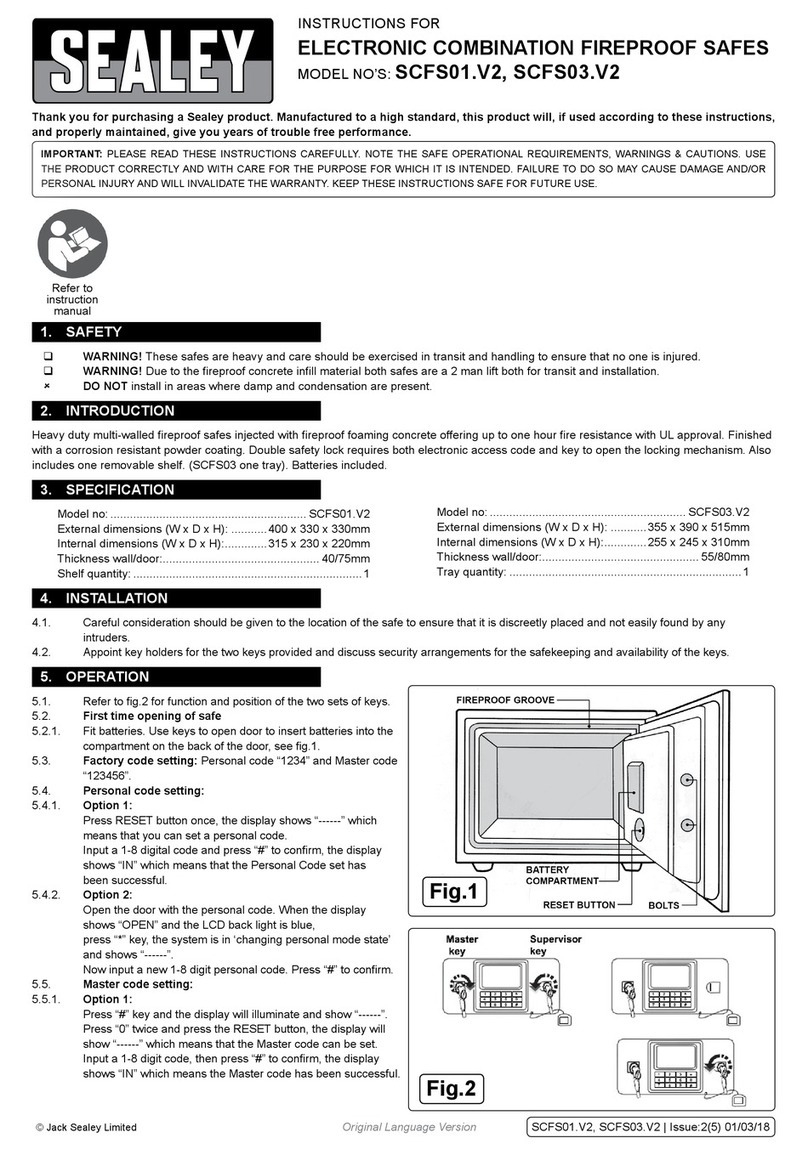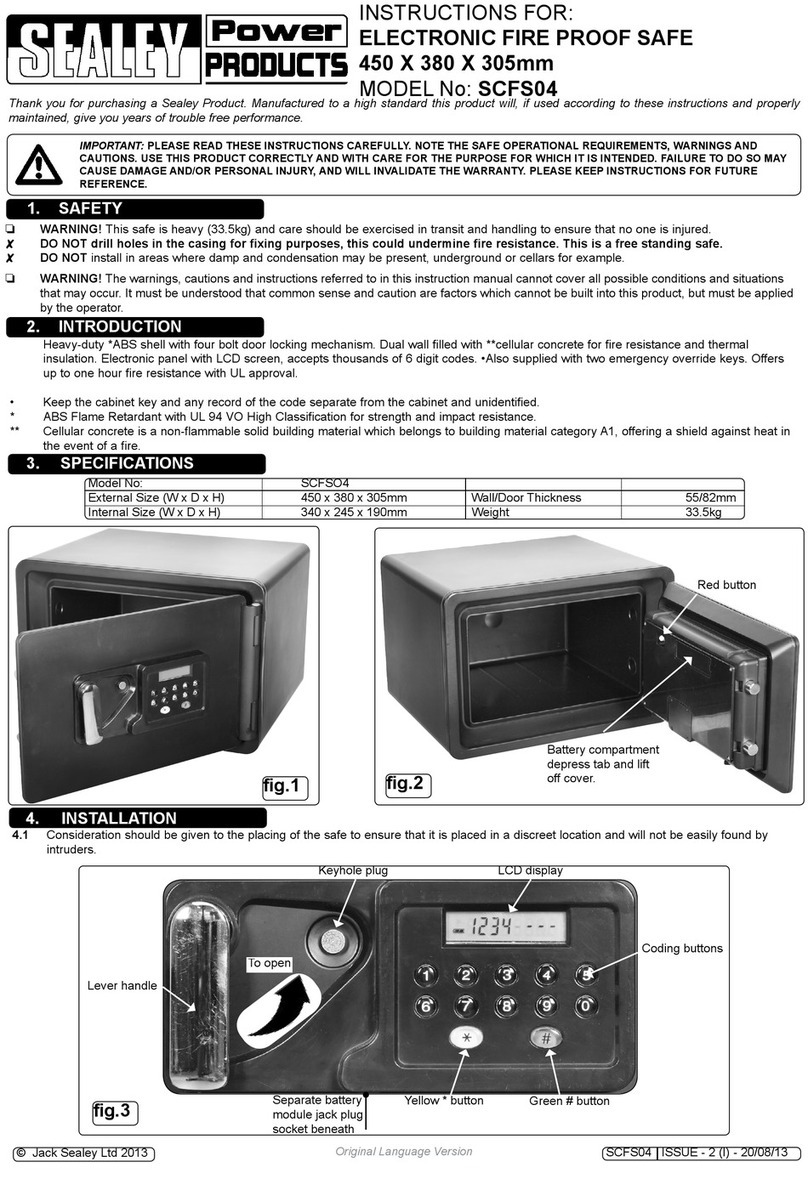
4.4 Setting the date and time. Whilst still in standby mode, press
the star '*' button to enter set up mode causing the left hand
value (year) to flash.
4.4.1 You must commence adjusting the display within 3 seconds,
otherwise the display will revert to standby.
4.4.2 Press '8' to increase the value by one digit each time the button
is pressed.
4.4.3 Press '0' to decrease the value by one digit each time the button
is pressed.
4.4.4 To step to the next adjustable value press the hash '#' button.
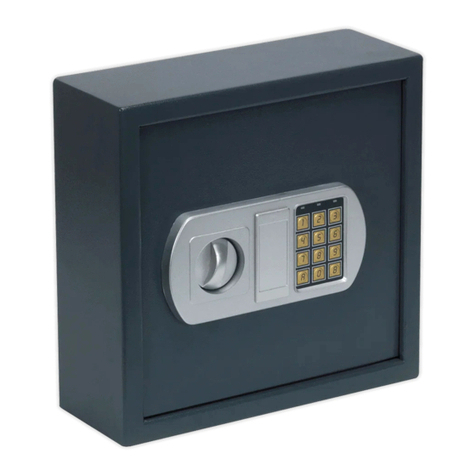
4.5 Opening the door. Press the hash '#' button causing the display
to light up yellow, ready for code entry with a dotted line on the
display.
4.5.1 Enter your four digit user code (or 8 digit master code) within
seven seconds and press the hash '#' button again to confirm.
If the code is correct the display colour will turn blue and the
word 'OPEN' will be displayed.
4.5.2 Turn the master key clockwise (within ten seconds) to open the
safe. Leave the key in the opened position, do not turn it back to
vertical otherwise you will have to enter the code again to lock
the door.
4.5.3 If the wrong code is entered the display will not change to blue
and the word 'ERROR' is displayed.
4.6 Closing the door. Close the door and turn the key anti-
clockwise to lock the door.
4.7 Setting the user code. The factory set user code is 1234. To
change this to a new code do the following:-
4.7.1 Press the hash '#' button causing the display to light up yellow,
ready for code entry with a dotted line on the display.
4.7.2 Enter your four digit user code within seven seconds and press
the hash '#' button again to confirm. If the code is correct the
display colour will turn blue and the word 'OPEN' will be
displayed.
4.7.3 Now press the star '*' button within 7 seconds to display a dotted
code entry line on the blue screen.
4.7.4 Enter your new user code and press the hash '#' button to
confirm. The display will show the word 'INTO' to indicate that the
new code has been stored.
4.8 Setting the master code. The factory set, eight digit master
code is 86729888. To change this to a new master code do the
following:-
4.8.1 Press the hash '#' button causing the display to light up yellow,
ready for code entry, with a dotted line on the display.
4.8.2 Enter your existing eight digit master code within seven seconds
and press the hash '#' button again to confirm. If the code is
correct the display colour will turn blue and the word 'OPEN' will
be displayed.
4.8.3 Now press the star '*' button within 7 seconds to display a dotted
code entry line on the blue screen.
4.8.4 Enter you new user code and press the hash '#' button to
confirm. The display will show the word 'INTO' to indicate that the
new code has been stored.
To return the safe to its factory settings, press the reset button on
the back of the door. The display will show the word 'CLEAR'
meaning that user set codes are lost and the factory codes are
recalled.
4.9 Tracking door opening records Open the door using the
required code. When the word 'OPEN' disappears from the blue
screen, immediately press '0'.
4.9.1 The display will show the last door opening record, i.e. year,
month, date, hour, minute, week and code to open.
NOTE: When PASS 1 is displayed this means the door was opened by
the master code. When PASS 2 is displayed this means the door was
opened with the user code. Pressing '0' whilst PASS 2 is displayed will
show the last but one record. Each time a previous record is displayed
'0' can be pressed again when PASS 2 is on the screen to see the next
stored record. This way, up to 14 records can be recalled.
4.10 Hiding the code when opening the safe. If, when opening the
safe you require the code not to be seen, you can add an extra
step to the opening sequence. Press the hash '#' button as
normal causing the display to light up yellow. Before entering the
code, press the star '*' button. Now, when you enter the code
it will not be displayed.
4.11 Alarm device. If the wrong code is entered 3 times consecutively,
the alarm will sound for 60 seconds. If the '0' button is pressed
whilst the alarm is sounding the display will show 'BELL ON'. If the
safe is attacked by shaking, striking or moving the alarm will sound
for 60 seconds.
NOTE: It is our policy to continually improve products and as such we reserve the right to alter data, specifications and component parts without prior notice.
IMPORTANT: No liability is accepted for incorrect use of this product.
WARRANTY: Guarantee is 12 months from purchase date, proof of which will be required for any claim.
INFORMATION: For a copy of our latest catalogue and promotions call us on 01284 757525 and leave your full name and address, including postcode.
01284 757500
01284 703534
sales@sealey.co.uk
Sole UK Distributor, Sealey Group,
Kempson Way, Suffolk Business Park,
Bury St. Edmunds, Suffolk,
IP32 7AR
www.sealey.co.uk
Web
email
Original Language Version SCFS01, SCFS03 Issue: 3(I) - 20/09/13
g.4
SCFS03 355 x 390 x 525
4.12 Replacement Keys.
Should you lose your keys we can supply replacements. To order
these please contact our sales office on 01284 757500 and quote
the unique serial number relating to your safe, this can be found
on the front of this manual. We will also require a copy of your
purchase invoice for the safe to confirm that you are the owner.
Please note that replacement keys are special order only (we do
not carry these in stock for security reasons) and as such they
can take 14 – 28 days to arrive.
© Jack Sealey Limited
