manuals.online logo
Brands
  1. Home
  2. •
  3. Brands
  4. •
  5. Sealey
  6. •
  7. Test Equipment
  8. •
  9. Sealey VS2050.V2 User manual

Sealey VS2050.V2 User manual

Thank you for purchasing a Sealey product. Manufactured to a high standard this product will, if used according to these instructions
and properly maintained, give you years of trouble free performance.
IMPORTANT: PLEASE READ THESE INSTRUCTIONS CAREFULLY. NOTE THE SAFE OPERATIONAL REQUIREMENTS, WARNINGS AND CAUTIONS.
USE THE PRODUCT CORRECTLY AND WITH CARE FOR THE PURPOSE FOR WHICH IT IS INTENDED. FAILURE TO DO SO MAY CAUSE DAMAGE
AND/OR PERSONAL INJURY AND WILL INVALIDATE THE WARRANTY. PLEASE KEEP INSTRUCTIONS SAFE FOR FUTURE USE.
1. SAFETY INSTRUCTIONS
3. PARTS
2. INTRODUCTION
WARNING! Ensure Health and Safety, local authority and general workshop practice regulations are adhered to when using this kit.
WARNING! Fuel is flammable - keep away from sources of ignition, including hot surfaces e.g. exhaust manifold.
DO NOT use the kit if any parts are missing or damaged.
DO NOT use the kit to perform a task for which it is not designed.
DO NOT allow untrained persons to use the kit.
DO NOT use when tired or under the influence of drugs, alcohol or intoxicating medication.
Switch off vehicle's ignition before commencing work under the bonnet.
Maintain the kit's components in good and clean condition for best and safest performance.
Wear eye protection and keep skin contact with fuel to a minimum. If fuel enters eyes rinse with plenty of water and seek medical
advice. If swallowed seek medical advice immediately. A full range of personal safety equipment is available from your Sealey dealer.
Wear suitable clothing to avoid snagging. Do not wear jewellery and tie back long hair.
Keep children and other unauthorised persons away from the working area.
Ensure there is adequate lighting whilst using this kit.
Use approved parts only. Unapproved parts may be dangerous and will invalidate the warranty.
Keep work area clean and tidy and free from unrelated materials.
 If running the vehicle's engine in an enclosed space, ensure that there is sufficient ventilation or use an exhaust extraction system.
Dispose of waste fuel in accordance with local authority regulations.
When work on the vehicle is finished ensure that there are no tools or parts left in the engine compartment.
After use, clean equipment, return all contents to the case and store in a safe, dry, childproof location.
IMPORTANT: Always refer to the vehicle manufacturer's service instructions, or proprietary manual, to establish the current
procedures and
correct data.
Item Part No. Description
1 VS2050.V2.01 Pressure Gauge (-1 to +3 bar) (Delphi)
2 VS2050.V2.02 Pressure Gauge (-1 to +15 bar) (Bosch/Siemens)
3 VS2050.V2.03 Main Body
4 VS2050.V2.04 Injector Connector
5 VS2050.V2.05 Injector Connector (angled)
Item Part No. Description
6 VS2050.V2.06 Brass Cone (Delphi)
7 VS2050.V2.07 Return Flow Connector (Brass end)
8 VS2050.V2.08 Return Flow Connector
9 VS2050.V2.09 Drain Tube (Delphi-brass cone)
10 VS2050.V2.10 Drain Tube (Delphi-brass cone)
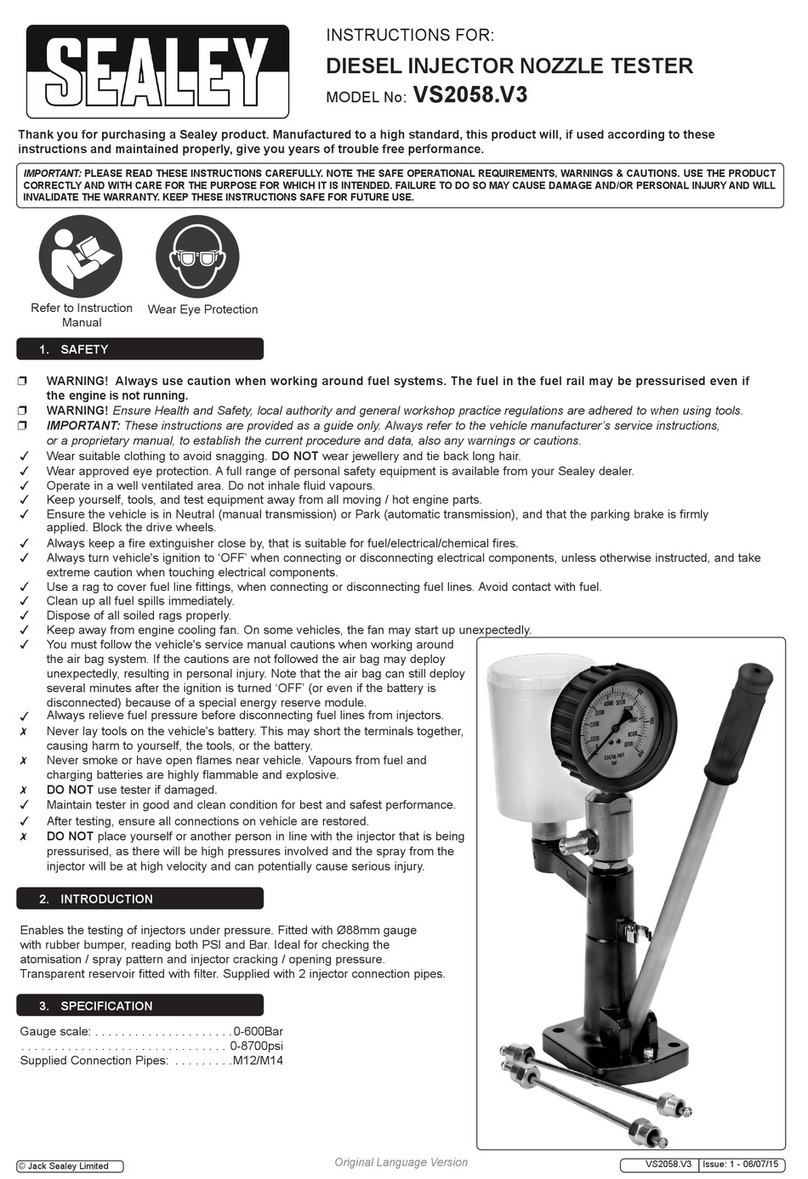
Specially designed to test the return fuel flow pressure from Piezo diesel common rail injectors on Bosch, Delphi and Siemens systems. Supplied
with two gauges, -1 to +3 bar and -1 to +15 bar. Sight-glass that identifies air in the fuel system and drain valve allows safe recovery of fuel.
Drain Pipe Drain Valve
Main
Tester
Body
3
INSTRUCTIONS FOR:
DIESEL INJECTION LEAK BACK
TEST KIT - PIEZO
MODEL No: VS2050.V2
Original Language Version VS2050.V2 Issue: 1 - 30/10/13
©Jack Sealey Limited
4. OPERATION
NOTE:Before using the tester, inspect the adaptor connections
and return flow connections for obstructions, as these
could considerably increase the pressure in the injector,
possibly causing damage to it. Ensure that the fuel system
is NOT pressurised, refer to the vehicle manufacturer's
instruction manual.
4.1. Setting up the tester.
Fit one of the gauges to the main body, the 15 Bar gauge for
Bosch and Siemens systems and the 3 Bar gauge for Delphi
systems. Ensure that the drain valve is in the Off position.
4.1.1. Disconnect the return line to the injector that is to be tested.
4.1.2. Connect the return line to one of the return flow connectors and
connect the other end of the return flow connector to one of the
connectors on the main body of the tester.
4.1.3. Connect one of the injector connectors to the injector and the other
end of the injector connector to the other connector on the main
body.
4.1.4. If testing a Delphi system, use the brass cone for the return flow.
4.2. Testing an engine that will not start.
4.2.1. Briefly operate the starter motor several times so that the
transparent sight glass is filled with fuel.
4.2.2. Operate the starter motor for ten seconds, at the same time read
the pressure or vacuum reading on the gauge. Compare this
reading with the manufacturer's data and rectify problem if required.
4.3. Testing an engine that is running.
4.3.1. Start the engine and allow it to run at idling speed until the
transparent sight glass is filled with fuel.
4.3.2. Read the pressure or vacuum reading on the gauge. Compare this
reading with the manufacturer's data and rectify problem if required.
4.4. Removing tester.
4.4.1. Turn off the engine. To depressurise the fuel system, place the drain
pipe into a suitable container and open the drain valve. When all
fuel has drained out, close the drain valve. Dispose of the fuel
responsibly or re-use it.
4.4.2. Remove the connectors from the main body, disconnect the
connectors from the vehicle's fuel system and reconnect the return
line to the injector. Ensure all tools and kit parts are removed before
driving the vehicle.
Web
email
NOTE: It is our policy to continually improve products and as such we reserve the right to alter data, specifications and component parts without prior notice.
IMPORTANT: No liability is accepted for incorrect use of this product.
WARRANTY: Guarantee is 12 months from purchase date, proof of which will be required for any claim.
INFORMATION: For a copy of our latest catalogue and promotions call us on 01284 757525 and leave your full name and address, including postcode.
Sole UK Distributor, Sealey Group,
Kempson Way, Suffolk Business Park,
Bury St. Edmunds,
Suffolk,
IP32 7AR
Original Language Version VS2050.V2 Issue: 1 - 30/10/13
01284 757500
01284 703534
sales@sealey.co.uk
www.sealey.co.uk
©Jack Sealey Limited
Other Sealey Test Equipment manuals

Sealey Auto Service Line TA131 User manual

Sealey

Sealey Auto Service Line TA131 User manual

Sealey AUTO SERVICE VS401 User manual

Sealey

Sealey AUTO SERVICE VS401 User manual

Sealey VS0061 User manual

Sealey

Sealey VS0061 User manual

Sealey VSE2020.V3 User manual

Sealey

Sealey VSE2020.V3 User manual

Sealey MC105 User manual

Sealey

Sealey MC105 User manual

Sealey VS2030.V2 User manual

Sealey

Sealey VS2030.V2 User manual

Sealey TA130 User manual

Sealey

Sealey TA130 User manual

Sealey VS0275.V2 User manual

Sealey

Sealey VS0275.V2 User manual

Sealey PPVT User manual

Sealey

Sealey PPVT User manual

Sealey VSE211.V3 User manual

Sealey

Sealey VSE211.V3 User manual

Sealey TST22 User manual

Sealey

Sealey TST22 User manual

Sealey VS2030.V2 User manual

Sealey

Sealey VS2030.V2 User manual

Sealey VSE210 User manual

Sealey

Sealey VSE210 User manual

Sealey VS0012 User manual

Sealey

Sealey VS0012 User manual

Sealey BT91/7.V4 User manual

Sealey

Sealey BT91/7.V4 User manual

Sealey VS8193 User manual

Sealey

Sealey VS8193 User manual

Sealey VS211.V2 User manual

Sealey

Sealey VS211.V2 User manual

Sealey BT91/7PF User manual

Sealey

Sealey BT91/7PF User manual

Sealey VS0033 User manual

Sealey

Sealey VS0033 User manual

Sealey BT105 User manual

Sealey

Sealey BT105 User manual

Sealey VS4021 User manual

Sealey

Sealey VS4021 User manual

Sealey VSE300D User manual

Sealey

Sealey VSE300D User manual

Sealey BT91/7P User manual

Sealey

Sealey BT91/7P User manual

Sealey BT91/1.V2 User manual

Sealey

Sealey BT91/1.V2 User manual

Popular Test Equipment manuals by other brands

Rigol MSO1000Z series Programming guide

Rigol

Rigol MSO1000Z series Programming guide

LeCroy WAVERUNNER 6000 SERIES Service manual

LeCroy

LeCroy WAVERUNNER 6000 SERIES Service manual

Sonatest Masterscan D-70 user guide

Sonatest

Sonatest Masterscan D-70 user guide

ISA T2000 Introductory guide

ISA

ISA T2000 Introductory guide

Transmille 9000 Series Operation manual

Transmille

Transmille 9000 Series Operation manual

JDS Uniphase IP Video Test Option HST-3000 Testing Guide

JDS Uniphase

JDS Uniphase IP Video Test Option HST-3000 Testing Guide

XPOtool 61185 user manual

XPOtool

XPOtool 61185 user manual

Hantek 500MSa/s introduction

Hantek

Hantek 500MSa/s introduction

BD Loops BD-Megger instructions

BD Loops

BD Loops BD-Megger instructions

Anritsu MP1590B Operation manual

Anritsu

Anritsu MP1590B Operation manual

Tektronix 533 instruction manual

Tektronix

Tektronix 533 instruction manual

Amprobe CT238A user manual

Amprobe

Amprobe CT238A user manual

Climax ALDER TAT-SRV operating manual

Climax

Climax ALDER TAT-SRV operating manual

Tektronix BERTScope Quick start user manual

Tektronix

Tektronix BERTScope Quick start user manual

Beha-Amprobe 2100-Beta user manual

Beha-Amprobe

Beha-Amprobe 2100-Beta user manual

Monarch Nova-Strobe bax instruction manual

Monarch

Monarch Nova-Strobe bax instruction manual

IDEAL Networks SecuriTEST IP manual

IDEAL Networks

IDEAL Networks SecuriTEST IP manual

Tektronix TDS200 Series Programmer's manual

Tektronix

Tektronix TDS200 Series Programmer's manual

manuals.online logo
manuals.online logoBrands
  • About & Mission
  • Contact us
  • Privacy Policy
  • Terms and Conditions

Copyright 2025 Manuals.Online. All Rights Reserved.