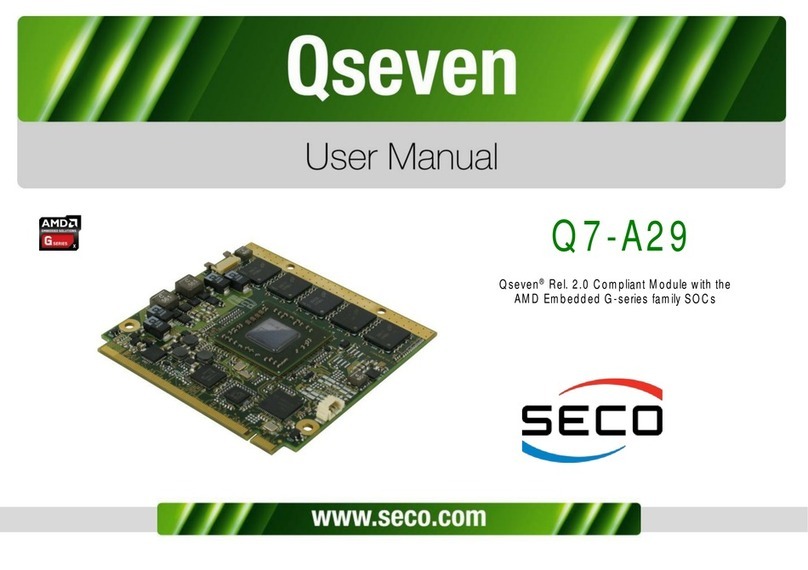
Seco Q7-928 User manual

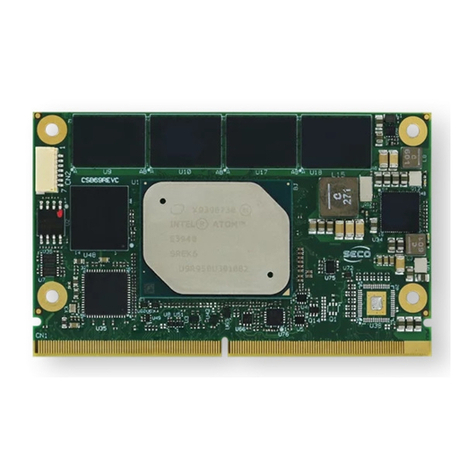
Q7-928
Qseven®Rel. 2.0 Compliant
Module with NXP i.MX6 Processor

Q7-928
Q7-928 User Manual - Rev. First Edition: 1.0 - Last Edition: 3.0 - Author: S.B. - Reviewed by P.Z Copyright © 2016 SECO S.r.l.
2
All rights reserved. All information contained in this manual is proprietary and confidential material of SECO S.r.l.
Unauthorised use, duplication, modification or disclosure of the information to a third-party by any means without prior consent of SECO S.r.l. is prohibited.
Every effort has been made to ensure the accuracy of this manual. However, SECO S.r.l. accepts no responsibility for any inaccuracies, errors or omissions herein.
SECO S.r.l. reserves the right to change precise specifications without prior notice to supply the best product possible.
For further information on this module or other SECO products, but also to get the required assistance for any and possible issues, please contact us using the
dedicated web form available at http://www.seco.com (registration required).
Our team is ready to assist you.
Revision
Date
Note
Rif
1.0
16th November 2012
First Release
SB
1.1
7th May 2013
Introduction and Technical features revised; Block Diagram updated
Power consumption added; Qseven®golden finger pinout updated
SB
2.0
30th September 2013
New manual release
SB
2.1
22nd November 2013
Minor corrections; Technical features updated: number of independent displays and LVDS max resolutions
updated; Supported Operating Systems added. Limitation about PCI express support added. Pull-up
resistors indicated on signals UART0_RX and UART0_CTS#.
Corrected pull-up to pull-down on WDOUT signal description
SB
2.2
14th January 2014
LVDS resolution combinations corrected (par. 3.2.3.8)
SB
2.3
6th May 2014
μSD card slot warning added (par 3.2.2); LVDS resolution combinations corrected (par. 3.2.3.8); SUS_S4#
signal name changed to SUS_S5#
SDIO_PWR Signal added in Qseven golden card edge connector’s pinout
Minor corrections about signal names in paragraph 3.2.3.15
SB
2.4
10th July 2014
Added I2C table in par. 3.2.3.14
SB
2.5
30th July 2014
Heatspreader and heatsink description updated in par. 4.1
SB
2.6
29th May 2015
Qseven®connector’s pins 125, 127 description corrected
SB
2.7
29th October 2015
UART0_RTS# and UART0_CTS# signals removed from Qseven®connector’s pins 172, 178. Paragraph
3.2.3.2 updated consequently
SB
3.0
26th January 2016
Product Name change
SB
REVISION HISTORY

Q7-928
Q7-928 User Manual - Rev. First Edition: 1.0 - Last Edition: 3.0 - Author: S.B. - Reviewed by P.Z Copyright © 2016 SECO S.r.l.
3
INDEX
INTRODUCTION.......................................................................................................................................................................... 4Chapter 1.
1.1 Warranty........................................................................................................................................................................................................................................ 5
1.2 Information and assistance............................................................................................................................................................................................................. 6
1.3 RMA number request..................................................................................................................................................................................................................... 6
1.4 Safety............................................................................................................................................................................................................................................ 7
1.5 Electrostatic Discharges.................................................................................................................................................................................................................7
1.6 RoHS compliance.......................................................................................................................................................................................................................... 7
1.7 Terminology and definitions ............................................................................................................................................................................................................8
1.8 Reference specifications ..............................................................................................................................................................................................................10
OVERVIEW ............................................................................................................................................................................... 12Chapter 2.
2.1 Introduction..................................................................................................................................................................................................................................13
2.2 Technical Specifications...............................................................................................................................................................................................................14
2.3 Electrical Specifications................................................................................................................................................................................................................15
2.3.1 Power Consumption ............................................................................................................................................................................................................15
2.3.2 Power Rails meanings..........................................................................................................................................................................................................16
2.3.3 Inrush current.......................................................................................................................................................................................................................16
2.3.4 Current consumption during boot phase...............................................................................................................................................................................17
2.4 Mechanical Specifications............................................................................................................................................................................................................18
2.5 Block Diagram .............................................................................................................................................................................................................................19
CONNECTORS......................................................................................................................................................................... 20Chapter 3.
3.1 Introduction..................................................................................................................................................................................................................................21
3.2 Connectors description................................................................................................................................................................................................................ 22
3.2.1 FFC/FPC Camera Interface ..................................................................................................................................................................................................22
3.2.2 μSD Card Slot.....................................................................................................................................................................................................................23
3.2.3 Qseven®Connector.............................................................................................................................................................................................................23
Appendices.............................................................................................................................................................................. 41Chapter 4.
4.1 Thermal Design............................................................................................................................................................................................................................42

Q7-928
Q7-928 User Manual - Rev. First Edition: 1.0 - Last Edition: 3.0 - Author: S.B. - Reviewed by P.Z Copyright © 2016 SECO S.r.l.
4
Chapter 1.
Warranty
Information and assistance
RMA number request
Safety
Electrostatic Discharges
RoHS compliance
Terminology and definitions
Reference specifications

Q7-928
Q7-928 User Manual - Rev. First Edition: 1.0 - Last Edition: 3.0 - Author: S.B. - Reviewed by P.Z Copyright © 2016 SECO S.r.l.
5
1.1Warranty
This product is subject to the Italian Law Decree 24/2002, acting European Directive 1999/44/CE on matters of sale and warranties to consumers.
The warranty on this product lasts for 1 year.
Under the warranty period, the Supplier guarantees the buyer assistance and service for repairing, replacing or credit of the item, at the Supplier’s own discretion.
Shipping costs that apply to non-conforming items or items that need replacement are to be paid by the customer.
Items cannot be returned unless previously authorised by the supplier.
The authorisation is released after completing the specific form available on the web-site http://www.seco.com/en/prerma (RMA Online). The RMA authorisation
number must be put both on the packaging and on the documents shipped with the items, which must include all the accessories in their original packaging, with
no signs of damage to, or tampering with, any returned item.
The error analysis form identifying the fault type must be completed by the customer and has must accompany the returned item.
If any of the above mentioned requirements for RMA is not satisfied, the item will be shipped back and the customer will have to pay any and all shipping costs.
Following a technical analysis, the supplier will verify if all the requirements, for which a warranty service applies, are met. If the warranty cannot be applied, the
Supplier will calculate the minimum cost of this initial analysis on the item and the repair costs. Costs for replaced components will be calculated separately.
Warning!
All changes or modifications to the equipment not explicitly approved by SECO S.r.l. could impair the equipment’s functionality and
could void the warranty

Q7-928
Q7-928 User Manual - Rev. First Edition: 1.0 - Last Edition: 3.0 - Author: S.B. - Reviewed by P.Z Copyright © 2016 SECO S.r.l.
6
1.2Information and assistance
What do I have to do if the product is faulty?
SECO S.r.l. offers the following services:
SECO website: visit http://www.seco.com to receive the latest information on the product. In most of the cases it is possible to find useful information to
solve the problem.
SECO Sales Representative: the Sales Rep can help to determine the exact cause of the problem and search for the best solution.
SECO Help-Desk: contact SECO Technical Assistance. A technician is at disposal to understand the exact origin of the problem and suggest the correct
solution. E-mail: technical.se[email protected]
Fax (+39) 0575 340434
Repair center: it is possible to send the faulty product to the SECO Repair Centre. In this case, follow this procedure:
oReturned items must be accompanied by a RMA Number. Items sent without the RMA number will be not accepted.
oReturned items must be shipped in an appropriate package. SECO is not responsible for damages caused by accidental drop, improper usage, or
customer neglect.
Note: Please have the following information before asking for technical assistance:
-Name and serial number of the product;
-Description of Customer’s peripheral connections;
-Description of Customer’s software (operating system, version, application software, etc.);
-A complete description of the problem;
-The exact words of every kind of error message encountered.
1.3RMA number request
To request a RMA number, please visit SECO’s web-site. On the home page, please select “RMA Online”and follow the procedure described.
A RMA Number will be sent within 1 working day (only for on-line RMA requests).

Q7-928
Q7-928 User Manual - Rev. First Edition: 1.0 - Last Edition: 3.0 - Author: S.B. - Reviewed by P.Z Copyright © 2016 SECO S.r.l.
7
Whenever handling a Q7-928 module, ground yourself through an anti-static wrist strap. Placement of the board on an anti-static
surface is also highly recommended.
1.4Safety
The Q7-928 module uses only extremely-low voltages.
While handling the board, please use extreme caution to avoid any kind of risk or damages to electronic components.
1.5 Electrostatic Discharges
The Q7-928 module, like any other electronic product, is an electrostatic sensitive device: high voltages caused by static electricity could damage some or all the
devices and/or components on-board.
1.6 RoHS compliance
The Q7-928 module is designed using RoHS compliant components and is manufactured on a lead-free production line. It is therefore fully RoHS compliant.
Always switch the power off, and unplug the power supply unit, before handling the board and/or connecting cables or other boards.
Avoid using metallic components - like paper clips, screws and similar - near the board when connected to a power supply, to avoid
short circuits due to unwanted contacts with other board components.
If the board has become wet, never connect it to any external power supply unit or battery.
Check carefully that all cables are correctly connected and that they are not damaged.

Q7-928
Q7-928 User Manual - Rev. First Edition: 1.0 - Last Edition: 3.0 - Author: S.B. - Reviewed by P.Z Copyright © 2016 SECO S.r.l.
8
1.7 Terminology and definitions
AC’97 Audio Codec’97, a standard for audio hardware codecs developed by Intel®in 1997
ACPI Advanced Configuration and Power Interface, an open industrial standard for the board’s devices configuration and power management.
API Application Program Interface, a set of commands and functions that can be used by programmers for writing software for specific Operating
Systems
CAN Bus Controller Area network, a protocol designed for in-vehicle communication
CEC Consumer Electronics Control, an HDMI feature which allows controlling more devices connected together by using only one remote control.
CPLD Complex Programmable Logic Device, a type of programmable logical device with complexity lower than that of FPGAs
CSI2 MIPI Camera Serial Interface, 2nd generation standard regulating communication between a peripheral device (camera) and a host processor
DDC Display Data Channel, a kind of I2C interface for digital communication between displays and graphics processing units (GPU)
DDR Double Data Rate, a typology of memory devices which transfer data both on the rising and on the falling edge of the clock.
DDR3 DDR, 3rd generation
DVI Digital Visual interface, a type of display video interface
FFC/FPC Flexible Flat Cable / Flat Panel Cable
FPGA Field-programmable gate array, a device designed to be fully programmed by customers in order to implement different functionalities.
GBE Gigabit Ethernet
Gbps Gigabits per second
GND Ground
GPI/O General purpose Input/Output
HD Audio High Definition Audio, most recent standard for hardware codecs developed by Intel®in 2004 for higher audio quality
HDMI High Definition Multimedia Interface, a digital audio and video interface
I2C Bus Inter-Integrated Circuit Bus, a simple serial bus consisting only of data and clock line, with multi-master capability
JTAG Joint Test Action Group, common name of IEEE1149.1 standard for testing printed circuit boards and integrated circuits through the Debug port.
LPC Bus Low Pin Count Bus, a low speed interface based on a very restricted number of signals, deemed to management of legacy peripherals like PS/2,
LPT and COM ports
LVDS Low Voltage Differential Signalling, a standard for transferring data at very high speed using inexpensive twisted pair copper cables, usually used
for video applications
MAC Medium Access Controller, the hardware implementing the Data Link Layer of ISO/OSI-7 model for communication systems
Mbps Megabits per second

Q7-928
Q7-928 User Manual - Rev. First Edition: 1.0 - Last Edition: 3.0 - Author: S.B. - Reviewed by P.Z Copyright © 2016 SECO S.r.l.
9
MIPI Mobile Industry Processor Interface alliance
MMC/eMMC MultiMedia Card / embedded MMC, a type of memory card, having the same interface as the SD card. The eMMC is the embedded version of
the MMC. They are devices that incorporate the flash memories on a single BGA chip.
N.A. Not Applicable
N.C. Not Connected
OpenCL Open Computing Language, a software library based on C99 programming language, conceived explicitly to realise parallel computing using
Graphics Processing Units (GPU)
OpenGL Open Graphics Library, an Open Source API dedicated to 2D and 3D graphics
OpenVG Open Vector Graphics, an Open Source API dedicated to hardware accelerated 2D vector graphics
OTG On-the-Go, a specification that allows to USB devices to act indifferently as Host or as a Client, depending on the device connected to the port.
PCI-e Peripheral Component Interface Express
PHY Abbreviation of Physical, it is the device implementing the Physical Layer of ISO/OSI-7 model for communication systems
PWM Pulse Width Modulation
PWR Power
RGMII Reduced Gigabit Media Independent Interface, a particular interface defining the communication between an Ethernet MAC and a PHY
SATA Serial Advance Technology Attachment, a differential full duplex serial interface for Hard Disks.
SD Secure Digital, a memory card type
SDIO Secure Digital Input/Output, an evolution of the SD standard that allows the use of the same SD interface to drive different Input/Output devices,
like cameras, GPS, Tuners and so on.
SM Bus System Management Bus, a subset of the I2C bus dedicated to communication with devices for system management, like a smart battery and
other power supply-related devices.
SPI Serial Peripheral Interface, a 4-Wire synchronous full-duplex serial interface which is composed of a master and one or more slaves, individually
enabled through a Chip Select line.
TBM To be measured
TMDS Transition-Minimized Differential Signalling, a method for transmitting high speed serial data, normally used on DVI and HDMI interfaces
TTL Transistor-transistor Logic
USB Universal Serial Bus
uSDHC Ultra Secure Digital Host Controller
V_REF Voltage reference Pin

Q7-928
Q7-928 User Manual - Rev. First Edition: 1.0 - Last Edition: 3.0 - Author: S.B. - Reviewed by P.Z Copyright © 2016 SECO S.r.l.
10
1.8 Reference specifications
Here below it is a list of applicable industry specifications and reference documents.
Reference
Link
AC’97
http://download.intel.com/support/motherboards/desktop/sb/ac97_r23.pdf
ACPI
http://www.acpi.info
CAN Bus
http://www.bosch-semiconductors.de/en/ubk_semiconductors/safe/ip_modules/can_literature/can_literature.html
CSI
http://www.mipi.org/specifications/camera-interface
DDC
http://www.vesa.org
Gigabit Ethernet
http://standards.ieee.org/about/get/802/802.3.html
HD Audio
http://www.intel.com/content/dam/www/public/us/en/documents/product-specifications/high-definition-audio-specification.pdf
HDMI
http://www.hdmi.org/index.aspx
I2C
http://www.nxp.com/documents/other/UM10204_v5.pdf
JTAG
http://standards.ieee.org/develop/wg/Boundary_Scan_Architecture.html
LPC Bus
http://www.intel.com/design/chipsets/industry/lpc.htm
LVDS
http://www.ti.com/ww/en/analog/interface/lvds.shtml
http://www.ti.com/lit/ml/snla187/snla187.pdf
MIPI
http://www.mipi.org
MMC/eMMC
http://www.jedec.org/committees/jc-649
OpenCL
http://www.khronos.org/opencl
OpenGL
http://www.opengl.org
OpenVG
http://www.khronos.org/openvg
PCI Express
http://www.pcisig.com/specifications/pciexpress
Qseven®Design Guide
http://www.sget.org/uploads/media/Qseven_Design_Guide_2_0.pdf
Qseven®specifications
http://www.sget.org/uploads/media/Qseven-Spec_2.0_SGET.pdf
SATA
https://www.sata-io.org

Q7-928
Q7-928 User Manual - Rev. First Edition: 1.0 - Last Edition: 3.0 - Author: S.B. - Reviewed by P.Z Copyright © 2016 SECO S.r.l.
11
SD Card Association
https://www.sdcard.org/home
SDIO
https://www.sdcard.org/developers/overview/sdio
SM Bus
http://www.smbus.org/specs
TMDS
http://www.siliconimage.com/technologies/tmds
USB
http://www.usb.org/developers/docs/usb_20_070113.zip
NXP i.MX6 processor
http://www.nxp.com/products/microcontrollers-and-processors/arm-processors/i.mx-applications-processors-based-on-arm-cores/i.mx-6-
processors:IMX6X_SERIES

Q7-928
Q7-928 User Manual - Rev. First Edition: 1.0 - Last Edition: 3.0 - Author: S.B. - Reviewed by P.Z Copyright © 2016 SECO S.r.l.
13
2.1Introduction
Q7-928 is a CPU module, in Qseven®format, based on embedded NXP i.MX6 processor, an ARM®Cortex®-A9 processor, Single-, Dual- and Quad-Core, with
frequencies up to 1.2GHz, which is ideal for applications requiring multimedia capabilities and/or high levels of parallel computing.
Along with programmable CPLD Lattice LCMXO640, the board offers a very high level of integration, both for all most common used peripherals in ARM world and
for bus interfaces normally used in x86 world, like PCI-Express and S-ATA.
All this comes out in the extremely reduced space offered by Qseven®boards, which offers all functionalities of standard boards in just 70x70mm.
This solution allows combining the advantages of a standard, ready-to-use board, like Qseven®boards are, with all advantages offered by ARM application specific
processors like NXP i.MX6 processor, in its different versions (Single Core, Dual Core, Dual Core Lite, Quad Core)
Moreover, NXP i.MX6 processors integrates three separated accelerators for 2D, OpenGL®ES2.0 3D and OpenVG™, giving the processor incredible graphical
performances (OpenVG™accelerator is not available with i.MX6 Solo and Dual Lite processors).
The board is completed with up to 4GB DDR3 (up to 2GB with i.MX6 Solo) directly soldered on board, and one eMMC Flash Disk, directly accessible like any
standard Hard Disk, with up to 32GB of capacity.
The board can support up to three independent displays using dedicated video interfaces of the module: the first one, is a 24 bit Single/Dual Channel LVDS
interface, which can be configured to work as two independent 24 bit Single Channel interfaces. The other display interface is i.MX6’s native HDMI port. Please be
aware that using i.MX6 Solo and i.MX6 Dual Lite processors, only two independent displays at a time are supported.
HW video decoding, in the most common video coding standards (i.e., H.264, MPEG2, MPEG4, DivX, RealVideo and other), is supported.
Many other features available through the standard Qseven®connector are native for i.MX6 processor: CAN Interface, UART interfaces, SD/SDIO/MMC interface,
PCI-Express x1, SATA (not available with i.MX6 Solo and Dual Lite), 2 x PWM Channels, Audio, GPI/Os, one USB OTG port.
USB Hi-Speed interface drives an SMSC USB2514 USB2.0 Hi-Speed USB Hub Controller, which allows the board to have 4 USB 2.0 Host Ports.
RGMII i.MX6 native interface is internally carried to a Micrel KSZ9031RN Ethernet Transceiver, allowing the implementation of a Gigabit Ethernet interface
The Lattice CPLD mounted on board, makes available LPC Bus, one additional PWM Channel and one Timer input.
For external interfacing to standard devices, a carrier board with a 230-pin MXM connector is needed. This board will implement all the routing of the interface
signals to external standard connectors, as well as integration of other peripherals/devices not already included in Q7-928 CPU module.
Furthermore, an FFC/FPC connector is provided to give access to Image Processing Unit of i.MX6 processor, which supports multiple formats and can be
connected to a wide variety of image sensors for video-preview, video-record and frame grabbing applications. Interfacing is possible using the direct parallel
interface or the integrated MIPI/CSI interface (both available on the same connector).

2.2Technical Specifications
Processors
NXP i.MX6 Family, based on ARM®CORTEX-A9 processors
-i.MX6S Solo - Single core up to 1GHz
-i.MX6D Dual - Dual core up to 1.2GHz per core
-i.MX6DL Dual Lite - Dual core up to 1GHz per core
-i.MX6Q Quad - Quad core up to 1.2GHz per core
Memory
Up to 4GB DDR3 onboard (up to 2GB with i.MX6S)
Graphics
Dedicated 2D Hardware accelerator
Dedicated 3D Hardware accelerator, supports OpenGL®ES2.0 3D
Dedicated Vector Graphics accelerator supports OpenVG™(only i.MX6D and
i.MX6Q)
Supports up to 3 independent displays with i.MX6D and i.MX6Q
Supports 2 independent displays with i.MX6DL and i.MX6S
Video Interface
1 x LVDS Dual Channel or 2 x LVDS Single Channel 18/24 bit interface
HDMI Interface
Video Input Port / Camera Connector
Video Resolution
LVDS, up to 1920x1200
HDMI, up to 1080p
Mass Storage
Onboard eMMC Disk, up to 32 GB *
SD/MMC/SDIO interface
1 x μSD Card Slot onboard
1 x External S-ATA Channel (only available with i.MX6D and i.MX6Q)
* Please consider that for HDD and Flash Disk manufacturers, 1GB = 10^9 Byte.
Some OS (like, for example, Windows) intends 1GB = 1024^3 byte, so global
capacity shown for Disk Properties will be less than expected. Please also consider
that a portion of disk capacity will be used by internal Flash Controller for Disk
management, so final capacity will be lower.
USB
1 x USB OTG interface
4 x USB2.0 Host interfaces
Networking
Gigabit Ethernet interface
Audio
AC’97 Audio interface
PCI Express
1 x PCI-e x1 lane (only PCI-e 1.1 and Gen2 are supported)
Serial Ports
2 x Serial ports (TTL interface)
CAN port interface
Other Interfaces
I2C bus
LPC Bus
SM Bus
Power Management Signals
Power supply voltage: +5VDC ± 5%
Operating temperature: 0°C ÷ +60°C (commercial version) **
-40°C ÷ +85°C (industrial version) **
Dimensions: 70 x70 mm (2.76”x 2.76”)
Supported Operating Systems: Linux
Android
Windows Embedded Compact 7
** Temperatures indicated are the maximum temperature that the
heatspreader / heatsink can reach in any of its parts. This means that it is
customer
’
s responsibility to use any passive cooling solution along with an
application-dependent cooling system, capable to ensure that the
heatspreader / heatsink temperature remains in the range above indicated.
Please also check paragraph 4.1

2.3Electrical Specifications
According to Qseven®specifications, Q7-928 board needs to be supplied only with an external +5VDC power supply.
5 Volts standby voltage needs to be supplied for working in ATX mode.
For Real Time Clock working and CMOS memory data retention, it is also needed a backup battery voltage. All these voltages are supplied directly through card
edge fingers (see connector’s pinout).
All remaining voltages needed for board’s working are generated internally from +5V_S power rail.
2.3.1 Power Consumption
Q7-928 module, like all Qseven®modules, needs a carrier board for its normal working. All connections with the external world come through this carrier board,
which provide also the required voltage to the board, deriving it from its power supply source.
Anyway, it has been possible to measure power consumption directly on +5V_S power rail that supplies the board.
Status
Processor
i.MX6S
i.MX6DL
i.MX6D
i.MX6Q
2GB RAM
OS Ubuntu 12.04
idle at login, output on serial port, no
video
TBM
TBM
TBM
1.7W
idle at login, HDMI display connected, full
HD resolution
TBM
TBM
TBM
1.8W
idle at login, HDMI display connected, full
HD resolution, USB Disk connected
TBM
TBM
TBM
1.9W
With one core at 100% load
TBM
TBM
TBM
2.7W
With 2 cores at 100% load
---
TBM
TBM
3.3W
With 3 cores at 100% load
---
---
---
3.9W
With 4 cores at 100% load
---
---
---
4.6W

Q7-928
Q7-928 User Manual - Rev. First Edition: 1.0 - Last Edition: 3.0 - Author: S.B. - Reviewed by P.Z Copyright © 2016 SECO S.r.l.
16
Please consider that power consumption is strongly dependent on the board’s configuration, on number of processor cores active and from the interfaces that are
SW enabled. PCI-express and SATA interface are particularly significant for power consumption, so it is strongly recommended to disable them (via SW) if they are
not used.
2.3.2 Power Rails meanings
In all the tables contained in this manual, Power rails are named with the following meaning:
_S: Switched voltages, i.e. power rails that are active only when the board is in ACPI’s S0 (Working) state. Examples: +3.3V_S, +5V_S.
_A: Always-on voltages, i.e. power rails that are active both in ACPI’s S0 (Working), S3 (Standby) and S5 (Soft Off) state. Examples: +5V_A, +3.3V_A.
Other suffixes are used for application specific power rails, which are usually derived from same value of voltage, switched rails (for example, +3.3V_CAM is
derived from +3.3V_S, and so on).
2.3.3 Inrush current
In the following pictures are shown the inrush current relative to the total current drawn by Q7-928 module (with the only exception of the battery absorbed by the
battery, drawn from VCC_RTC pin).
Measurements have been made on all modules of Qseven i.MX6 family, no significant differences exist between various modules. For this reason, only graphs
related to i.MX6 Solo equipped with 512MB of DRAM and i.MX6 Quad with 4GB of DRAM are shown.
Current measurements are made using a Current Probe Chauvin Arnoux E3N 10-100A/V and an Oscilloscope Tektronix TDS2022C
IVCC current drawn from +5V_S power rail on MXM connector
ISB current drawn from +5V_A power rail on MXM connector
Fig. 1 IVCC + IVSB Current consumption i.MX6 Solo 512MB DDR3
Fig. 2 IVCC Current consumption i.MX6 Solo 512MB DDR3

Q7-928
Q7-928 User Manual - Rev. First Edition: 1.0 - Last Edition: 3.0 - Author: S.B. - Reviewed by P.Z Copyright © 2016 SECO S.r.l.
17
2.3.4 Current consumption during boot phase
The graphs below show the total current absorbed by the Q7-928 module in the boot phase, from POWER ON moment until the completion of the boot.
The data shown in figure 3 are related to the module Q7-928 with iMX6 Quad Core and 4 GB of LDDR3 RAM. Measurements are made using Digital Multimeter
TTi-1705.
Fig. 4 IVCC Current consumption i.MX6 QUAD 4GB LDDR3
Fig. 3 IVCC + IVSB Current consumption i.MX6 QUAD 4GB LDDR3

Q7-928
Q7-928 User Manual - Rev. First Edition: 1.0 - Last Edition: 3.0 - Author: S.B. - Reviewed by P.Z Copyright © 2016 SECO S.r.l.
18
2.4 Mechanical Specifications
According to Qseven®specifications, board dimensions are: 70 x 70 mm (2.76”x 2.76”).
Printed circuit of the board is made of ten layers, some of them are ground planes, for
disturbance rejection.
The MXM connector accommodates various connector heights for different carrier board
applications needs. Qseven®specification suggests two connector heights, 7.8mm and
7.5mm, but it is also possible to use different connector heights, also remaining compliant
to the standard.
When using different connector heights, please consider that, according to Qseven®
specifications, components placed on bottom side of Q7-928 will have a maximum height
of 2.2mm ± 0.1. Keep this value in mind when choosing the MXM connector’s height, if it is
necessary to place components on the carrier board in the zone below the Qseven®
module.

Q7-928
Q7-928 User Manual - Rev. First Edition: 1.0 - Last Edition: 3.0 - Author: S.B. - Reviewed by P.Z Copyright © 2016 SECO S.r.l.
19
2.5 Block Diagram
USB 0 / 2 / 3 / 4
USB OTG
UART
I2C
SPI
Audio
CAN
External SD
SATA
PCI Express
LVDS 0 / 1
HDMI
2 x PWM
Gigabit Ethernet
MFG
LPC or GPIO
PWM
Timer IN
Lattice®
MachXO
LCMXO640
CPLD
SMSC USB2514
USB2.0 Hi-Speed
Hub Controller
Texas Instruments®
MSP430F2232
microcontroller
Embedded MMC
Disk
μSD Slot
Camera Interface
NXP i.MX6
Processor
Micrel KSZ9031RN
Ethernet
Transceiver
JTAG
Factory
alternatives
DDR3 System
Memory
DDR3 System
Memory
MIPI/CSI
BT.656
uSDHC3
uSDHC1
uSDHC4
USB_HI
RGMII
UART2
EIM1 EIM2
USB_OTG
UART5
UART4/FLEXCAN1
Power management
Power section
+5V_S, +5V_A
Other Seco Control Unit manuals
Seco
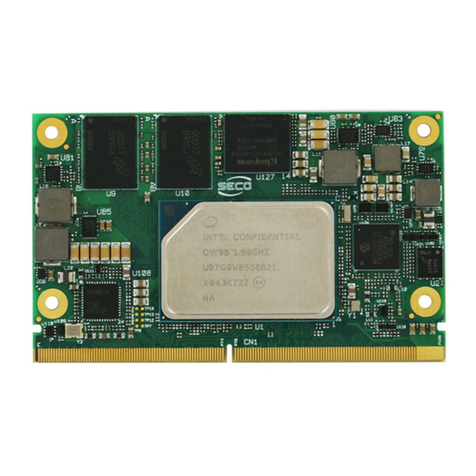
Seco Smarc SM-B69 User manual
Seco
Seco Smarc SM-C93 User manual
Seco
Seco Qseven Q7-C26 User manual
Seco
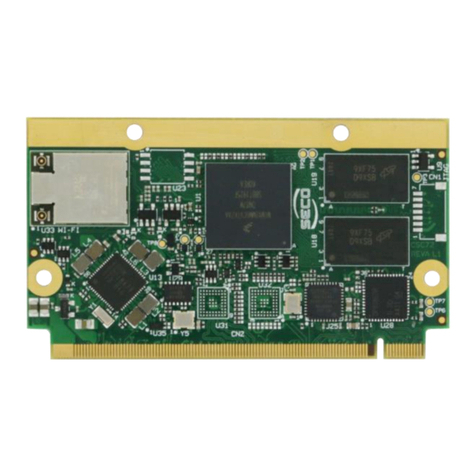
Seco Qseven mQ7-C72 User manual
Seco
Seco SECO104-CX700M User manual

Seco
Seco Smarc SM-B71 User manual
Seco
Seco Qseven Q7-974 User manual
Seco
Seco COMe-C55-CT6 User manual
Seco
Seco SM-C12 User manual
Seco
Seco Qseven Q7-B03 User manual
Popular Control Unit manuals by other brands
Vimar
Vimar Elvox R854 Installer's guide
Interlogix
Interlogix UltraSync UM-C-H1 Installation sheet

Motorline professional
Motorline professional MC70 EVO User& installer's manual
SYC
SYC AR-MP3SHIELD user guide
WellMark
WellMark 2600 series Installation & maintenance instructions
Harvia
Harvia C260 Instuctions for use


