manuals.online logo
Brands
  1. Home
  2. •
  3. Brands
  4. •
  5. Siemens
  6. •
  7. Security Sensor
  8. •
  9. Siemens HI921 User manual

Siemens HI921 User manual

SiemensSiemens
SiemensSiemens
Siemens IndustryIndustry
IndustryIndustry
Industry,,
,,
,Inc.Inc.
Inc.Inc.
Inc.
BuildingBuilding
BuildingBuilding
Building
TT
TT
Tecec
ecec
echnologies Dihnologies Di
hnologies Dihnologies Di
hnologies Divisionvision
visionvision
vision
A6V10323932_a_en_--
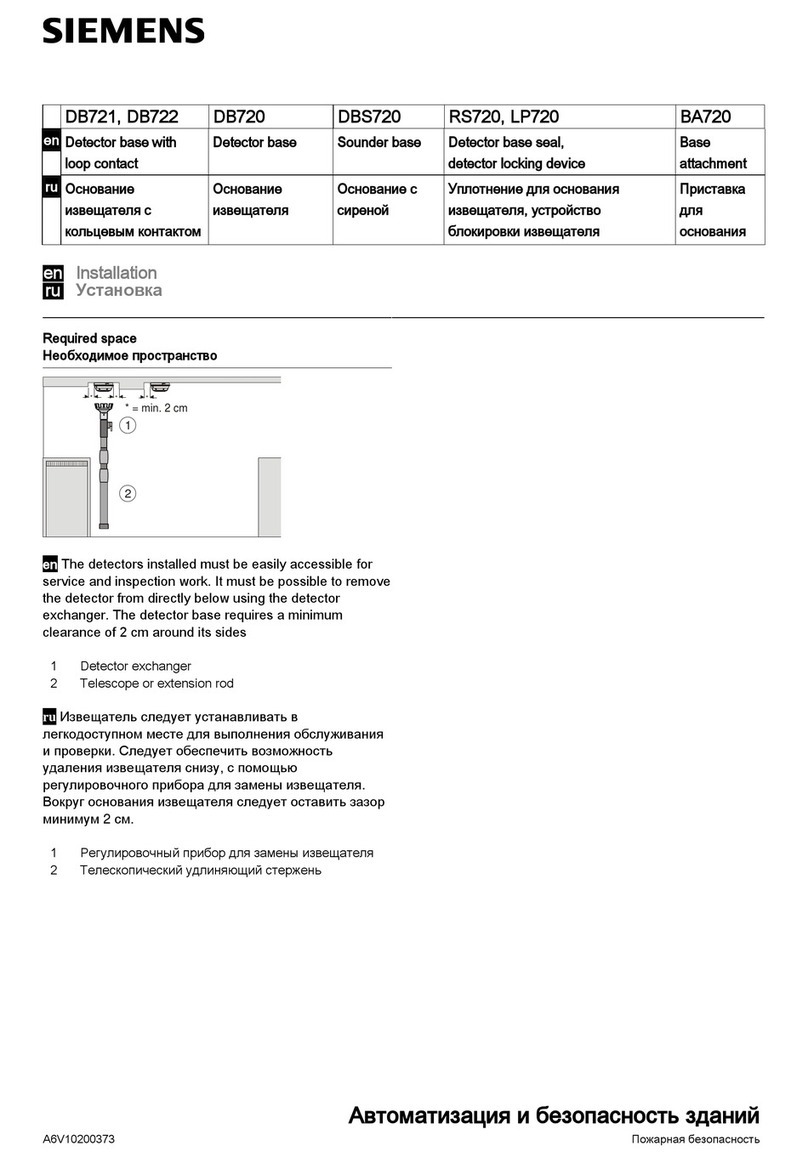
These instructions are written in accordance with the installation
guidelinesofNFPA72,NationalFireAlarmCode,TheInstallation
of Fire Alarm Systems.
CAUTION
Detection Device Storage
DO NOT install this detection device until all construction
is completed.
DO NOT store this detection device where it can be
contaminated by dirt, dust, or humidity.
DETECTOR PLACEMENT
Locate Model HI921 on the ceiling, at least 4 inches from the
side walls. For an ideal, smooth ceiling condition, place the
detectors at a maximum center spacing of 50 feet (2500 square
feet).
Actualjob conditions must determine detector spacing. Consider
environmentalfactors includingambient temperature fluctuation,
and the nature of the fire hazard. Room or area configuration
and ceiling type (sloped or flat, smooth or beamed) also dictates
placement.
Should questions arise regarding detector placement, follow the
drawings provided and/or approved by Siemens Industry, Inc.,
or by its authorized distributors.This is extremely important! The
detectorplacementsshownonthesedrawingswerechosenafter
a careful evaluation of the area being protected. Siemens
Industry, Inc.’s extensive experience in design of the system
assuresthebestdetectorplacementbyfollowingthesedrawings.
TEMPERATURE – HUMIDITY– PRESSURE
Theoperating temperature range for the HI921 detectors is 32°F
(0°C) to 100°F (38°C). The thermal alarm temperature depends
onthe parameterselected. Use these detectors inenvironments
where the humidity does not exceed 95% (non-condensing).
Normal changes of atmospheric pressure do not affect detector
sensitivity.
LED INDICATOR OPERATION
The Model HI921 contains an LED indicator capable of flashing
either one of three distinct colors: green, yellow, or red. The
microprocessor-based detector monitors the following:
• Internal sensors and electronics
Basedon the resultsofthe monitoring, the LED indicator flashes
the following:
hsalF roloCnoitidnoC lavretnIhsalF )sdnoceS(
*neerG.noitarepoyrosivrepuslamroN01
wolleY sdeendnaelbuortnisirot
ceteD .tnemecalper 4
deRmralA1
oN sehsalF ro,derewoptonsirotceteD .dedeensitnemecalper -
fonoitpircsedgnidnopser
rocehtwollofesaelP.ffodenrutebnacDEL* .desulenaPeht
DETECTOR PROGRAMMING
Each detector must be programmed to respond to a unique
system address between 001 - 252.
• To program the detector address, use the Model DPU
(Device Programming Unit), refer to the DPU manual, P/N
315-033260, or the 8720 Programming Unit, refer to the
8720 Manual, P/N 315-033260FA.
• Record the loop and device number (system address) for
the detector on the detector label and on the base to
prevent installing the detector in the wrong base. The
optional DPU or 8720 label printer can be used for this
purpose.
Each detector provides pre-programmed parameter sets which
can be selected by the panel. Please follow the corresponding
descriptions of the panel used.
• Fixed 135°F (57°C)
• Fixed 145°F (63°C)
• Fixed 155°F (68°C)
• Fixed 165°F (74°C)
• Fixed 174°F (79°C)
• Rate-of-risedetection:15°F/min(8.3°C)atfixed135°F(57°C)
• Rate-of-risedetection:15°F/min(8.3°C)atfixed174°F(79°C)
Additionally the detector can be configured by some panels to
have a low temperature warning at 40°F (4.4°C).
Figure 1
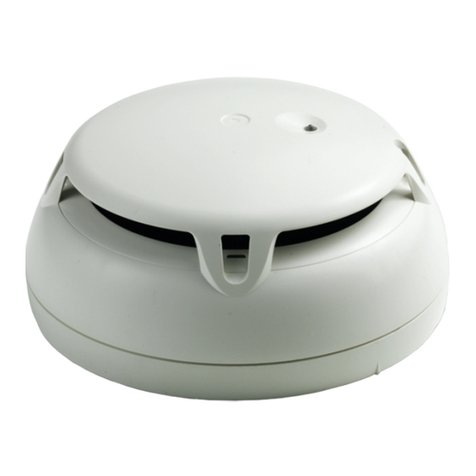
HI921
Heat Detector
Installation Instructions
Model HI921
DETECTOR TESTING
Only qualified service personnel should test. To assure proper
operation of the detector and control panel, the Functional Test
should be conducted. The minimum test schedule may be found
in the current edition of NFPA 72 for installations in the U.S.
The detectors can be tested individually using the DPU (refer to
the DPU manual, P/N 315-033260) or with the Model 8720
ProgrammingUnit(referto the 8720Manual,P/N315-033260FA).
MAINTENANCE
No special maintenance procedures are required for the HI921.
The control unit automatically indicates the trouble message for
any detector. This detector may need replacement.
CAUTION: UNDER NO CIRCUMSTANCES IS THE
DETECTOR HEAD TO BE DISASSEMBLED. NO REPAIRS
SHOULD BE ATTEMPTED.
DO NOT PAINT
The detector/base plastic is marked DO NOT PAINT. This is
intended to prohibit painting during routine maintenance of the
occupancy which can affect proper operation of the detector.
Figure 2
Installation and Wiring Diagram
A6V10323932_a_en_--Siemens Industry, Inc.
Building Technologies Division
Florham Park, NJ
WIRING
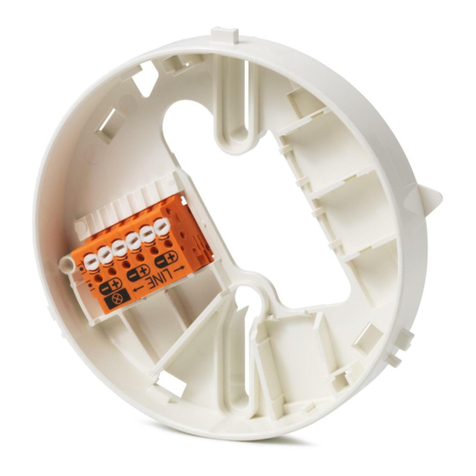
Detector bases for Model HI921 should be connected as shown
in Figure 2.
DETECTOR MOUNTING
To ensure proper installation of the detector head into the base,
be sure the wires are properly dressed at installation:
• Position all wires flat against the base.
• Take up all slack in the outlet box
• Route wires away from connector terminals.
TO INSTALL DETECTOR HEAD:
• Rotate detector counterclockwise while gently pressing on
it until the detector seats fully into base.
• Then rotate the detector clockwise until it stops and locks in
place. Insert optional locking screw (Order Model LK-11).
TO REMOVE DETECTOR HEAD:
• Loosen locking screw, if installed.Then rotate the detector
counterclockwise until stop is reached.
• Pull detector out of base.
OPTIONAL
REMOTE
ALARM
INDICATOR
MODELS
RL-HW / RL-HC
TO NEXT BASE
TO NEXT BASE
DO NO
T
USE AN
END OF
LINE
DEVICE
DETECTOR BASE
MODEL DB-11/DB-11E
LINE 1**
LINE 2**
5
6
1a
TB1
TB3
TB2
1b
5
6
1a
1b
RELAY*
CONTACTS
3A, 120 VAC
3A, 30 VDC
REMOTE RELAY
BASE MODEL DB2-HR
*The relay contacts are shown after System reset, which represents the non-alarm condition.
**HI921 is a polarity insensitive detector. Line 1 and Line 2 can be either line of the loop.
5+
NO
C
NC
6–
5+
NO
C
NC
6–
DO NO
T
USE AN
END OF
LINE
DEVICE
FROM ADDRESSABLE
DEVICE CIRCUIT OF A
COMPATIBLE CONTROL
UNIT OR PREVIOUS
ADDRESSABLE DEVICE
Siemens Canada Limited
Building Technologies Division
2 Kenview Boulevard
Brampton, Ontario L6T 5E4 Canada

This manual suits for next models

1

Other Siemens Security Sensor manuals

Siemens FDB22 Series User manual

Siemens

Siemens FDB22 Series User manual

Siemens DF11 Series User manual

Siemens

Siemens DF11 Series User manual

Siemens OH720 User manual

Siemens

Siemens OH720 User manual

Siemens FDM243H User manual

Siemens

Siemens FDM243H User manual

Siemens FDOOTC241 User manual

Siemens

Siemens FDOOTC241 User manual

Siemens Matchtec IRM270C User manual

Siemens

Siemens Matchtec IRM270C User manual

Siemens AZL66 Series User manual

Siemens

Siemens AZL66 Series User manual

Siemens FDB181 Series User manual

Siemens

Siemens FDB181 Series User manual

Siemens AlgoRex CS1140 Operating instructions

Siemens

Siemens AlgoRex CS1140 Operating instructions

Siemens AP 251/11 Service manual

Siemens

Siemens AP 251/11 Service manual

Siemens FDOOTC241 User manual

Siemens

Siemens FDOOTC241 User manual

Siemens SIMATIC ET 200S User manual

Siemens

Siemens SIMATIC ET 200S User manual

Siemens UP 255D21 5WG1 255-2DB21 Service manual

Siemens

Siemens UP 255D21 5WG1 255-2DB21 Service manual

Siemens FDT421 User manual

Siemens

Siemens FDT421 User manual

Siemens DB721 User manual

Siemens

Siemens DB721 User manual

Siemens FDF241-9 User manual

Siemens

Siemens FDF241-9 User manual

Siemens FDT181 User manual

Siemens

Siemens FDT181 User manual

Siemens ADM-Q12 User manual

Siemens

Siemens ADM-Q12 User manual

Siemens milltronics User manual

Siemens

Siemens milltronics User manual

Siemens AS Series User manual

Siemens

Siemens AS Series User manual

Siemens DB721 User manual

Siemens

Siemens DB721 User manual

Siemens OOH941 User manual

Siemens

Siemens OOH941 User manual

Siemens QRI Series User manual

Siemens

Siemens QRI Series User manual

Siemens Cerberus CS1140 Guide

Siemens

Siemens Cerberus CS1140 Guide

Popular Security Sensor manuals by other brands

nedis WIFISM10WT quick start guide

nedis

nedis WIFISM10WT quick start guide

Mobeye CMVXI-R user manual

Mobeye

Mobeye CMVXI-R user manual

DANLERS CBU-HBND IP66 quick guide

DANLERS

DANLERS CBU-HBND IP66 quick guide

Niko 351-2656x user manual

Niko

Niko 351-2656x user manual

Resolution Products Mighty Mouse RE211 instructions

Resolution Products

Resolution Products Mighty Mouse RE211 instructions

Reer JANUS Quick installation guide

Reer

Reer JANUS Quick installation guide

schmersal EX-BNS 33 2187 Series operating instructions

schmersal

schmersal EX-BNS 33 2187 Series operating instructions

Avidsen HomeSecure 100757 manual

Avidsen

Avidsen HomeSecure 100757 manual

Pyronix KX10DTP quick start guide

Pyronix

Pyronix KX10DTP quick start guide

RKI Instruments 35-3001-01H-DIL Operator's manual

RKI Instruments

RKI Instruments 35-3001-01H-DIL Operator's manual

Aritech RF430I4 Installation sheet

Aritech

Aritech RF430I4 Installation sheet

RPB NOVA 2000 instruction manual

RPB

RPB NOVA 2000 instruction manual

Bellman & Symfon BE1411 user manual

Bellman & Symfon

Bellman & Symfon BE1411 user manual

jablotron JA-80PB quick start guide

jablotron

jablotron JA-80PB quick start guide

Subsite 910R Support

Subsite

Subsite 910R Support

Pilot Communications PILOT-M1 PREMIUM user manual

Pilot Communications

Pilot Communications PILOT-M1 PREMIUM user manual

Grizzly H7786 Parts Breakdown

Grizzly

Grizzly H7786 Parts Breakdown

Thermo Scientific Surveyor UV Plus Hardware manual

Thermo Scientific

Thermo Scientific Surveyor UV Plus Hardware manual

manuals.online logo
manuals.online logoBrands
  • About & Mission
  • Contact us
  • Privacy Policy
  • Terms and Conditions

Copyright 2025 Manuals.Online. All Rights Reserved.