manuals.online logo
Brands
  1. Home
  2. •
  3. Brands
  4. •
  5. Siemens
  6. •
  7. Smoke Alarm
  8. •
  9. Siemens OP121 User manual

Siemens OP121 User manual

A6V10281367_d_en_-- SIEMENS Industry, Inc.
2021-12-17 Smart Infrastructure
Installation Instructions
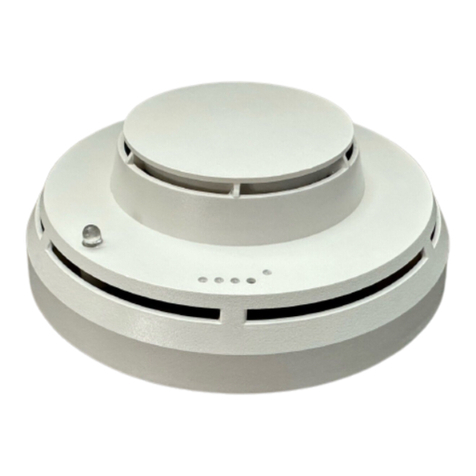
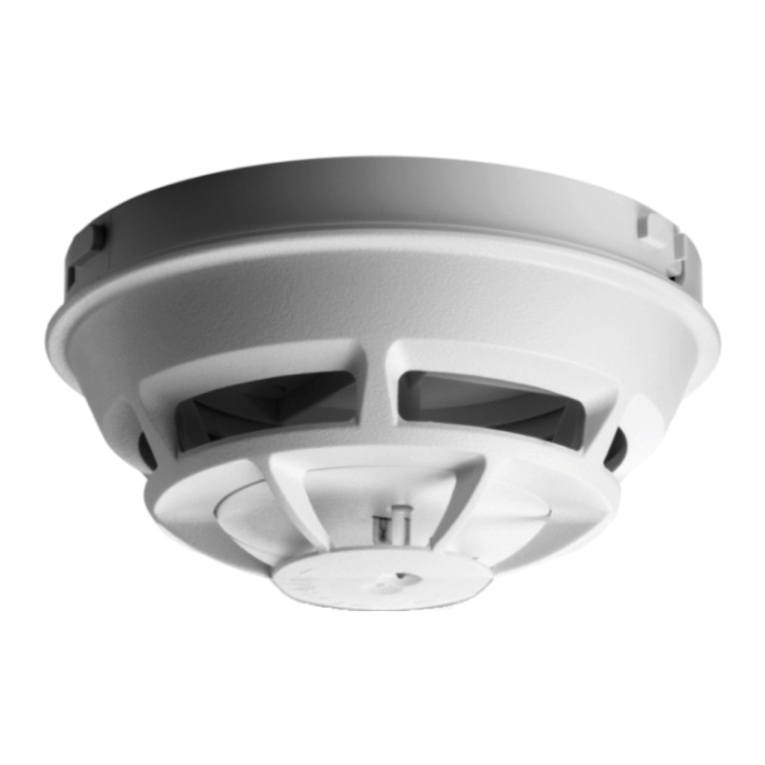
Models OP121/OH121
Photoelectric Smoke Detector
Photo Smoke/Thermal Detector
UL268 7th edition listed
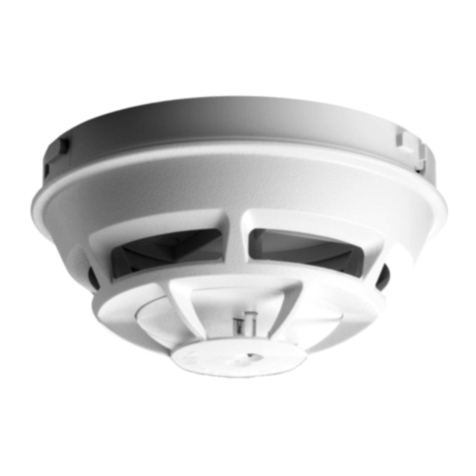
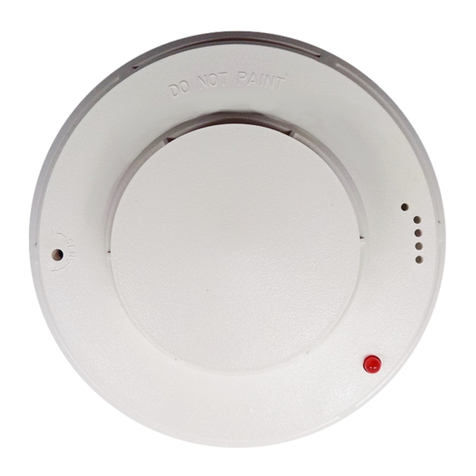
Figure 1 Figure 2
OP121 OH121
Photoelectric Smoke Detector Photo Smoke/Thermal Detector
These
instructions are written in accordance with the
installation guidelines of NFPA 72, National Fire Alarm
Code, and CAN/ULC-
S524, TheInstallation of FireAlarm
Systems.
AIR CURRENTS
Before a detector can sense a fire, the products of
combustion or smoke mu
st travel from the fire to the
detector. This travel is especially influenced by air
currents; therefore, consider air movement when
designing the system. While combustion products tend
to rise, drafts from hallways, air diffusers, fans, etc., may
help or
hinder the travel of combustion products to the
detector. When positioning a detector at a particular
location, give consideration to windows and doors, both
open and closed, and to other factors influencing air
movement. Do not install a detector in the a
ir stream of
a room air supply diffuser. It is better to position a
detector closer to an air return.
SPECIFICATIONS
Environmental
Operating Temperature:
32 °F (0 °C) to 100 °F (38°C)
Humidity: Up to 95 % RH, non-condensing
Air Pressure: No effect
Air Velocity:
Open area protection: 0 - 300 ft/min
Duct application: 300 - 4000 ft/min
Alarm Temperature (model OH121): 135 °F (57 °C)
UL listed with STI Mechanical Protection Guard Model:
STI-9604 (see www.sti-usa.com for details)
Electrical
Voltage: 16-27 VDC
Ripple: 3 V peak-to-peak
Supervisory Current: 100 μA max
Alarm Current: 30-50 mA
Start-up Time: 30 seconds max
DO NOT install this detection device until all
construction is completed.
DO NOT store this detection device where it can be
contaminated by dirt, dust, or humidity.
DETECTOR PLACEMENT
For a clean air application, use 30-
foot center spacing
(900 sq ft) from NFPA Standard 72 initiating devices
chapter and CAN/ULC-S524 as a
starting point for a
detector installation layout. This spacing, however, is
based on ideal conditions –
smooth ceiling, no air
movement, and no physical obstructions. In some
applications, considerably less area is protected
adequately by each smoke detec
tor. In all installations,
place the detector on the ceiling, a minimum of 6
inches
from a side wall, or on a wall, 12 inches from the ceiling.
Follow the drawings provided or approved by Siemens
Industry, Inc. or by its authorized distributors. See
NFPA 72, National Fire Alarm Code, initiating devices
chapter for additional guidance on special issues such
as beamed construction and high stockpiling.
TO AVOID NUISANCE ALARMS
Do not
locate the detectors where excessive smoke
concentrations exist under normal conditions, or in areas
of prolonged high relative humidity where condensation
occurs.
Do not
locate the detectors next to an oil burner, or
garage where exhaust fumes can trigg
er an alarm. Other
causes of false alarms are dust accumulation, heavy
concentrations of steam, heavy pipe or cigar smoke, and
certain aerosol sprays.
2 A6V10281367_d_en_--
WIRING
The OP121/OH121 should be connected as shown in Figure 3 using the separate mounting base, Model DB-11.
Follow the control panel wiring connection drawing installed on the inside face of each control panel cover. See DB-
11 instruction, P/N 315-094193, for base mounting. Duplicate wiring information is also in the Installation, Operation,
and Maintenance Manual provided with every control panel.
Note any limitations on the number of detectors and restrictions on the use of remote devices permitted for
each circuit.
WARNING!
Connect detector only to control units specified in detector and panel literature or system may
not operate.
AVERTISSEMENT!
Connectez le détecteur uniquement aux unités de contrôle spécifiées dans la documentation du
détecteur et de la centrale, faute de quoi le système pourrait ne pas fonctionner.
Figure 3
Wire size: maximum 14 AWG, minimum 18 AWG (Wire larger than 14 AWG can damage the
connector)
DETECTOR MOUNTING
TO INSTALL:

Rotate detector counterclockwise while gently
pressing on it until the detector seats fully into base.

Then rotate the detector clockwise until it stops and
locks in place. Insert optional locking screw (Order
Model LK-11).
TO REMOVE:

Loosen locking screw, if installed. Then rotate the
detector counterclockwise until stop is reached.
Pull detector out of base.
Under no circumstances is the detector head to be
disassembled.
No repairs should be attempted.
DO NOT PAINT
The detector is marked DO NOT PAINT.This is intended
to prohibit painting during routine maintenance of the
occupancy which can affect
proper operation of the
detector.
LED INDICATOR OPERATION
The OP121/OH121 contains an LED indicator capable of
flashing either one of three distinct colors: green, yellow,
or red. The microprocessor-
based detector monitors the
following:
Smoke in its sensing chamber

Smoke sensitivity is within the range indicated on the
nameplate label
Internal sensors and electronics
Based on the results of the monitoring, the LED indicator
flashes the following:
F
l
a
sh
C
o
l
o
r
Cond
iti
on
Flash I
n
t
e
r
v
a
l
(
S
e
conds
)
Green
Normal supervisory operation. S
moke
sensitivity is within rated
limits. 10
Yellow Detector is in trouble and
needs
replacemen
t. 5
Red
A
larm 2.5
No
Flashes
Detector not powered properly.
Installation check or device
replacement is needed
–
To initiating
circuit of Siemens
compatible
control unit
See remote device instructions
for wiring details
DB-11/DB-11E
[No remote device]
+
–
1a
51b
6
Do not use looped wire under base
terminal 5. Break wire run to provide
supervision of connection.
End of line
device
(note polarity
when applicable)
DB-11/DB-11E
[With remote device(s)]
1b
5
Device
RLC-11, RLW-11
ADB-11
Installation instructions
P/N 315-094925
P/N 315-096162
–
+
If remote devices are supported by the initiating circuit, each
detector/base may have up to 2 remote devices with the following
configurations and restrictions only:
Multiple remote devices
Remote device 1
RLC-11, RLW-11
RLC-11, RLW-11
Remote device 2
RSAC-11, RSAW-11
RLC-11, RLW-11
Restrictions
Wire from base to
RSAC-11/RSAW-11 to RL-11
1b
5
6
See 1)
1)
A6V10281367_d_en_-- 3
FLASHING AT START-UP
Only during the first 180 seconds:
F
l
a
sh
C
o
l
o
r
Cond
iti
on
Flash I
n
t
e
r
v
a
l
(
S
e
conds
)
Green Configuration
- Open area: double flash
- Air duct: triple flash 10
Yellow Fault 5
Red
A
larm 2.5
No
Flashes
Low voltage
–
DETECTOR CONFIGURATION
Two programmed parameter sets can be changed with
the magnetic switch:
Standard (open area protection)
Duct (In Duct or Duct Housing application)
In Duct application with OH121 and OP121.
Duct Housing application only with OP121.
NOTE
Detectors with product version <17 only have one
parameter set. When using detectors
in air duct
applications set to the parameter to “Duct”.
Magnetic Switch Logic
Alarm detection is always active, whether
the switch
is applied or not.
Magnet shall be app
lied to the device after startup is
finished which is indicated by the blinking LED.

In case of fault or alarm themagnetic switch is turned
off.
FLASHING DURING CONFIGURATION
Magnet
applied
(seconds)
Behavior /
Operation
LED Indication
Color / time (seconds), flashing
<2.75
– –
2.75 to 10 Normal
Red / 2.5, single flash
2.75 to 10
Magnet
released Alarm
Red / 2.5, single flash
>10 Normal
30 seconds per configuration
(Starting with current setting)
- Open area: Green / 10, double flash
- Air duct: Green / 10, triple flash
>10
Magnet
released
Current
settings
confirmed
Normal
30
seconds per applied setting
- Open area: Green/ 10, double flash
- Air duct:
Green / 10, triple flash
TESTING AND MAINTENANCE
To assure proper operation of the
detector and control
panel, it is required that both the Sensitivity test and the
Functional test be conducted using the procedures
outlined below.
SENSITIVITY TEST
The OP121/OH121 monitors its smoke sensitivity
automatically and requires no test
equipment. A green
flash of the detector LED about every 10
seconds
indicates that the smoke sensitivity is within its listed
limits.
FUNCTIONAL TEST
To test the detector and control panel for functional
operation follow the instructions on the gas caniste
r
label.
Perform a functional (Go, No-
Go) test by activating the
detector using the following test gases:
Smoke Sabre, P/N SMOKESABRE-01-001
Smoke Centurion (M8), P/N M8-001-024
Solo A5 P/N SOLOA5 001
Solo A10, P/N SOLO A10 / A10s
Testifire 1001 / 2001, P/N TS3-001
HSI PurCheck, P/N HO-30S
HSI SmokeCheck™, P/N HO-25S
This test is simply used to ensure that smoke can enter
the sensing chamber and alarm the control panel when
the detector reaches the programmed obscuration
(concentration) level.
Detec
tor and control panel functionality can also be
tested
using the TM121 test magnet as shown in
Figure 4 and Figure 6. Place the
magnet in the specific
area at the bottom of the detector that is
shown in
Figure 5 and Figure 7 for at least 2.5 seconds with t
he
colored side
towards the centered LED. The detector will
send an alarm to the panel.
Siemens Industry, Inc.
Smart Infrastructure
8, Fernwood Road
Florham Park, New Jersey 07932
www.siemens.com/buildingtechnologies
Siemens Canada Limited
Smart Infrastructure
2 Kenview Boulevard
Brampton, Ontario L6T 5E4
Canada © Siemens Industry, Inc.
Data and design subject to change without notice.
A6V10281367_d_en_-- P/N A5Q00039609
OP121
Figure 4 Figure 5
TM121 Test Magnet Magnet Placement
OH121
Figure 6 Figure 7
TM121 Test Magnet Magnet Placement
Testing with the magnet only tests the circuit; it
does not
test the detector’s sensing ability.
The TM121 test magnet is a strong magnet that
can be
harmful to pacemaker wearers and to those with
medical
implants. Keep the magnet away from magnetic
media
such as credit cards and memory disks/chips.
COMPATIBLE CONTROL EQUIPMENT
Equipment Compatibility
Identifier Installation/Wiring
Instructions
SZM (FS-250C System) 315-034850C
SXL-EX 315-095997
SZE-4X 315-096018
SZE-8AX 315-096022
PAD-5-CDC A6V101030366
HZM A6V10233195
HZM-Z A6V11208370
CDC-4 A6V10239127
CZM-4 A6V10239188
CP-35 315-084881
ZU-35 315-083222
TXR-320 A6V12013675
FDBZ492-R A6V10336866
FDBZ492-PR A6V10330327
FCC Statement
WARNING!
Installation and usage of equipment not in accordance with instructions manual may
result in:
Radiation of radio frequency energy
Interference to radio communications
Install and use equipment in accordance with installation instructions manual
Read the following information
AVERTISSEMENT!
L'installation et l'utilisation d'équipement non conforme au manuel d'instructions peuvent
entraîner :
Rayonnement d'énergie radiofréquence
Interférence aux communications radio
Installez et utilisez l'équipement conformément au manuel d'instructions d'installation
Lisez les informations suivantes
This equipment generates, uses, and can radiate radio frequency energy and if not installed and used in
accordance with the instructions manual, may cause interference to radio communications.
It has been tested and found to comply with the limits for a Class A computing device pursuant to Part 15 of FCC
Rules, which are designed to provide reasonable protection against such interference when operated in a
commercial environment.
Operation of this equipment in a residential area is likely to cause interference in which case the user at his own
expense will be required to take whatever measures may be required to correct the interference.
3
0
°
3
0
°
3
0
°
3
0
°

Other manuals for OP121

2

This manual suits for next models

1

Other Siemens Smoke Alarm manuals

Siemens DELTA reflex SD230N Service manual

Siemens

Siemens DELTA reflex SD230N Service manual

Siemens Sinteso Cerberus PRO FDA221 User manual

Siemens

Siemens Sinteso Cerberus PRO FDA221 User manual

Siemens TITANUS 3000 User manual

Siemens

Siemens TITANUS 3000 User manual

Siemens DOW1171 User manual

Siemens

Siemens DOW1171 User manual

Siemens FDA241 Guide

Siemens

Siemens FDA241 Guide

Siemens FDOT421 User manual

Siemens

Siemens FDOT421 User manual

Siemens DELTA reflex 5TC1 290 Service manual

Siemens

Siemens DELTA reflex 5TC1 290 Service manual

Siemens DI-3 User manual

Siemens

Siemens DI-3 User manual

Siemens OP121 User manual

Siemens

Siemens OP121 User manual

Siemens DB-ADPT User manual

Siemens

Siemens DB-ADPT User manual

Siemens Sinteso Cerberus PRO User manual

Siemens

Siemens Sinteso Cerberus PRO User manual

Siemens Cerberus DOT1151A-Ex Parts list manual

Siemens

Siemens Cerberus DOT1151A-Ex Parts list manual

Siemens DELTA Reflex SD9 User manual

Siemens

Siemens DELTA Reflex SD9 User manual

Siemens OH921 User manual

Siemens

Siemens OH921 User manual

Siemens OP921 User manual

Siemens

Siemens OP921 User manual

Siemens Cerberus DLO1191 Guide

Siemens

Siemens Cerberus DLO1191 Guide

Siemens FCI2016-U1 Guide

Siemens

Siemens FCI2016-U1 Guide

Siemens BH17 7ER User manual

Siemens

Siemens BH17 7ER User manual

Siemens Cerberus Pyrotronics PB-1191 User manual

Siemens

Siemens Cerberus Pyrotronics PB-1191 User manual

Siemens 5TC1292-6 User manual

Siemens

Siemens 5TC1292-6 User manual

Siemens 5TC1292-7 User manual

Siemens

Siemens 5TC1292-7 User manual

Siemens FDA2 Series Technical manual

Siemens

Siemens FDA2 Series Technical manual

Siemens TITANUS SuperSens User manual

Siemens

Siemens TITANUS SuperSens User manual

Siemens Synco living AP260 User manual

Siemens

Siemens Synco living AP260 User manual

Popular Smoke Alarm manuals by other brands

Dyna-Glo DGY784BDP installation instructions

Dyna-Glo

Dyna-Glo DGY784BDP installation instructions

NOXE LUMENS Installation and user guide

NOXE

NOXE LUMENS Installation and user guide

Develco SMAZB-141 installation manual

Develco

Develco SMAZB-141 installation manual

Kidde PI2010CA user guide

Kidde

Kidde PI2010CA user guide

Honeywell 5800COMBO Installation and setup guide

Honeywell

Honeywell 5800COMBO Installation and setup guide

Gentex 7109CS installation instructions

Gentex

Gentex 7109CS installation instructions

FireAngel Thermoptek ST-622 user manual

FireAngel

FireAngel Thermoptek ST-622 user manual

teko Astra-42A user guide

teko

teko Astra-42A user guide

ELRO FS8110 instruction manual

ELRO

ELRO FS8110 instruction manual

Heiman SMOKI NS-626PHS user manual

Heiman

Heiman SMOKI NS-626PHS user manual

Resolution Products RE612 CryptiX quick start guide

Resolution Products

Resolution Products RE612 CryptiX quick start guide

First Alert PC900V user manual

First Alert

First Alert PC900V user manual

Eminent EM6590 E-Domotica user manual

Eminent

Eminent EM6590 E-Domotica user manual

Ei Electronics Ei Ei168RC user manual

Ei Electronics

Ei Electronics Ei Ei168RC user manual

Carrier Kidde Quell Q301 user manual

Carrier

Carrier Kidde Quell Q301 user manual

Family Gard FG225 user manual

Family Gard

Family Gard FG225 user manual

Regin SDD-S65 instruction manual

Regin

Regin SDD-S65 instruction manual

LST ÜMS-55000-841 Specification sheet

LST

LST ÜMS-55000-841 Specification sheet

manuals.online logo
manuals.online logoBrands
  • About & Mission
  • Contact us
  • Privacy Policy
  • Terms and Conditions

Copyright 2025 Manuals.Online. All Rights Reserved.