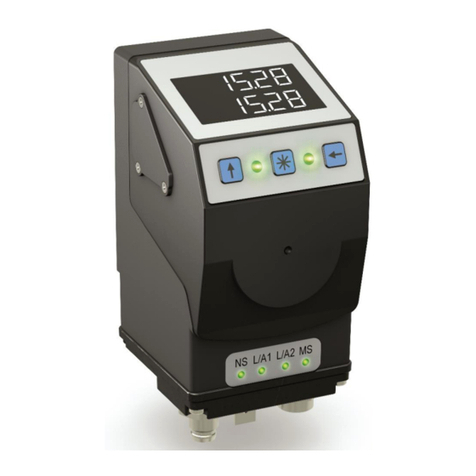
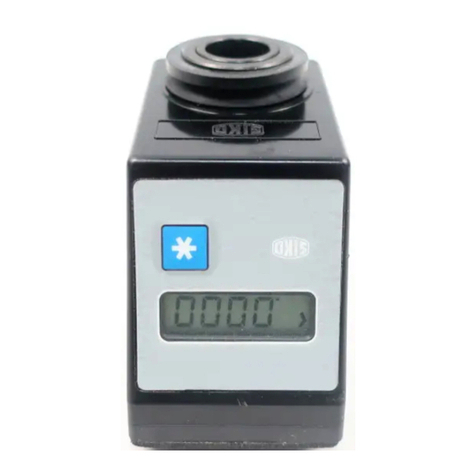
Siko AP10 User manual

37/22
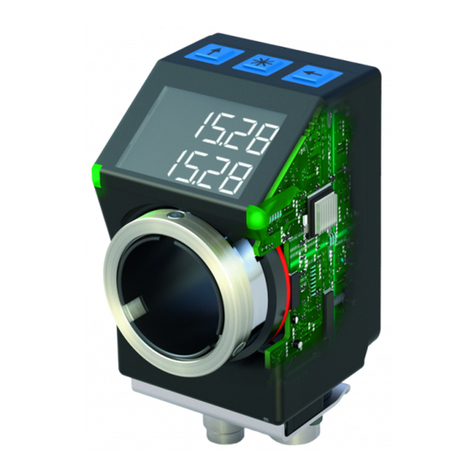
AP10
Absolute Position Indicator with CANopen
interface
User manual

AP10 Date: 28.02.2022 Art. No. 86853 Mod. status 37/22 Page 2 of 78
Table of contents
1General Information .................................................................................................. 5
1.1 Documentation ........................................................................................................5
1.1.1 History ................................................................................................................5
2Intended use............................................................................................................. 5
2.1 Switching on the supply voltage.................................................................................6
3Display and control keys ............................................................................................ 6
3.1 General ...................................................................................................................6
3.2 LCD display..............................................................................................................7
3.2.1 Extended display range ..........................................................................................7
3.3 LED display..............................................................................................................7
3.4 Keys .......................................................................................................................7
4Functional Description ............................................................................................... 8
4.1 Operating modes ......................................................................................................8
4.1.1 Position-bound operating modes.............................................................................9
4.1.1.1 Positioning.......................................................................................................9
4.1.1.2 Loop positioning .............................................................................................10
4.1.2 Alpha-numeric display operating mode...................................................................11
4.2 Battery buffering....................................................................................................12
4.3 Parameterization of the position indicator .................................................................12
4.3.1 Manual parameterization......................................................................................12
4.3.1.1 Starting parameterization .................................................................................12
4.3.1.2 Value input.....................................................................................................13
4.3.1.3 Value selection................................................................................................13
4.3.1.4 Adjustable parameters......................................................................................13
4.3.2 Parameterization via interface ..............................................................................13
4.4 Warnings / Errors....................................................................................................13
4.4.1 Warnings ...........................................................................................................13
4.4.2 Errors ................................................................................................................14
4.5 System commands ..................................................................................................14
4.5.1 Calibration .........................................................................................................14
4.5.2 Restore factory settings .......................................................................................15
4.5.3 Diagnosis...........................................................................................................16
5Communication via CAN bus (CANopen) .................................................................... 16
5.1 Telegram setup.......................................................................................................16
5.2 Node control..........................................................................................................18
5.2.1 Network management services (NMT) .....................................................................18
5.2.1.1 NMT communication statuses ............................................................................18
5.2.1.2 Switching between NMT communication states ....................................................19
5.2.2 Boot-Up.............................................................................................................19
5.2.3 SYNC object........................................................................................................19

AP10 Date: 28.02.2022 Art. No. 86853 Mod. status 37/22 Page 3 of 78
5.3 Process data exchange ............................................................................................20
5.3.1 Transfer of Process Data Objects (PDO)...................................................................20
5.3.1.1 Transmit PDO (from AP10 to the master).............................................................20
5.3.1.2 Receive-PDO (from master to AP10) ...................................................................21
5.3.2 Control word ......................................................................................................21
5.3.3 Status word........................................................................................................22
5.4 Parameter data exchange.........................................................................................23
5.4.1 Transfer of Service data objects (SDO)....................................................................23
5.4.2 Error Response....................................................................................................25
5.4.3 Examples of SDO access........................................................................................25
5.5 Node monitoring ....................................................................................................26
5.5.1 Emergency Service (EMCY) ....................................................................................26
5.5.2 Node Guarding....................................................................................................27
5.5.3 Heartbeat ..........................................................................................................28
5.5.4 External heartbeat...............................................................................................28
5.5.5 Guarding Bit.......................................................................................................28
5.6 Auto functions .......................................................................................................29
5.6.1 Auto-Baud .........................................................................................................29
5.6.2 Auto-ID .............................................................................................................29
5.7 Directory of objects ................................................................................................31
5.7.1 Overview of objects .............................................................................................31
5.7.2 Description of objects..........................................................................................33
5.7.2.1 1000h: Device Type..........................................................................................33
5.7.2.2 1001h: Error Register .......................................................................................34
5.7.2.3 1002h: Manufacturer Status Register ..................................................................34
5.7.2.4 1003h: Pre-defined Error Field...........................................................................34
5.7.2.5 1005h: COB-ID SYNC message............................................................................35
5.7.2.6 1008h: Manufacturer Device Name .....................................................................36
5.7.2.7 1009h: Manufacturer Hardware Version ...............................................................36
5.7.2.8 100Ah: Manufacturer Software Version................................................................36
5.7.2.9 100Ch: Guard Time...........................................................................................37
5.7.2.10 100Dh: Life Time Factor....................................................................................37
5.7.2.11 1010h: Store Parameter....................................................................................37
5.7.2.12 1011h: Restore Parameter.................................................................................40
5.7.2.13 1014h: COB-ID Emergency Message ....................................................................42
5.7.2.14 1017h: Producer Heartbeat Time........................................................................42
5.7.2.15 1018h: Identity Object.....................................................................................42
5.7.2.16 1200h: Server SDO Parameter ............................................................................44
5.7.2.17 1400h: 1. Receive PDO Parameter ......................................................................44
5.7.2.18 1401h: 2. Receive PDO Parameter ......................................................................46
5.7.2.19 1600h: 1. Receive PDO Mapping Parameter..........................................................47
5.7.2.20 1601h: 2. Receive PDO Mapping Parameter..........................................................48
5.7.2.21 1800h: 1. Transmit PDO Parameter .....................................................................49
5.7.2.22 1801h: 2. Transmit PDO Parameter .....................................................................50

AP10 Date: 28.02.2022 Art. No. 86853 Mod. status 37/22 Page 4 of 78
5.7.2.23 1A00h: 1. Transmit PDO Mapping Parameter ........................................................52
5.7.2.24 1A01h: 2. Transmit PDO Mapping Parameter ........................................................53
5.7.2.25 2001h: Application Offset.................................................................................54
5.7.2.26 2002h: Calibrate encoder value..........................................................................54
5.7.2.27 2003h: Calibration enable.................................................................................55
5.7.2.28 2004h: Incremental measurement enable ............................................................55
5.7.2.29 2005h: Configuration enable via keyboard and delay of start of configuration ..........55
5.7.2.30 5000h: Diagnosis of CAN bus errors ....................................................................57
5.7.2.31 5F09h: External Heartbeat timer and external Heartbeat source..............................57
5.7.2.32 5F0Ah: Node-ID, Auto-ID and Baud rate Bus CAN .................................................58
5.7.2.33 5F0Bh: Display in the 2nd row ............................................................................59
5.7.2.34 5F0Ch: Control word.........................................................................................59
5.7.2.35 5F0Dh: Differential value and difference formation...............................................60
5.7.2.36 5F10h: Target window1 (near field)....................................................................60
5.7.2.37 5F11h: Decimal places......................................................................................61
5.7.2.38 5F12h: Display orientation and LEDs ..................................................................61
5.7.2.39 5F13h: Display divisor (ADI) and ADI application .................................................64
5.7.2.40 5F14h: Loop length..........................................................................................65
5.7.2.41 5F15h: Positioning type ...................................................................................65
5.7.2.42 5F16h: Read target value..................................................................................65
5.7.2.43 5F19h: Status word..........................................................................................67
5.7.2.44 5F1Bh: Sensor type and operating mode .............................................................67
5.7.2.45 5F1Ch: Acknowledgement settings .....................................................................68
5.7.2.46 5F1Fh: Direction indicators (CW, CCW) ................................................................68
5.7.2.47 5F21h: Target window2 (far) and target window2 visualization ..............................69
5.7.2.48 6000h: Operating Parameters ............................................................................70
5.7.2.49 6001h: Measuring steps per revolution (Display per revolution = APU) ....................70
5.7.2.50 6002h: Total of measuring steps........................................................................71
5.7.2.51 6003h: Preset value (calibration value)...............................................................71
5.7.2.52 6004h: Position value ......................................................................................71
5.7.2.53 6200h: Cycle Timer ..........................................................................................72
5.7.2.54 6500h: Operating Status...................................................................................72
5.7.2.55 6501h: Single-turn resolution............................................................................72
5.7.2.56 6502h: Number of distinguishable revolutions .....................................................73
5.7.2.57 6503h: Alarms.................................................................................................73
5.7.2.58 6504h: Supported Alarms..................................................................................74
5.7.2.59 6505h: Warnings .............................................................................................74
5.7.2.60 6506h: Supported Warnings ..............................................................................75
5.7.2.61 6507h: Profile and Software Version...................................................................75
5.7.2.62 6508h: Operating Time.....................................................................................75
5.7.2.63 6509h: Encoder calibration value .......................................................................76
5.7.2.64 650Ah: Module Identification............................................................................76
5.7.2.65 650Bh: Serial Number.......................................................................................77

General Information
AP10 Date: 28.02.2022 Art. No. 86853 Mod. status 37/22 Page 5 of 78
1General Information
1.1 Documentation
The following documents describe this product:
•The data sheet describes the technical data, the dimensions, the pin assignments, the
accessories and the order key.
•The installation instructions describe the mechanical and electrical installation including
all safety-relevant requirements and the associated technical specification.
•The user manual for commissioning and integrating the position indicator into a fieldbus
system.
•EDS file (electronic data sheet); this file enables integration and configuration in a
CANopen network by means of commercial CANopen configurators.
These documents can also be downloaded at http://www.siko-global.com/p/ap10.
1.1.1 History
Mod. status
Date
Description
037/22
28.02.2022
from firmware V3.01
Chapter 1.1.1 History new
Chapter 3.2.1 Extended display range add text
Chapter 5.3.1.1 Transmit PDO (from AP10 to the master) revised
Chapter 5.3.1.2 Receive-PDO (from master to AP10) revised
Chapter 5.3.2 Control word revised
Chapter 5.3.3 Status word revised
Chapter 1A00h: 1. Transmit PDO Mapping Parameter revised
Chapter 1A01h: 2. Transmit PDO Mapping Parameter revised
Chapter 2005h: Configuration enable via keyboard and delay of
start of configuration revised
Chapter 5F16h: Read target value revised
Chapter 5F1Ch: Acknowledgement settings sub-index 1 revised
Chapter 6002h: Total of measuring steps revised
Chapter 6502h: Number of distinguishable revolutions revised
Chapter 6507h: Profile and Software Version revised
Chapter 650Ah: Module Identification revised
2Intended use
Absolute position indicator with hollow shaft suitable for direct shaft mounting. Actual and
target values are indicated via the backlit two-row LC display. A direction indicator (arrow) is
blended in if the actual value deviates from the target value including the adjustable target
window. The direction of the arrow indicates the direction of shaft movement necessary to
reach the target. Additionally, various visualization tasks can be realized by means of two bi-
color LEDs.

Display and control keys
AP10 Date: 28.02.2022 Art. No. 86853 Mod. status 37/22 Page 6 of 78
The device parameters can be adjusted by means of 3 keys. You can change the set point,
output the position value and adjust all device parameters via the integrated bus interface.
Scanning is magnetically incremental. In the currentless state, scanning and saving of
changes of the position value are battery-supported.
The state of charge of the replaceable battery is monitored and signified.
Display and interface are active with external power supply only.
2.1 Switching on the supply voltage
The AP10 will be initialized after switching on the supply voltage. A display test is executed
during initialization, the LEDs are lighted consecutively and the configuration parameters are
loaded from the non-volatile memory into the RAM of the controller.
With the display still unconfigured all parameters are set to their default values. See to it that
the bus will be connected only after correct adjustment of baud rate and ID (see chapter 4.3
and chapter 5.6). The AP10 functions with the data last parameterized.
After completing the initialization procedure, the AP10 with CAN interface sends a specific
NMT command, the Boot-Up Message, which informs the system about the availability of the
display. The AP10 is now in the Pre-Operational Mode. In this state, the display can be
parameterized via SDO commands in accordance with the requirements of the application. This
applies to configuration parameters as well as to the way it makes available to the system its
position values (asynchronous or synchronous data transmission).
3Display and control keys
3.1 General
The position indicator has a two-line display with special characters and three control keys.
The keys serve for position indicator parameterization and control. Two LEDs (1) serve for
monitoring positioning.
Fig. 1: Control elements
LED3+4
LED1+2

Display and control keys
AP10 Date: 28.02.2022 Art. No. 86853 Mod. status 37/22 Page 7 of 78
3.2 LCD display
The The display range is limited to -19999 … 99999. Values outside this
range are displayed with "".
With supply voltage applied to the position indicator with factory settings, the actual value
will be displayed in the 1st row and the set point in the 2nd row. If there is no valid set point,
"---" will be displayed in the 2nd row. The values displayed are determined by the operating
mode.
Direction indicators (arrows) support positioning.
The battery symbol is shown with a critical or insufficient battery status.
With incremental measurement function activated, the incremental measurement symbol
is shown.
If battery voltage drops to a critical value, the battery symbol on the display will flash. If it
falls below the minimum value, the symbol will glow permanently.
3.2.1 Extended display range
Values up to -999999 can be displayed by means of the control word. If the relevant bit has
been set and the value to be displayed is between -199999 and -999999, then the negative
sign and the digit of the highest order will flash alternately. If the value range drops below -
99999, "" will be displayed.
This function is not available in the alpha-numeric display mode for unacknowledged values.
3.3 LED display
In its basic state (factory setting) the LED display has different meanings depending on the
operating mode (see chapter 4.1.1 and 4.1.2).
With the basic function of the LEDs inactivated, every LED can be controlled independently via
the control word (see object 5F12h: Display orientation and LEDs and chapter 5.3.2).
3.4 Keys
Pressing the key enables or disables the incremental measurement function. With the
Auto-ID function, the new ID is adopted by actuating this key (see chapter 5.6).
Pressing the key starts calibration (see chapter 4.5.1) and acknowledges a pending error
(see chapter 4.4.2).
Pressing the key starts the parameterization mode (see chapter 4.3).
In the "Alpha-numeric display" operating mode, the set points previously received (set point1
and set point2) are acknowledged via the respective buttons depending on the
acknowledgment settings (see chapter 5.7.2.45).

Functional Description
AP10 Date: 28.02.2022 Art. No. 86853 Mod. status 37/22 Page 8 of 78
4Functional Description
4.1 Operating modes
The following position-dependent operating modes are differentiated: Absolute Position,
Differential Value, Modulo and the position-independent operating mode Alpha-numeric
Display.
Operating
mode
Absolute position
Differential value
Modulo
Alpha-numeric
Display
Line 1
Actual position
Actual position
Actual position
Set point1
Line 2
Set point
Differential value
Set point
Set point2
Table 1: Display with different operating modes
Absolute position:
Linear absolute position values are displayed.
Differential value display:
With factory setting: Differential value = actual position - set point
Modulo display:
Position values ranging from 0° to 359° are displayed.
Using the "Decimal places" parameter (see object 5F11h: Decimal places) the resolution and
the modulo point of the displayed values are set.
Decimal places
Display resolution
Display range
0
1°
0° …359°
1
1/10°
0.0° …35.9°
2
1/100°
0.00° …3.59°
3
1/1000°
0.000° …0.359°
4
1/10000°
0.0000° …0.0359°
Table 2: Modulo display
Alpha-numeric display:
Both rows can be written freely. Set point1 is received via the Receive data object 1 (RPDO1),
set point2 is received correspondingly with RPDO2. The data identifier must be correctly set in
the relevant control word. The data identifier differentiates whether the data is interpreted
and displayed as figures or alpha-numeric characters (ASCII) (see chapter 5.3.2).

Functional Description
AP10 Date: 28.02.2022 Art. No. 86853 Mod. status 37/22 Page 9 of 78
4.1.1 Position-bound operating modes
4.1.1.1 Positioning
(see chapter 4.1.1.2)
Arrows: (see object 5F1Fh: Direction indicators (CW, CCW))
Arrows are displayed to support the user with positioning as long as the current actual
position value is outside (see object 5F10h: Target window1 (near field)) target window1. The
direction of the arrow indicates the direction of shaft rotation in order to arrive at the set
point.
LED display: (see e. g. object 5F12h: Display orientation and LEDs)
With factory setting, the LED glows green as long as the actual position is within the
programmed window1. When leaving target window1, the LED glows red. The shaft must be
rotated in the direction of the glowing LED in order to arrive at the set point. The red glowing
LED on the right means: clockwise (cw) rotation required. Red glowing LED on the left:
counter-clockwise (ccw) rotation required.
An additional target window (target window2) and an associated visualization can also be
configured (5F21h: Target window2 (far) and target window2 visualization).
With factory settings, the LED display has the following meaning:
Operating state
LED
Status
Meaning
There is no valid set
point.
both
off
Positioning disabled.
There is a valid set
point.
LED left
off
Target window not reached!
The shaft must be rotated clockwise (cw) in
order to reach the target.
red
Target window not reached!
The shaft must be rotated counter-clockwise
(ccw) in order to reach the target.
green
Target window reached
LED right
off
Target window not reached!
The shaft must be rotated counter-clockwise
(ccw) in order to reach the target.
red
Target window not reached!
The shaft must be rotated clockwise (cw) in
order to reach the target.
green
Target window reached
Table 3: LED display
Control word (see chapter 5.3.2):
The set point is not displayed and positioning not monitored unless the set point is marked as
valid in the control word.
Status word (see chapter 5.3.3):
Upon reaching target window1, the static and dynamic target-window-reached bits are set in
the status word. The dynamic bit is deleted when leaving target window1. The user must
acknowledge the static bit.

Functional Description
AP10 Date: 28.02.2022 Art. No. 86853 Mod. status 37/22 Page 10 of 78
Example Position monitoring:
Parameterization: Factory setting
Additionally: Set point = 100
Fig. 2: Positioning monitoring
Example of position monitoring with additionally activated target window2 parameter:
Parameterization: Factory setting
Additionally: Target window 2 = 15
Visualization target window 2 = 1
Set point = 100
Fig. 3: Positioning monitoring with target window2
4.1.1.2 Loop positioning
Target window1 is also applied to the loop length.
If the position indicator is operated on a spindle or an additional gear, the spindle or external
gear backlash can be compensated by means of loop positioning. Therefore, movement
towards the set point is always in the same direction. This direction of approach can be
defined.
Example:
The direction from which every target position shall be driven to is positive.
100
+
-
Target
window1
95
105
LED left
Positioning monitoring
LED right
+
-
Target
window1
Target window2
LED left
Positioning monitoring
85
115
LED right
100
95
105

Functional Description
AP10 Date: 28.02.2022 Art. No. 86853 Mod. status 37/22 Page 11 of 78
•Case 1 the new position is greater than actual position:
Direct travel to the target position.
•Case 2 the new position is smaller than actual position:
The position indicator's arrows show that the set point is to be overrun by the loop length.
Afterwards, the set point is approached in positive direction.
Fig. 4: Positioning Loop+
4.1.2 Alpha-numeric display operating mode
Two 6-digit set points can be displayed in this operating mode. With factory settings, the set
points are acknowledged by pressing the asterisk key (see chapter 3.4).
LCD display:
In the absence of a valid set point, the 1st row is displayed empty (blank). " --- " appears in
the 2nd row.
A valid setpoint is displayed flashing in the factory setting until it is acknowledged.
Acknowledgement and display can be set (see object 5F1Ch: Acknowledgement settings).
LED display:
With factory settings, the LED display works according to the following table.
Operating state
LED
Status
Meaning
There is no valid set
point.
both
off
There is a valid set
point.
LED left
red
Set point1 not acknowledged
green
Set point1 acknowledged
LED right
red
Set point2 not acknowledged
green
Set point2 acknowledged
Table 4: LED display in the alpha-numeric display operating mode
Set point
+
-
Positioning in positive
direction
Positioning in negative
direction
Positioning: loop +
Loop length
Target window1

Functional Description
AP10 Date: 28.02.2022 Art. No. 86853 Mod. status 37/22 Page 12 of 78
Control word:
In the control word, the relevant type (number or character string) and the validity of the set
point is transmitted to the display. As an additional option, the set point can be
acknowledged via the control word.
Status word:
Type, validity and acknowledgement status of the set points are fed back in the status word.
4.2 Battery buffering
The battery makes possible the detection of currentless displacement. Battery life is approx. 5
years depending on the duration of battery operation (including storage) and frequency of
currentless adjustments. Battery voltage is checked at intervals of approx. 5 min. If battery
voltage drops below a specified value, the battery symbol will blink on the display. If
the battery voltage continues to drop, will be displayed permanently. The battery
should be replaced within approx. three months after the first appearance of the battery
symbol. For battery replacement it is mandatory to follow the instructions of the installation
instructions. The battery can also be replaced by the SIKO distribution partners or at the SIKO
main factory.
Status word:
The charge status of the battery is signified in the status word. CANopen Emergency messages
are sent upon detection of a critical charge state and with detection of the empty state
(see chapter 5.5.1).
4.3 Parameterization of the position indicator
The position indicator can be fully parameterized via the bus interface. You can configure
manually via keyboard the most significant bus parameters (node address and baud rate).
4.3.1 Manual parameterization
4.3.1.1 Starting parameterization
After applying supply voltage and completion of initialization, the position indicator is on the
uppermost level of the menu structure (default/Factory settings).
By actuating the key, the set node address and baud rate is displayed. Parameterization
starts if it is actuated for the duration of the enable time (see object 2005h: Configuration
enable via keyboard and delay of start of configuration).

Functional Description
AP10 Date: 28.02.2022 Art. No. 86853 Mod. status 37/22 Page 13 of 78
4.3.1.2 Value input
Enter values via the key and the key. Confirm values entered by pressing the key.
- decimal place selection key
- value input key
4.3.1.3 Value selection
For some parameters you can select values from a list.
Direct value input is not possible there.
Pressing the key, the value can be selected from the list. By pressing the key, the
selection is confirmed.
4.3.1.4 Adjustable parameters
The following parameters can be adjusted.
Display
Parameter
Options
ID
Node-ID
1 … 127 (see chapter 5.6.2)
KBAUD
Baud rate
Auto baud (see chapter 5.6.1)
125 kbaud
250 kbaud
500 kbaud
800 kbaud
1000 kbaud
CODE
System commands
Load factory settings (see chapter 4.5.2)
Start diagnosis (see chapter 4.5.3)
Table 5: Manually adjustable parameters
4.3.2 Parameterization via interface
The position indicator can be completely parameterized in the CANopen interface
(see chapter 5.4).
4.4 Warnings / Errors
4.4.1 Warnings
Warnings do not influence the acquisition of the absolute position value.
Warnings are deleted after removing the cause.

Functional Description
AP10 Date: 28.02.2022 Art. No. 86853 Mod. status 37/22 Page 14 of 78
Possible warnings:
•Battery voltage for absolute position detection is below limit immediately exchange
battery!
This warning is displayed with a blinking battery symbol . Via status word and the
emergency service, warning messages are output via the interface (see chapter 5.3.3,
chapter 5.5.1 and chapter 4.5.3).
Display
Error code
Emergency
Bit assignment in
the status word
Error
blinking
3200h
11
Low battery voltage
4.4.2 Errors
Error states are signalled via display and interface.
To return to normal operation, the cause must be removed (see Table 7) and the fault message
acknowledged or deleted via key.
(For signaling see chapter 5.3.3, chapter 5.5.1 chapter 4.5.3)
Display
Error code
Emergency
Bit assignment in
the status word
Error
permanent
3200h
11+7
Low battery voltage
SPEED
FF12h
12
Admissible speed exceeded
Table 6: Error messages
Display
Error
Possible effect
Corrective actions
permanent
Battery empty
Position value not
reliable
Battery change +
calibration travel
SPEED
Admissible speed
exceeded (see
installation instruction)
Position value not
reliable
Reduce speed +
calibration travel
Table 7: Corrective actions
4.5 System commands
4.5.1 Calibration
Two steps are required for executing calibration:
1. Write calibration value (see object 6003h: Preset value (calibration value))
2. Execute calibration (reset) (see chapter 3.4: Keys or object 2002h: Calibrate encoder
value)
Due to the absolute measuring system, calibration is only required once during commissioning
or, if necessary, during troubleshooting.
With calibration, the calibration value is adopted for calculation of the position value. The
following equation is applied in case of calibration:
Position value = 0 + calibration value + offset value

Functional Description
AP10 Date: 28.02.2022 Art. No. 86853 Mod. status 37/22 Page 15 of 78
Calibration value (see object 6003h: Preset value (calibration value))
Offset value (see object 2001h: Application Offset)
4.5.2 Restore factory settings
There are various options for restoring the factory settings of the device:
Access
Coding
Factory settings are restored
Manual
This is only possible if the
configuration is enabled via
the keyboard (see object
2005h: Configuration enable
via keyboard and delay of
start of configuration).
CODE
011100
all parameters
011102
all except bus parameters
011105
only bus parameters
CANopen
(see object 1011h: Restore
Parameter)
1011h
"load"
Sub-index 1
all parameters
Sub-index 2
only bus parameters
Sub-index 3
only Draft-Standard-406 parameters
Sub-index 4
only manufacturer-specific parameters
Table 8: Access to factory settings
Procedure for access via CANopen:
1. Execute object 1011h.
2. Device restart. Now all desired parameters are set to factory settings (volatile).
3. Permanent recovery: execute object 1010h: Store Parameter.
The bus parameters are:
Display
Parameter address
Parameter
ID
5F0Ah
Node-ID
KBAUD
5F0Ah
Baud rate
-
1005h
COB-ID SYNC
-
100Ch
Guard Time
-
100Dh
Life Time Factor
-
1014h
COB-ID Emergency
-
1017h
Heartbeat timer value
-
1400h Sub-index1
COB-ID RPDO1
-
1400h Sub-index2
Transmission Type RPDO1
-
1401h Sub-index1
COB-ID RPDO2
-
1401h Sub-index2
Transmission Type RPDO2
-
1800h Sub-index1
COB-ID TPDO1
-
1800h Sub-index2
Transmission Type TPDO1
-
1800h Sub-index5
Event Timer TPDO1
-
1801h Sub-index1
COB-ID TPDO2
-
1801h Sub-index2
Transmission Type TPDO2
-
5F09h Sub-index1
Ext. Heartbeat value

Communication via CAN bus (CANopen)
AP10 Date: 28.02.2022 Art. No. 86853 Mod. status 37/22 Page 16 of 78
Display
Parameter address
Parameter
-
5F09h Sub-index2
Ext. Heartbeat source
-
1001h
Error Register
Table 9: Bus parameters
4.5.3 Diagnosis
To receive a list of all errors occurring from chapter 4.4.2 of the device, the device must be
switched to diagnosis operation. Enter CODE "200000" in parameterization (see chapter 4.3.1)
and confirm by pressing the key. Any errors occurring are output indicating the error
number and total of occurrences in the upper row. The type of error is shown in the lower row.
Error number 1 contains the latest error. The oldest error is output with the highest error
number.
5Communication via CAN bus (CANopen)
The CiA DS-301 V4.2 CANopen communication profile as well as the Device profile for Encoders
CiA DS-406 V3.2 form the basis for AP10, which supports device class C2. As this device is
beyond the scope of an encoder's functionality, communication partly differs from the above-
mentioned device profile. This document contains the details necessary for understanding the
operation of the device. If more-in-depth information is required, we recommend to consult
the pertinent specialized literature on CAN or CANopen.
5.1 Telegram setup
The data telegram of a CAN message consists of the following fields:
SOF
Identifier (COB-ID)
Control field
Data field (max. 8 byte)
CRC
ACK / EOF
SOF:
(Start of Frame) start bit of the telegram
Identifier (COB-ID):
•All bus sharing units check via identifier whether the message is relevant for them.
•The identifier sets the priority of the message. The lower the value of the identifier, the
higher the priority of the message. This results in preferential transfer of messages via the
bus.
The Identifier field contains the identifier as well as bits for the recognition of the length of
the identifierss (11 or 29 bit). Furthermore, the identifier serves for determining the device
address, the channel selection as well as the direction of data transfer.
The 11bit identifier (COB identifier) consists of a 4bit function code and a 7bit node number:
Bit no.
10
9
8
7
6
5
4
3
2
1
0
Type
Function code
Node number (node ID)
Assignment
x
x
x
x
0
0
x
x
x
x
x

Communication via CAN bus (CANopen)
AP10 Date: 28.02.2022 Art. No. 86853 Mod. status 37/22 Page 17 of 78
The following function codes have been defined in the "Pre-defined Connection Set" (only the
function codes used in the present device are listed):
Object
Function code
Resulting COB-ID
Object
Page
Network management (NMT)
0000b
0
-
18
SYNC message
0001b
128 (80h)
1005h
35
Emergency message
0001b
128 (80h) + Node-ID
1014h
42
TPD01
0011b
384 (180h) + Node-ID
1800h
49
RPD01
0100b
512 (200h) + Node-ID
1400h
44
TPD02
0101b
640 (280h) + Node-ID
1801h
50
RPD02
0110b
768 (300h) + Node-ID
1401h
46
SDO (tx)
1011b
1408 (580h) + Node-ID
1200h
44
SDO (rx)
1100b
1536 (600h) + Node-ID
1200h
44
Heartbeat message
1110b
1792 (700h) + Node-ID
-
28
Node Guard message
1110b
1792 (700h) + Node-ID
-
27
Table 10: Overview of COB identifiers
Changes to COB-IDs are only possible in the PRE-OPERATIONAL NMT status. First, the COB-ID
must be deactivated via Bit 31 = 1b before it can be changed and reactivated.
The COB-ID of the SYNC object is an exception. There, Bit 30 must be = 0 to enable the
change of the COB-ID. The COB-ID could be changed any time because Bit 30 cannot be set to
1 in the AP10 device.
The identifier determines the priority of the message. The lower the value of the identifier,
the higher the priority of the message.
The node number (Node-ID) (see object 5F0Ah: Node-ID, Auto-ID and Baud rate Bus CAN) is
assigned in every bus system once while AP10 is being configured. Node-ID = 0 is reserved
and must not be used; thus, the node numbers are in the range of 1 to 127.
A newly set node number will only be adopted with reinitialization (see chapter 5.2.1).
The set point display is delivered with the factory-set Node-ID 125 (7Dh).
Control field:
Contains bit-by-bit information on the number of user data and decides whether a data frame
or a Remote Transmission Request (RTR) frame is concerned.
Data field:
Contains up to 8 bytes of user data. The user data has a different meaning depending on the
channel selection.
CRC:
Contains bits for error detection.
ACK/EOF:
The ACK/EOF field contains telegram acknowledgement bits as well as bits for determining the
end of telegram.

Communication via CAN bus (CANopen)
AP10 Date: 28.02.2022 Art. No. 86853 Mod. status 37/22 Page 18 of 78
For a detailed description of the telegram refer to the relevant CAN expert literature. For
simplification, only identifier (COB-ID) and data field will be dealt with in the subsequent
telegram descriptions.
5.2 Node control
5.2.1 Network management services (NMT)
The master configures, manages and monitors network nodes via the NMT service. The device
is always in one of the four communication statuses "INITIALISATION", "PRE-OPERATIONAL",
"OPERATIONAL" or "STOPPED" (see Fig. 5).
Fig. 5: NMT status diagram
5.2.1.1 NMT communication statuses
NMT Status INITIALIZATION
The unit is not involved in the bus actions in this state. All hardware and software
components are initialised. This state is attained after switching on the device or after receipt
of the command code 81h of the own or global addresses. After receiving the command code
82h, the display is also in the initialization status. However, only the hardware and software
associated with CAN communication is reinitialized. The device automatically signifies
completion of initialization via a boot-up message. After successful transmission of the boot-
up message, the device will be in the "PRE-OPERATIONAL" status.
NMT Status PRE-OPERATIONAL
Parameterization data (SDO) can be exchanged in the Pre-Operational Mode. However, no
process data (PDO) is transferred.
Power on or software reset
Initialization
CAN-communication
BootUp Message
1
2
2
3
3
4
4
4
1
Re-initialization
CAN-card
5
5
5
Init

Communication via CAN bus (CANopen)
AP10 Date: 28.02.2022 Art. No. 86853 Mod. status 37/22 Page 19 of 78
NMT Status OPERATIONAL
Exchange of process data is enabled as well.
NMT Status STOPPED
Communication is stopped except for Heartbeat and Node Guarding. Only NMT communication is
enabled.
5.2.1.2 Switching between NMT communication states
Telegrams with the following structures are used for switching between the communications
statuses:
Status change
Transition
in Fig. 5
COB-ID
Com.
Node-
ID
from
to
PRE-OPERATIONAL / STOPPED
OPERATIONAL
1
0h
01h
x
OPERATIONAL/ PRE-
OPERATIONAL
STOPPED
2
0h
02h
x
OPERATIONAL / STOPPED
PRE-OPERATIONAL
3
0h
80h
x
OPERATIONAL / PRE-
OPERATIONAL / STOPPED
INITIALISATION
(Reset Node)
5
0h
81h
x
OPERATIONAL / PRE-
OPERATIONAL / STOPPED
INITIALISATION
(Reset Communication)
4
0h
82h
x
Table 11: Switching between communication statuses
If transmitted as Node-ID x = 0, the message is intended for all bus subscribers.
5.2.2 Boot-Up
The COB-ID of the Boot-Up message consists of 700h and the Node-ID. The NMT-status
"Initialization" is output as data content.
COB-ID
Byte 0
700h + Node-ID
00h
Table 12: Boot-up message
5.2.3 SYNC object
CANopen makes it possible to simultaneously scan inputs and simultaneously set outputs. This
is accomplished by the synchronization message (SYNC), a high-priority CAN message. The
identifier of the SYNC object can be set via object 1005h (see 1005h: COB-ID SYNC message).

Communication via CAN bus (CANopen)
AP10 Date: 28.02.2022 Art. No. 86853 Mod. status 37/22 Page 20 of 78
5.3 Process data exchange
5.3.1 Transfer of Process Data Objects (PDO)
Process data objects (PDO) serve for quick process data exchange. A maximum of 8 bytes of
user data can be transferred in a PDO. AP10 supports the Receive-PDO services RPDO1 and
RPDO2 according to Draft Standard 301 as well as the Transmit-PDO services TPDO1 and TPDO2
according to Draft Standard 301 and Device Profile 406.
5.3.1.1 Transmit PDO (from AP10 to the master)
PDO transfer from the display to the bus master (TPDO) can be initiated as a result of various
events:
•asynchronous, controlled by an internal device timer
•synchronous as a reply to a SYNC message
•as a reply to an RTR message
TPDO1 and TPDO2 are always formed from a status word (see chapter 5.3.3) and the current
position value.
The transfer behavior of TPDO1 is determined via objects 1800h, 1A00h and 6200h and is
assigned to asynchronous transfer. TPDO2 is defined via objects 1801h and 1A01h and serves
for synchronous transfer.
The messages have the structure shown in Table 13, and mapping cannot be changed.
COB-ID
Process data in binary code
Byte 0
(LSB)
Byte 1
Byte 2
Byte 3
(MSB)
Byte 4
Byte 5
Byte 6
Byte 7
TPDO1
180h + Node-ID
Position value
Dummy 0x0000
5F19h: Status
word (see
chapter 5.3.3)
TPDO2
280h + Node-ID
Table 13: TPDO message
Asynchronous data transfer (TPDO1)
If a TPDO1 is to be sent cyclically, then the cycle time must be entered into object 1800h,
sub-index 5, in milliseconds. The TPDO1 will not be sent if the value 0 ms is written. The
function is disabled (delivery state). The minimum value to be set is 1 (= 1 ms). Alternately,
the value can also be written into the object 6200h which is permanently linked internally.
Synchronous data transfer (TPDO2)
The device is factory set to reply by output of the TPD02 message when receiving a SYNC
message. Thus it is set to the synchronous transfer type. 1 is entered in object 1801h, sub-
index 2. The device responds to every n SYNC message if a value n between 1 and 240 (=F0h)
has been entered.
Other manuals for AP10
3
Table of contents
Other Siko Measuring Instrument manuals
Popular Measuring Instrument manuals by other brands
South
South GALAXY G7 user manual

McCrometer
McCrometer Water Specialties VF28D OPERATION AND MAINTENANCE MANUAL PARTS LIST

Endress+Hauser
Endress+Hauser RID14 operating instructions
Agilent Technologies
Agilent Technologies PSA Series manual

BMR
BMR PLA44 User and service manual

YOSensi
YOSensi YO Power user guide
