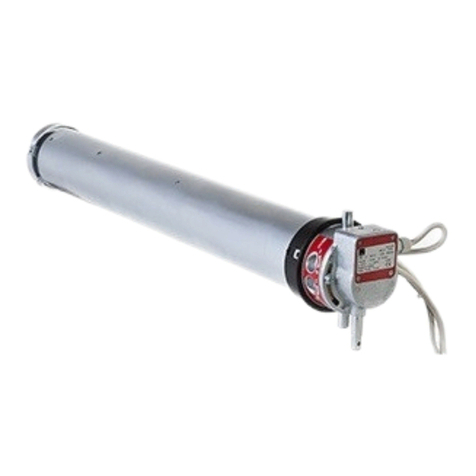
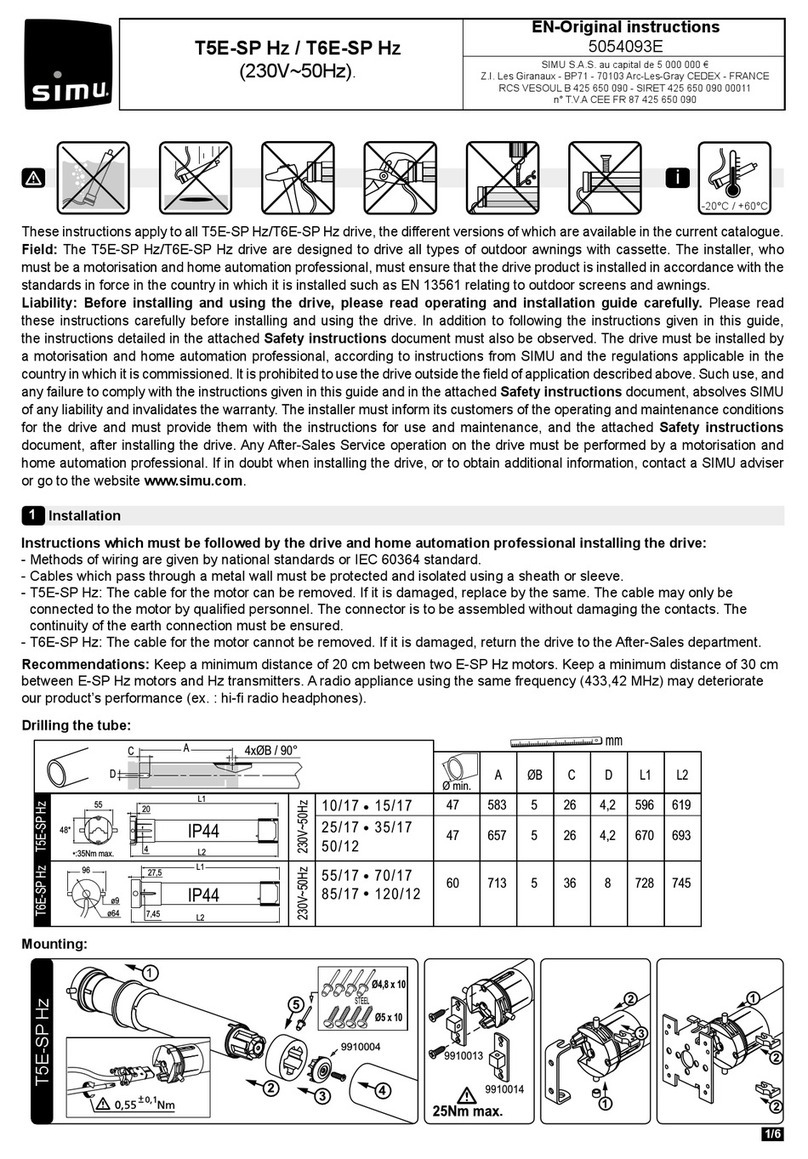
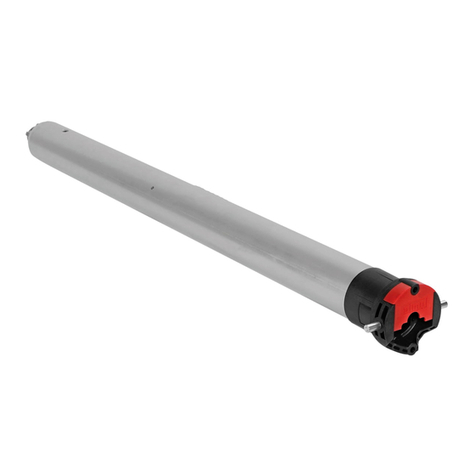
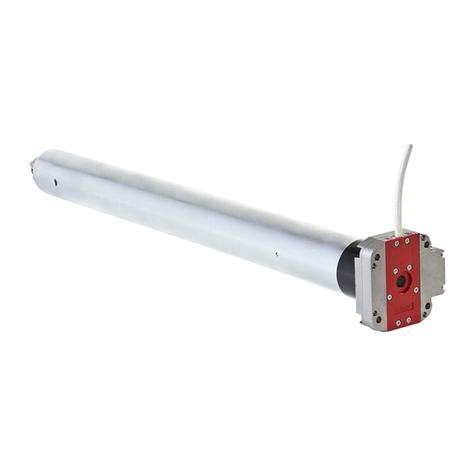
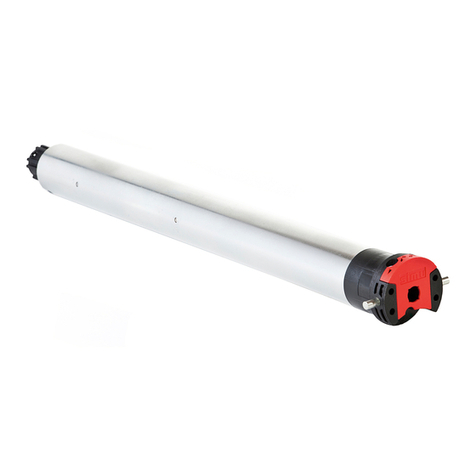
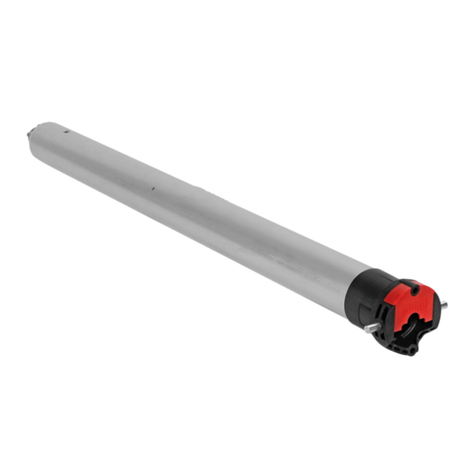
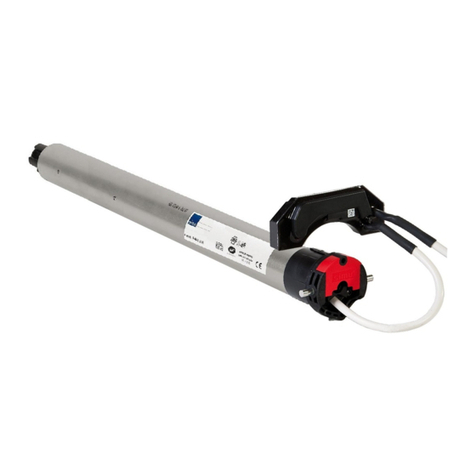
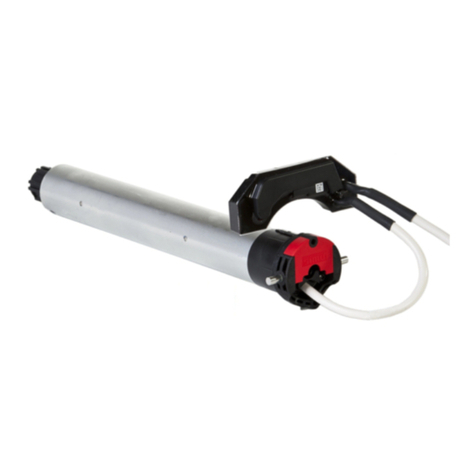
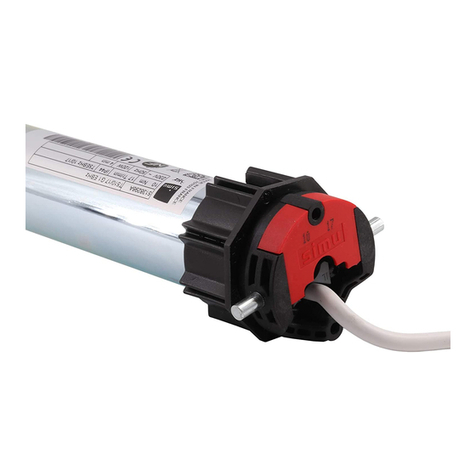
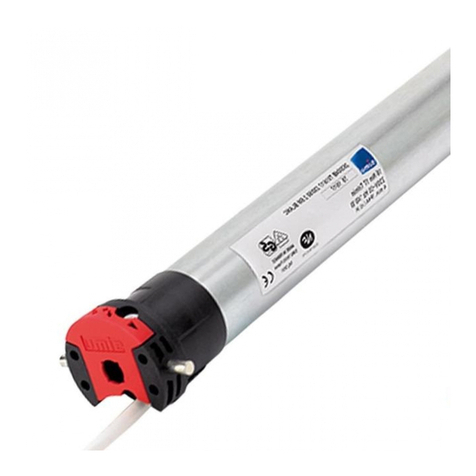
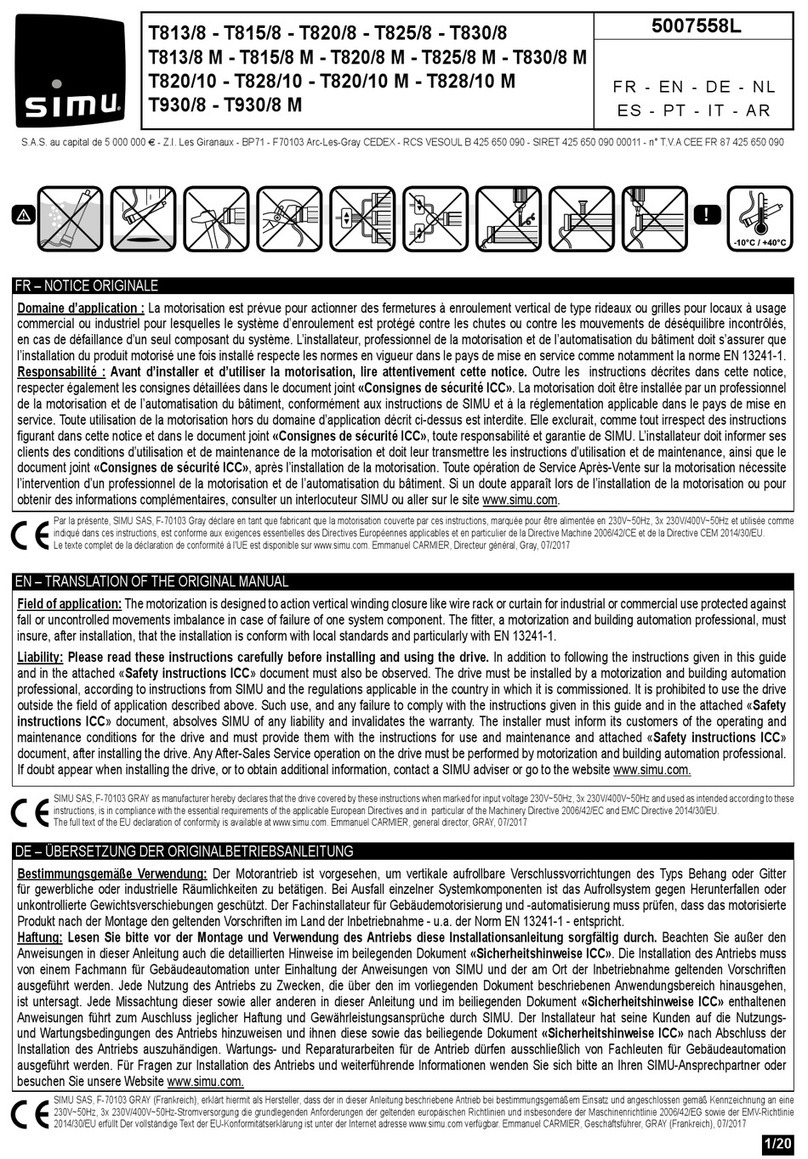
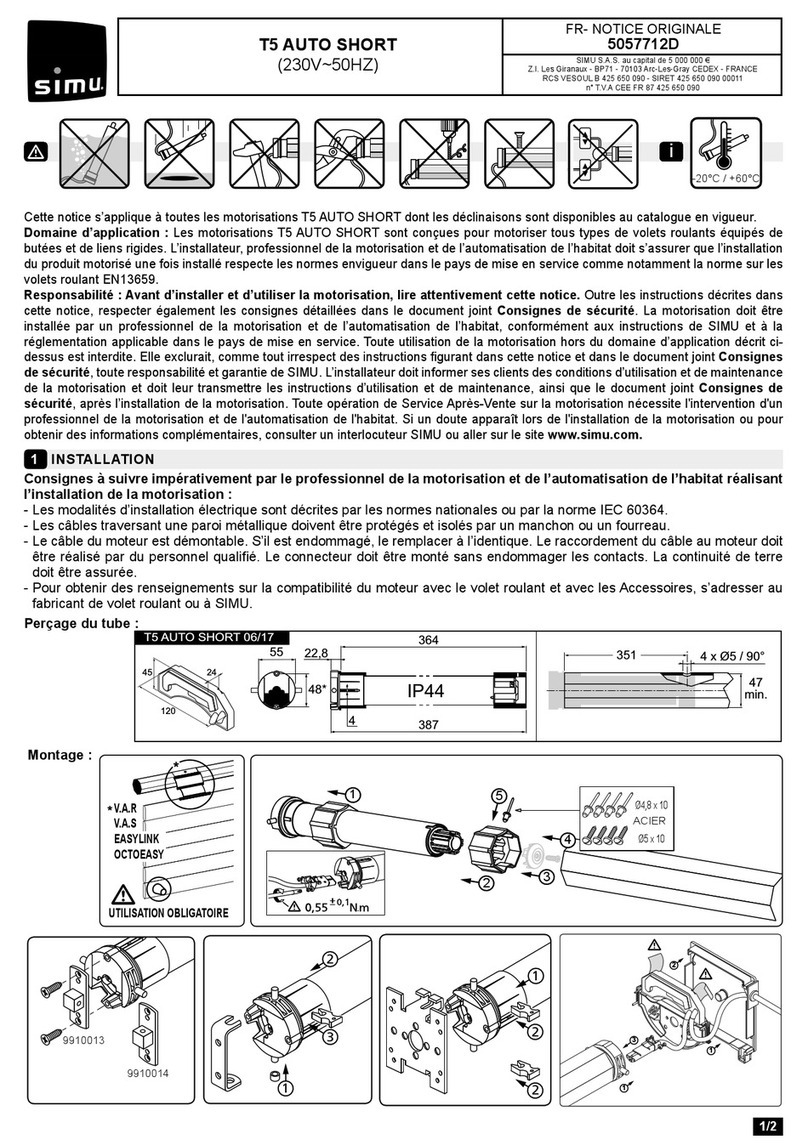
Simu T5 AUTO SHORT Hz User manual

T5 AUTO SHORT Hz
(230V~50Hz) S.A.S. au capital de 5 000 000 € - Z.I. Les Giranaux
BP71 - 70103 Arc-Les-Gray CEDEX
RCS GRAY B 425 650 090 - SIRET 425 650 090 00011
n° T.V.A CEE FR 87 425 650 090
FR- NOTICE ORIGINALE
5057768E
Installation
1
Cette notice s’applique à toutes les motorisations T5 AUTO SHORT Hz dont les déclinaisons sont disponibles au catalogue en vigueur.
Domaine d’application : Les motorisations T5 AUTO SHORT Hz sont conçues pour motoriser tous types de volets roulants équipés de
butées et de liens rigides. L’installateur, professionnel de la motorisation et de l’automatisation de l’habitat doit s’assurer que l’installation,
du produit motorisé une fois installé, respecte les normes en vigueur dans le pays de mise en service comme notamment la norme sur
les volets roulants EN13659.
Responsabilité : Avant d’installer et d’utiliser la motorisation, lire attentivement cette notice. Outre les instructions décrites
dans cette notice, respecter également les consignes détaillées dans le document joint «Consignes de sécurité». La motorisation
doit être installée par un professionnel de la motorisation et de l’automatisation de l’habitat, conformément aux instructions de SIMU
et à la réglementation applicable dans le pays de mise en service. Toute utilisation de la motorisation hors du domaine d’application
décrit ci-dessus est interdite. Elle exclurait, comme tout irrespect des instructions gurant dans cette notice et dans le document joint
«Consignes de sécurité», toute responsabilité et garantie de SIMU. L’installateur doit informer ses clients des conditions d’utilisation
et de maintenance de la motorisation et doit leur transmettre les instructions d’utilisation et de maintenance, ainsi que le document joint
«Consignes de sécurité», après l’installation de la motorisation. Toute opération de Service Après-Vente sur la motorisation nécessite
l’intervention d’un professionnel de la motorisation et de l’automatisation de l’habitat. Si un doute apparaît lors de l’installation de la
motorisation ou pour obtenir des informations complémentaires, consulter un interlocuteur SIMU ou aller sur le site www.simu.com.
i
-20°C / +60°C
Consignes à suivre impérativement par le professionnel de la motorisation et de l’automatisation de l’habitat réalisant
l’installation de la motorisation :
- Les modalités d’installation électrique sont décrites par les normes nationales ou par la norme IEC 60364.
- Les câbles traversant une paroi métallique doivent être protégés et isolés par un manchon ou un fourreau.
- Le câble du moteur est démontable. S’il est endommagé, le remplacer à l’identique. Le raccordement du câble au moteur doit
être réalisé par du personnel qualié. Le connecteur doit être monté sans endommager les contacts. La continuité de terre
doit être assurée.
Préconisations : Respecter une distance minimum de 20 cm entre deux moteurs T5 AUTO SHORT Hz. Respecter une
distance minimum de 30 cm entre un moteur T5 AUTO SHORT Hz et un émetteur Hz. L’utilisation d’un appareil radio utilisant
la même fréquence (433,42MHz) peut dégrader les performances de ce produit (ex.: casque radio Hi-Fi). Pour obtenir des
renseignements sur la compatibilité du moteur avec le volet roulant et avec les accessoires, s’adresser au fabricant de volet
roulant ou à SIMU.
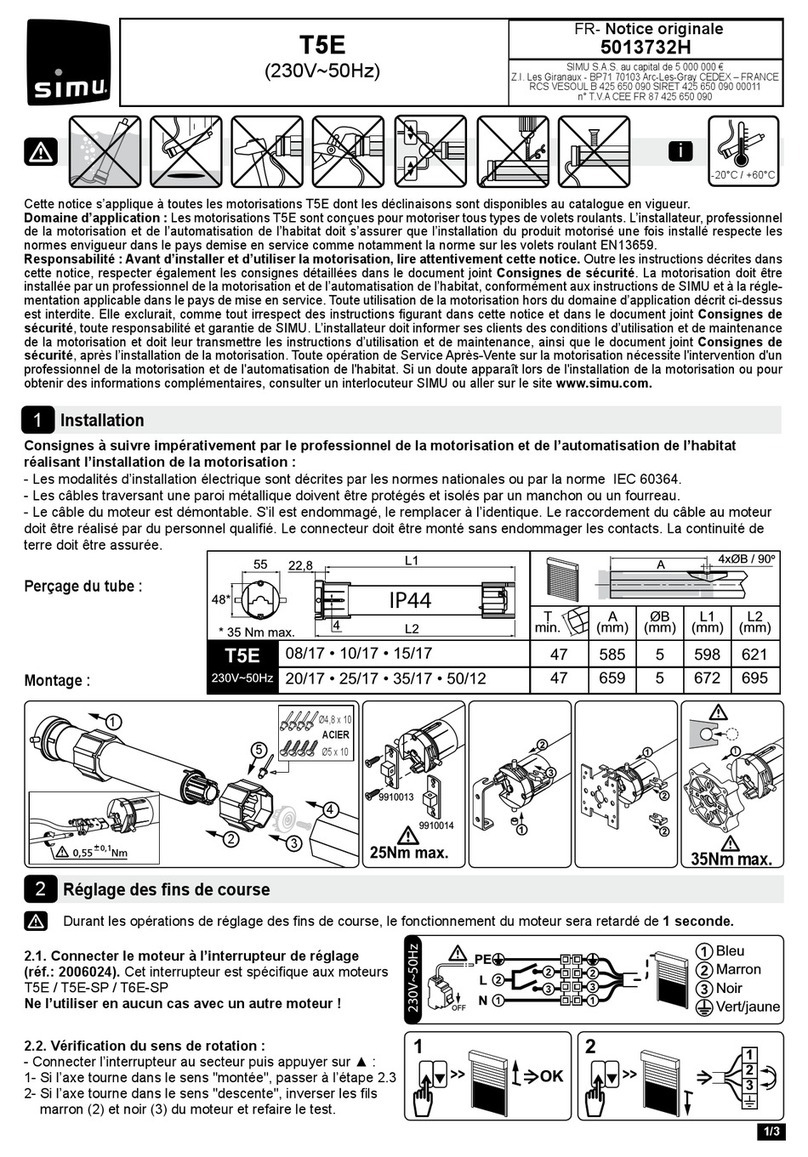
Perçage du tube : 351 4 x Ø5 / 90°
47
min.
364
387
4
22,8
55
48*
* 35 Nm max.
120
45 24
IP44
T5 AUTO SHORT Hz 06/17
Montage :
OCTOEASY
1
3
2
2
1
3
1
4
2
1/4

Enregistrement des réglages automatiques
4
Câblage
2
Emetteurs compatibles
3
- Il est recommandé de pouvoir couper individuelle-
ment l’alimentation de chaque moteur.
- Attacher les câbles pour éviter tout contact avec une partie
en mouvement.
- Si la motorisation est utilisée en extérieur, et si le câble
d’alimentation est de type H05-VVF alors installer le câble
dans un conduit résistant aux UV, par exemple sous
goulotte.
1 : Emetteur Hz mural 1 / 5 canaux/ Memory Hz
2 : Emetteur Hz mobile 1 / 5 canaux
3 : Emetteur Hz Color Multi / Timer Easy / Timer Multi
4 : Capteur Hz soleil
Emplacement de la touche PROG sur les émetteurs Hz :
Éloigner les émetteurs de toute surface ou structure métallique qui
pourraient nuire à leur bon fonctionnement (perte de portée).
(12 émetteurs (canaux) max. par moteur.)
2 3 4
1
Si l’installation comporte plusieurs moteurs, un seul moteur doit être alimenté pendant les opérations du chapitre 4.1, ceci
pour éviter les interférences avec les autres moteurs lors de la programmation.
4.3- Validation des réglages automatiques :
>>
ON
aOK 4.3
OK 4.3
b
>> >>
>> >>
>>
>> >>
4.1- Mode apprentissage:
- Mettre le moteur sous tension.
- Appuyer simultanément sur les touches «Montée» et «Descente» d’un
émetteur Hz. Le moteur effectue une rotation de 0,5 seconde dans un sens
puis dans l’autre.
Cet émetteur commande maintenant le moteur en mode instable.
Passer à l’étape 4.2.
4.2- Conguration du sens de rotation :
Appuyer sur la touche «Montée» de l’émetteur :
a- Si l’axe tourne dans le sens montée, passer à l’étape 4.3.
b- Si l’axe tourne dans le sens descente, inverser le sens de rotation en appuyant sur la touche «Stop» pendant au moins 3
secondes. Le moteur conrme la modication par une rotation de 0,5 seconde dans un sens puis dans l’autre.
Passer à l’étape 4.3.
2s
1A2
1- Appuyer simultanément sur les touches «Montée» et «Descente» de
l’émetteur Hz. Le moteur effectue une rotation de 0,5 seconde dans un
sens puis dans l’autre.
2- Appuyer sur la touche «Stop» pendant 2 s. Le moteur effectue une rota-
tion de 0,5 s. dans un sens puis dans l’autre.
L’opération est terminée. Passer au §5.
PE
L
NT5 AUTO SHORT Hz
230V~50Hz
Bleu
Marron
Vert / jaune
3 4
2/4

3/4
Si vous souhaitez programmer un autre émetteur que celui utilisé jusqu’à présent comme point
de commande du moteur :
- couper l’alimentation du moteur (2 secondes minimum).
- reprendre l’opération 4.1* avec un nouvel émetteur avant de passer au chapitre 5.
* A la mise sous tension le moteur effectue une courte rotation dans un sens puis dans l’autre, ce qui indique
que les ns de course sont déjà réglés.
Cette opération ne peut être effectuée que depuis l’émetteur ayant effectué l’opération 4.1.
Programmation du premier point de commande individuel
5
Programmation d’un nouveau point de commande (individuelle, groupe ou générale)
6
Enregistrement / commande / suppression de la position intermédiaire
7
- Appuyer environ 1 seconde sur la touche PROG
de l’émetteur. Le moteur effectue une rotation de 0,5
seconde dans un sens puis dans l’autre.
Votre émetteur est maintenant programmé et com-
mande le moteur en mode stable.
>>
1
PROG 1s.
>>
2
1
PROG < 1s.
>>
1
PROG ≥ 3s.
2
6.2-
Valider l’opération depuis le nouvel émetteur à programmer :
- Appuyer environ 1 seconde sur la touche PROG du nouvel
émetteur. Le moteur effectue une rotation de 0,5 seconde dans
un sens puis dans l’autre.
6.1- Ouvrir la mémoire du moteur depuis l’émetteur de com-
mande individuelle :
- Appuyer environ 3 secondes sur la touche PROG de l’émetteur
de commande individuelle. Le moteur effectue une rotation de 0,5
seconde dans un sens puis dans l’autre.
- Si votre nouveau point de commande est une commande de groupe : répéter les opérations 6.1 et 6.2 pour chaque moteur du groupe.
- Si votre nouveau point de commande est une commande générale : répéter les opérations 6.1 et 6.2 pour chaque moteur de l’installation.
- Pour supprimer un émetteur de la mémoire du moteur : Effectuer les opérations 6.1 depuis l’émetteur de commande individuelle et l’opéra-
tion 6.2 depuis l’émetteur à supprimer.
5s
Enregistrement :
- Positionner le moteur sur la posi-
tion intermédiaire désirée.
- Appuyer 5s sur la touche «Stop».
Le moteur effectue une rotation
de 0,5 s dans un sens puis dans
l’autre.
0,5s
Commande :
- Appuyer sur la touche
«Stop» pendant 0,5s. Le
moteur rejoint la position
intermédiaire.
Suppression : Positionner le moteur sur la position intermédiaire. Appuyer 5s sur la touche «Stop». la posi-
tion intermédiaire est supprimée.

4/4
Après l’étape 1, si l’opération 2 n’est pas effectuée avant 2 secondes, le moteur effectue à nouveau une brève
rotation dans un sens puis dans l’autre et le sens de rotation n’est pas modié.
5s
1
2s
2s
2
Ne pas positionner le volet roulant sur le n de course haut ou bas.
1 - Appuyer simultanément sur les touches "Montée" et "Descente" de
l’émetteur pendant 5 secondes. Le moteur tourne 0.5 seconde dans un
sens puis dans l’autre.
2 - Dans un délai de 2 secondes, appuyer sur la touche "Stop" de l’émet-
teur pendant 2 secondes. Le moteur tourne 0.5 seconde dans un sens
puis dans l’autre, le sens de rotation est inversé.
Modication du sens de rotation (en mode utilisateur) :
8
Annulation de la programmation et des réglages de ns de course
9
Utilisation et maintenance
10
PROG >7s
2s 7s
9.1- Couper l’alimentation du moteur pendant 2 secondes.
9.2- Rétablir l’alimentation du moteur pendant 7 secondes.
9.3- Couper l’alimentation du moteur pendant 2 secondes.
9.4- Rétablir l’alimentation du moteur.
Si le moteur se trouve en position de n de course (haute ou basse),
il effectue une brève rotation dans les deux sens. Si il se trouve
dans une autre position, il effectue une rotation de 5 secondes
dans un sens quelconque.
Le moteur est maintenant en mode "annulation de la programmation".
- Appuyer plus de 7 secondes sur la touche PROG de l’émetteur. Mainte-
nir l’appui jusqu’à ce que le moteur effectue une première rotation de 0,5
seconde dans un sens puis dans l’autre, puis quelques seconde plus tard une
seconde rotation de 0,5 seconde dans les deux sens.
La mémoire du moteur est maintenant complètement vidée. Effectuer de
nouveau la programmation complète du moteur.
OFF
2s9.19.2 9.39.47s
5s
2s
ON ONOFF
9.5- Ensuite valider l’annulation de la programmation du moteur concerné depuis l’émetteur de commande individuelle :
- Cette motorisation ne nécessite pas d’opération de maintenance.
- Appuyer sur la touche ▲du point de commande pour faire monter le produit motorisé.
- Appuyer sur la touche ▼ du point de commande pour faire descendre le produit motorisé.
- Quand le produit motorisé est en cours de mouvement, un appui bref sur la touche « Stop » arrête le produit motorisé.
- Quand le produit motorisé est à l’arrêt, un appui bref sur la touche « Stop » commande le produit motorisé sur la position
intermédiaire programmée. (Pour modier ou supprimer une position intermédiaire voir le chapitre §7).
Astuces et conseils d’utilisation :
Si le produit motorisé ne fonctionne toujours pas, contacter un professionnel de la motorisation et de l’automatisation de
l’habitat.
Par la présente, Simu SAS, F-70103 GRAY déclare en tant que fabricant que la motorisation couverte par ces instructions, marquée pour être alimentée
en 230V~50Hz et utilisée comme indiqué dans ces instructions, est conforme aux exigences essentielles des Directives Européennes applicables et en
particulier de la Directive Machine 2006/42/EC et de la Directive Radio 2014/53/EU. Le texte complet de la déclaration de conformité à l’UE est disponible
sur www.simu.com. Emmanuel CARMIER, directeur général, GRAY, 11/2016.
CONSTATS
Le produit motorisé ne fonctionne pas
CAUSES POSSIBLES
La motorisation est en protection thermique
SOLUTIONS
Attendre que le moteur refroidisse
Si vous intervenez sur l’alimentation de plusieurs moteurs, ils seront tous dans ce mode. Il convient donc
«d’éjecter» de ce mode tous les moteurs non concernés par cette modication en appuyant sur une touche
de commande d’un émetteur programmé.
i

T5 AUTO SHORT Hz
(230V~50Hz) S.A.S. au capital de 5 000 000 € - Z.I. Les Giranaux
BP71 - 70103 Arc-Les-Gray CEDEX
RCS GRAY B 425 650 090 - SIRET 425 650 090 00011
n° T.V.A CEE FR 87 425 650 090
EN- ORIGINAL INSTRUCTIONS
5057768E
i
-20°C / +60°C
Installation
1
These instructions apply to all T5 AUTO SHORT Hz drive, the different versions of which are available in the current catalogue.
Field of application: T5 AUTO SHORT Hz drive are designed to drive all types of roller shutters equipped with stop blocks and rigid links. The instal-
ler, who must be a motorisation and home automation professional, must ensure that the drive product is installed in accordance with the standards
in force in the country in which it is installed such as EN 13659 relating to roller shutters.
Liability: Before installing and using the drive, please read operating and installation guide carefully. Please read these instructions carefully
before installing and using the drive. In addition to following the instructions given in this guide, the instructions detailed in the attached Safety ins-
tructions document must also be observed. The drive must be installed by a motorisation and home automation professional, according to instruc-
tions from Simu and the regulations applicable in the country in which it is commissioned. It is prohibited to use the drive outside the eld of application
described above. Such use, and any failure to comply with the instructions given in this guide and in the attached Safety instructions document,
absolves Simu of any liability and invalidates the warranty. The installer must inform its customers of the operating and maintenance conditions for the
drive and must provide them with the instructions for use and maintenance, and the attached Safety instructions document, after installing the drive.
Any After-Sales Service operation on the drive must be performed by a motorisation and home automation professional. If in doubt when installing
the drive, or to obtain additional information, contact a Simu adviser or go to the website www.simu.com.
Instructions which must be followed by the drive and home automation professional installing the drive:
- Methods of wiring are given by national standards or IEC60364 standard.
- Cables which pass through a metal wall must be protected and isolated using a sheath or sleeve.
- The cable for the motor can be removed. If it is damaged, replace by the same. The cable may only be connected to the
motor by qualied personnel. The connector is to be assembled without damaging the contacts. The continuity of the earth
connection must be ensured.
Recommendations: Keep a minimum distance of 20 cm between two T5 AUTO SHORT Hz motors. Keep a minimum
distance of 30 cm between T5 AUTO SHORT Hz motors and Hz transmitters. A radio appliance using the same frequency
(433,42MHz) may deteriorate our product’s performance (ex. : hi- radio headphones). To receive information regarding the
compatibility of the motor and the roller shutter or/and accessories, contact the roller shutter manufacturer or SIMU.
Drilling of the tube:
351 4 x Ø5 / 90°
47
min.
364
387
4
22,8
55
48*
* 35 Nm max.
120
45 24
IP44
T5 AUTO SHORT Hz 06/17
Mounting:
MANDATORY
V.A.R
V.A.S
EASYLINK
OCOTEASY
STEEL
1
3
2
2
1
3
1
4
2
1/4

2/4
Memorizing the automatic settings
4
Wiring
2
Compatible transmitters
3
- You must have the possibility to switch off indivi-
dually each motor.
- Attach cables to prevent any contact with moving parts.
- If the motor is used outdoors and if the power supply
cable is of the H05-VVF type, then run the cable in a
UV-resistant conduit, e.g. trunking.
1 : 1/5 channels Wall Hz transmitter/ Memory Hz
2 : 1/5 channels Mobile Hz transmitter
3 : Color Multi/Timer Easy/Timer Multi transmitters
4 : Hz Sun sensor
Location of the PROG key on Hz transmitters:
Do not position the transmitter near metal in order to avoid range
losses.
(12 transmitters (channels) max. for one motor.)
2 3 4
1
If the installation includes several motors, only one motor is to be powered during this programming procedure. It will elimi-
nate interferences with the other motor during the procedure.
4.3- Memorizing the automatic settings.
>>
ON
aOK 4.3
OK 4.3
b
>> >>
>> >>
>>
>> >>
4.1- Learning mode:
- Switch the motor ON.
- Simultaneously press the "UP" and "DOWN" keys of a Hz transmitter.
The motor will run for 0,5 second in one direction, then in the other.
The transmitter now controls the motor in unstable mode, move to stage 4.2
4.2- Checking the rotation direction:
Press the "UP' key of the transmitter:
a- If the motorized tube runs in the UP direction, move to next stage (4.3).
b- If the motorized tube runs in the DOWN direction, reverse the rotation direction by pressing the "Stop" key for at least 3
seconds.
The motor will run for 0,5 second in one direction, then in the other direction. Move to the stage 4.3.
2s
1A2
1- Simultaneously press the "UP" and "DOWN" keys of a Hz transmitter.
The motor will run for 0,5 second in one direction and then in the other.
2- Press the "Stop" key for 2 s. The motor will run for 0,5 second in one
direction and then in the other.
The operation is completed. Go to stage §5.
PE
L
NT5 AUTO SHORT Hz
230V~50Hz
Blue
Brown
Green / yellow

If you do not want to use this transmitter as the individual control:
- cut the power supply (2 seconds minimum).
- repeat the opération 4.1* with a new transmitter and then go to step §5.
* In this case, the motor will run for 0,5 second in both directions, that means the limits setting is already done.
This operation can only be performed from the transmitter that was used for operation 4.1.
Programming the rst individual control point
5
- Press the transmitter PROG Key for approximately one
second. The motor will run for 0,5 second in one direction
and then in the other.
Your transmitter is now programmed to control the motor in
stable mode.
>>
1
PROG 1s.
3/4
>>
2
1
PROG < 1s.
>>
1
PROG ≥ 3s.
2
6.2- Conrm the operation from the new transmitter you want
to program:
- Press the PROG key of the transmitter for 1 second. The motor
will run for 0,5 second in one direction and then in the other.
6.1- Open the memory of the receiver from the control trans
-
mitter:
- Press the PROG key of the transmitter for about 3 seconds.
The motor will run for 0,5 second in one direction and then in the
other.
Programming a new (individual, group or general) control point
6
- For group controls, repeat operations 6.1 and 6.2 for each motor in the group.
- For general controls, repeat operations 6.1 and 6.2 for each motor in the installation.
- To delete an transmitter from the memory of a motor, perform operations 6.1 with a programmed transmitter, then
perform the operation 6.2 with the transmitter to be deleted.
Recording / controling / deleting intermediate position
7
5s
Recording:
- Move the motor to the wanted
position.
- Press 5 seconds on the "Stop"
key. The motor will run for 0,5
second in one direction and then
in the other.
0,5s
Control:
- Press the "Stop" key for
0,5 second. The motor
runs to the intermediate
position.
Deleting :
- Position the motor on the intermediate position. Press 5 seconds on the "Stop" key, the intermediate position is
deleted.

After stage 1, if no operation is carried out before 2 seconds, the motor runs again briey in one direction
and then in the other, and the rotation direction is not changed.
5s
1
2s
2s
2
Do not move the roller shutter to the up or down end limit position.
1 - Press the "Up" and "Down" buttons simultaneously for 5 seconds. The motor
runs briey in one direction, then in the other.
2 - Within 2 seconds, press the Stop button for 2 seconds. The motor briey runs
in one direction, then in the other. The rotation direction has been changed.
Modication of the rotation direction (in user mode):
8
Cancelling programming & settings
9
Operation and maintenance
10
PROG >7s
2s 7s
9.1- Switch off the power supply to the motor for 2 seconds.
9.2- Switch the power to the motor back on for 7 seconds.
9.3- Switch off the power supply to the motor for 2 seconds.
9.4- Switch the power to the motor back on.
If the motor is on the end limit position (up or down), the motor will
run briey in one direction and then in the other, otherwise, the
motor runs for 5 seconds in random direction.
The motor is now in the «cancelling mode».
- Press the PROG key of the transmitter more than 7 seconds. Maintain the
pressure until the motor will rst run for 0,5 second in one direction and then
in the other, and a few second later, it will run again in both direction.
The motor is now as it was originally congured, and no transmitter and no
settings is saved in its memory and is ready for a new programming.
OFF
2s9.19.2 9.39.47s
5s
2s
ON ONOFF
9.5- Then, conrm the cancelling of the concerned motor from the individual control:
4/4
If you switch off the power to several motors, they will all be in cancelling mode. That is why, you must «eject» out of
this mode all the receivers that are not to be deprogrammed by sending a command from their individual control trans-
mitter (UP or Down).
Simu SAS, F-70103 as manufacturer hereby declares that the drive covered by these instructions when marked for input voltage 230V~50Hz and used
as intended according to these instructions, is in compliance with the essential requirements of the applicable European Directives and in particular of
the Machinery Directive 2006/42/EC, and the Radio Directive 2014/53/EU. The full text of the EU declaration of conformity is available at www.simu.com.
Emmanuel CARMIER, general director, GRAY, 11/2016.
- This drive is maintenance-free.
- Press the ▲ button on the control point to raise the motorised product.
- Press the ▼ button on the control point to lower the motorised product.
- If the motorised product is moving: briey press the "Stop" button, the motorised product stops automatically.
- The motorised product is then stopped, press 0,5s on the "Stop" button. The motorised product moves to the
programmed intermediate position. (To modify or delete an intermediate position, see the section §7).
Tips and recommendations for use:
If the motorised product still does not work, contact a drive and home automation professional.
PROBLEMS POSSIBLE CAUSES SOLUTIONS
The motorised product does not operate. The overheating protection on the drive has been activated. Wait for the drive to cool down.
i

T5 AUTO SHORT Hz
(230V~50Hz) S.A.S. au capital de 5 000 000 € - Z.I. Les Giranaux
BP71 - 70103 Arc-Les-Gray CEDEX
RCS GRAY B 425 650 090 - SIRET 425 650 090 00011
n° T.V.A CEE FR 87 425 650 090
DE – ORIGINALANLEITUNG
5057768E
i
-20°C / +60°C
Installation
1
Diese Anleitung gilt für alle Antriebe vom Typ T5 AUTO SHORT Hz , deren Ausführungen im aktuellen Katalog zu nden sind.
Bestimmungsgemäße Verwendung: Die Antriebe T5 AUTO SHORT Hz wurden für den Antrieb aller Arten von Rollläden mit Anschlägen und
Wellenverbindern. Der Installateur, ein Fachmann für Gebäudeautomation, muss sicherstellen, dass die Installation des Antriebs nach Montage den
geltenden Vorschriften des Ortes der Inbetriebnahme entspricht. Hierzu gehören insbesondere die Norm: EN13659 (Rollläden).
Haftung: Lesen Sie bitte vor der Montage und Verwendung des Antriebs diese Installationsanleitung sorgfältig durch. Beachten Sie außer
den Anweisungen in dieser Anleitung auch die detaillierten Hinweise im beiliegenden Dokument «Sicherheitshinweise». Die Installation des Antriebs
muss von einem Fachmann für Gebäudeautomation unter Einhaltung der Anweisungen von SIMU und der am Ort der Inbetriebnahme geltenden Vor-
schriften ausgeführt werden. Jede Nutzung des Antriebs zu Zwecken, die über den im vorliegenden Dokument beschriebenen Anwendungsbereich
hinausgehen, ist untersagt. Jede Missachtung dieser, sowie aller anderen in dieser Anleitung und im beiliegenden Dokument «Sicherheitshinweise»
enthaltenen Anweisungen führt zum Ausschluss jeglicher Haftung und Gewährleistungsansprüche durch SIMU. Der Installateur hat seine Kunden auf
die Nutzungsund Wartungsbedingungen des Antriebs hinzuweisen und ihnen diese sowie das beiliegende Dokument «Sicherheitshinweise» nach
Abschluss der Installation des Antriebs auszuhändigen. Wartungs- und Reparaturarbeiten für den Antrieb dürfen ausschließlich von Fachleuten für
Gebäudeautomation ausgeführt werden. Für Fragen zur Installation des Antriebs und weiterführende Informationen wenden Sie sich bitte an Ihren
SIMU-Ansprechpartner oder besuchen Sie unsere Website www.simu.com.
Hinweise, die die installierende Fachkraft zu beachten hat:
- Die Verdrahtung muss den geltenden VDE Vorschriftenentsprechen.
- Alle Kabel, die in Kontakt mit einer metallischen Wandung geraten könnten, müssen mit einer Hülse oder Ummantelung
geschützt und isoliert werden.
- Das Kabel des Antriebs kann demontiert werden: Wenn das Spannungsversorgungskabel beschädigt ist, muss es durch ein
identisches Kabel ersetzt werden. Das Kabel muss von einer Elektrofachkraft an den Motor angeschlossen werden. Bei der Stec-
kermontage dürfen die Kontakte nicht beschädigt werden. Die Durchgängigkeit des Schutzleiters muss sichergestellt sein.
Empfehlungen: Halten Sie eine Mindestdistanz von 20 cm zwischen zwei T5 AUTO SHORT Hz Motoren ein. Halten Sie eine
Mindestdistanz von 30 cm zwischen T5 AUTO SHORT Hz Motoren und Hz- Funksendern ein. Ein Radiogerät, das die gleiche
Frequenz nutzt (433,42 MHz), könnte die Leistung des Produkts stören (z.B. Hi-Fi Radio-Kopfhörer). Für weitere Informationen
zur Kompatibilität des Antriebes mit dem Rollladen und dessen Zubehör, wenden Sie sich an den Rollladen-Hersteller oder SIMU.
Bohrungen in der Welle :
351 4 x Ø5 / 90°
47
min.
364
387
4
22,8
55
48*
* 35 Nm max.
120
45 24
IP44
T5 AUTO SHORT Hz 06/17
Montage :
Unbedingt erforderlich
V.A.R
V.A.S
EASYLINK
OCTOEASY
STAHL
1
3
2
2
1
3
1
4
2
1/4

Erfassung der automatischen Einstellungen
4
Verdrahtung
2
Kompatible Sender
3
- Wir empfehlen, für jeden Motor eine separate
Abschaltung zu verwenden.
- Bringen Sie die Kabel so an, dass sie nicht Kontakt zu
beweglichen Teilen geraten können.
- Wenn der Antrieb im Freien montiert wird und mit ei-
nem Netzkabel vom Typ H05-VVF versehen ist, ist das
vor Netzkabel UV-Strahlen zu schützen, z.B. durch ein
Schutzrohr.
1 : 1/5 Kanal Hz Wandsender/ Memory Hz
2 : 1/5 Kanal Hz Handsender
3 : Color Mult /Timer Easy/Timer Multi Handsender
4 : Hz- Sonnensensor
Anordnung der PROG Taste am Hz-Sender:
Bewahren Sie den Sender nicht in der Nähe metallischer Objekte auf,
diese könnten die Senderleistung beeinussen (geringere Reichweite).
(Maximal 12 Sender pro Motor)
2 3 4
1
Wenn die Installation mehrere Motoren umfasst, darf während der Programmierung nur ein Motor mit Strom versorgt werden.
Auf diese Weise werden Störungen durch andere Motoren während der Programmierung vermieden.
4.3- Bestätigen der automatischen Einstellungen:
>>
ON
aOK 4.3
OK 4.3
b
>> >>
>> >>
>>
>> >>
4.1- Programmiermodus:
- Schalten Sie den Motor EIN.
- Drücken Sie gleichzeitig die AUF- und AB-Taste eines Hz Senders. Der
Motor läuft 0,5 Sekunden in die eine, dann in die andere Richtung.
Der Sender steuert nun den Motor im Totmannbetrieb. Siehe Schritt 4.2
4.2- Überprüfen der Laufrichtung:
a- Wenn sich der Behang nach oben bewegt, wechseln Sie zum nächsten Schritt 4.3.
b- Wenn sich der Behang nach unten bewegt, ändern Sie die Richtung, indem Sie die STOPP Taste mindestens 3 S.
lang gedrückt halten. Der Empfänger bestätigt den Richtungswechsel und dreht 0,5 S. lang in die eine, dann in die
andere Richtung. Weiter mit Schritt 4.3.
2s
1A2
1 - Drücken Sie gleichzeitig die AUF und die AB Taste des Senders. Der Motor
läuft fûr 0,5 Sekunden in die eine und in die andere Richtung.
2 - Drücken Sie die STOPP Taste fûr 2 Sekunden. Der Motor läuft für 0,5
Sekunden in die eine und in die andere Richtung.
Die Einstellung ist beendet, bitte gehen Sie zu Punkt 5.
PE
L
NT5 AUTO SHORT Hz
230V~50Hz
Blau
Braun
Grün / Gelb
3 4
2/4
Drücken Sie die AUF-Taste am Sender:

3/4
Wenn Sie diesen Sender nicht als Einzelbedienung benutzen wollen:
- Unterbrechen Sie die Stromversorgung des Motors (min. 2 Sekunden).
- Wiederholen Sie Schritt 4.1* mit einem neuen Sender und gehen Sie direkt zu §5.
* In diesem Fall fährt der Motor je eine halbe Sekunde in beide Richtungen. Das bedeutet, dass die Endlagen
bereits gespeichert sind.
Diese Einstellung kann nur für den unter Punkt 4.1 verwendeten Sender vorgenommen werden.
Programmierung des ersten individuellen Steuerpunkts
5
Programmierung eines neuen (individuellen, Gruppen- oder Haupt-) Steuerpunkts
6
Speichern, Kontrolle und Löschen der Zwischenpositionen
7
- Halten Sie die Taste PROG Sekunden ca. 1 Sekunde lang
gedrückt. Der Motor läuft 0,5 Sekunden in die eine, dann
in die andere Richtung.
Ihr Sender ist nun so programmiert, dass er den Motor
zuverlässig steuert.
>>
1
PROG 1s.
>>
2
1
PROG < 1s.
>>
1
PROG ≥ 3s.
2
6.2- Bestätigen Sie die Eingaben an dem neu zu programmierenden
Sender :
- Halten Sie die Taste PROG des Senders ca. 1 Sekunde lang gedrückt.
Der Motor läuft 0,5 Sekunden in die eine, dann in die andere Richtung.
6.1- Vorbereitung des Motors für einen weiteren Sender:
- Halten Sie die Taste PROG des Senders ca. 3 Sekunden lang
gedrückt. Der Motor läuft 0,5 Sekunden in die eine, dann in die
andere Richtung.
- Für Gruppensteuerungen wiederholen Sie die Schritte 6.1 und 6.2 für jeden Empfänger der Gruppe.
- Für die Hauptsteuerung wiederholen Sie die Schritte 6.1 und 6.2 für jeden Empfänger der Installation.
- Um einen Sender aus dem Speicher des Empfängers zu löschen, wiederholen Sie Schritt 6.1 mit einem programmierten
Sender und dann Schritt 6.2 mit dem zu löschenden Sender.
5s
Speichern:
- Fahren Sie den Motor in die
gewünschte Position.
- Halten Sie 5 Sekunden die
STOPP Taste gedrückt. Der Motor
fährt 0,5 Sekunden in die eine,
dann in die andere Richtung.
0,5s
Kontrolle:
- Halten Sie 0,5 Sekunden
die STOPP Taste gedrückt.
Der Motor fährt an die
gespeicherte Zwischenpo-
sition.
Löschen einer Zwischenposition:
- Den Motor in die zu löschende Zwischenposition fahren. Drücken Sie die STOPP-Taste 5 Sekunden lang, die
Zwischenposition ist gelöscht.

4/4
Wenn nach Schritt 1 innerhalb von 2 Sekunden kein Signal vom Sender gegeben wird, fährt der Motor kurz
in die eine Richtung, danach in die andere und die Drehrichtung wurde nicht geändert.
5s
1
2s
2s
2
Der Rollladen darf nicht in der oberen oder unteren Endlage benden.
1 - Drücken Sie die Tasten Aufwärts und Abwärts 5 Sekunden lang
gleichzeitig. Der Motor dreht sich kurz in die eine, dann in die andere
Richtung.
2 - Binnen 2 Sekunden drücken Sie 2 Sekunden lang die Taste STOPP.
Der Motor dreht sich kurz in die eine, dann in die andere Richtung: Der
Drehrichtung ist nun geändert.
Änderung der drehrichtung (Endverwendermodus):
8
Löschen der Programmierung
9
Anwendung und Wartung
10
PROG >7s
2s 7s
9.1- Schalten sie die Stromversorgung des Motors 2 Sekunden ab.
9.2 - Schalten sie die Stromversorgung des Motors 7 Sekunden ein.
9.3 - Schalten sie die Stromversorgung des Motors 2 Sekunden ab.
9.4 - Schalten sie die Stromversorgung wieder ein.
Bendet sich der Motor in einer Endlage (oben oder unten), dreht er
zuerst in die eine, danach in die andere Richtung. Anderenfalls dreht
der Motor für 5 Sekunden in eine beliebige Richtung.
Jetzt bendet der Motor sich im «Lösch-Modus».
- Halten Sie die Taste PROG des Senders so lange gedrückt, bis der Motor 2x eine
halbe Sekunde lang in die eine Richtung läuft. (mindestens 7 Sekunden lang).
Nun ist der Motor auf die Werkseinstellungen zurückgesetzt. Es sind keine
Sender und Einstellungen mehr im Speicher programmiert.
OFF
2s9.19.2 9.39.47s
5s
2s
ON ONOFF
9.5- Bestätigen Sie dann das Löschen des entsprechendes Motors an der Einzelsteuerung oder mit einem neuen Sender:
- Für diesen Antrieb sind keine Wartungsarbeiten erforderlich.
- Ein einfacher Druck auf die Taste ▲ löst eine Öffnung des Behanges aus.
- Ein einfacher Druck auf die Taste ▼ löst eine Schließung des Behanges aus.
- Wenn der angetriebene Behang sich bewegt, drücken Sie kurz auf die STOPP-Taste. Der Behang stoppt automatisch.
- Wenn der Behang gestoppt hat, drücken Sie 0,5s die STOPP-Taste. Der Behang fährt in die Zwischenposition. (Zum
speichern oder löschen der Zwischenposition, siehe Kapitel §7).
Tipps und Empfehlungen die Installation:
Wenn das Produkt weiterhin nicht funktioniert, wenden Sie sich bitte an einen Fachmann für Gebäudeautomation.
Simu SAS, F-70103 (Frankreich), erklärt hiermit als Hersteller, dass der in dieser Anleitung beschriebene Antrieb bei bestimmungsgemäßem Einsatz und
angeschlossen gemäß Kennzeichnung an eine 230 V / 50 Hz-Stromversorgung die grundlegenden Anforderungen der geltenden europäischen Richtlinien
und insbesondere der Maschinenrichtlinie 2006/42/EG sowie der Funkanlagenrichtlinie 2014/53/EU erfüllt. Der vollständige Text der EU-Konformität-
serklärung ist unter der Internetadresse www.simu.com verfügbar. Emmanuel CARMIER, Geschäftsführer, GRAY (Frankreich), 11/2016.
Wenn Sie die Stromversorgung zu mehreren Motoren unterbrechen, benden sich alle im Modus Löschen. Daher
müssen Sie alle Motoren, die nicht gelöscht werden sollen «auswerfen», indem sie ein Signal vom individuellen Sender
(AUFWÄRTS oder ABWÄRTS) aus senden.
PROBLEME
Der angetriebene Behang funktionniert nicht
MÖGLICHE URSACHEN
Der Überhitzungsschutz des Antriebs wurde ausgelöst
LÖSUNGEN
Warten Sie, bis des Antrieb
abekühlt ist.
i

T5 AUTO SHORT Hz
(230V~50Hz) S.A.S. au capital de 5 000 000 € - Z.I. Les Giranaux
BP71 - 70103 Arc-Les-Gray CEDEX
RCS GRAY B 425 650 090 - SIRET 425 650 090 00011
n° T.V.A CEE FR 87 425 650 090
NL- VERTALING VAN DE ORIGINELE HANDLEIDING
5057768E
i
-20°C / +60°C
Installatie
1
Deze handleiding is geldig voor alle uitvoeringen van de motorisaties T5 AUTO SHORT Hz die in de actuele catalogus zijn opgenomen.
Toepassingsgebied: De motorisaties T5 AUTO SHORT Hz zijn ontworpen voor het motoriseren van alle rolluiktypes die zijn uitgerust met starre
verbindingen en stoppers. Het gemotoriseerde systeem moet geïnstalleerd worden door een erkende installateur van automatiseringssystemen in
woningen, in overeenstemming met de instructies van SIMU en met de van het land van gebruik geldende normen en met name met de norm voor
rolluiken EN13659.
Verantwoordelijkheid: Voordat de motorisatie geïnstalleerd en gebruikt wordt, moet deze handleiding zorgvuldig gelezen worden. Houd u
altijd aan de aanwijzingen die in deze handleiding staan. Houd u ook altijd aan de gedetailleerde voorschriften die in het bijgevoegde document «Vei-
ligheidsvoorschriften» staan. De motorisatie moet geïnstalleerd worden door een erkende installateur van automatiseringssystemen in woningen,
in overeenstemming met de instructies van SIMU en met de in het land van gebruik geldende wet- en regelgeving. Leder gebruik van de motorisatie
buiten het hierboven beschreven toepassingsgebied is verboden. Hierdoor en door het niet opvolgen van de instructies die in deze handleiding en in
het bijgevoegde document «Veiligheidsvoorschriften» staan, vervalt de aansprakelijkheid en de garantie van SIMU. De installateur moet de klant in-
formeren over de voorwaarden voor het gebruik en het onderhoud van de motorisatie en moet hem/haar, na de installatie van de motorisatie, de aanwi-
jzingen voor het gebruik en het onderhoud, evenals het bijgevoegde document «Veiligheidsvoorschriften», overhandigen. Servicewerkzaamheden
aan de motorisatiemogen alleen uitgevoerd worden door een erkende installateur van automatiseringssystemen in woningen. Raadpleeg, bij twijfel
tijdens de installatie van de motorisatie of voor aanvullende informatie uw SIMU leverancier of ga naar de website www.simu.com.
Verplichte voorschriften voor de erkende installateur van automatiseringssystemen in woningen die de installatie van de
motorisatie uitvoert:
- Bedradingsvoorschriften worden voorgeschreven volgens de nationale normen of IEC 60364 normen.
- Kabels die door een metalen schot lopen moeten beschermd en geïsoleerd worden door een doorvoerrubber of.
- De kabel van de motor is afneembaar. Vervang hem door een identiek exemplaar als hij beschadigd raakt. De aansluiting van de
kabel van de motor moet worden uitgevoerd door gekwaliceerd personeel. De connector moet worden gemonteerd zonder de contac-
tpunten te beschadigen. De aardaansluiting moet worden verzekerd.
Adviezen: Bewaar een minimum afstand van 20 cm tussen twee motor T5 AUTO SHORT Hz. Bewaar een minimum afstand van 30
cm tussen een motor T5 AUTO SHORT Hz en een zender Hz. Een radiotoepassing (bij. hi- hoofdtelefoon) die gebruikt maakt van
dezelfde frequencie (433,42 MHz). kan de performance van onze producten nadelig beïnvloeden. Voor informatie over de geschiktheid
van de motor voor het rolluik en de accessoires raadpleegt u de fabrikant van de rolluik of SIMU.
Het Boren van de gaten:
351 4 x Ø5 / 90°
47
min.
364
387
4
22,8
55
48*
* 35 Nm max.
120
45 24
IP44
T5 AUTO SHORT Hz 06/17
Installatie:
V.A.R
V.A.S
EASYLINK
OCTOEASY
VERPLICHT GEBRUIK
STAAL
1
3
2
2
1
3
1
4
2
1/4

Registratie van het automatische regelen
4
Bekabling
2
Compatibele zenders
3
Wij adviseren de elektrische installatie zo uit te
voeren dat iedere motor apart van het.
- Maak kabels vast zodat zij niet in contact kunnen komen
met bewegende delen.
- Indien de motor buiten wordt gebruikt, moet de voe-
dingskabel van het type HO5-VVF in een tegen uv-licht
bestendige koker worden geïnstalleerd (bv. In een kabel-
goot).
1 : 1/5 Kanaals Hz Muurzender/ Memory Hz
2 : 1/5 Kanaals Hz Handzender
3 : Color Multi /Timer Easy/Timer Multi zender
4 : Zonsensor Hz
Plaats van de toets PROG op de zenders Hz:
Zet de zender niet tegen of in de buurt van een metalen deel, het
bereik zal dan namzlijk kleiner zijn.
(Max. 12 zenders per motor)
2 3 4
1
PE
L
NT5 AUTO SHORT Hz
230V~50Hz
Blauw
Bruin
Groen / Geel
3 4
2/4
4.3- Bevestigen van de automatische afstellingen:
>>
ON
2s
1A2
aOK 4.3
OK 4.3
b
>> >>
>> >>
>>
>> >>
4.1- Leermodus:
- Zet de motor onder spanning.
- Druk vervolgens tegelijkertijd, op de toetsen «Omhoog» en «Omlaag»
van een zender, de motor draait 0,5 seconde in een richting en vervolgens
in een andere richting.
Deze zender bedient nu de motor in onstabiele mode. Ga naar 4.2.
1- Druk tegelijkertijd op de "OP" en "NEER" knopppen van de Hz zender. De
motor zal bevestigen door in beide richtingen kort te bewegen.
2- Druk 2 sec. op "STOP". De motor zal bevestigen door in beide richtingen kort
te bewegen.
De eindschakelaars zijn nu geprogrammeerd. Ga naar stap 5.
4.2- Controle van de draairichting van de motor:
Druk op de «OP» knop van de zender :
Als de installatie uit meerdere motoren bestaat, mag alleen de te programmeren motor aan de voedingsspan-
ning gekoppeld zijn. Dit voorkomt onderlinge storing tijdens het programmeren.
a- Als het luik omhoog gaat, gaat u verder naar de volgende stap.
b-
Als het luik daalt, verander dan de draairichting door tenminste 3 seconden op de toets "STOP" te drukken. Ga naar 4.3.

3/4
Als u de handzender niet wil gebruiken als individuele bediening:
- Verbreek de voedingsspanning (minimaal 2 sec.).
- Herhaal stap 4.1* met een nieuwe handzender en ga dan direkt naar stap §5.
* in dit geval zal de motor een halve seconde in beide richtingen draaien ten teken dat de eindafstelling reeds
geprogrameerd zijn.
Deze procedure geldt alleen voor een zender die procedure 4.1. al heeft doorlopen.
Programmering als individueel bedienpunt
5
- Druk ongeveer seconde op de toets PROG van de
zender. De motor draait 0,5 seconde in een richting
en vervolgens in de andere richting.
Uw zender is nu geprogrammeerd om de motor in de
stabiele mode te besturen.
>>
1
PROG 1s.
>>
2
1
PROG < 1s.
>>
1
PROG ≥ 3s.
2
6.2- Valideer de werking door een nieuwe zender in te leren :
- Druk ongeveer 1 seconde op de toets PROG van de nieuwe
zender. De motor draait een seconde in een richting en vervolgens
in de andere richting.
6.1- Open het geheugen van de ontvanger vanuit de individuele
bedieningszender:
- Druk ongeveer 3 seconden op de toets PROG van de individuele
bedieningszender. De motor draait 0,5 seconde in een richting en
vervolgens in de andere richting.
Programmeren van een andere zender (individueel, groep of hoofdzender)
6
- Voor een gegroepeerde bediening met de andere zender: voer de operaties 6.1 en 6.2 uit voor iedere ontvanger van de betreffende
groep.
- Voor een algemene bediening met de andere zender: voer de operaties 6.1 en 6.2 uit voor iedere ontvanger van de installatie.
- Om een zender uit het geheugen van een ontvanger te wissen, volg procedure 6.1 met een geprogrammeerde zender, Volg
daarna procedure 6.2 met de zender die gewist moet worden.
Programmeren, oproepen en verwijderen van de tussenpositie
7
5s
Programeren:
- De motor op de gewenste positie
instellen.
- Druk 5s op de toets "STOP". De
motor draait 0,5s in een richting en
vervolgens in de andere richting.
0,5s
Oproepen:
- Druk 0,5s op de toets
"STOP". De motor loopt
naar de ingestelde
tussenpositie.
Tussenpositie verwijderen:
- De motor op de tussenpositie te gaan. Druk op de "STOP" toets tenminste 5 seconden, de tussenpositie is nu gewist.

4/4
Na stap 1, indien geen handeling is gedaan voor 2 sec (of indien geen handeling is gebeurd anders dan stap
2, zal de motor terug draaien kort op en kort neer, en de draaizin van de motor is niet gewijzigd.
5s
1
2s
2s
2
Positioneer het rolluik niet op een van zijn eindpunten maar ergens tussen de
twee.
1 - Druk gedurende 5 seconden gelijktijdig op de toetsen Stijgen en
Dalen. De motor geeft een korte draai in de ene richting en daarna in de
andere.
2 - Druk binnen 2 seconden gedurende 2 seconden op de "STOP" toets.
De motor geeft een korte draai in de ene richting en daarna in de andere,
de draairichting is nu gewijzigd.
Wijziging van de draaizin van de motor (in de gebruikers modus):
8
9.1 - Schakel gedurende 2 seconden de voeding van de ontvanger uit.
9.2 - Schakel gedurende 7 seconden de voeding van de ontvanger weer in.
9.3 - Schakel gedurende 2 seconden de voeding van de ontvanger uit.
9.4 - Schakel de voeding van de ontvanger weer in.
Indien de motor in zijn einpositie staat zal de motor alleen een kort
op-neer doen. In het andere geval draait de motor 5 seconden in
een of andere richting.
De motor bevindt zich nu in de status van "annulatie van de
programmering"
- Druk meer dan 7 seconden op de toets «PROG» van de individuele bedie-
ningszender. Houdt deze toetsindedrukt totdat, de motor draait 0,5 seconde in
een richting en vervolgens in de andere richting en enkele seconden later in
beide richtingen.
De motor is nu helemaal gewist en terug in de staat waarin u hem af
fabriek geleverd krijgt.
OFF
2s9.19.2 9.39.47s
5s
2s
ON ONOFF
Het wissen van de programmering
9
9.5- Valideer het wissen van de betreffende ontvanger vanuit de individuele bedieningszender of van een nieuwe zender:
Als u de voeding van meerdere ontvangers uitschakelt, komen die allemaal in de annuleringsmode. Om ontvangers
"uit te sluiten" voor het wissen geeft u een wisopdracht steeds vanuit een individuele bedieningszender.
Gebruik en onderhoud
10
- Deze motorisatie heft geen onderhoud nodig.
- Door een druk op de toets ▲gaat het gemotoriseerde system omhoog.
- Door een druk op de toets ▼ gaat het gemotoriseerde system respectievelijk omlaag.
- Het gemotoriseerde produkt is in beweging, druk kort op “STOP”, het produkt stopt automatisch.
- De gemotoriseerde produkt komt tot stilstand, druk 0,5s op de “STOP”-toets, het produkt gaat naar de tussenpositie.
(Voor het aanpassen of verwijderen van een tussenpositie, raadpleegt u hoofdstuk §7)
Tips en adviezen voor het gebruik:
Als het gemotoriseerd system nog steeds niet werkt, neem dan contact op met een erkende installateur van automatise-
ringssystemen in woningen.
Hierbij verklaart SIMU SAS, F-70103 GRAY dat de motorisatie die bestemd is om te worden gebruikt met 230V~50Hz volgens de aanwijzingen in dit docu-
ment, in overeenstemming is met de essentiële eisen en de andere relevante bepalingen van de Europese richtlijnen voor toepassing binnen de Europese
Unie en in het bijzonder met de Machinerichtlijn 2006/42/EG en de Richtlijn Radioapparatuur 2014/53/EU. De volledige EU-conformiteitsverklaring staat ter
beschikking op de website www.simu.com. Emmanuel CARMIER, directeur-generaal, GRAY, 11/2016.
PROBLEMEN
Het gemotoriseerde systeem werkt niet.
MOGELIJKE OORZAKEN
De thermische beveiliging van de motor is in werking gatreden.
OPLOSSINGEN
Wacht totdat de motor is afgekoeld
i
PROG >7s
2s 7s

T5 AUTO SHORT Hz
(230V~50Hz) S.A.S. au capital de 5 000 000 € - Z.I. Les Giranaux
BP71 - 70103 Arc-Les-Gray CEDEX
RCS GRAY B 425 650 090 - SIRET 425 650 090 00011
n° T.V.A CEE FR 87 425 650 090
ES- TRADUCCIÓN DEL MANUAL ORIGINAL
5057768E
i
-20°C / +60°C
Installatión
1
Este manual se aplica a todos los motores T5 AUTO SHORT Hz cuyas versiones se encuentran disponibles en el catálogo en vigor.
Ámbito de aplicación: Los motores T5 AUTO SHORT Hz están diseñados para automatizar todos los tipos de persianas enrollables con topes
y uniones rígidas. El instalador, profesional del motor y de la automatización de la vivienda, debe asegurarse de que la instalación del producto
automatizado una vez instalado respete las normas vigentes en el país donde vaya a utilizarse y las normas sobre persianas enrollables EN 13659.
Responsabilidad: Antes de instalar y utilizar a motorización, lea atentamente este manual. Además de las instrucciones descritas en este
manual, deben respetarse las normas detalladas en el documento adjunto «Normas de seguridad». La motorización debe ser instalada por un pro-
fesional de la motorización y de la automatización de la vivienda, de conformidad con las instrucciones proporcionadas por SIMU y con la normativa
aplicable en el país donde vaya a utilizarse. Se prohíbe cualquier uso de la motorización fuera del ámbito de aplicación anteriormente descrito. Ello
conllevaría, como todo incumplimiento de las instrucciones que guran en este manual y en el documento adjunto «Normas de seguridad», la ex-
clusión de toda responsabilidad por parte de SIMU y la anulación de la garantía. El instalador debe informar a sus clientes de las condiciones de uso
y de mantenimiento de la motorización y debe entregarles las instrucciones de uso y de mantenimiento, así como el documento adjunto «Normas
de seguridad», tras la instalación de la motorización. Cualquier operación del Servicio posventa que deba realizarse en la motorización requiere la
intervención de un profesional de la motorización y la automatización de la vivienda. Para resolver cualquier duda que pudiera surgir durante la insta-
lación del motor o para obtener información adicional, póngase en contacto con uno de los agentes de SIMU o visite la página web www.simu.com.
Instrucciones que debe seguir obligatoriamente el profesional de la motorización y la automatización del hogar que
efectúe la instalación de la motorización:
- Las modalidades de instalación eléctrica se describen en las normas nacionales o en la norma IEC 60364.
- En caso de que los cables deban atravesar una pared metálica, deben protegerse y aislarse con un manguito o una vaina.
- El cable de la motorización es desmontable. Sólo personal calicado podrá efectuar la conexión del cable al motor. El
conector deberá montarse sin dañar los contactos. Se deberá garantizar la continuidad de tierra.
Consejos : Respetar una distancia mínima de 20 cm entre dos motores T5 AUTO SHORT Hz. Respetar una distancia
mínima de 30 cm entre un motor T5 AUTO SHORT Hz y un emisor Hz. La utilización de un aparato de radio con las mismas
frecuencias (433,42 MHz) puede degradar las prestaciones de nuestro equipo. (ej: casco de radio hi-). Para obtener más
informacíon sobre la compatibilidad del motor con la persiana enrollable y sus accesorios, diríjase al fabricante de la misma o
a SIMU.
Perfuração do tubo :
351 4 x Ø5 / 90°
47
min.
364
387
4
22,8
55
48*
* 35 Nm max.
120
45 24
IP44
T5 AUTO SHORT Hz 06/17
Montaje :
V.A.R
V.A.S
EASYLINK
OCTOEASY
UTILIZACIÓN OBLIGATORIA
ACERO
1
3
2
2
1
3
1
4
2
1/4

Registro de los ajustes automáticos
4
Cableado
2
Emisores compatibles
3
- Se recomienda poder cortar individualmente la
alimentación de cada motor.
- Fije los cables para evitar cualquier contacto con un
componente en movimiento.
- Si el motor esta a la intemperie y el cable de alimenta-
ción es de tipo H05-VVF, instale el cable en un conducto
resistente a los rayos UV, como una canaleta.
1 : El emisor Mural Hz 1/5 canales/Memory Hz
2 : El emisor Móvil Hz 1/5 canales
3 : Emisores Hz /Color Multi/Timer Multi/Timer Easy
4 : Sensor Sol Hz
Emplazamiento de la tecla PROG en los emisores Hz
Alejar los emisores de todas la supercies metálicas que pudieran
resultar nocivas para su buen funcionamiento (pérdida de alcance).
(12 Emisores Máximo por motor)
2 3 4
1
PE
L
NT5 AUTO SHORT Hz
230V~50Hz
Marrón
Verde /
Amarillo
Azul
3 4
2/4
4.3- Validación de los ajustes automáticos:
>>
ON
2s
1A2
aOK 4.3
OK 4.3
b
>> >>
>> >>
>>
>> >>
4.1- Modo de programacion :
- Encender el motor.
- Pulsar simultáneamente en las teclas "Subida" y "Descenso" de un emisor Hz. El
motor efectúa una rotación de 0,5 segundo en un sentido y luego en el otro.
Este emisor acciona ahora el motor en modo de pulsación momentánea. Pasar a la
etapa 4.2.
1- Pulsar simultáneamente en las teclas "Bajada" y "Subida" de un emisor
Hz. El motor efectúa una rotación de 0,5 segundo en un sentido y luego en
el otro.
2- Pulsar 2 segundos en la tecla "Stop". El motor efectúa una rotación de 0,5
segundo en un sentido y luego en el otro.
La programacion esta concluida. Pasar a la etapa 5.
4.2- Conguración del sentido de rotación :
Pulsar en la tecla "Subida" del emisor :
Si la instalación consta de varios motores, sólo un motor debe estar alimentado durante las operaciones del
capítulo 4.1. con objeto de evitar interferencias con los demás motores durante la programación.
a- Si el eje gira en el sentido "Subida", pasar a la etapa 4.3.
b- Si el eje gira en el sentido "Descenso", invertir el sentido de rotación pulsando en la tecla "Stop" durante al menos 3 segundos. El
motor conrma la modicación mediante una rotación de 0,5 segundo en un sentido y luego en el otro. Pasar a la etapa 4.3.

3/4
Si no quiere usar este emisor como control de maniobra individual :
- Cortar la corriente minimente 2 segundos.
- Repetir la operación 4.1* con un nuevo emisor y despues pasar directamente a §5.
* En este caso el motor functionara durante medio segundo en cada sentido, esto querra decir que la progra-
mación de los nales de carrera esta realizada.
Programación del primero punto de mando individual
5
Programación de un nuevo punto de mando (individual, grupo o general)
6
Memorizar, programar y Supresión de una posición intermedia
7
>>
1
PROG 1s.
- Pulsar aproximadamente 1 segundo en la tecla PROG, girando
entonces el motor 0,5 segundo en un sentido y luego en otro.
El emisor está programado y acciona el motor en modo de pulsa-
ción permanente.
Esta operación no puede efectuarse hasta que el emisor haya realizado la operación 4.1.
>>
2
1
PROG < 1s.
>>
1
PROG ≥ 3s.
2
6.2- Validar la operación desde el nuevo emisor a programar :
- Pulsar 1 segundo aproximadamente en la tecla PROG del nuevo
emisor. El motor gira 0,5 segundo en un sentido y luego en otro.
6.1- Abrir la memoria del motor desde el emisor de accionamiento
individual :
- Pulsar aproximadamente 3 segundos en la tecla PROG del emisor
de accionamiento individual. El motor gira 0,5 segundo en un sentido
y luego en otro.
- Si el nuevo punto de mando es un emisor de grupo: repetir las operaciones 6.1 y 6.2. para cada motor del grupo.
- Si el nuevo punto de mando es un emisor general: repetir las operaciones 6.1 y 6.2 para cada motor de la instalación.
- Para suprimir un emisor de la memoria del motor: efectuar las operaciones 6.1 desde el emisor de mando individual y la
operación 6.2 desde el emisor a suprimir.
5s
Memorizar :
- Maniobarar el motor hasta la posi-
ción deseada.
- Pulsar en la tecla "Stop" durante
5s. El motor gira 0,5s en un senti-
do luego y en el otro.
0,5s
Programar :
- Pulsar en la tecla "Stop"
durante 0,5s. El motor
gira y se colocar a la
posición intermedia me-
morizada.
Supresión de una posición intermedia:
- Maniobra el motor hasta la posición intermedia. Pulsar mas de 5 segundos en la tecla "Stop", la posición intermedia
quedará suprimida.

4/4
Despuer de la operación 1, si no efectuamos ninguna operación antes de 2 segundos, el motor efectuara de
nuevo una breve rotación en un sentido y despues en el otro sin que el sentido de giro del motor se modique.
5s
1
2s
2s
2
No posicionar el motor sobre los nales de carrera de subida o bajada.
1 - Presionar al mismo tiempo las teclas "Subida" y "Bajada" durante 5 se-
gundos. El motor efectuará una corta rotación en un sentido y después en otro.
2 - En un plazo de 2 segundos, presionar la tecla 'Stop" durante 2 segun-
dos. El motor efectuará una corta rotación en un sentido y después en otro, de
esta manera se habrá modicado el sentido de rotación.
Modicación del sentido de rotación (en modo usuario) :
8
Anulación de la programación
9
Uso y Mantenimiento
10
- Este mecanismo no requiere ninguna operación de mantenimiento.
- Al pulsar una vez el botón ▲, el producto automatizado sube por completo.
- Al pulsar una vez el botón ▼ el producto automatizado baja por completo.
- El producto motorizado está en movimiento : pulse brevemente el botón "Stop", el producto se detiene automáticamente.
- El producto motorizado debe estar detenido, pulse 0,5s la tecla "Stop". El producto motorizado irá a la posición interme-
dia. (Para modicar o suprimir la posición intermedia, véase el capítulo §7).
Trucos y consejos de uso:
Si el producto automatizado sigue sin funcionar, póngase en contacto con un profesional de la motorización y la automati-
zación de la vivienda.
En virtud del presente documento, SIMU SAS, F-70103 GRAY declara que, en tanto que fabricante de la motorización que cubren estas instrucciones,
marcada para recibir alimentación a 230 V~50 Hz y utilizada tal y como se indica en las mismas, es conforme a las exigencias básicas de las Directivas
europeas aplicables y, en particular, la Directiva de máquinas 2006/42/CE y la Directiva de radio 2014/53/UE. El texto completo de la declaración de
conformidad en la UE se encuentra disponible en www.simu.com. Emmanuel CARMIER, director general, GRAY, 11/2016.
i
9.1 - Cortar la alimentación del receptor durante 2 segundos.
9.2 - Restablecer la alimentación del receptor durante 7 segundos.
9.3 - Cortar la alimentación del receptor durante 2 segundos.
9.4 - Restablecer la alimentación del receptor.
Si el motor esta en posición de funales de carrera (subida o baja-
da), ej motor efectuara un corto y seguido movimiento de subida
y bajada. Si no, el motor efectuara una rotación de 5 segundos en
cualquiera de los sentidos.
El motor se encuentra ahora en modo anulación de la progra-
mación.
- Pulsar más de 7 segundos en la tecla PROG del emisor de mando individual.
Mantener pulsado hasta que el motor efectúe una primera rotación de 0,5
segundo en un sentido y luego en el otro, y luego unos segundos más tarde
una segunda rotación de 0,5 segundo en ambos sentidos.
La memoria del motor está ahora completamente vacía. Efectuar de
nuevo la programación completa del motor.
OFF
2s9.19.2 9.39.47s
5s
2s
ON ONOFF
9.5- Validar la anulación del motor involucrado desde el emisor de accionamiento individual :
Si se interviene en la alimentación de varios motores, estarán todos en este modo de anulación. Es conveniente entonces separar
todos los motores no involucrados por esta anulación efectuando un accionamiento desde su emisor de mando individual.
PROBLEMAS
El producto automatizado no funciona
POSIBLES CAUSAS
La motorizaci
ón esta en térmico.
SOLUCIONES
Espere a que la motorizaci
ó
n se enfrie.
PROG >7s
2s 7s
Other manuals for T5 AUTO SHORT Hz
1
Table of contents
Languages:
Other Simu DC Drive manuals

Simu
Simu DMI5 Hz User manual

Simu
Simu Autosun 2 T3.5 EHz DC User manual

Simu
Simu T5 AUTO+JOB Series User manual

Simu
Simu T3.5EBHz User manual

Simu
Simu T5E-SP Hz User manual

Simu
Simu T813/8 Repair manual

Simu
Simu T3.5EBHz User manual

Simu
Simu T845/10 K User manual

Simu
Simu T5 AUTOSHORT BHz User manual

Simu
Simu DMI 6 User manual