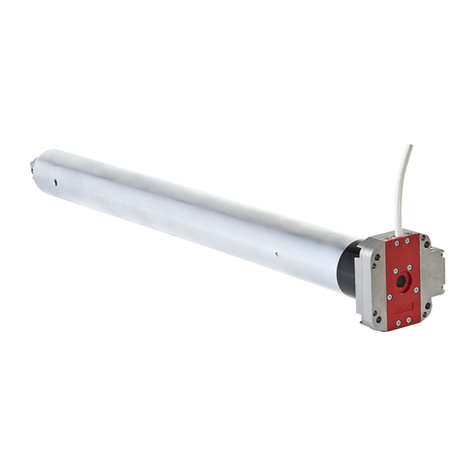
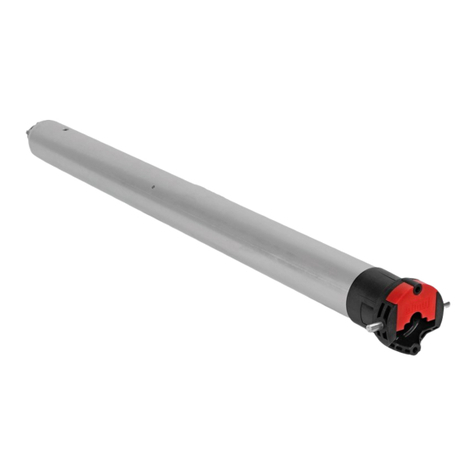
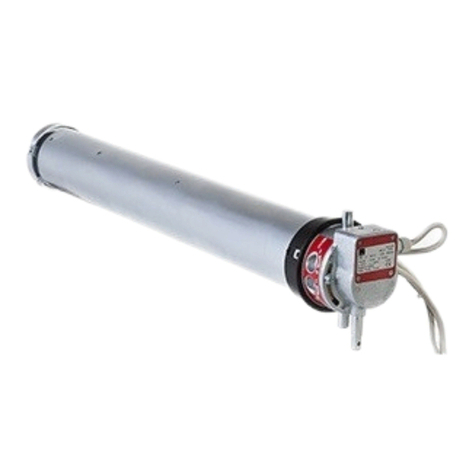
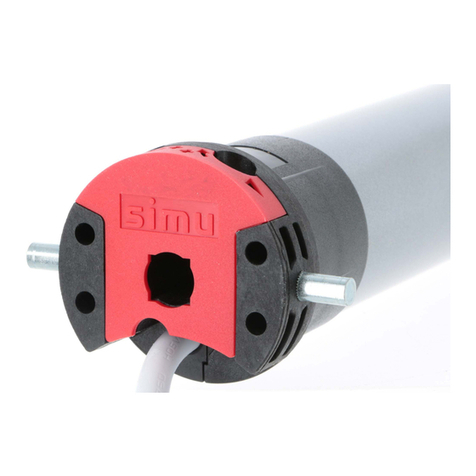
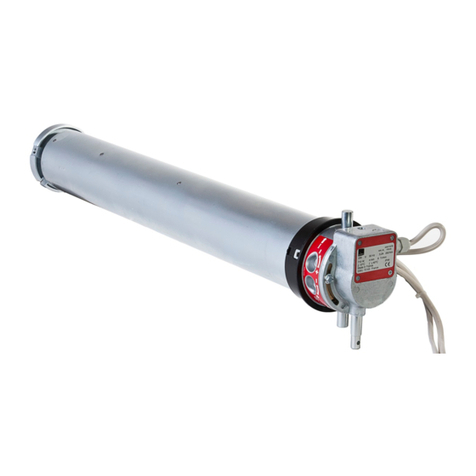
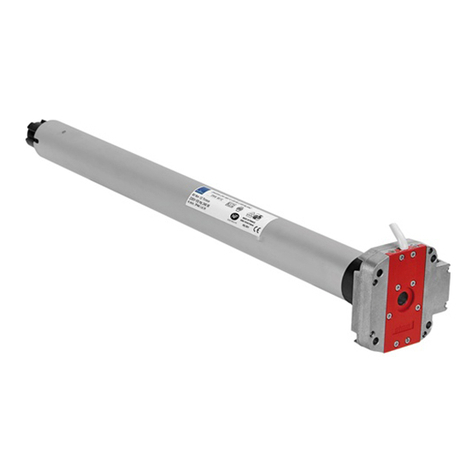
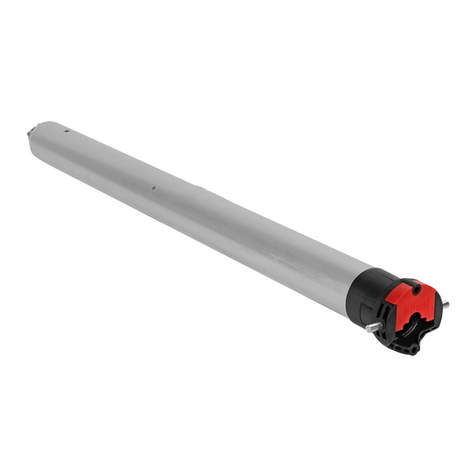
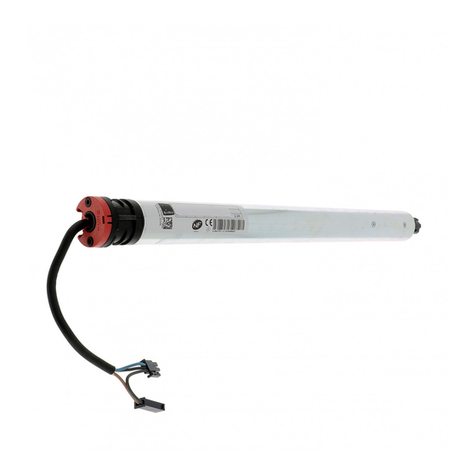
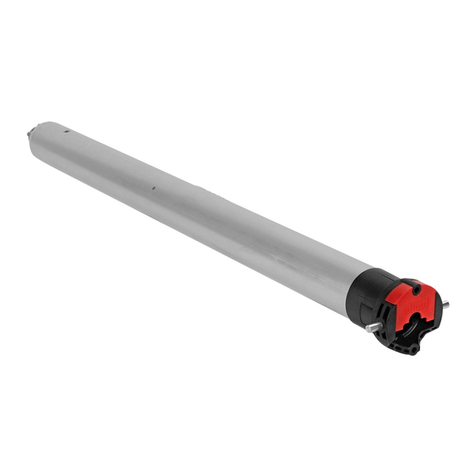
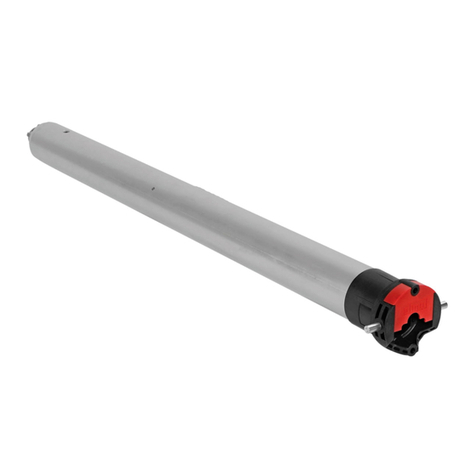
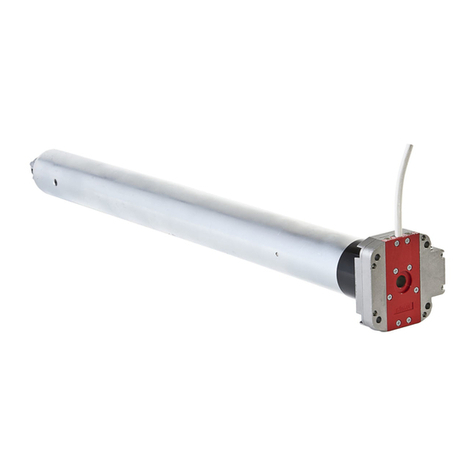
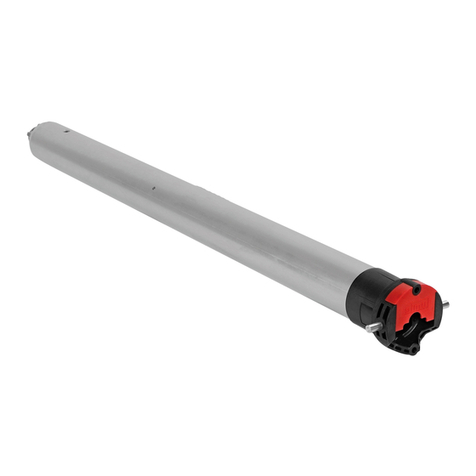
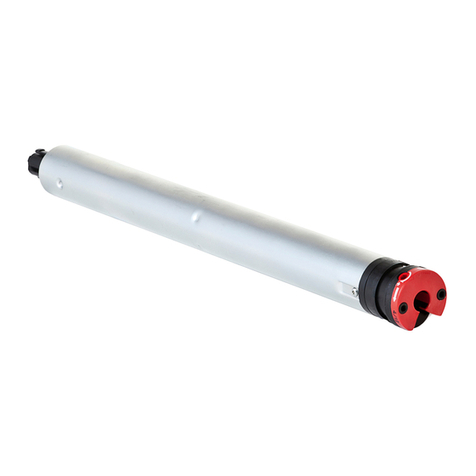
Simu T3.5DC ESP HZ User manual

FR
SIMU S.A.S. au capital de 5 000 000 € - Z.I. Les Giranaux - 70100 ARC-LÈS-GRAY - FRANCE - RCS VESOUL B 425 650 090 - SIRET 425 650 090 00011 - n° T.V.A CEE FR 87 425 650 090
CONSIGNES DE SÉCURITÉ 5151225A
FR - NOTICE ORIGINALE
Ces consignes de sécurité complètent la Notice de la motorisation. Pour contacter un interlocuteur SIMU,
aller sur www.simu.com. Transmettre ces consignes à l’utilisateur après l’installation.
I. CONSIGNES DE SÉCURITÉ POUR L’INSTALLATION DE LA MOTORISATION. MISE EN GARDE :
Consignes importantes de sécurité. Suivre toutes les consignes car une installation incorrecte peut conduire
à des blessures graves. La Notice de la motorisation jointe à ce document précise le domaine d’application
de la motorisation, le diamètre minimal du tube pour les motorisations tubulaires, les informations
nécessaires au montage de la motorisation, à sa xation, à sa connexion au réseau d’alimentation
électrique, à la façon de régler les dispositifs de commande, ainsi que les opérations de maintenance liées
à la motorisation elle-même. Utiliser uniquement des accessoires (roue, couronne, support, alimentation
très basse tension) référencés par SIMU et des dispositifs de commande compatibles avec la motorisation.
S’assurer que la masse et la dimension du produit à motoriser sont compatibles avec le couple assigné
et la durée de fonctionnement assignée de la motorisation. Ces informations sont disponibles auprès
de votre interlocuteur SIMU. Avant d’installer la motorisation, enlever toutes les cordes inutiles et mettre
hors service tout équipement qui n’est pas nécessaire pour un fonctionnement motorisé. L’organe de
manoeuvre d’un interrupteur sans verrouillage doit être en vue directe de la partie entraînée, mais éloigné
des parties mobiles. Il doit être installé à une hauteur minimale de 1.5m et non accessible au public. Les
dispositifs de commande xes doivent être clairement visibles après l’installation. Un dispositif de coupure
omnipolaire approprié doit être installé en amont dans l’installation électrique selon les règles de câblage.
Si le câble d’alimentation est endommagé, il doit être remplacé par un câble identique. Si le câble n’est pas
démontable, retourner la motorisation au SAV pour éviter tout danger. Si la motorisation est équipée d’un
dispositif de dépannage manuel, installer l’organe de manoeuvre de ce dispositif à une hauteur inférieure à
1m80. Pour les motorisations de stores de projection dont la barre de charge du store serait à une hauteur
< 2 m, maintenir une distance de 0,4 m entre le store projeté et tout objet xe.
II. CONSIGNES DE SÉCURITÉ POUR L’UTILISATION ET LA MAINTENANCE DE LA MOTORISATION.
MISE EN GARDE : Instructions importantes de sécurité. Il est impératif de suivre ces instructions pour
assurer la sécurité des personnes. Conserver ces instructions. MISE EN GARDE : La motorisation doit
être déconnectée de l’alimentation électrique lors d’opération de nettoyage, de maintenance ou lors de
remplacement de pièces. Cet appareil peut être utilisé par des enfants âgés d’au moins 8 ans et par des
personnes ayant des capacités physiques, sensorielles ou mentales réduites ou dénuées d’expérience
ou de connaissance, s’ils (si elles) sont correctement surveillé(e) s ou si des instructions relatives à
l’utilisation en toute sécurité de l’appareil ont été données et si les risques encourus ont été appréhendés.
Les enfants ne doivent pas jouer avec l’appareil. Le nettoyage et l’entretien par l’usager ne doivent pas
être eectués par des enfants sans surveillance. Ne pas laisser les enfants jouer avec les dispositifs de
commande xes. Mettre les dispositifs de télécommande hors de portée des enfants. Vérier fréquemment
l’installation pour déceler tout mauvais équilibrage ou tous signes d’usure ou de détérioration des câbles
et des ressorts. Ne pas utiliser si une réparation ou un réglage est nécessaire. Surveiller l’appareil pendant
qu’il est en mouvement et éloigner les personnes jusqu’à ce qu’il soit complètement déroulé. Dans le cas
d’une motorisation équipée d’un câble noir de type H05-RRF pour des installations extérieures, le câble ne
peut être remplacé que par un câble identique fourni par le fabricant de la motorisation. Dans le cas d’une
motorisation alimentée par une alimentation amovible très basse tension, utiliser uniquement l’alimentation
fournie avec la motorisation. Dans le cas de motorisation équipée d’un dispositif de dépannage manuel, les
conditions d’utilisation de celui-ci sont indiquées dans la Notice de la motorisation. LpA ≤70 dB(A).
1/8

FR
US Pat N° US6794778, US6867565, US7726379, US7852765, US7860481, US8189620, US9702190, US10017987
-20°C / +60°C
i
FR- T3.5DC ESP HZ (12VDC)
5151225A
FR - NOTICE ORIGINALE
Cette notice s’applique à toutes les motorisations T3.5DC ESP HZ dont les déclinaisons sont disponibles au
catalogue en vigueur.
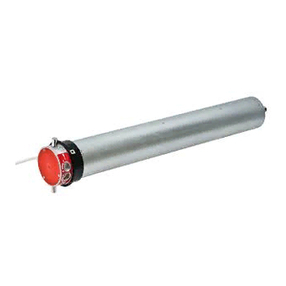
Domaine d’application : Les motorisations T3.5DC ESP HZ sont conçues pour motoriser des stores verticaux
(lambrequin, screen, à projection). L’installateur, professionnel de la motorisation et de l’automatisation de l’habitat
doit s’assurer que l’installation du produit motorisé une fois installé respecte les normes en vigueur dans le pays de
mise en service comme notamment la norme sur les stores d’extérieur EN 13561.
Responsabilité : Avant d’installer et d’utiliser la motorisation, lire attentivement cette notice. Outre les
instructions décrites dans cette notice, respecter également les consignes détaillées dans le document
joint Consignes de sécurité. La motorisation doit être installée par un professionnel de la motorisation et de
l’automatisation de l’habitat, conformément aux instructions de SIMU et à la réglementation applicable dans le
pays de mise en service. Toute utilisation de la motorisation hors du domaine d’application décrit ci-dessus est
interdite. Elle exclurait, comme tout irrespect des instructions gurant dans cette notice et dans le document joint
Consignes de sécurité, toute responsabilité et garantie de SIMU. L’installateur doit informer ses clients des
conditions d’utilisation et de maintenance de la motorisation et doit leur transmettre les instructions d’utilisation et
de maintenance, ainsi que le document joint Consignes de sécurité, après l’installation de la motorisation. Toute
opération de Service Après-Vente sur la motorisation nécessite l’intervention d’un professionnel de la motorisation
et de l’automatisation de l’habitat. Si un doute apparaît lors de l’installation de la motorisation ou pour obtenir des
informations complémentaires, consulter un interlocuteur SIMU ou aller sur le site www.simu.com.
2/8
PRÉSENTATION DU SYSTÈME
i
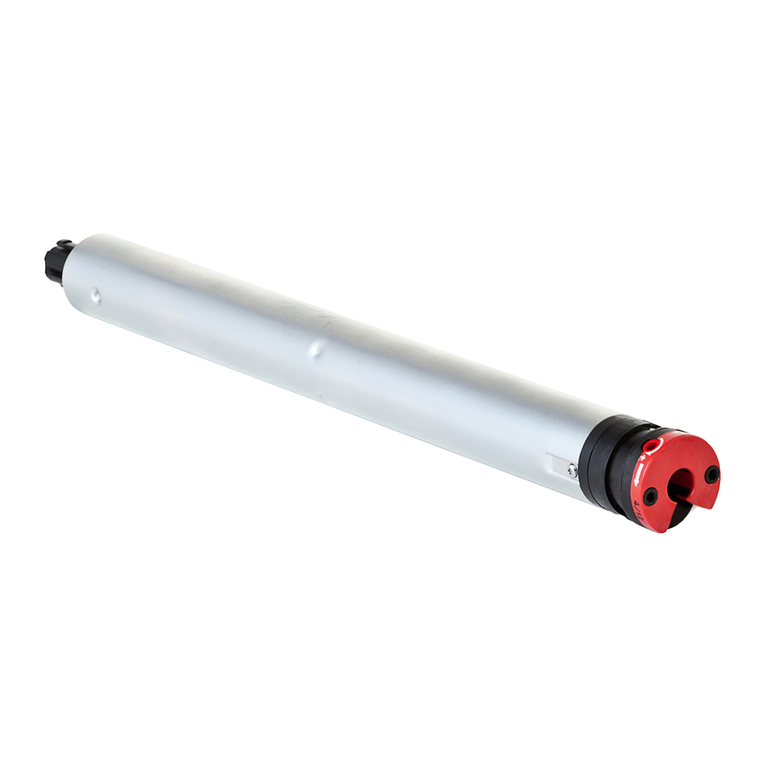
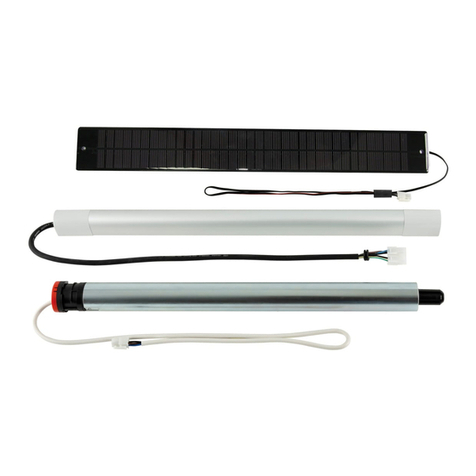
Le moteur T3.5DC ESP HZ fait partie d’un système autonome fonctionnant à l’énergie solaire dont les
références sont disponibles au catalogue en vigueur. L’énergie électrique fournie par le panneau solaire
est stockée dans la batterie du système. Ce système est prévu pour fonctionner dans les pays suivants :
France, Allemagne, Grande Bretagne, Belgique, Pays Bas, République Tchèque, Pologne, Irlande, Espagne,
Portugal, Italie, Grèce, Suisse, Luxembourg, Danemark, Autriche, Hongrie, États-Unis (hors Alaska), Australie,
et Turquie. Pour toute autre zone, veuillez nous contacter.
Le système est composé de :
1- Moteur T3.5DC ESP HZ (12V); 3, 6 ou 10 Nm.
2- Panneau solaire -12V : «3.2W SOLAR PANEL» ; 3,2W/
Voc : 21V/ Isc : 196 mA.
3- Batterie NiMh - 12V/ 2,2Ah :
- “Naked battery autosun 2 »
ou
- “Batterie coque equip.”
En option :
4 - Chargeur de batterie réf.: 9020638. Permet d’eectuer
une recharge rapide de la batterie du système ( 3).
5- Support panneau solaire réf.: 9019683
6- Rallonge pour panneau solaire 5 m réf. : 9019722
iLe moteur T3.5DC ESP HZ est compatible avec tous les émetteurs SIMU Hz (12 émetteurs max. / 3
capteurs max. par moteur). Se référer aux notices correspondantes.
i• Le poids du produit motorisé doit respecter les abaques déterminés pour chacun des moteurs.
• Ces préconisations sont déterminées à partir de données moyennes annuelles et pour une utilisation
du store à raison de 2 cycles / jour (1 cycle = 1 montée et 1 descente). Attention, 1 cycle maximum pour
moteur 10 Nm en cas d’orientation Nord. Pour les années exceptionnelles, se servir du chargeur ( 4)
pour recharger la batterie du système.
• Le panneau solaire doit toujours être positionné de manière à être exposé le plus possible au rayonnement
du soleil.
4
9020638
9019722
6
+ +
9019683
5
1
2
3
SIMU S.A.S. au capital de 5 000 000 € - Z.I. Les Giranaux - 70100 ARC-LÈS-GRAY - FRANCE - RCS VESOUL B 425 650 090 - SIRET 425 650 090 00011 - n° T.V.A CEE FR 87 425 650 090

FR
INSTALLATION
1
Consignes à suivre impérativement par le professionnel de la motorisation et de l’automatisation de
l’habitat réalisant l’installation de la motorisation :
- Les modalités d’installation électrique sont décrites par les normes nationales ou par la norme IEC 60364.
- Les câbles traversant une paroi métallique doivent être protégés et isolés par un manchon ou un fourreau.
Attacher les câbles pour éviter tout contact avec une partie en mouvement. Les connecteurs doivent être
protégés de la pluie, à l’intérieur du core du store.
- Le câble du moteur n’est pas démontable. S’il est endommagé, retourner la motorisation au SAV.
Préconisations : Respecter une distance minimum de 20 cm entre deux moteurs T3.5DC ESP HZ. Respecter
une distance minimum de 30 cm entre un moteur T3.5DC ESP HZ et un émetteur Hz. L’utilisation d’un appareil
radio utilisant les mêmes fréquences (433,42MHz) peut dégrader les performances de ce produit (ex. : casque
radio Hi-Fi). Utiliser des stores avec une toile antistatique.
Se référer à la notice 5117585/5139459 pour l’installation du panneau solaire.
Se référer à la notice 5136806/5144624 pour l’installation et la charge de la batterie. Charger la
batterie avant utilisation avec le chargeur réf. : 9020638
Perçage du tube :
T3.5DC ESP HZ
ØB
A
C
D
mm
Ø min.
A ØB C D L1 L2
L2
L1
29
Ø38,2
IP44 03/23 • 06/18 • 10/12 37 433 4.2 8 5.5 487 470
Montage du moteur :
2
1,2
1
3
4
PLASTITE FXS N7 \ 7X12 ZING
(5005970)
Ø4 x 10 / 120°
ACIER
3/8
RÉGLAGE DES FINS DE COURSE
2
Si l’installation comporte plusieurs moteurs, un seul moteur doit être
alimenté pendant les opérations du chapitre 2.1, ceci pour éviter les
interférences avec les autres moteurs lors de la programmation.
2.1- Mode apprentissage :
1- Connecter la batterie 12V au moteur.
2- Ensuite, connecter le panneau solaire 12V au moteur. Passer à l’étape suivante.
3- Appuyer simultanément sur les touches « Montée » et « Descente »
d’un émetteur Hz. Le moteur eectue une rotation de 0,5 seconde
dans un sens puis dans l’autre.
Cet émetteur commande maintenant le moteur en mode instable.
Passer à l’étape 2.2.
2.2- Conguration du sens de rotation :
Appuyer sur la touche « Montée » de l’émetteur :
a- Si l’axe tourne dans le sens montée, passer à l’étape 2.3.
b- Si l’axe tourne dans le sens descente,
inverser le sens de rotation en
appuyant sur la touche « Stop »
pendant au moins 3 secondes. Le
moteur conrme la modication par
une rotation de 0,5 seconde dans
un sens puis dans l’autre. Passer à
l’étape 2.3.
1
>>
3
a
b
OK § 2.3
§ 2.3
3 s
>>>>>>
>> >>
>>
1
2

FR
2.3- Réglage des ns de course :
Réglage semi-automatique pour les stores équipés de butées hautes :
+2 s
> 2 s
312 4
1- Positionner le moteur sur le point d’arrêt bas souhaité à l’aide des touches « Montée » et « Descente ». (Un
appui supérieur à 2 secondes sur une touche « Montée » ou « Descente » entraîne un mouvement continu
du store. Appuyer sur la touche « Stop » pour immobiliser le store sur la position basse souhaitée).
2- Appuyer simultanément sur les touches « Stop » et « Montée » pour mémoriser le point d’arrêt bas. Le
moteur se met automatiquement en rotation en montée.
3- (facultatif) Appuyer sur « Stop » pour immobiliser le moteur.
4- Appuyer 2 secondes sur la touche « Stop » pour valider le réglage. Le moteur eectue une rotation de 0,5
seconde dans un sens puis dans l’autre. L’opération est terminée. Passer à l’étape 3.
Réglage manuel pour les stores sans butée haute :
34 512
+2 s
> 2 s
67
1- Positionner le moteur sur le point d’arrêt bas souhaité à l’aide des touches « Montée » et « Descente ». (Un
appui supérieur à 2 secondes sur une touche « Montée » ou « Descente » entraîne un mouvement continu
du store. Appuyer sur la touche « Stop » pour immobiliser le store sur la position basse souhaitée).
2- Appuyer simultanément sur les touches « Stop » et « Montée » pour mémoriser le point d’arrêt bas. Le
moteur se met automatiquement en rotation en montée.
3- Appuyer sur « Stop » pour immobiliser le moteur.
4- Positionner le moteur sur le point d’arrêt haut souhaité à l’aide des touches « Montée » et « Descente ».
5- Appuyer simultanément sur les touches « Stop » et « Descente » pour mémoriser le point d’arrêt haut. Le
moteur se met automatiquement en rotation en descente .
6- (Facultatif) Appuyer sur « Stop » pour immobiliser le moteur.
7- Appuyer 2 secondes sur la touche « Stop » pour valider le réglage. Le moteur eectue une rotation de 0,5
seconde dans un sens puis dans l’autre. L’opération est terminée. Passer à l’étape 3.
Si vous souhaitez programmer un autre émetteur que celui utilisé jusqu’à présent comme point de
commande du moteur :
- couper l’alimentation du moteur (2 secondes minimum (batterie et panneau solaire)).
- reprendre l’opération 2.1* avec un nouvel émetteur avant de passer au chapitre 3.
*Alamise soustension le moteureectue une courterotation dans unsens puisdans l’autre, cequi
indiquequelesnsdecoursesontdéjàréglés.
Cette opération ne peut être eectuée que depuis l’émetteur ayant eectué l’opération 2.1-3.
- Appuyer environ 1 seconde sur la touche « PROG »
de l’émetteur. Le moteur eectue une rotation de 0,5
seconde dans un sens puis dans l’autre. L’opération est
terminée.
Votre émetteur est maintenant programmé et commande le moteur en mode stable.
PROGRAMMATION DU PREMIER POINT DE COMMANDE INDIVIDUEL
3
1
PROG 1 s
>>
4/8

FR
4.1- Ouvrir la mémoire du moteur depuis l’émetteur de
commande individuelle :
- Appuyer environ 3 secondes sur la touche « PROG » de
l’émetteur. Le moteur eectue une rotation de 0,5 seconde
dans un sens puis dans l’autre.
4.2- Valider l’opération depuis le nouvel émetteur à
programmer :
- Appuyer environ 1 seconde sur la touche « PROG » du
nouvel émetteur. Le moteur eectue une rotation de 0,5
seconde dans un sens puis dans l’autre. L’opération est
terminée.
- Si votre nouveau point de commande est une commande de groupe : répéter les opérations 4.1 et 4.2 pour
chaque moteur du groupe.
- Si votre nouveau point de commande est une commande générale : répéter les opérations 4.1 et 4.2 pour
chaque moteur de l’installation.
-Poursupprimerunémetteurdelamémoire dumoteur:Eectuerlesopérations4.1depuisl’émetteur de
commande individuelle et l’opération 4.2 depuis l’émetteur à supprimer.
PROGRAMMATION D’UN NOUVEAU POINT DE COMMANDE (INDIVIDUEL, GROUPE OU GÉNÉRAL)
4
5.1- Ouvrir la mémoire du moteur depuis l’émetteur de
commande Individuelle :
- Appuyer environ 3 secondes sur la touche « PROG »
de l’émetteur. Le moteur eectue une rotation de 0,5
seconde dans un sens puis dans l’autre.
5.2- Valider l’opération depuis l’automatisme à
programmer :
- Appuyer environ 1 seconde sur la touche « PROG ». Le
moteur eectue une rotation de 0,5 seconde dans un
sens puis dans l’autre. L’opération est terminée.
Si votre automatisme doit contrôler un groupe de moteur : Répéter les opérations 5.1 et 5.2 pour chaque
moteur du groupe.
Préconisations concernant l’emploi d’un automatisme : en cas d’échange ou de suppression de
l’automatisme, il est impératif de le supprimer de la mémoire de tous les moteurs dans lesquels il était
programmé. Eectuer l’opération 5.1 depuis l’émetteur de commande individuelle et l’opération 5.2
depuis l’automatisme à supprimer.
PROGRAMMATION D’UN AUTOMATISME
5
1
PROG ≥ 3 s
>>
PROG < 1 s
2
>>
1
PROG ≥ 3 s
>>
2PROG < 1 s
>>
Enregistrement :
1- Positionner le moteur sur
la position intermédiaire
désirée.
2- Appuyer 5 s sur la touche
« Stop ». Le moteur eectue
une rotation de 0,5 s dans
un sens puis dans l’autre.
ENREGISTREMENT / COMMANDE / SUPPRESSION DE LA POSITION INTERMÉDIAIRE
6
Commande :
- Appuyersurlatouche
« Stop » pendant
0,5 s. Le moteur
rejoint la position
intermédiaire.
Suppression : Positionner le moteur sur la position intermédiaire. Appuyer 5 s sur la touche « Stop », le
moteur eectue une rotation de 0,5 s dans un sens puis dans l’autre. La position intermédiaire est supprimée.
+5 s
12
5/8

FR
Cette fonction permet d’augmenter ou de diminuer l’eort de fermeture du store sur 3 seuils (fort-moyen-
faible).
Contacter le fabricant du store avant toute utilisation de cette fonction pour valider la compatibilité
de votre installation. Par sécurité, cette fonction est atteignable par le point de commande dans 3
cas seulement :
• Après la validation des réglages et avant l’enregistrement du premier point de commande.
• Après l’enregistrement du premier point de commande et durant les 4 cycles suivants.
• Après une simple coupure d’alimentation et durant les 4 cycles suivants.
12
++ 2 s
5 s0,5 s
3
4
1 - Placer le produit motorisé en position médiane à l’aide des touches Montée et Descente. Appuyer sur
« Stop » pour immobiliser le moteur.
2 - Pour mettre en œuvre cette fonction, faire 2 appuis successifs :
- 1er appui : Faire un appui bref et simultané sur les touches « Stop » et « Montée », sans obtenir de
rotation du moteur.
- 2eme appui : appui maintenu et simultané (>5 s) sur les touches « Stop » et « Montée », jusqu’aux
mouvements du store.
Le moteur est en mode programmation pendant 10 s uniquement. Par défaut, le moteur est positionné en
sortie d’usine sur le niveau moyen.
3 - Pour augmenter l’eort de fermeture, appuyer sur la touche « Montée » jusqu’au mouvement lent du
store : l’eort de fermeture du store est passé au seuil supérieur.
- Pour diminuer l’eort de fermeture, appuyer sur la touche « Descente » jusqu’au mouvement lent du
store : l’eort de fermeture du store est passé au seuil inférieur .
4 - Appuyer 2 s sur la touche « Stop » pour valider le réglage. Le moteur eectue une rotation de 0,5
seconde dans un sens puis dans l’autre. Le nouvel eort de fermeture est enregistré, l’opération est
terminée.
FONCTION « EFFORT DE FERMETURE »
7
Cette fonction permet de tendre la toile après chaque mouvement d’ouverture du store.
Pour activer cette fonction, régler l’angle de tension de la toile entre 11 et 180° (Pour désactiver cette
fonction régler l’angle à 0 °):
4123
5 s2s
Entre 11°et 180°
1- Positionner le moteur sur le point d’arrêt bas réglé en §2.3 à l’aide de la touche « Descente ».
2- Appuyer simultanément sur les touches « Stop » et « Montée » pendant 5 secondes. Le moteur eectue
une rotation de 0,5 seconde dans un sens puis dans l’autre.
3- Ajuster la tension de la toile à l’aide des touches « Montée » ou « Descente » (entre 11 et 180°).
4- Appuyer 2 s sur la touche « Stop » pour valider le réglage. Le moteur eectue une rotation de 0,5 seconde
dans un sens puis dans l’autre. L’opération est terminée.
Par défaut, la fonction « Back impulse » est désactivée en sortie d’usine.
FONCTION « BACK IMPULSE »
8
6/8

FR
Cette fonction permet de relâcher la tension sur la toile après la fermeture du store. Par sécurité,
cette fonction peut être activée ou désactivée par le point de commande dans 3 cas seulement :
• Après la validation des réglages et avant l’enregistrement du premier point de commande
• Après l’enregistrement du premier point de commande et durant les 4 cycles suivants.
• Après une simple coupure d’alimentation et durant les 4 cycles suivants.
Pour activer ou désactiver la fonction « Back release », la procédure est
identique:
1- Positionner le moteur sur le point d’arrêt haut réglé en §2.3 à l’aide de la touche
« Montée ».
2- Appuyer simultanément sur les touches « Stop » et « Descente » pendant 5
secondes. Le moteur eectue une rotation de 0,5 seconde dans un sens puis dans
l’autre. L’opération est terminée.
Par défaut, la fonction « back release » est désactivée en sortie d’usine.
FONCTION « BACK RELEASE »
9
12
5 s
10.1- Ré-ajustement du n de course bas:
1- Positionner le moteur sur le point d’arrêt bas réglé en §2.3 à
l’aide de la touche « Descente ».
2- Appuyer simultanément sur les touches « Montée » et
« Descente » pendant 5 secondes. Le moteur eectue une
rotation de 0,5 seconde dans un sens puis dans l’autre.
3- Aner le réglage à l’aide des touches « Descente » et
« Montée » pour obtenir la position de n de course souhaitée.
4- Appuyer 2 s sur la touche « Stop » pour valider le réglage. Le
moteur eectue une rotation de 0,5 seconde dans un sens puis dans l’autre. La nouvelle position de n de
course est mémorisée.
10.2- Ré-ajustement du n de course haut (uniquement dans
le cas d’un réglage manuel, et store sans butée haute) :
1- Positionner le moteur sur le point d’arrêt haut réglé en §2.3 à
l’aide de la touche « Montée ».
2- Appuyer simultanément sur les touches « Montée » et
« Descente » pendant 5 secondes. Le moteur eectue une
rotation de 0,5 seconde dans un sens puis dans l’autre.
3- Aner le réglage à l’aide des touches « Montée » et
« Descente » pour obtenir la position de n de course
souhaitée.
4- Appuyer 2 s sur la touche « Stop » pour valider le réglage. Le moteur eectue une rotation de 0,5 seconde
dans un sens puis dans l’autre. La nouvelle position de n de course est mémorisée.
RÉ-AJUSTEMENT DES POSITIONS DE FIN DE COURSE
10
4123
5 s
2 s
4123
5 s
2 s
7/8

FR
Durant les opérations de ce chapitre (§11), ne pas travailler sur plusieurs moteurs simultanément.
>>>
11.1 11 .2 11.3
7s
11.4 11 .5
2s 2s
5 s
12V - 2.2Ah 12V - 2.2Ah 12V - 2.2Ah 12V - 2.2Ah 12V - 2.2Ah
11.1- Déconnecter le panneau solaire du moteur T3.5DC ESP HZ
11.2- Déconnecter la batterie du moteur T3.5DC ESP HZ pendant 2 secondes.
11.3- Connecter la batterie au moteur pendant 7 secondes.
11.4- Déconnecter la batterie du moteur pendant 2 secondes.
11.5- Rétablir la connexion. Si le moteur se trouve en position de n de course (haute ou basse), il eectue une
brève rotation dans les deux sens. S’il se trouve dans une autre position, il eectue une rotation de 5 secondes
dans un sens quelconque. Le moteur est maintenant en mode “annulation de la programmation”.
Passer à l’étape 11.6
11.6- Ensuite valider l’annulation de la programmation du moteur concerné depuis l’émetteur de
commande individuelle ou depuis un nouvel émetteur :
- Appuyer plus de 7 secondes sur la touche
« PROG » de l’émetteur. Maintenir l’appui
jusqu’à ce que le moteur eectue une première
rotation de 0,5 seconde dans un sens puis
dans l’autre, puis quelques secondes plus
tard une seconde rotation de 0,5 seconde
dans les deux sens.
La mémoire du moteur est maintenant complètement vidée. Vous pouvez reconnecter le panneau solaire,
puiseectuerdenouveaulaprogrammationcomplètedumoteur(§2).
ANNULATION DE LA PROGRAMMATION
11
1
PROG > 7 s
11.6
2 s
7 s
>>
- Cette motorisation ne nécessite pas d’opération de maintenance.
- Appuyer sur la touche ▲du point de commande pour faire monter le produit motorisé.
- Appuyer sur la touche ▼ du point de commande pour faire descendre le produit motorisé.
-
Quand le produit motorisé est en cours de mouvement, un appui bref sur la touche « Stop » arrête le produit motorisé.
-
Quand le produit motorisé est à l’arrêt, un appui bref sur la touche « Stop » commande le produit motorisé sur la
position intermédiaire programmée. (Pour modier ou supprimer une position intermédiaire voir le chapitre §6).
Astuces et conseils d’utilisation :
CONSTATS CAUSES POSSIBLES SOLUTIONS
Le produit motorisé
ne fonctionne pas.
La pile du point de commande est faible. Contrôler si la pile est faible et
la remplacer si besoin.
La batterie du système est faible. Recharger la batterie
(voir notice 5136806/5144624)
La réception radio est altérée par des équipements
radio-externes (par exemple un casque hi-)
Arrêter les équipements radio
alentours.
Si le produit motorisé ne fonctionne toujours pas, contacter un professionnel de la motorisation et de
l’automatisation de l’habitat.
UTILISATION ET MAINTENANCE
12
Par la présente, SIMU SAS, 70100 ARC-LÈS-GRAY, déclare en tant que fabricant que la motorisation couverte par ces instructions et utilisée
comme indiqué dans ces instructions, est conforme aux exigences essentielles des Directives Européennes applicables et en particulier à la
Directive Machine 2006/42/EC et à la Directive Radio 2014/53/EU. Bruno STRAGLIATI, Président, ARC-LÈS-GRAY, 01/2020.
Nous nous soucions de notre environnement. Ne jetez pas votre appareil avec les déchets ménagers
habituels. Déposez-le dans un point de collecte agréé pour son recyclage.
Veiller à séparer les piles et batteries des autres types de déchets et à les recycler via le système
local de collecte.
8/8

EN
SIMU S.A.S. au capital de 5 000 000 € - Z.I. Les Giranaux - 70100 ARC-LÈS-GRAY - FRANCE - RCS VESOUL B 425 650 090 - SIRET 425 650 090 00011 - n° T.V.A CEE FR 87 425 650 090
SAFETY INSTRUCTIONS 5151225A
EN – ORIGINAL INSTRUCTIONS
These safety instructions supplement the drive Instructions. To contact a SIMU representative,
go to www.simu.com. Please give these instructions to the user after installation.
I. SAFETY INSTRUCTIONS FOR DRIVE INSTALLATION. WARNING: Important safety
instructions. Follow all instructions, since incorrect installation can lead to severe injury.
Inspect all parts prior to installation. The drive Instructions enclosed with this document sets
out the elds of application of the drive, the minimum tube diameter for tubular drives, the
information necessary for mounting and securing the drive, connecting it to the power supply
and setting the controls, and the maintenance operations relating to the drive itself. Only
use SIMU accessories (wheel, ring, mount, very low voltage power supply) and controls
compatible with the drive. Ensure that the weight and dimension of the product to be
motorised are compatible with the rated torque and rated operating time. These information
are available from your SIMU contact. Before installing the drive, remove any unnecessary
cords and disable any equipment not needed for powered operation. The actuating member
of a biased-o switch is to be located within direct sight of the driven part but away from
moving parts. It is to be installed at a minimum height of 1,5 m and not accessible to the
public. Fixed controls shall be clearly visible after installation. A suitable multi-pole switching
device must be incorporated upstream in the xed wiring in accordance with the wiring rules.
If the supply cord is damaged, it must be replaced by an identical cord. If the cord is not
removable, return the drive to after sales department to avoid a hazard. If the drive is tted
with a manual release, install its actuating member at a height less than 1,8 m. For drive for
projecting awnings with an edge at a height <2m from the ground or any other access level,
maintain a horizontal distance of at least 0.4 m between the fully unrolled driven part and
any permanent object.
II. SAFETY INSTRUCTIONS FOR DRIVE USE AND MAINTENANCE. WARNING:
Important safety instructions. It is important for the safety of persons to follow these
instructions. Save these instructions. WARNING: The drive shall be disconnected from
its power source during cleaning, maintenance and when replacing parts. This appliance
can be used by children aged from 8 years and above and persons with reduced physical,
sensory or mental capabilities or lack of experience and knowledge if they have been given
supervision or instruction concerning use of the appliance in a safe way and understand the
hazards involved. Children shall not play with the appliance. Cleaning and user maintenance
shall not be made by children without supervision. Do not allow children to play with xed
controls. Keep remote controls away from children. Frequently examine the installation for
imbalance and signs of wear or damage to cables and springs. Do not use if repair or
adjustment is necessary. Watch the motorised installation while it is moving and keep people
away until the motorised installation is fully extended. For drives tted with a black H05-RRF
cable for outdoor installations, the cord must only be replaced by an identical cord supplied
by manufacturer of the drive. For drives powered by a very low voltage removable power
supply, only the power supply provided with the drive must be used. For drives tted with
a manual release, operating conditions are given in the drive Instructions. LpA ≤70 dB(A).
1/8

EN
US Pat N° US6794778, US6867565, US7726379, US7852765, US7860481, US8189620, US9702190, US10017987
-20°C / +60°C
i
EN- T3.5DC ESP HZ (12VDC)
5151225A
EN- ORIGINAL INSTRUCTIONS
These instructions apply to all T3.5DC ESP HZ drive, the dierent versions of which are available in the current
catalogue.
Field of application: The T3.5DC ESP HZ drive is designed to motorise vertical awnings (valance, screen,
and projection). The installer, who must be a motorisation and home automation professional, must ensure
that the drive product is installed in accordance with the standards in force in the country in which it is installed
such as EN 13561 relating to outdoor screens and awnings.
Liability: Before installing and using the drive, please read operating and installation guide carefully.
Please read these instructions carefully before installing and using the drive. In addition to following
the instructions given in this guide, the instructions detailed in the attached Safety instructions document
must also be observed. The drive must be installed by a motorisation and home automation professional,
according to instructions from SIMU and the regulations applicable in the country in which it is commissioned.
It is prohibited to use the drive outside the eld of application described above. Such use, and any failure to
comply with the instructions given in this guide and in the attached Safety instructions document, absolves
SIMU of any liability and invalidates the warranty. The installer must inform its customers of the operating and
maintenance conditions for the drive and must provide them with the instructions for use and maintenance, and
the attached Safety instructions document, after installing the drive. Any After-Sales Service operation on
the drive must be performed by a motorisation and home automation professional. If in doubt when installing
the drive, or to obtain additional information, contact a SIMU adviser or go to the website www.simu.com.
2/8
SYSTEM PRESENTATION
i
The T3.5DC ESP HZ motor is part of an autonomous system powered by solar energy which references
are available in the current catalogue. The electrical energy supplied by the solar panel is stored inside the
battery of the system. This system was developed to run into the following countries: France, Germany,
England, Belgium, Netherlands, Czech Republic, Poland, Ireland, Spain, Portugal, Italy, Greece, Switzerland,
Luxembourg, Denmark, Austria, Hungary, USA (excluding Alaska), Australia and Turkey. For other countries,
please contact us.
System components:
1- 12V motor T3.5DC ESP HZ (12V) 3, 6 or 10 Nm.
2- Solar panel-12V: « 3.2W SOLAR PANEL »; 3,2W /
Voc: 21V / Isc : 196 mA.
3- Battery NiMh - 12V: 2.2Ah:
-“Naked battery autosun 2”
Or
-”Batterie coque equip.”
In option:
4- Battery charger ref. 9020638. Allows rapid recharging of
the battery of the system ( 3).
5- Solar Panel bracket ref.: 9019683
6- Extension cable 5m ref.: 9019722
iThe T3.5DC ESP HZ motor is compatible with all Simu Hz transmitters ((12 transmitters max. / 3 sensors
max. per motor). Please refer to the corresponding.
i• The weight of motorised product must comply with the charts determined for the motors.
• These consign are based on average annual data and for a motorised product used for 2 cycles/day
(1 cycle = 1 up and 1 down movement). Caution 1 cycle maximum for the 10 Nm motor when North
orientation (or South orientation for Australia only). In exceptional years, use the battery charger to
recharge the battery of the system.
• The solar panel should always be placed on the shutter housing so as to be as exposed as possible to
the sun’s rays.
4
9020638
9019722
6
+ +
9019683
5
1
2
3
SIMU S.A.S. au capital de 5 000 000 € - Z.I. Les Giranaux - 70100 ARC-LÈS-GRAY - FRANCE - RCS VESOUL B 425 650 090 - SIRET 425 650 090 00011 - n° T.V.A CEE FR 87 425 650 090

EN
INSTALLATION
1
Instructions which must be followed by the drive and home automation professional installing the
drive:
- Methods of wiring are given by national standards or IEC 60364 standard.
- Cables which pass through a metal wall must be protected and isolated using a sheath or sleeve. Secure
the cables to prevent any contact with moving parts. The connectors must be protected against rain, inside
the awning box.
- The cable for the motor cannot be removed. If it is damaged, return the drive to the After-Sales department.
Recommendations: Keep a minimum distance of 20 cm between two T3.5DC ESP HZ motors. Keep a
minimum distance of 30 cm between T3.5DC ESP HZ motors and Hz transmitters. A radio appliance using the
same frequency (433,42 MHz) may deteriorate our product’s performance (ex. : hi- radio headphones). Use
an antistatic fabric.
Refer to instruction 5117585/5139459 for solar panel installation.
Refer to instruction 5136806/5144624 for battery installation. Recharge the battery before use
with the charger ref. 9020638.
Drilling of the tube:
T3.5DC ESP HZ
ØB
A
C
D
mm
Ø min.
A ØB C D L1 L2
L2
L1
29
Ø38,2
IP44 03/23 • 06/18 • 10/12 37 433 4.2 8 5.5 487 470
Mounting:
2
1,2
1
3
4
PLASTITE FXS N7 \ 7X12 ZING
(5005970)
Ø4 x 10 / 120°
STEEL
3/8
END LIMIT ADJUSTMENT
2
If the installation includes several motors, only one motor should to
be powered during this programming procedure 2.1. It will eliminate
interferences with the other motors during the procedure.
2.1- Learning mode:
1- Connect the 12V battery to the motor.
2- Then, connect the 12V solar panel to the motor. Go to next step.
3- Press simultaneously on the “UP” and “DOWN” buttons of the
Hz transmitter. The motor turns 0.5 second in one direction, then
in the other.
This transmitter now commands the motor in unstable mode. Go to
step 2.2.
2.2- Checking the rotation direction:
Press the UP button of the transmitter :
a- If the motorized tube runs in the Up direction, move to next stage 2.3.
b- If the motorized tube runs in the Down
direction, reverse the rotation direction
by pressing the STOP button for at
least 3 seconds. The motor will run
for 0.5 second in one direction, then in
the other direction. Move to the stage
2.3.
1
>>
3
a
b
OK § 2.3
§ 2.3
3 s
>>>>>>
>> >>
>>
1
2

EN
2.3- End limit setting:
Semi-automatic setting for awnings with blockers for UP end limit:
+2 s
> 2 s
312 4
1- Move the motor to the desired DOWN end-limit position using the UP and DOWN buttons. (If you hold
the UP or DOWN button for more than 2 seconds the awning will move automatically in the UP or DOWN
direction. You will then have to stop the awning at the desired end-limit position by pressing the STOP
button.)
2- To set the DOWN end limit position, press simultaneously the STOP and UP buttons. The motor will run
automatically in the UP direction.
3- (Optional) Press STOP button to stop the motor.
4- To conrm the end limits press for 2 seconds on STOP. The motor will run for 0.5 second in one direction,
then in the other direction. The operation is completed. Go to section 3.
Manual setting for awnings without blockers for UP end limit:
34 512
+2 s
> 2 s
67
1- Move the motor to the desired DOWN end limit position using the DOWN and UP buttons. (If you hold the
UP or DOWN button for more than 2 seconds the awning will move automatically in the up or down direction.
You will then have to stop the awning at the wished end-limit position by pressing the STOP button.)
2- To set the DOWN end limit position, press simultaneously the STOP and UP buttons. The motor will run
automatically in the UP direction.
3- Before the motor reaches the UP end limit, press the STOP button.
4- If necessary adjust the position with the UP and DOWN buttons.
5- To set the UP end limit position, press simultaneously the STOP and DOWN buttons. The motor will run
automatically in the DOWN direction.
6- (Optional) Press STOP button to stop the motor.
7- Press the “STOP” button for 2 s. The motor will run for 0.5 second in one direction and then in the other. The
operation is completed. Go to section 3.
If you do not want to use this transmitter as the individual control:
- Switch the power supply o (2 seconds minimum (battery and solar panel)).
- Repeat the operation 2.1* with a new transmitter and then go to section 3.* In this case, the motor will run
for 0.5 second in both directions, that means the limits setting is already done.
This operation can only be performed from the transmitter that was used for operation 2.1-3.
- Press the transmitter PROG button for approximately 1
second. The motor will run for 0.5 second in one direction
and then in the other. The operation is completed.
Your transmitter is now programmed to control the
motor in stable mode.
PROGRAMMING THE FIRST INDIVIDUAL POINT OF CONTROL
3
1
PROG 1 s
>>
4/8

EN
4.1- Open the memory of the receiver from the
individual control transmitter:
- Press the “PROG” button of the transmitter for about
3 seconds. The motor will run for 0.5 second in one
direction and then in the other.
4.2- Conrm the operation from the new transmitter
you wish to add:
Press the “PROG” button of the transmitter for 1 second.
The motor will run for 0.5 second in one direction and then
in the other.
The operation is completed.
- For group controls, repeat operations 4.1 and 4.2 for each motor in the group.
- For general controls, repeat operations 4.1 and 4.2 for each motor in the installation.
- To delete an transmitter from the memory of a motor, perform operations 4.1 with a programmed transmitter,
then perform the operation 4.2 with the transmitter to be deleted.
PROGRAMMING/ADDING A NEW (INDIVIDUAL, GROUP, OR MAIN) CONTROL POINT
4
5.1- Open the memory of the motor from the individual
control transmitter:
- Press the “PROG” button of the transmitter for about
3 seconds. The motor will run for 0.5 second in one
direction and then in the other.
5.2- Conrm the operation from the sensor you wish
to add:
- Press the “PROG” button of the sensor less than 1
second. The motor will run for 0.5 second in one direction
and then in the other. The operation is completed.
For group controls, repeat operations 5.1 and 5.2 for each motor in the group.
Recommendations when using a sensor: If the Wind sensor on an installation is changed or deleted, it
is important to delete it from the memory of all the motors in which it was programmed: perform operation
5.1 with a programmed transmitter, then perform the operation 5.2 with the sensor to be deleted.
PROGRAMMING A SENSOR
5
1
PROG ≥ 3 s
>>
PROG < 1 s
2
>>
1
PROG ≥ 3 s
>>
2PROG < 1 s
>>
Recording :
1- Move the motor to the wished
position.
2- Press 5 seconds on the STOP
button. The motor will run for
0.5 second in one direction,
then in the other direction.
RECORDING / CONTROLING / DELETING INTERMEDIATE POSITION
6
Control :
- Press the
« STOP » button
for 0.5 second.
The motor runs to
the intermediate
position.
Deleting: Position the motor on the intermediate position. Press 5 seconds on the “Stop” button. The motor
will run for 0.5 second in one direction, then in the other direction. The intermediate position is deleted.
+5 s
12
5/8

EN
This function allows the closing force of the awning’s box to be increased or decreased to 3 levels (high/
medium/low).
Contact the awning’s manufacturer before using these functions to check the compatibility of your
systems. For safety reasons, this function can only be accessed via the individual control point in
3 situations:
• After the settings conrmation and before programming the rst control point.
• After programming the rst control and during the next 4 cycles.
• After a single power outage and during the next 4 cycles.
12
++ 2 s
5 s0,5 s
3
4
1 - Position the motor to the halfway position using the DOWN or UP button. Press the “STOP” button to
stop the awning.
2 - To activate closing force function press twice successively:
- For half a second press simultaneously STOP and UP buttons, without the motor rotating.
- For more than 5 seconds press simultaneously STOP and UP buttons. The motor will run for 0.5
second in one direction, then in the other direction.
The motor is now in programming mode for only 10 seconds, the motor is factory set at the medium level.
3 - To increase the closing force, press the UP button until the awning makes a slow movement, the box
awning’s closing force has moved up a level.
- To decrease the closing force, press the DOWN button until the store makes a slow movement, the box
awning’s closing force has moved down a level.
4 - Conrm the new setting by pressing 2 seconds the STOP button. The motor will run for 0.5 second in
one direction, then in the other direction. The new setting is memorized, the operation is completed.
« CLOSING FORCE » FUNCTION
7
This function back tensions the fabric after an opening order. This function will only be activated once the
installation of the motor is completed.
To activate the function set the angle between 11 and 180° (to disable the Back impulse, set the angle
to 0°):
4123
5 s2s
Between
11 and 180°
1- Move the motor to the DOWN end limit previously set in section 2.3 with the DOWN button.
2- Press simultaneously for 5 seconds the UP and STOP buttons. The motor will run for 0.5 second in one
direction, then in the other direction.
3- Adjust the angle of back impulse function (between 11 and 180°) with the UP and DOWN buttons.
4- Conrm the setting by pressing 2 seconds the STOP button. The motor will run for 0.5 second in one
direction, then in the other direction. The operation is completed.
The «back impulse» function is disable in the factory mode.
« BACK IMPULSE » FUNCTION
8
6/8

EN
This function enables the release of the fabric tension after the complete closing of the box awning.
For safety reasons, this function can only be activated or deactivated by the individual control
point in 3 situations:
• After the settings conrmation and before programming the rst control point.
• After programming the rst control point and during the next 4 cycles.
• After a single power outage and during the next 4 cycles.
To activate or deactivate this function, the procedure is the same:
1- Move the motor to the UP end limit previously set in section 2.3 with the UP button.
2- Press simultaneously the STOP and DOWN buttons for 5 seconds. The motor
will run for 0.5 second in one direction, then in the other direction. The operation
is completed.
The «back release» function is disable in the factory mode.
« BACK RELEASE” FUNCTION
9
12
5 s
10.1- DOWN end limit re-adjustment :
1- Move the motor to the DOWN end limit previously set in
section 2.3 with the DOWN button.
2- Press simultaneously for 5 seconds the UP and DOWN
buttons, the motor will run for 0.5 second in one direction,
then in the other direction.
3- Move to the new position with the UP and DOWN buttons.
4- Conrm the new position by pressing 2 seconds the STOP
button. The motor will run for 0,5 second in one direction
and then in the other direction. The new end limit setting is
memorized.
10.2- UP end limit re-adjustment (only in case of manual setting, awnings without blockers for UP end limit):
1- Move the motor to the UP end limit previously set in section
2.3 with the UP button.
2- Press simultaneously for 5 seconds the UP and DOWN
buttons, the motor will jog in both directions.
3- Move to the new position with the UP and DOWN buttons.
4- Conrm the new position by pressing 2 seconds the STOP
button. The motor will run for 0,5 second in one direction
and then in the other direction. The new end limits setting is
memorized.
END LIMIT RE-ADJUSTMENT
10
4123
5 s
2 s
4123
5 s
2 s
7/8

EN
During the operations in this section (§11), do not work on several motors at the same time.
>>>
11.1 11 .2 11.3
7s
11.4 11 .5
2s 2s
5 s
12V - 2.2Ah 12V - 2.2Ah 12V - 2.2Ah 12V - 2.2Ah 12V - 2.2Ah
11.1- Disconnect the solar panel from the T3.5DC ESP HZ motor
11.2- Disconnect the battery from the T3.5DC ESP HZ motor for 2 seconds.
11.3- Connect the battery to the motor for 7 seconds.
11.4- Disconnect the battery from the motor for 2 seconds.
11.5- Connect the battery to the motor . If the motor is on the end limit position (up or down), the motor will run
briey in one direction and then in the other, otherwise, the motor runs for 5 seconds in random direction.
The motor is now in the "cancelling mode". Go to section 11.6.
11.6- Then, conrm the cancelling of the concerned motor from the individual control :
- Press the PROG button of the transmitter
more than 7 seconds. Maintain the
pressure until the motor will rst run for 0,5
second in one direction and then in the other,
and a few second later, it will run again in both
direction.
The memory of the motor is now completely deleted. You can connect the solar panel, and then proceed
tothecompleteprogramming(§2).
CANCELLING THE PROGRAMMING
11
1
PROG > 7 s
11.6
2 s
7 s
>>
- This drive is maintenance-free.
- Press the ▲ button on the control point to raise the motorised product.
- Press the ▼ button on the control point to lower the motorised product.
- If the motorised product is moving, briey press the “Stop” button, the motorised product stop automatically.
- The motorised product is then stopped, briey press the “Stop” button, the motorised product moves to the
programmed intermediate position. (To modify or delete an intermediate position, see the section §6).
Tips and recommendations for use :
PROBLEMS POSSIBLES CAUSES SOLUTIONS
The motorised
product is not
operational.
The battery of the control point is low. Check the battery and replace
is as required.
The battery of the system is low. Recharge the battery (see
intruction 5136806/5144624).
External radio equipment is interfering with the radio
reception (e.g. Hi-Fi radio headphones).
Turn o all radio equipment
nearby.
If the motorised product still does not work, contact a drive and home automation professional.
OPERATION AND MAINTENANCE
12
SIMU SAS, 70100 ARC-LÈS-GRAY as manufacturer hereby declares that the drive covered by these instructions and used as intended according to these instructions
is in compliance with the essential requirements of the applicable European Directives and in particular of the Machinery Directive 2006/42/EC, and the Radio Directive
2014/53/EU. The full text of the EU declaration of conformity is available at www.simu.com. Bruno STRAGLIATI, Executive Ocer, ARC-LÈS-GRAY, 01/2020.
We care about our environment. Do not dispose of the appliance with usual household waste. Give it
to an approved collection point for recycling.
Please separate storage cells and batteries from other types of waste and recycle them via the local
collection facility.
8/8

DE
SIMU S.A.S. au capital de 5 000 000 € - Z.I. Les Giranaux - 70100 ARC-LÈS-GRAY - FRANCE - RCS VESOUL B 425 650 090 - SIRET 425 650 090 00011 - n° T.V.A CEE FR 87 425 650 090
SICHERHEITSHINWEISE 5151225A
DE – ORIGINALANLEITUNG
Diese Sicherheitshinweise ergänzen die Gebrauchsanleitung des Antriebs. Einen SIMU-Fachpartner nden
Sie unter www.simu.com. Bitte übergeben Sie diese Anleitung nach der Installation dem Endverwender.
I. SICHERHEITSHINWEISE FÜR DIE INSTALLATION. WARNUNG: Wichtige Sicherheitshinweise. Alle
Anweisungen sind zu befolgen, da es bei unsachgemäßer Benutzung zu schweren Verletzungen kommen
kann. Die in diesem Dokument enthalten Anweisungen für den Antrieb enthalten Angaben über den
Anwendungsbereich des Antriebs und den Mindestwellendurchmesser für Einsteckantriebe sowie alle
Informationen, die für die Montage und Befestigung des Antriebs, den Anschluss an die Spannungsversorgung,
zur Einstellung der Steuerungen und zu Wartungsarbeiten am Antrieb selber erforderlich sind. Es dürfen nur
SIMU-Zubehörteile (Mitnehmer,Adapter, Befestigung, Niederspannungsnetzteil) und mit demAntrieb kompatible
Steuervorrichtungen verwendet werden. Es muss sichergestellt sein, dass das Gewicht und die Abmessungen
des Produkts, das angetrieben werden soll, mit dem Nenn-Drehmoment und der Nenn-Betriebsdauer
kompatibel sind. Diese Angaben erhalten Sie bei Ihrem SIMU-Fachpartner. Entfernen Sie vor der Installation
des Antriebs alle überüssigen Kabel und legen Sie alle Ausrüstungsteile still, die für den motorisierten Betrieb
nicht erforderlich sind. Die Bedienung des Tasters muss in Sichtkontakt mit dem angetriebenen Teil, aber
entfernt von allen beweglichen Teilen installiert werden. Es muss in einer Höhe von mindestens 1,5 Metern und
unzugänglich für die Allgemeinheit angebracht werden. Fest installierte Betätigungsmodule müssen nach der
Installation gut sichtbar sein. Gemäß den Anschlussvorschriften muss vor dem Gerät in den fest installierten
Anschlussleitungen eine allpolige Schaltvorrichtung installiert werden. Wenn das Spannungsversorgungskabel
beschädigt ist, muss es durch ein identisches Kabel ersetzt werden. Wenn das Kabel nicht entfernt werden
kann, muss der Antrieb zum Kundendienst gebracht werden, um Gefahren zu vermeiden. Wenn der Antrieb
über eine manuelle Auslösung verfügt, muss die Betätigungsvorrichtung in einer Höhe von weniger als 1,8 m
installiert werden. Bei Antrieben für auskragende Markisen mit einer Unterkante < 2m vom Boden oder von
einer anderen. zugänglichen Ebene muss zwischen dem ganz ausgefahrenen angetriebenen Teil und anderen
ständig vorhandenen Objekten ein Abstand von mindestens 0,4 m gewährleistet sein.
II. SICHERHEITSHINWEISE FÜR DIE BENUTZUNG UND WARTUNG DES ANTRIEBS. WARNUNG: Wichtige
Sicherheitshinweise. Für die Gewährleistung der Sicherheit von Personen ist es wichtig, dass alle Hinweise
befolgt werden. Bewahren Sie diese Hinweise auf. WARNUNG: Vor Reinigungs- und Wartungsarbeiten sowie
vor dem Austausch von Teilen muss der Antrieb von der Spannungsversorgung getrennt werden. Dieses Gerät
kann von Kindern ab 8 Jahren und Personen mit eingeschränkten physischen, sensorischen oder mentalen
Fähigkeiten bzw. ohne ausreichende Erfahrung und Sachkenntnis benutzt werden, wenn sie durch eine für ihre
Sicherheit verantwortliche Person beaufsichtigt werden oder zuvor Erklärungen zur sicheren Bedienung des
Gerätes und zu den damit verbundenen Gefahren erhalten haben. Das Gerät ist kein Spielzeug für Kinder. Kinder
dürfen Reinigungs- und Pegearbeiten nur unter Aufsicht durchführen. Lassen Sie nie zu, dass Kinder mit den
fest installierten Steuervorrichtungen spielen. Bewahren Sie Funkhandsender außerhalb der Reichweite von
Kindern auf. Überprüfen Sie die Anlage regelmäßig auf Unwucht und Zeichen von Verschleiß oder Schäden an
Kabeln und Federn. Verwenden Sie sie nicht, wenn Reparatur oder Einstellarbeiten erforderlich sind. Behalten
Sie die motorisierte Anlage im Auge, während sie sich bewegt, und halten Sie andere Personen fern, bis die
motorisierte Anlage ganz ausgefahren ist. Bei Antrieben mit einem schwarzen H05-RRF-Kabel für Anlagen
im Freien darf das Kabel nur durch ein identisches Kabel ersetzt werden, das der Hersteller des Antriebs
geliefert hat. Bei Antrieben, die von einem abnehmbaren Niederspannungsnetzteil versorgt werden, darf nur
das mit dem Antrieb gelieferte Netzteil verwendet werden. Bei Antrieben mit manueller Auslösung müssen die
Betriebsbedingungen in der Anleitung des Antriebs beachtet werden. LpA ≤70 dB(A).
1/8

DE
US Pat N° US6794778, US6867565, US7726379, US7852765, US7860481, US8189620, US9702190, US10017987
-20°C / +60°C
i
DE- T3.5DC ESP HZ (12VDC)
5151225A
DE- ORIGINALANLEITUNG
Diese Anleitung gilt für alle Antriebe vom Typ T3.5DC ESP HZ, deren Ausführungen im aktuellen Katalog zu nden sind.
Bestimmungsgemäße Verwendung: Der Motor T3.5DC ESP HZ wurde zur Motorisierung von senkrechten Markisen
(Volant, Screens und Leinwände) entwickelt. Der Installateur, ein Fachmann für Gebäudeautomation, muss sicherstellen,
dass die Installation des Antriebs nach Montage den geltenden Vorschriften des Ortes der Inbetriebnahme entspricht.
Hierzu gehören insbesondere die Norm: EN 13561 (Außenbeschattung).
Haftung: Lesen Sie bitte vor der Montage und Verwendung des Antriebs diese Installationsanleitung
sorgfältig durch. Beachten Sie außer den Anweisungen in dieser Anleitung auch die detaillierten Hinweise
im beiliegenden Dokument „Sicherheitshinweise“. Die Installation des Antriebs muss von einem Fachmann für
Gebäudeautomation unter Einhaltung der Anweisungen von SIMU und der am Ort der Inbetriebnahme geltenden
Vorschriften ausgeführt werden. Jede Nutzung des Antriebs zu Zwecken, die über den im vorliegenden Dokument
beschriebenen Anwendungsbereich hinausgehen, ist untersagt. Jede Missachtung dieser, sowie aller anderen
in dieser Anleitung und im beiliegenden Dokument „Sicherheitshinweise“ enthaltenen Anweisungen führt zum
Ausschluss jeglicher Haftung und Gewährleistungsansprüche durch SIMU. Der Installateur hat seine Kunden auf die
Nutzungs-und Wartungsbedingungen des Antriebs hinzuweisen und ihnen diese sowie das beiliegende Dokument
„Sicherheitshinweise“ nach Abschluss der Installation des Antriebs auszuhändigen. Wartungs- und Reparaturarbeiten
für den Antrieb dürfen ausschließlich von Fachleuten für Gebäudeautomation ausgeführt werden. Für Fragen zur
Installation des Antriebs und weiterführende Informationen wenden Sie sich bitte an Ihren SIMU-Ansprechpartner oder
besuchen Sie unsere Website www.simu.com.
2/8
BESCHREIBUNG SYSTEM
i
Die Motoren vom Typ T3.5DC ESP HZ sind Teil eines autonomen Systems, welches mittels Sonnenenergie
betrieben wird. Weitere Informationen nden Sie im aktuellen Katalog. Die elektrische Energie, die vom
Solarpanel bereitgestellt wird, wird in dem Akku des Systems gespeichert. Dieses System ist für die Verwendung
in folgenden Ländern entwickelt worden: Frankreich, Deutschland, Belgien, Niederlande, Tschechien, Polen,
Grossbritanien, Spanien, Portugal, Italien, Griechenland, Schweiz, Luxemburg, Dänemark, Österreich, Ungarn,
USA (ausgenommen Alaska), Türkei, Australien. Für andere Länder setzen Sie sich bitte mit uns in Verbindung.
Das Autosun-2-System besteht aus:
1- Motor 12V T3.5DC ESP HZ (12V), 3, 6 oder 10 Nm.
2- Solarpanel-12V: « 3.2W SOLAR PANEL »;3,2W /
Voc: 21V / Isc : 196 mA.
3- Akku NiMh - 12V: 2.2Ah:
- “Naked battery autosun 2”
oder
-”Batterie coque equip.”
Optional :
4- Ladegerät Nr.: 9020638. Für eine schnelle Nachladung
des Akku des Systems 3.
5- Halter Solarpaneel Art.-Nr: 9019683
6- Verlängerungsleitung 5m Art.-Nr: 9019722
iDie Antriebe T3.5DC ESP HZ ist kompatibel mit allen Simu Hz Sendern (max. 12 Sender (1 Kanal) pro
Antrieb). Siehe dazu die entsprechenden Hinweise.
i• Das Behanggewicht muss mit dem für jeden der Motoren festgelegten Diagrammen übereinstimmen.
• Diese Anweisungen basieren auf jährlichen Mittelwerten und einer Nutzung: 2 Zyklen/Tag aus (1 Zyklus
= 1 x Hochfahren und 1 x Herunterfahren). Achtung: Bei einer Ausrichtung nach Norden (oder nach
Süden in Australien) ist für den Motor mit 10Nm maximal1 Zyklus pro Tag vorgesehen.
•InAusnahmejahrenkanndasLadegerätzumAuadenderSystem-Akkusdienen( 4). Das Solarpanel
muss immer so installiert werden, dass die Sonnenstrahlen es erreichen.
4
9020638
9019722
6
+ +
9019683
5
1
2
3
SIMU S.A.S. au capital de 5 000 000 € - Z.I. Les Giranaux - 70100 ARC-LÈS-GRAY - FRANCE - RCS VESOUL B 425 650 090 - SIRET 425 650 090 00011 - n° T.V.A CEE FR 87 425 650 090

DE
INSTALLATION
1
Hinweise, die die installierende Fachkraft zu beachten hat:
- Die Verdrahtung muss den geltenden VDE Vorschriften entsprechen.
- Alle Kabel, die in Kontakt mit einer metallischen Wandung geraten könnten, müssen mit einer Hülse
oder Ummantelung geschützt und isoliert werden. Bringen Sie die Kabel so an, dass sie nicht Kontakt zu
beweglichen Teilen geraten können. Die Anschlüsse müssen innerhalb des Markisengehäuses gegen Regen
geschützt verbunden werden.
- Das Kabel des Antriebes kann nicht demontiert werden. Wenn es beschädigt ist, müssen Sie den Antrieb
zum Kundendienst bringen.
Empfehlungen: Halten Sie eine Mindestdistanz von 20 cm zwischen zwei T3.5DC ESP HZ Motoren ein.
Halten Sie eine Mindestdistanz von 30 cm zwischen T3.5DC ESP HZ Motoren und Hz- Funksendern ein. Ein
Radiogerät, das die gleiche Frequenz nutzt (433,42 MHz), könnte die Leistung des Produkts stören (z.B. Hi-Fi
Radio-Kopfhörer). Verwenden Sie ein antistatiches Gewebe.
Für die Installation des Solarpanels sehen Sie bitte in der Bedienungsanleitung 5117585/5139459 nach.
Für die Installation und Auadung des Akkus sehen Sie bitte in der Bedienungsanleitung 5136806
/5144624 nach. Laden Sie den Akku vor Gebrauch mit dem Ladegerät Art.-Nr.: 9020638 auf.
Bohrungen in der Welle:
T3.5DC ESP HZ
ØB
A
C
D
mm
Ø min.
A ØB C D L1 L2
L2
L1
29
Ø38,2
IP44 03/23 • 06/18 • 10/12 37 433 4.2 8 5.5 487 470
Montage :
2
1,2
1
3
4
PLASTITE FXS N7 \ 7X12 ZING
(5005970)
Ø4 x 10 / 120°
STAHL
3/8
EINSTELLUNG ENDBEGRENZUNG
2
Wenn die Installation mehrere Motoren umfasst, darf während der
Programmierung nur ein Motor mit Strom versorgt werden. Auf diese Weise
werden Störungen durch andere Motoren während der Programmierung
vermieden.
2.1- Programmiermodus :
1- Verbinden Sie den Akku 12V mit dem Motor.
2- Dann das 12V Solarpanel an den Motor anschließen. Gehen Sie zum nächsten
Punkt.
3- Drücken Sie gleichzeitig die AUF- und AB-Taste eines Hz
Senders. Der Motor läuft 0,5 Sekunden in die eine, dann in die
andere Richtung.
Der Sender steuert nun den Motor im Totmannbetrieb. Siehe Schritt 2.2.
2.2- Überprüfen der Laufrichtung:
Drücken Sie die AUF-Taste am Sender :
a- Dreht sich der Motor „Aufwärts“, gehen
Sie zum Schritt 2.3. weiter.
b-
Dreht sich der Motor „Abwärts“,
ändern Sie die Richtung, indem Sie
die STOPP Taste mindestens 3 S. lang
gedrückt halten. Der Motor bestätigt
den Richtungswechsel und läuft 0,5
Sekunden in die eine, dann in die
andere Richtung. Siehe Schritt 2.3.
1
>>
3
a
b
OK § 2.3
§ 2.3
3 s
>>>>>>
>> >>
>>
1
2

DE
2.3- Einstellung der Endbegrenzung :
Halbautomat Modus für Markisen mit oberen Endanschlag :
+2 s
> 2 s
312 4
1- Fahren Sie den Motor mit den AUF und AB Tasten in die untere Endposition. (Wenn Sie die Taste länger als
2 Sekunden drücken, fährt die Markise in Selbsthaltung ein. Stoppen Sie die Markise an der gewünschten
Position.)
2- Zur Speicherung der Endbegrenzung UNTEN drücken Sie gleichzeitig die Tasten STOP & NACH OBEN.
Der Motor läuft automatisch aufwärts.
3- (Optional) Drücken Sie jetzt die STOPP Taste um den Motor anzuhalten.
4- Halten Sie die Taste STOPP 2 Sekunden lang gedrückt, um die Einstellung zu bestätigen. Der Motor stoppt
und läuft 0,5 Sekunde in die eine, dann in die andere Richtung. Die Programmierung ist abgeschlossen.
Weiter mit Schritt 3.
Manueller Modus für Markisen ohne oberen Endanschlag:
34 512
+2 s
> 2 s
67
1-
Fahren Sie den Motor mit den AUF und AB Tasten in die untere Endposition. (Wenn Sie die Taste länger als 2
Sekunden drücken, fährt die Markise in Selbsthaltung ein. Stoppen Sie die Markise an der gewünschten Position.)
2- Zur Speicherung der Endbegrenzung UNTEN drücken Sie gleichzeitig die Tasten STOP & NACH OBEN.
Der Motor läuft automatisch aufwärts.
3- Wenn der Motor die obere Endbegrenzung erreicht, drücken Sie die Taste STOPP.
4- Justieren Sie die Position gegebenenfalls mit den AUF- oder AB Tasten.
5- Zur Speicherung der Endbegrenzung OBEN drücken Sie gleichzeitig die Tasten STOPP & NACH UNTEN.
Der Motor läuft automatisch abwärts.
6- (Optional) Drücken Sie jetzt die STOPP Taste um den Motor anzuhalten.
7- Halten Sie die Taste STOPP 2 Sekunden lang gedrückt, um die Einstellung zu bestätigen. Der Motor stoppt
und läuft 0,5 Sekunden in die eine, dann in die andere Richtung. Die Programmierung ist abgeschlossen.
Weiter mit Schritt 3.
Wenn Sie diesen Sender nicht als Einzelbedienung benutzen wollen:
- Unterbrechen Sie die Stromversorgung des Motors (min. 2 Sekunde (Akku und Solarpanel)).
- Wiederholen Sie Schritt 2.1* mit einem neuen Sender und gehen Sie direkt zu §3.
* In diesem Fall fährt der Motor je eine halbe Sekunde in beide Richtungen. Das bedeutet, dass die
Endlagen bereits gespeichert sind.
Diese Einstellung kann nur für den unter Punkt 2.1-3 verwendeten Sender vorgenommen werden.
- Halten Sie die Taste PROG ca. 1 Sekunde lang
gedrückt. Der Motor läuft eine halbe Sekunden in die
eine, dann in die Andere Richtung. Die Programmierung
ist abgeschlossen.
Ihr Sender ist nun so programmiert, dass er den Motor
zuverlässig steuert.
PROGRAMMIERUNG DES ERSTEN INDIVIDUELLEN STEUERPUNKTS
3
1
PROG 1 s
>>
4/8
Table of contents
Languages:
Other Simu Engine manuals
Popular Engine manuals by other brands
Beta
Beta Enduro RR 350 2015 Workshop manual
Volvo Penta
Volvo Penta D1-13 Workshop manual
Assun
Assun AM-CL2845MAN Series product manual
Briggs & Stratton
Briggs & Stratton 310000 VERTICAL SERIES Operator's manual
Xylem
Xylem CentriPro Xtreme Duty Series installation manual

ZIEHL-ABEGG
ZIEHL-ABEGG ECQ Assembly instructions
