INSTRUCTION
MANUAL
FOR
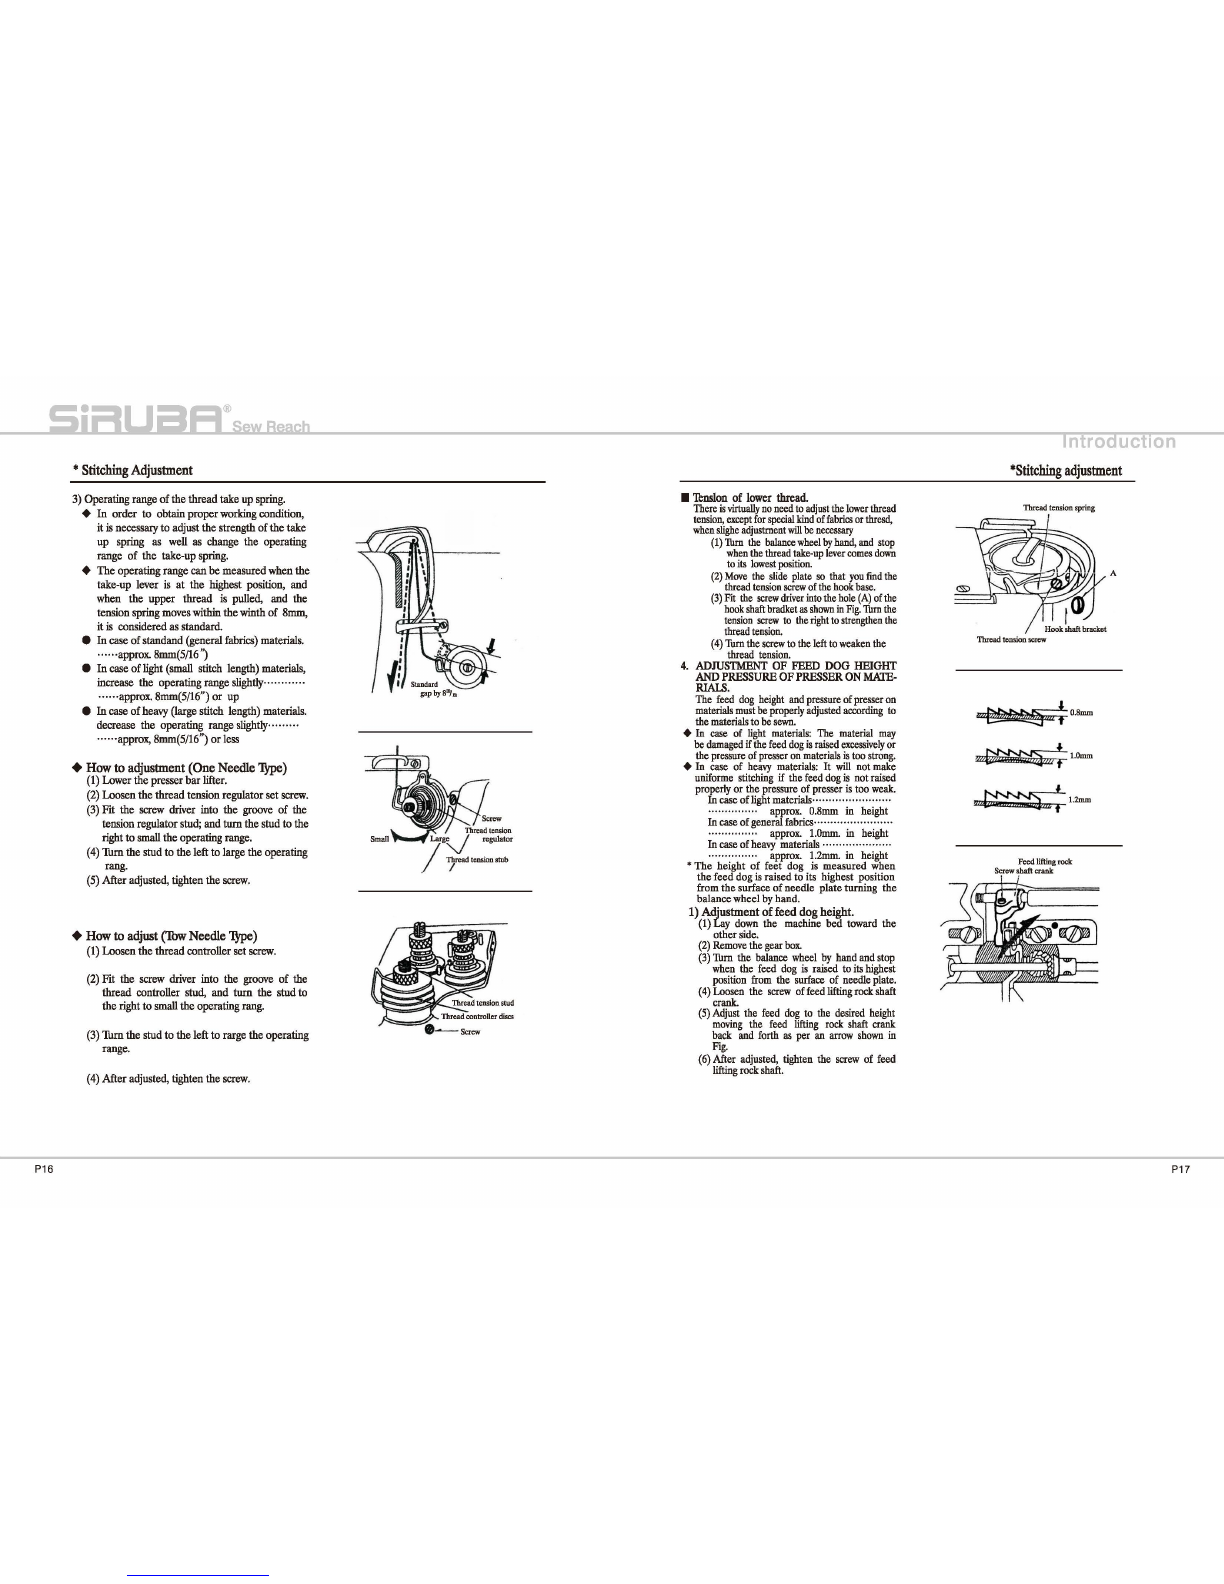
POST
-BED
INDUSTRIAL
SEWING
MACHINE
This manual is prepared to permit the sewing machine to be used efficiently and for highest performance.
This machine is post-bed industrial
sewing
machine suitable for sewing shoes, bags, caps and general
leather
works.
You
can either select !-needle
or
2-needle machine according to your type
of
works.
Being equipped with spring return reverse lever type feed mechanism opener type vertical hook, and slide
type thread take-up provides perfect uniformed stitching.
-INDEX-
Specification···...·········...·········...······...·········...·········...······...·········...·········...······...·..······...···2
Mainparts name
of
machine head···...···...···...···...···...···...···...···...···...···...···...···...···...···...···...3
I .Preparation for installation of machine
...........................................................................
4
1). Place of installation of machine
....................................................................................
4
2).
How to mount the machine head ·················································································4
3).
How to mount the
motor"···························
.......
····················
............
···············
··--······4
4).
How to connect the motor lever and foot pedaJ
............................................................
4
5).
How
to mount the bobbin winder assembly..
·························································
..........
4
6).
How to mount and adjust the knee lifter mechanism
...................................................
5
7).
How to mount the oil
pan···························································································
..6
8). How to mount the vibration preventing rubber············.......
··········································
··6
!!.
Preparation for
operation····························································································
·7
1). Selection of
thread································································································7
2). How to attach the
needle·······················································································7
3).
How to lead the upper thread..···············································································8
4).
How to wind the lower thread on the bobbin..
··•·······•····•····•·······•···
..
························9
5). How to adjust the bobbin winder assembly..
···························································
··10
6). How to place the bobbin into the book..
··································································
·11
ill.
How
to
operate······································································································13
1
).
Starting to
sewing·······························································································
·13
2). Sewing
over·····································································································
····13
IV. Stitching
adjustment··············································
..
···..
··········································
·14
1). Adjustment
of
stitch
length·················································································14
2). Forward and Reverse stitching······..
··························
..
··········································14
3).
Adjustment
of
thread tension ··············································································14
4). Adjustment
of
feed dog height and pressure
of
presser
on
matcrials
........................
17
5). Proper timing between the hook and needle...
··················································
....
18
6). Proper timing between the hook and opener..····•··•···•··••··•······•······•··••······•··•···•····21
7). Proper timing between the feed dog and needle..···••···••····•·········••··
.....
··•·····•····•·
·22
V.
Cleaning and Lubrication··
........................................................................................
23
1).
Cleaning············································································································23
2). Lubrication··..
···········································
..
···········································
..
···········23
3).
Grease··················································
......
······•·•·•·······•·•·•······••···•····
......
·····
·····24
P1