manuals.online logo
Brands
  1. Home
  2. •
  3. Brands
  4. •
  5. SOMFY
  6. •
  7. Engine
  8. •
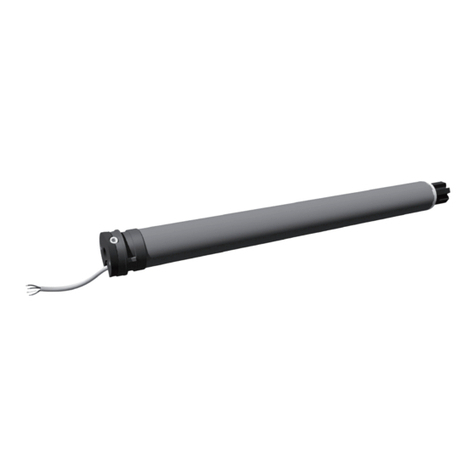
  9. SOMFY Maestria 50 RTS Operating instructions

SOMFY Maestria 50 RTS Operating instructions

QUICK PROGRAMMING GUIDE FOR MAESTRIA™ 50 RTS MOTORS
On the transmitter, press briefly both
UP and DOWN simultaneously:
the screen jogs.
INSTALLER TIP: It is the same
procedure as with Altus motors.
1) Position the screen at
the desired UPPER Limit
2) Press MY and DOWN
simultaneously: the
screen lowers.
NOTE: If hand-held transmitter direction is not properly programmed, Eolis/Soliris RTS sensor will not function in the manner it was intended.
Damage to the screens and injury may occur as a result.
SHORT JOGSHORT JOG
1. INITIATE PROGRAMMING 2. CHECK THE DIRECTION OF OPERATION
3. PROGRAMMING MODE - MANUAL ADJUSTMENT
Check the direction of rotation by
pressing UP or DOWN. If necessary
change the direction of rotation by
simply pressing and holding the MY
button until the screen jogs.
3) Position the screen at
the desired LOWER Limit.
4) Press MY and UP
simultaneously: the
screen raises.
5) Press MY until the screen jogs
to validate the end limit setting.
6) Briefly press the programming
button on the back of the
transmitter with a paper clip:
the screen jogs.
▶ ▶
SHORT JOG
SCREEN HALFWAY
LONG JOG LONG JOG
BRIEFLY HOLD
THEN
Copyright © Somfy SAS 10/2018 P-0030
OBSTACLE DETECTION - CHANGE THE LEVEL OF DETECTION OR DEACTIVATE
This function gives the possibility to deactivate the obstacle detection or increase the sensitivity up from the default level during the
downward movement.
Move the screen to half-way position, press MY
and UP briefly and again MY and UP until the
screen jogs.
1. ENTER THE OBSTACLE SETTING MODE
Press UP briefly within 2 seconds
and then press UP briefly again.
The sceen will jog slowly and is
now deactivated.
Press DOWN briefly within 2 seconds
and then press DOWN briefly again.
The sceen will jog slowly and is now
more sensitive.
To Increase Sensitivity:
To Deactivate:
IF THE JOG IS SHORT YOU’VE
REACHED THE DEFAULT SETTING.
TO DEACTIVATE PRESS UP AGAIN.
IF THE JOG IS SHORT YOU’VE REACHED
THE DEFAULT SETTING. TO INCREASE
SENSITIVITY PRESS DOWN AGAIN
3. CONFIRM THE NEW SETTING & EXIT THE SETTING MODE
2. CHANGE THE OBSTACLE DETECTION LEVEL
Press MY/STOP until the screen jogs to confirm the new setting.
For more information please visit www.somfysystems.com/Maestria
The registered level of Obstacle Detection will be reached when entering Step 1 again.
▶▶
When programming, all button presses must be completed within 2 seconds of the previous press.
If the actuator goes back to USER MODE (short jog) repeat Step 1.
MANUAL SETTING OF THE END LIMITS
IMPORTANT TO NOTE: Programming screens should not be inactive for more than 2 minutes or motor
will exit PROGRAMMING MODE. In which case you will need to start from Step 1.
SHORT JOG
▶
AUTOMATIC SETTING OF THE END LIMITS
Automatic setting at UP end limit is only compatible with screens featuring a hard stop.
QUICK PROGRAMMING GUIDE FOR MAESTRIA™ 50 RTS MOTORS
On the transmitter, press
briefly both UP and
DOWN simultaneously:
the screen jogs.
1) Bring the screen to it’s
halfway position.
2) Briefly press both the UP and
DOWN buttons simultaneously.
The screen jogs.
3) Press the DOWN button: the
screen lowers until it detects the
LOWER Limit, performs a brief
upward movement and returns
to it’s LOWER Limit position.
4) To validate the setting, press MY
until the screen jogs.
5) Briefly press the programming
button on the back of the transmitter
with a paper clip: the screen jogs.
NOTE: If hand-held transmitter direction is not properly programmed, Eolis/Soliris RTS sensor will not function in the manner it was intended.
Damage to the screens and injury may occur as a result.
IMPORTANT TO NOTE: Programming screens should not be inactive for more than 2 minutes or motor
will exit PROGRAMMING MODE. In which case you will need to start from Step 1.
SHORT JOGSHORT JOG
SHORT JOG
1 sec.
1. INITIATE PROGRAMMING
3. PROGRAMMING MODE - AUTOMATIC ADJUSTMENT
2. CHECK THE DIRECTION OF OPERATION
Check the direction of rotation by pressing UP or
DOWN. If necessary change the direction of
rotation by simply pressing and holding the MY
button until the screen jogs.
▶
▶
▶
SHORT JOG
SCREEN HALFWAY
LONG JOG LONG JOG
BRIEFLY HOLD
THEN
Copyright © Somfy SAS 10/2018 P-0030
OBSTACLE DETECTION - CHANGE THE LEVEL OF DETECTION OR DEACTIVATE
This function gives the possibility to deactivate the obstacle detection or increase the sensitivity up from the default level during the
downward movement.
Move the screen to half-way position, press MY
and UP briefly and again MY and UP until the
screen jogs.
1. ENTER THE OBSTACLE SETTING MODE
Press UP briefly within 2 seconds and
then press UP briefly again. The sceen
will jog slowly and is now deactivated.
Press DOWN briefly within 2 seconds and
then press DOWN briefly again. The sceen
will jog slowly and is now more sensitive.
To Increase Sensitivity:
To Deactivate:
IF THE JOG IS SHORT YOU’VE
REACHED THE DEFAULT SETTING.
TO DEACTIVATE PRESS UP AGAIN.
IF THE JOG IS SHORT YOU’VE REACHED
THE DEFAULT SETTING. TO INCREASE
SENSITIVITY PRESS DOWN AGAIN
3. CONFIRM THE NEW SETTING & EXIT THE SETTING MODE
2. CHANGE THE OBSTACLE DETECTION LEVEL
Press MY/STOP until the screen jogs to confirm the new
setting.
For more information please visit www.somfysystems.com/Maestria
The registered level of Obstacle Detection will be reached when entering Step 1 again.
▶▶
When programming, all button presses must be completed within 2 seconds of the previous press.
If the actuator goes back to USER MODE (short jog) repeat Step 1.
SHORT JOG
▶
SHORT JOG
▶
5) Briefly press
and hold the
programming
button on the back
of the transmitter
with a paper clip:
the screen jogs.
SEMI-AUTOMATIC SETTING OF THE END LIMITS
Automatic setting at UP end limit is only compatible with screens featuring a hard stop.
QUICK PROGRAMMING GUIDE FOR MAESTRIA™ 50 RTS MOTORS
On the transmitter, press
briefly both UP and DOWN
simultaneously:
the screen jogs.
1) Position the screen
at the desired LOWER
Limit.
2) Press MY and UP
simultaneously: the
screen raises.
3) Press MY to stop the
screen.
4) Press MY until the screen
jogs to validate the LOWER
Limit setting. Following this
step the UPPER Limit is set
automatically.
NOTE: If hand-held transmitter direction is not properly programmed, Eolis/Soliris RTS sensor will not function in the manner it was intended.
Damage to the screens and injury may occur as a result.
IMPORTANT TO NOTE: Programming screens should not be inactive for more than 2 minutes or motor
will exit PROGRAMMING MODE. In which case you will need to start from Step 1.
SHORT JOG
SHORT JOG
SHORT JOG
1 sec.
1. INITIATE PROGRAMMING
3. PROGRAMMING MODE - SEMI-AUTOMATIC ADJUSTMENT
2. CHECK THE DIRECTION OF OPERATION
Check the direction of rotation by pressing UP
or DOWN. If necessary change the direction
of rotation by simply pressing and holding the
MY button until the screen jogs.
▶
▶
▶
▶
SHORT JOG
SCREEN HALFWAY
LONG JOG LONG JOG
BRIEFLY HOLD
THEN
Copyright © Somfy SAS 10/2018 P-0030
OBSTACLE DETECTION - CHANGE THE LEVEL OF DETECTION OR DEACTIVATE
This function gives the possibility to deactivate the obstacle detection or increase the sensitivity up from the default level during the
downward movement.
MANUAL ADJUSTMENT OF THE LOWER END LIMIT AND AUTOMATIC ADJUSTMENT OF THE UPPER END LIMIT
Move the screen to half-way position, press MY
and UP briefly and again MY and UP until the
screen jogs.
1. ENTER THE OBSTACLE SETTING MODE
Press UP briefly within 2 seconds and
then press UP briefly again. The sceen
will jog slowly and is now deactivated.
Press DOWN briefly within 2 seconds
and then press DOWN briefly again. The
sceen will jog slowly and is now more
sensitive..
To Increase Sensitivity:
To Deactivate:
IF THE JOG IS SHORT YOU’VE
REACHED THE DEFAULT SETTING.
TO DEACTIVATE PRESS UP AGAIN.
IF THE JOG IS SHORT YOU’VE REACHED
THE DEFAULT SETTING. TO INCREASE
SENSITIVITY PRESS DOWN AGAIN
3. CONFIRM THE NEW SETTING & EXIT THE SETTING MODE
2. CHANGE THE OBSTACLE DETECTION LEVEL
Press MY/STOP until the screen jogs to confirm the new setting.
For more information please visit www.somfysystems.com/Maestria
The registered level of Obstacle Detection will be reached when entering Step 1 again.
▶▶
When programming, all button presses must be completed within 2 seconds of the previous press.
If the actuator goes back to USER MODE (short jog) repeat Step 1.
SHORT JOG
▶
RESETTING THE MOTOR TO FACTORY MODE
Power
ON
New transmitter is programmed
and ready to operate the screen.
SHORT JOG
3 sec.
1.PERFORM DOUBLE POWER CUT-OFF
2.FINISH THE RESET
▶
▶
SHORT JOG
ADJUSTING LIMITS AFTER
PROGRAMMING IS COMPLETED
1. INITIATE PROGRAMMING
2A. ADDING A NEW
TRANSMITTER
ADDING/ DELETING TRANSMITTERS
Cut power
for 2 sec.
Cut power
for 2 sec.
Power
ON
Power back
ON for 8
seconds
SHORT JOG
▶
0.5 sec.
The transmitter is now deleted
from the motor’s memory.
2B.DELETING A
TRANSMITTER
Briefly press the programming
button on the back of the
transmitter to be added.
The motor jogs.
SHORT JOG
▶
0.5 sec.
TO CHANGE THE LOWER LIMIT
TO CHANGE THE UPPER LIMIT:
QUICK PROGRAMMING GUIDE FOR MAESTRIA™ 50 RTS MOTORS
USER MODE
Copyright © Somfy SAS 10/2018 P-0030
OR
OR
STEP 2: Press and hold
both UP and DOWN
simultaneously until the
screen jogs.
STEP 3: Adjust
to a new LOWER
Limit position.
STEP 3: Press & hold
the MY/STOP button
until the screen jogs, to
confirm the new limit.
STEP 4: Press & hold
the MY/STOP button
until the screen jogs, to
confirm the new limit.
STEP 1: Press DOWN
to send the screen to its
current LOWER Limit.
STEP 1: Press UP to
send the screen to its
current UPPER Limit.
STEP 2: Press and hold
both UP and DOWN
simultaneously until the
screen jogs.
STEP 3: Adjust
to a new UPPER
Limit position.
Press & hold the programming button (about 3 seconds) of an
already programmed remote control. The motor will jog and is now
in Programming Mode.
Briefly press the programming
button on the back of the
previously programmed
transmitter to be deleted.
The motor jogs.
Press & hold the
programming button
on the back of the
control for about 7 sec.
▶ ▶
SHORT JOG SHORT JOG
The motor
will jog aer 2
seconds.
And then the motor
will jog again
validating the reset.

Other manuals for Maestria 50 RTS

3

This manual suits for next models

2

Other SOMFY Engine manuals

SOMFY Glydea Operating instructions

SOMFY

SOMFY Glydea Operating instructions

SOMFY Orea RTS User instructions

SOMFY

SOMFY Orea RTS User instructions

SOMFY Glydea Ultra RTS Series User manual

SOMFY

SOMFY Glydea Ultra RTS Series User manual

SOMFY PHOENIX PH 30/14 User manual

SOMFY

SOMFY PHOENIX PH 30/14 User manual

SOMFY LT RTS CMO Operating manual

SOMFY

SOMFY LT RTS CMO Operating manual

SOMFY Sonesse ULTRA 30 WireFree RTS Li-ion Operating instructions

SOMFY

SOMFY Sonesse ULTRA 30 WireFree RTS Li-ion Operating instructions

SOMFY Ilmo 40 WT User manual

SOMFY

SOMFY Ilmo 40 WT User manual

SOMFY Sonesse Ultra 50 RTS User manual

SOMFY

SOMFY Sonesse Ultra 50 RTS User manual

SOMFY Sonesse ULTRA 30 WF Zigbee Li-ion User manual

SOMFY

SOMFY Sonesse ULTRA 30 WF Zigbee Li-ion User manual

SOMFY Pergola io Assembly instructions

SOMFY

SOMFY Pergola io Assembly instructions

SOMFY LS 40 User manual

SOMFY

SOMFY LS 40 User manual

SOMFY Tilt & Lift 25 RTS Central User manual

SOMFY

SOMFY Tilt & Lift 25 RTS Central User manual

SOMFY ilmo 50 S WT User manual

SOMFY

SOMFY ilmo 50 S WT User manual

SOMFY ILT 2 User manual

SOMFY

SOMFY ILT 2 User manual

SOMFY Irismo Wirefree User manual

SOMFY

SOMFY Irismo Wirefree User manual

SOMFY Sonesse 40 RS485 User manual

SOMFY

SOMFY Sonesse 40 RS485 User manual

SOMFY Oximo io User manual

SOMFY

SOMFY Oximo io User manual

SOMFY J4 1TN User manual

SOMFY

SOMFY J4 1TN User manual

SOMFY LOGGIA RTS User manual

SOMFY

SOMFY LOGGIA RTS User manual

SOMFY Altus RTS User instructions

SOMFY

SOMFY Altus RTS User instructions

SOMFY sonesse 30 rts Installation manual

SOMFY

SOMFY sonesse 30 rts Installation manual

SOMFY Tilt Only 50 WF RTS User manual

SOMFY

SOMFY Tilt Only 50 WF RTS User manual

SOMFY ORIENTA User manual

SOMFY

SOMFY ORIENTA User manual

SOMFY RDO 50 CSI User manual

SOMFY

SOMFY RDO 50 CSI User manual

Popular Engine manuals by other brands

SEW-Eurodrive CM3C63 Series operating instructions

SEW-Eurodrive

SEW-Eurodrive CM3C63 Series operating instructions

Champion Power Equipment 60701 Owner's manual & operating instructions

Champion Power Equipment

Champion Power Equipment 60701 Owner's manual & operating instructions

Vetus VF4 Service manual

Vetus

Vetus VF4 Service manual

Roca W25 installation instructions

Roca

Roca W25 installation instructions

ILMOR MV8 owner's manual

ILMOR

ILMOR MV8 owner's manual

elero JAR quick start guide

elero

elero JAR quick start guide

BMW D35-1 Brochure & specs

BMW

BMW D35-1 Brochure & specs

O.S. engine GT15HZ600 Owner's instruction manual

O.S. engine

O.S. engine GT15HZ600 Owner's instruction manual

Lenze 13.120.35 Wiring diagram

Lenze

Lenze 13.120.35 Wiring diagram

Tie Down Engineering 160F-AH Quick start manual

Tie Down Engineering

Tie Down Engineering 160F-AH Quick start manual

Subaru ER12 Service manual

Subaru

Subaru ER12 Service manual

Kohler KDI 2504TM owner's manual

Kohler

Kohler KDI 2504TM owner's manual

Teledyne Continental Motors Sandcast Series MAINTENANCE AND OPERATOR'S MANUAL

Teledyne Continental Motors

Teledyne Continental Motors Sandcast Series MAINTENANCE AND OPERATOR'S MANUAL

MWM Sprint 4.07 TCA Training Book

MWM

MWM Sprint 4.07 TCA Training Book

Briggs & Stratton 114900 to 114999 Illustrate parts list

Briggs & Stratton

Briggs & Stratton 114900 to 114999 Illustrate parts list

DoorHan SWING-5000 installation manual

DoorHan

DoorHan SWING-5000 installation manual

Texas GARDEN SNOWBUSTER (160F) instruction manual

Texas

Texas GARDEN SNOWBUSTER (160F) instruction manual

Nice NX FIT MB 534 SH BD Instructions and warnings for installation and use

Nice

Nice NX FIT MB 534 SH BD Instructions and warnings for installation and use

manuals.online logo
manuals.online logoBrands
  • About & Mission
  • Contact us
  • Privacy Policy
  • Terms and Conditions

Copyright 2025 Manuals.Online. All Rights Reserved.