manuals.online logo
Brands
  1. Home
  2. •
  3. Brands
  4. •
  5. SOMFY
  6. •
  7. Engine
  8. •
  9. SOMFY Wirefree Roll-Up 28 RTS Operating instructions

SOMFY Wirefree Roll-Up 28 RTS Operating instructions

Other SOMFY Engine manuals

SOMFY SGH io Assembly instructions

SOMFY

SOMFY SGH io Assembly instructions

SOMFY Sonesse ULTRA 30 WF Zigbee Li-ion User manual

SOMFY

SOMFY Sonesse ULTRA 30 WF Zigbee Li-ion User manual

SOMFY Tilt & Lift 25 RTS Central User manual

SOMFY

SOMFY Tilt & Lift 25 RTS Central User manual

SOMFY Sonesse 40 RTS Installation manual

SOMFY

SOMFY Sonesse 40 RTS Installation manual

SOMFY Altus RTS User instructions

SOMFY

SOMFY Altus RTS User instructions

SOMFY Glydea ULTRA DIGITAL NETWORK Operating instructions

SOMFY

SOMFY Glydea ULTRA DIGITAL NETWORK Operating instructions

SOMFY J4 io Instruction Manual

SOMFY

SOMFY J4 io Instruction Manual

SOMFY Dexxo Pro 800 RTS User manual

SOMFY

SOMFY Dexxo Pro 800 RTS User manual

SOMFY J4 RTS Assembly instructions

SOMFY

SOMFY J4 RTS Assembly instructions

SOMFY Pergola io Assembly instructions

SOMFY

SOMFY Pergola io Assembly instructions

SOMFY Tilt Only 50 WF RTS User manual

SOMFY

SOMFY Tilt Only 50 WF RTS User manual

SOMFY ORIENTA User manual

SOMFY

SOMFY ORIENTA User manual

SOMFY Sonesse 30 RTS 24V DC Operating instructions

SOMFY

SOMFY Sonesse 30 RTS 24V DC Operating instructions

SOMFY Sunea 40 RTS DC User manual

SOMFY

SOMFY Sunea 40 RTS DC User manual

SOMFY ilmo 50 WT User manual

SOMFY

SOMFY ilmo 50 WT User manual

SOMFY ORIENTA User manual

SOMFY

SOMFY ORIENTA User manual

SOMFY LT50 RS485 User manual

SOMFY

SOMFY LT50 RS485 User manual

SOMFY Oximo Series Assembly instructions

SOMFY

SOMFY Oximo Series Assembly instructions

SOMFY Maestria 50 RTS Operating instructions

SOMFY

SOMFY Maestria 50 RTS Operating instructions

SOMFY Sonesse Ultra 50 DC RS485 User manual

SOMFY

SOMFY Sonesse Ultra 50 DC RS485 User manual

SOMFY Tilt Only 50 WF RTS User manual

SOMFY

SOMFY Tilt Only 50 WF RTS User manual

SOMFY SUNEA CSI RTS User manual

SOMFY

SOMFY SUNEA CSI RTS User manual

SOMFY Sonesse 40 RTS User manual

SOMFY

SOMFY Sonesse 40 RTS User manual

SOMFY Oximo RTS User manual

SOMFY

SOMFY Oximo RTS User manual

Popular Engine manuals by other brands

Nakanishi EM-3030T Operation manual

Nakanishi

Nakanishi EM-3030T Operation manual

Siemens COMBIMASTER CM12 operating instructions

Siemens

Siemens COMBIMASTER CM12 operating instructions

Bosch Rexroth Hagglunds CA Series Installation and maintenance manual

Bosch

Bosch Rexroth Hagglunds CA Series Installation and maintenance manual

Hyundai H170VC manual

Hyundai

Hyundai H170VC manual

Graco 273199 repair parts

Graco

Graco 273199 repair parts

MOTO GUZZI BREVA V1100 Workshop manual

MOTO GUZZI

MOTO GUZZI BREVA V1100 Workshop manual

Dualsky Track & Field Z5 instruction manual

Dualsky

Dualsky Track & Field Z5 instruction manual

Rotax 125 senior MAX evo installation manual

Rotax

Rotax 125 senior MAX evo installation manual

Kohler K361 Service manual

Kohler

Kohler K361 Service manual

MTD OHV Series user guide

MTD

MTD OHV Series user guide

Mercury D4.2L D-Tronic manual

Mercury

Mercury D4.2L D-Tronic manual

Perkins 1206E-E66TA Operation and maintenance manual

Perkins

Perkins 1206E-E66TA Operation and maintenance manual

Skov DA 174 Technical user guide

Skov

Skov DA 174 Technical user guide

Rotax 915 i A SERIES Maintenance manual

Rotax

Rotax 915 i A SERIES Maintenance manual

AL-KO PRO 350 Instructions for use

AL-KO

AL-KO PRO 350 Instructions for use

MTU 12 V 4000 Lx4 operating instructions

MTU

MTU 12 V 4000 Lx4 operating instructions

Nanni N3.30 Workshop manual

Nanni

Nanni N3.30 Workshop manual

Nanni N5.160 CR2 Operator's manual

Nanni

Nanni N5.160 CR2 Operator's manual

manuals.online logo
manuals.online logoBrands
  • About & Mission
  • Contact us
  • Privacy Policy
  • Terms and Conditions

Copyright 2025 Manuals.Online. All Rights Reserved.

Roll-Up 28 Wirefree™ RTS
Quick Programming Guide
P-0039CBG
INITIAL PROGRAMMING AND LIMIT SETTING
Step 2: Check the direction of
operation. Press the DOWN button
and confirm the shade lowers.
Step 5: PRESS & HOLD
the MY/STOP button until
the shade jogs to confirm
both limit settings.
Step 3: Bring the shade to your desired upper
limit. PRESS & HOLD both the MY/STOP and
DOWN buttons until the shade begins to move
down, then release. Stop the shade at the desired
lower limit, adjust by pressing the UP or DOWN.
Step 6: To finalize BRIEFLY PRESS the PROGRAMMING
BUTTON on the back of the control. The shade will jog and
will now operate in user mode. A brief press of the UP or
DOWN button will send the shade to the respective limit.
Step 1: To initiate programming PRESS
& HOLD the UP and DOWN buttons at the
same time until the shade jogs.
Step 4: PRESS & HOLD the UP
and MY/STOP buttons until the
shade begins to move up.
The shade will stop at the original
upper limit. Adjust if necessary.
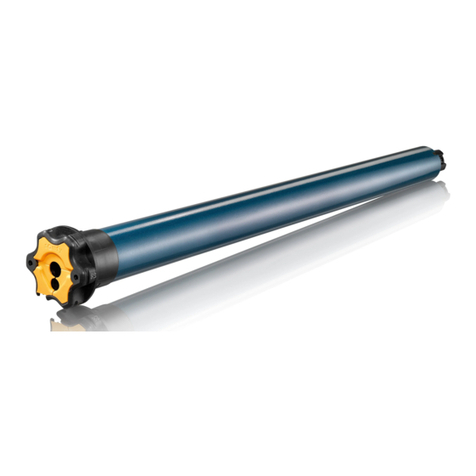
Programming
Button


If the shade raises instead of closing, change the direction - PRESS & HOLD the MY/
STOP button until the shade jogs. Confirm correct direction of operation before proceeding.
ADJUSTING THE LIMITS IN USER MODE
LOWER LIMIT
UPPER LIMIT
Step 4: PRESS & HOLD the MY/STOP button until the
shade jogs, then release. Check the new limit.
Step 3: Adjust to a new limit position using the UP or
DOWN buttons.
Step 2: PRESS & HOLD both UP and DOWN buttons
simultaneously until the shade jogs, then release.
Step 1: Move the shade to the current limit position you
wish to adjust and let it stop.
Copyright © Somfy SAS 5/2019
NOTE: Motor will exit programming mode aer 2 minutes of inactivity. While in programming
mode, the shade only operates when UP or DOWN buttons are continuosly pressed.
BEFORE YOU BEGIN: Check if you have a paired remote with the following directions:
1) Supply power to the motor by connecting the power source to the power cable on the motor.
2) If a remote was ordered, press a directional button (UP or DOWN) and see if the shade operates. If a multi-channel
remote was ordered, select the channel the shade should be programmed under then operate the shade.
a) If the shade operates - the shade is already programmed.
b) If the shade does not operate - choose the channel on which you would like to control the shade. PRESS & HOLD
the PROGRAMMING BUTTON on the motor until it jogs once. Then BRIEFLY PRESS the PROGRAMMING BUTTON
on the remote. The shade will jog once. The shade is now programmed.
NOTE: Upper and lower limits are set at the factory. In the event limit setting is required, please follow
steps under Initial Programming and Limit Setting.
Copyright © Somfy SAS 5/2019 P-0039CBG
www.somfysystems.com
The procedure to delete an RTS sensor is the same.
a) PRESS & HOLD the
PROGRAMMING BUTTON
on the back of Control 1 until
the shade jogs.
b) BRIEFLY PRESS the
PROGRAMMING BUTTON
on the back of Control 2.
The shade jogs.
CONTROL 1:
Previously programmed
control - single channel or
the channel (1-5) of a multi-
channel remote.
CONTROL 2:
Second control to be added or
deleted - single channel or
the channel (1-5) of a multi-
channel remote.
ADD OR DELETE A CONTROL
The shade must be programmed.
This feature temporarily prevents the motor from
responding to any previously programmed remote
commands.
1) PRESS & HOLD the motor
head PROGRAMMING BUTTON
until the shade jogs.
2) BRIEFLY PRESS the motor
head PROGRAMMING BUTTON,
the shade jogs twice. Sleep Mode
is activated. ADJUSTING THE SPEED
LED blinks alternately in green and yellow during the adjustment.
1) Move the shade away from the end limits. PRESS & HOLD the UP, MY/STOP
and DOWN buttons simultaneously, until the shade jogs. The shade will move up
and down automatically in ten second cycles.
2) To increase the speed, PRESS & HOLD the UP button
until the shade jogs. Repeat as needed.
Maximum speed is achieved when the shade no
longer jogs when the UP button is pressed.
3) To decrease the speed, PRESS & HOLD the DOWN
button until the shade jogs. Repeat as needed.
Minimum speed is achieved when the shade no
longer jogs when the DOWN button is pressed.
4) To confirm the new speed, PRESS & HOLD the MY/STOP
button until the shade jogs.
10 Sec. 10 Sec.
RESETTING THE MOTOR TO FACTORY MODE
PRESS & HOLD the PROGRAMMING BUTTON on the motor
(shown below) for approximately 12 seconds during which
the shade will jog 3 separate times.
All programmed remotes and limit settings will be erased.
Motor is now reset to factory mode. Motor limits will need
to be re-established.
To delete: First send the shade to the current “my” position, then PRESS & HOLD
the MY/STOP button for 5 seconds. The shade will jog to confirm deletion.
USING THE INTERMEDIATE “MY” POSITION
SETTING INTERMEDIATE "MY" POSITION
2) PRESS & HOLD the MY/STOP
button until the shade jogs. The "my"
favorite position is set.
If the shade is in motion, first stop it by pressing MY/STOP and then MY/STOP again
to send it to the “my” position.
While the shade is stationary, a simple press of the
MY/STOP button will move the shade to the “my”
intermediate position from any shade position.
OR
3) To set a NEW "my" position, repeat steps 1 and 2.
1) Move the shade to the desired position
and press MY/STOP button to stop the
shade.
ENABLING SLEEP MODE
NOTE: If step 3 is not performed, Sleep Mode will automatically
disable aer approximately 10 minutes.
2x
3X
DISABLING SLEEP MODE
3) Press the motor head
PROGRAMMING BUTTON.
The shade jogs and the remote
commands are enabled.
OR
Programming
Button