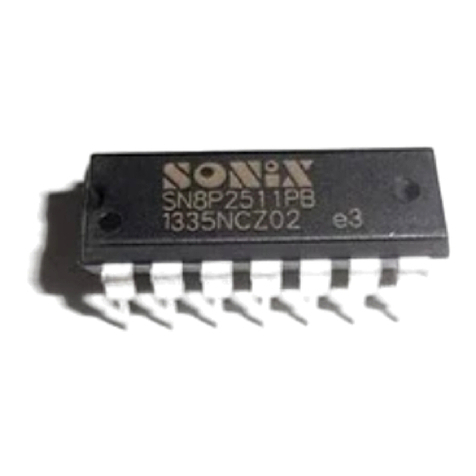
SONIX SN8P2624 User manual

SN8P2624
8-Bit Micro-Controller
SONiX TECHNOLOGY CO., LTD Page 1 Version0.3
SN8P2624
USER’S MANUAL
Preliminary Specification Version 0.3
SN8P2624
S
SO
ON
Ni
iX
X
8
8-
-B
Bi
it
t
M
Mi
ic
cr
ro
o-
-C
Co
on
nt
tr
ro
ol
ll
le
er
r
SONIX reserves the right to make change without further notice to any products herein to improve reliability, function or design. SONIX does not
assume any liability arising out of the application or use of any product or circuit described herein; neither does it convey any license under its patent
rights nor the rights of others. SONIX products are not designed, intended, or authorized for us as components in systems intended, for surgical
implant into the body, or other applications intended to support or sustain life, or for any other application in which the failure of the SONIX product
could create a situation where personal injury or death may occur. Should Buyer purchase or use SONIX products for any such unintended or
unauthorized application. Buyer shall indemnify and hold SONIX and its officers, employees, subsidiaries, affiliates and distributors harmless against
all claims, cost, damages, and expenses, and reasonable attorney fees arising out of, directly or indirectly, any claim of personal injury or death
associated with such unintended or unauthorized use even if such claim alleges that SONIX was negligent regarding the design or manufacture of
the part.

SN8P2624
8-Bit Micro-Controller
SONiX TECHNOLOGY CO., LTD Page 2 Version0.3
AMENDENT HISTORY
Version Date Description
VER 0.1 Jan. 2005 First issue
Apr. 2005 Remove SN8P26242 part number.VER 0.2
Nov.2005 1. ADD Brown-Out reset circuit.
2. Working Voltage vs. Frequency graphs.
VER 0.3 Nov 2005 1. Modify Topr value.
Dec 2005 2. Modify Brown-Out Reset description
3. Remove power consumption(Pc)
4. Remove Noise Filter Enable Working Voltage
5. Remove High clock32K mode
6. Add Fcpu limitation by noise filter.
7. Modify ELECTRICAL CHARACTERISTIC.

SN8P2624
8-Bit Micro-Controller
SONiX TECHNOLOGY CO., LTD Page 3 Version0.3
Table of Content
AMENDENT HISTORY................................................................................................................................ 2
1
1
1PRODUCT OVERVIEW......................................................................................................................... 7
1.1 FEATURES........................................................................................................................................ 7
1.2 SYSTEM BLOCK DIAGRAM.......................................................................................................... 8
1.3 PIN ASSIGNMENT........................................................................................................................... 9
1.4 PIN DESCRIPTIONS....................................................................................................................... 10
1.5 PIN CIRCUIT DIAGRAMS............................................................................................................. 11
2
2
2CENTRAL PROCESSOR UNIT (CPU) .............................................................................................. 12
2.1 MEMORY MAP............................................................................................................................... 12
2.1.1 PROGRAM MEMORY (ROM) ................................................................................................. 12
2.1.1.1 RESET VECTOR (0000H) .................................................................................................. 13
2.1.1.2 INTERRUPT VECTOR (0008H)......................................................................................... 14
2.1.1.3 LOOK-UP TABLE DESCRIPTION.................................................................................... 16
2.1.1.4 JUMP TABLE DESCRIPTION........................................................................................... 18
2.1.1.5 CHECKSUM CALCULATION........................................................................................... 20
2.1.2 CODE OPTION TABLE........................................................................................................... 21
2.1.3 DATA MEMORY (RAM)........................................................................................................... 22
2.1.4 SYSTEM REGISTER.................................................................................................................23
2.1.4.1 SYSTEM REGISTER TABLE ............................................................................................ 23
2.1.4.2 SYSTEM REGISTER DESCRIPTION ............................................................................... 23
2.1.4.3 BIT DEFINITION of SYSTEM REGISTER....................................................................... 24
2.1.4.4 ACCUMULATOR ............................................................................................................... 25
2.1.4.5 PROGRAM FLAG............................................................................................................... 26
2.1.4.6 PROGRAM COUNTER....................................................................................................... 27
2.1.4.7 H, L REGISTERS................................................................................................................. 30
2.1.4.8 Y, Z REGISTERS................................................................................................................. 31
2.1.4.9 R REGISTERS..................................................................................................................... 32
2.2 ADDRESSING MODE .................................................................................................................... 33
2.2.1 IMMEDIATE ADDRESSING MODE....................................................................................... 33
2.2.2 DIRECTLY ADDRESSING MODE.......................................................................................... 33
2.2.3 INDIRECTLY ADDRESSING MODE...................................................................................... 33
2.3 STACK OPERATION...................................................................................................................... 34
2.3.1 OVERVIEW .............................................................................................................................. 34
2.3.2 STACK REGISTERS.................................................................................................................35
2.3.3 STACK OPERATION EXAMPLE............................................................................................. 36

SN8P2624
8-Bit Micro-Controller
SONiX TECHNOLOGY CO., LTD Page 4 Version0.3
3
3
3RESET..................................................................................................................................................... 37
3.1 OVERVIEW..................................................................................................................................... 37
3.2 POWER ON RESET......................................................................................................................... 38
3.3 WATCHDOG RESET...................................................................................................................... 38
3.4 BROWN OUT RESET ..................................................................................................................... 39
3.4.1 BROWN OUT DESCRIPTION................................................................................................. 39
3.4.2 THE SYSTEM OPERATING VOLTAGE DECSRIPTION........................................................ 40
3.4.3 BROWN OUT RESET IMPROVEMENT.................................................................................. 40
3.5 EXTERNAL RESET........................................................................................................................ 42
3.6 EXTERNAL RESET CIRCUIT ....................................................................................................... 42
3.6.1 Simply RC Reset Circuit........................................................................................................... 42
3.6.2 Diode & RC Reset Circuit........................................................................................................43
3.6.3 Zener Diode Reset Circuit........................................................................................................ 43
3.6.4 Voltage Bias Reset Circuit........................................................................................................ 44
3.6.5 External Reset IC...................................................................................................................... 45
4
4
4SYSTEM CLOCK.................................................................................................................................. 46
4.1 OVERVIEW..................................................................................................................................... 46
4.2 CLOCK BLOCK DIAGRAM .......................................................................................................... 46
4.3 OSCM REGISTER........................................................................................................................... 47
4.4 SYSTEM HIGH CLOCK ................................................................................................................. 48
4.4.1 EXTERNAL HIGH CLOCK...................................................................................................... 48
4.4.1.1 CRYSTAL/CERAMIC......................................................................................................... 49
4.4.1.2 RC......................................................................................................................................... 49
4.4.1.3 EXTERNAL CLOCK SIGNAL........................................................................................... 50
4.5 SYSTEM LOW CLOCK.................................................................................................................. 51
4.5.1 SYSTEM CLOCK MEASUREMENT........................................................................................ 52
5
5
5SYSTEM OPERATION MODE...........................................................................................................53
5.1 OVERVIEW..................................................................................................................................... 53
5.2 SYSTEM MODE SWITCHING....................................................................................................... 54
5.3 WAKEUP......................................................................................................................................... 56
5.3.1 OVERVIEW .............................................................................................................................. 56
5.3.2 WAKEUP TIME........................................................................................................................ 56
5.3.3 P1W WAKEUP CONTROL REGISTER................................................................................... 57
6
6
6INTERRUPT........................................................................................................................................... 58
6.1 OVERVIEW..................................................................................................................................... 58
6.2 INTEN INTERRUPT ENABLE REGISTER................................................................................... 59
6.3 INTRQ INTERRUPT REQUEST REGISTER ................................................................................ 60

SN8P2624
8-Bit Micro-Controller
SONiX TECHNOLOGY CO., LTD Page 5 Version0.3
6.4 GIE GLOBAL INTERRUPT OPERATION .................................................................................... 60
6.5 PUSH, POP ROUTINE .................................................................................................................... 61
6.6 INT0 (P0.0) INTERRUPT OPERATION......................................................................................... 62
6.7 INT1 (P0.1) INTERRUPT OPERATION......................................................................................... 63
6.8 T0 INTERRUPT OPERATION ....................................................................................................... 64
6.9 TC1 INTERRUPT OPERATION..................................................................................................... 65
6.10 MULTI-INTERRUPT OPERATION............................................................................................... 66
7
7
7I/O PORT................................................................................................................................................ 67
7.1 I/O PORT MODE ............................................................................................................................. 67
7.2 I/O PULL UP REGISTER ................................................................................................................ 68
7.3 I/O OPEN-DRAIN REGISTER........................................................................................................ 69
7.4 I/O PORT DATA REGISTER.......................................................................................................... 70
8
8
8TIMERS .................................................................................................................................................. 71
8.1 WATCHDOG TIMER...................................................................................................................... 71
8.2 TIMER 0(T0)................................................................................................................................... 73
8.2.1 OVERVIEW .............................................................................................................................. 73
8.2.2 T0M MODE REGISTER........................................................................................................... 73
8.2.3 T0C COUNTING REGISTER................................................................................................... 74
8.2.4 T0 TIMER OPERATION SEQUENCE..................................................................................... 75
8.3 TIMER/COUNTER 0(TC1) ............................................................................................................ 76
8.3.1 OVERVIEW .............................................................................................................................. 76
8.3.2 TC1M MODE REGISTER........................................................................................................ 77
8.3.3 TC1C COUNTING REGISTER................................................................................................ 78
8.3.4 TC1R AUTO-LOAD REGISTER .............................................................................................. 79
8.3.5 TC1 CLOCK FREQUENCY OUTPUT (BUZZER).................................................................. 80
8.3.6 TC1 TIMER OPERATION SEQUENCE .................................................................................. 81
8.4 PWM1 MODE.................................................................................................................................. 82
8.4.1 OVERVIEW .............................................................................................................................. 82
8.4.2 TCxIRQ and PWM Duty........................................................................................................... 83
8.4.3 PWM Duty with TCxR Changing.............................................................................................. 84
8.4.4 PWM PROGRAM EXAMPLE .................................................................................................. 85
9
9
9INSTRUCTION TABLE ....................................................................................................................... 86
1
1
10
0
0ELECTRICAL CHARACTERISTIC.............................................................................................. 87
10.1 ABSOLUTE MAXIMUM RATING................................................................................................ 87
10.2 ELECTRICAL CHARACTERISTIC............................................................................................... 87
10.3 CHARACTERISTIC GRAPHS ....................................................................................................... 88
1
1
11
1
1OTP PROGRAMMING PIN.............................................................................................................89

SN8P2624
8-Bit Micro-Controller
SONiX TECHNOLOGY CO., LTD Page 6 Version0.3
11.1.1 EASY WRITER TRANSITION BOARD SOCKET PIN ASSIGNMENT.................................... 89
11.1.2 WRITER V2.5 AND V3.0 TRANSITION BOARD SOCKET PIN ASSIGNMENT .................... 89
11.1.3 PROGRAMMING PIN MAPPING........................................................................................... 90
1
1
12
2
2PACKAGE INFORMATION ........................................................................................................... 91
12.1 SK-DIP 28 PIN ................................................................................................................................. 91
12.2 SOP 28 PIN....................................................................................................................................... 92
12.3 SSOP 28 PIN..................................................................................................................................... 93

SN8P2624
8-Bit Micro-Controller
SONiX TECHNOLOGY CO., LTD Page 7 Version0.3
1
1
1
PRODUCT OVERVIEW
1.1 FEATURES
)Features Selection Table
Timer PWM
CHIP ROM RAM Stack T0 TC1 I/O Green
Mode Buzzer
Wakeup
Pin No. Package
SN8P1604A 4K*16 128 8 V 22 - V 10 SK-DIP28/SOP28
SN8P2604 4K*16 128 8 V V 24 V V 11 SK-DIP28/SOP28/SSOP28
SN8P26042 4K*16 128 8 V V 16 V V 11 P-DIP20/SOP20/SSOP20
SN8P2624 2K*16 64 8 V V 24 V V 11 SK-DIP28/SOP28/SSOP28
♦Memory configuration ♦Two 8-bit Timer/Counter
OTP ROM size: 2K * 16 bits. T0: Basic timer
RAM size: 64 * 8 bits. TC1: Auto-reload timer/Counter/PWM1/Buzzer output
Eight levels stack buffer
♦On chip watchdog timer and clock source is internal
♦I/O pin configuration low clock RC type (16KHz @3V, 32KHz @5V).
Bi-directional: P0, P1, P2, P5
Input only pin: P0.2 ♦Dual system clocks
Programmable open-drain: P1.0, P1.1 External high clock: RC type up to 10 MHz
Wakeup: P0, P1 level change trigger External high clock: Crystal type up to 16 MHz
Pull-up resisters: P0, P1, P2, P5 Internal low clock: RC type 16KHz(3V), 32KHz(5V)
External Interrupt trigger edge:
P0.0 controlled by PEDGE register ♦Operating modes
P0.1 is falling edge trigger only Normal mode: Both high and low clock active
Slow mode: Low clock only
♦Four interrupt sources Sleep mode: Both high and low clock stop
Two internal interrupts: T0, TC1. Green mode: Periodical wakeup by T0 timer
Two external interrupts: INT0, INT1.
♦Package (Chip form support)
SK-DIP 28 pins
♦Powerful instructions SOP 28 pins
One clocks per instruction cycle (1T) SSOP 28 pins
Most of instructions are one cycle only.
All ROM area JMP instruction.
All ROM area CALL address instruction.
All ROM area lookup table function (MOVC)

SN8P2624
8-Bit Micro-Controller
SONiX TECHNOLOGY CO., LTD Page 8 Version0.3
1.2 SYSTEM BLOCK DIAGRAM
INTERRUPT
CONTROL
EXTERNAL
HIGH OSC.
ACC
INTERNAL
LOW RC
TIMING GENERATOR
RAM
SYSTEM REGISTERS
LVD
(Low Voltage Detector)
WATCHDOG TIMER
TIMER & COUNTER
P0 P5P1
PWM 1
BUZZER 1
ALU
PC
FLAGS
IR
OTP
ROM
PWM1
BUZZER1
P2

SN8P2624
8-Bit Micro-Controller
SONiX TECHNOLOGY CO., LTD Page 9 Version0.3
1.3 PIN ASSIGNMENT
SN8P2624K (SK-DIP 28 pins)
SN8P2624S (SOP 28 pins)
SN8P2624X (SSOP 28 pins)
P0.1/INT1 1 U 28 RST/VPP/P0.2
VDD 2 27 XIN
P5.4 3 26 XOUT/Fcpu
VSS 4 25 P2.7
P0.0/INT0 5 24 P2.6
P5.0 6 23 P2.5
P5.1 7 22 P2.4
P5.2 8 21 P2.3
P5.3/BZ1/PWM1 9 20 P2.2
P1.0 10 19 P2.1
P1.1 11 18 P2.0
P1.2 12 17 P1.7
P1.3 13 16 P1.6
P1.4 14 15 P1.5
SN8P2624K
SN8P2624S
SN8P2624X

SN8P2624
8-Bit Micro-Controller
SONiX TECHNOLOGY CO., LTD Page 10 Version0.3
1.4 PIN DESCRIPTIONS
PIN NAME TYPE DESCRIPTION
VDD, VSS P Power supply input pins for digital circuit.
P0.2/RST/VPP I, P
P0.2: Input only pin (Schmitt trigger) if disable external reset function.
P0.2 without build-in pull-up resister.
Built-in wakeup function.
RST: System reset input pin. Schmitt trigger structure, low active, normal stay to
“high”.
VPP: OTP programming pin.
XIN I Oscillator input pin while external oscillator enable (crystal and RC).
XOUT/Fcpu I/O
XOUT: Oscillator output pin while external crystal enable.
Fcpu: Signal output pin while external RC mode enable.
P0.0/INT0 I/O
Port 0.0 bi-direction pin. Schmitt trigger structure as input mode.
Built-in pull-up resisters.
Built-in wakeup function.
INT0 trigger pin (Schmitt trigger).
P0.1/INT1 I/O
Port 0.1 bi-direction pin. Schmitt trigger structure as input mode.
Built-in pull-up resisters.
Built-in wakeup function.
INT1 trigger pin (Schmitt trigger).
TC1 event counter clock input pin.
P1.0~P1.1 I/O
Port 1.0, P1.1 bi-direction pin and open-drain pin. Schmitt trigger structure as input
mode.
Built-in pull-up resisters.
P1.2~P1.7 I/O
Port 1.2~P1.7 bi-direction pin. Schmitt trigger structure as input mode.
Built-in pull-up resisters.
P2.0~P2.7 I/O
Bi-direction pin. Schmitt trigger structure as input mode.
Built-in pull-up resisters.
P5.0~P5.2, P5.4 I/O Port 5 bi-direction pin. Schmitt trigger structure as input mode.
Built-in pull-up resisters.
P5.3/BZ1/PWM1 I/O
Port 5.3 bi-direction pin. Schmitt trigger structure as input mode.
Built-in pull-up resisters.
TC1 ÷ 2 signal output pin for buzzer or PWM1 output pin.

SN8P2624
8-Bit Micro-Controller
SONiX TECHNOLOGY CO., LTD Page 11 Version0.3
1.5 PIN CIRCUIT DIAGRAMS
Port 0, 1, 2, 5 structure:
Pull-Up
Pin
Output
Latch
PnM, PnUR
Input Bus
PnM
Output Bus
Port 1.0, P1.1 structure:
Pull-Up
Pin
Output
Latch
PnM, PnUR
Input Bus
PnM
Output Bus
P1OC
Open-Drain
Port 0.2 structure:
Pin
Ext. Reset
Code Option
Int. Bus
Int. Rst

SN8P2624
8-Bit Micro-Controller
SONiX TECHNOLOGY CO., LTD Page 12 Version0.3
2
2
2
CENTRAL PROCESSOR UNIT (CPU)
2.1 MEMORY MAP
2.1.1 PROGRAM MEMORY (ROM)
)2K words ROM
ROM
0000H Reset vector User reset vector
0001H Jump to user start address
.
.
0007H
General purpose area
0008H Interrupt vector User interrupt vector
0009H User program
.
.
000FH
0010H
0011H
.
.
.
.
.
03FCH
General purpose area
End of user program
03FDH
03FEH
03FFH
Reserved

SN8P2624
8-Bit Micro-Controller
SONiX TECHNOLOGY CO., LTD Page 13 Version0.3
2.1.1.1 RESET VECTOR (0000H)
A one-word vector address area is used to execute system reset.
)Power On Reset (NT0=1, NPD=0).
)Watchdog Reset (NT0=0, NPD=0).
)External Reset (NT0=1, NPD=1).
After power on reset, external reset or watchdog timer overflow reset, then the chip will restart the program from
address 0000h and all system registers will be set as default values. It is easy to know reset status from NT0, NPD
flags of PFLAG register. The following example shows the way to define the reset vector in the program memory.
¾Example: Defining Reset Vector
ORG 0 ; 0000H
JMP START ; Jump to user program address.
…
ORG 10H
START: ; 0010H, The head of user program.
… ; User program
…
ENDP ; End of program

SN8P2624
8-Bit Micro-Controller
SONiX TECHNOLOGY CO., LTD Page 14 Version0.3
2.1.1.2 INTERRUPT VECTOR (0008H)
A 1-word vector address area is used to execute interrupt request. If any interrupt service executes, the program
counter (PC) value is stored in stack buffer and jump to 0008h of program memory to execute the vectored interrupt.
Users have to define the interrupt vector. The following example shows the way to define the interrupt vector in the
program memory.
Note: ”PUSH”, “POP” instructions save and load ACC/PFLAG without (NT0, NPD). PUSH/POP buffer is a
unique buffer and only one level.
¾Example: Defining Interrupt Vector. The interrupt service routine is following ORG 8.
.CODE
ORG 0 ; 0000H
JMP START ; Jump to user program address.
…
ORG 8 ; Interrupt vector.
PUSH ; Save ACC and PFLAG register to buffers.
…
…
POP ; Load ACC and PFLAG register from buffers.
RETI ; End of interrupt service routine
…
START: ; The head of user program.
… ; User program
…
JMP START ; End of user program
…
ENDP ; End of program

SN8P2624
8-Bit Micro-Controller
SONiX TECHNOLOGY CO., LTD Page 15 Version0.3
¾Example: Defining Interrupt Vector. The interrupt service routine is following user program.
.CODE
ORG 0 ; 0000H
JMP START ; Jump to user program address.
…
ORG 8 ; Interrupt vector.
JMP MY_IRQ ; 0008H, Jump to interrupt service routine address.
ORG 10H
START: ; 0010H, The head of user program.
… ; User program.
…
…
JMP START ; End of user program.
…
MY_IRQ: ;The head of interrupt service routine.
PUSH ; Save ACC and PFLAG register to buffers.
…
…
POP ; Load ACC and PFLAG register from buffers.
RETI ; End of interrupt service routine.
…
ENDP ; End of program.
Note: It is easy to understand the rules of SONIX program from demo programs given above. These
points are as following:
1. The address 0000H is a “JMP” instruction to make the program starts from the beginning.
2. The address 0008H is interrupt vector.
3. User’s program is a loop routine for main purpose application.

SN8P2624
8-Bit Micro-Controller
SONiX TECHNOLOGY CO., LTD Page 16 Version0.3
2.1.1.3 LOOK-UP TABLE DESCRIPTION
In the ROM’s data lookup function, Y register is pointed to middle byte address (bit 8~bit 15) and Z register is pointed
to low byte address (bit 0~bit 7) of ROM. After MOVC instruction executed, the low-byte data will be stored in ACC and
high-byte data stored in R register.
¾Example: To look up the ROM data located “TABLE1”.
B0MOV Y, #TABLE1$M ; To set lookup table1’s middle address
B0MOV Z, #TABLE1$L ; To set lookup table1’s low address.
MOVC ; To lookup data, R = 00H, ACC = 35H
; Increment the index address for next address.
INCMS Z ; Z+1
JMP @F ; Z is not overflow.
INCMS Y ; Z overflow (FFH Æ00), ÆY=Y+1
NOP ;
;
@@: MOVC ; To lookup data, R = 51H, ACC = 05H.
… ;
TABLE1: DW 0035H ; To define a word (16 bits) data.
DW 5105H
DW 2012H
…
Note: The Y register will not increase automatically when Z register crosses boundary from 0xFF to
0x00. Therefore, user must take care such situation to avoid loop-up table errors. If Z register
overflows, Y register must be added one. The following INC_YZ macro shows a simple method
to process Y and Z registers automatically.
¾Example: INC_YZ macro.
INC_YZ MACRO
INCMS Z ; Z+1
JMP @F ; Not overflow
INCMS Y ; Y+1
NOP ; Not overflow
@@:
ENDM

SN8P2624
8-Bit Micro-Controller
SONiX TECHNOLOGY CO., LTD Page 17 Version0.3
¾Example: Modify above example by “INC_YZ” macro.
B0MOV Y, #TABLE1$M ; To set lookup table1’s middle address
B0MOV Z, #TABLE1$L ; To set lookup table1’s low address.
MOVC ; To lookup data, R = 00H, ACC = 35H
INC_YZ ; Increment the index address for next address.
;
@@: MOVC ; To lookup data, R = 51H, ACC = 05H.
… ;
TABLE1: DW 0035H ; To define a word (16 bits) data.
DW 5105H
DW 2012H
…
The other example of loop-up table is to add Y or Z index register by accumulator. Please be careful if “carry” happen.
¾Example: Increase Y and Z register by B0ADD/ADD instruction.
B0MOV Y, #TABLE1$M ; To set lookup table’s middle address.
B0MOV Z, #TABLE1$L ; To set lookup table’s low address.
B0MOV A, BUF ; Z = Z + BUF.
B0ADD Z, A
B0BTS1 FC ; Check the carry flag.
JMP GETDATA ; FC = 0
INCMS Y ; FC = 1. Y+1.
NOP
GETDATA: ;
MOVC ; To lookup data. If BUF = 0, data is 0x0035
; If BUF = 1, data is 0x5105
; If BUF = 2, data is 0x2012
…
TABLE1: DW 0035H ; To define a word (16 bits) data.
DW 5105H
DW 2012H
…

SN8P2624
8-Bit Micro-Controller
SONiX TECHNOLOGY CO., LTD Page 18 Version0.3
2.1.1.4 JUMP TABLE DESCRIPTION
The jump table operation is one of multi-address jumping function. Add low-byte program counter (PCL) and ACC
value to get one new PCL. If PCL is overflow after PCL+ACC, PCH adds one automatically. The new program counter
(PC) points to a series jump instructions as a listing table. It is easy to make a multi-jump program depends on the
value of the accumulator (A).
Note: PCH only support PC up counting result and doesn’t support PC down counting. When PCL is
carry after PCL+ACC, PCH adds one automatically. If PCL borrow after PCL–ACC, PCH keeps value and
not change.
¾Example: Jump table.
ORG 0X0100 ; The jump table is from the head of the ROM boundary
B0ADD PCL, A ; PCL = PCL + ACC, PCH + 1 when PCL overflow occurs.
JMP A0POINT ; ACC = 0, jump to A0POINT
JMP A1POINT ; ACC = 1, jump to A1POINT
JMP A2POINT ; ACC = 2, jump to A2POINT
JMP A3POINT ; ACC = 3, jump to A3POINT
SONIX provides a macro for safe jump table function. This macro will check the ROM boundary and move the jump
table to the right position automatically. The side effect of this macro maybe wastes some ROM size.
¾Example: If “jump table” crosses over ROM boundary will cause errors.
@JMP_A MACRO VAL
IF (($+1) !& 0XFF00) !!= (($+(VAL)) !& 0XFF00)
JMP ($ | 0XFF)
ORG ($ | 0XFF)
ENDIF
ADD PCL, A
ENDM
Note: “VAL” is the number of the jump table listing number.

SN8P2624
8-Bit Micro-Controller
SONiX TECHNOLOGY CO., LTD Page 19 Version0.3
¾Example: “@JMP_A” application in SONIX macro file called “MACRO3.H”.
B0MOV A, BUF0 ; “BUF0” is from 0 to 4.
@JMP_A 5 ; The number of the jump table listing is five.
JMP A0POINT ; ACC = 0, jump to A0POINT
JMP A1POINT ; ACC = 1, jump to A1POINT
JMP A2POINT ; ACC = 2, jump to A2POINT
JMP A3POINT ; ACC = 3, jump to A3POINT
JMP A4POINT ; ACC = 4, jump to A4POINT
If the jump table position is across a ROM boundary (0x00FF~0x0100), the “@JMP_A” macro will adjust the jump table
routine begin from next RAM boundary (0x0100).
¾Example: “@JMP_A” operation.
; Before compiling program.
ROM address
B0MOV A, BUF0 ; “BUF0” is from 0 to 4.
@JMP_A 5 ; The number of the jump table listing is five.
0X00FD JMP A0POINT ; ACC = 0, jump to A0POINT
0X00FE JMP A1POINT ; ACC = 1, jump to A1POINT
0X00FF JMP A2POINT ; ACC = 2, jump to A2POINT
0X0100 JMP A3POINT ; ACC = 3, jump to A3POINT
0X0101 JMP A4POINT ; ACC = 4, jump to A4POINT
; After compiling program.
ROM address
B0MOV A, BUF0 ; “BUF0” is from 0 to 4.
@JMP_A 5 ; The number of the jump table listing is five.
0X0100 JMP A0POINT ; ACC = 0, jump to A0POINT
0X0101 JMP A1POINT ; ACC = 1, jump to A1POINT
0X0102 JMP A2POINT ; ACC = 2, jump to A2POINT
0X0103 JMP A3POINT ; ACC = 3, jump to A3POINT
0X0104 JMP A4POINT ; ACC = 4, jump to A4POINT

SN8P2624
8-Bit Micro-Controller
SONiX TECHNOLOGY CO., LTD Page 20 Version0.3
2.1.1.5 CHECKSUM CALCULATION
The last ROM address are reserved area. User should avoid these addresses (last address) when calculate the
Checksum value.
¾Example: The demo program shows how to calculated Checksum from 00H to the end of user’s code.
MOV A,#END_USER_CODE$L
B0MOV END_ADDR1, A ; Save low end address to end_addr1
MOV A,#END_USER_CODE$M
B0MOV END_ADDR2, A ; Save middle end address to end_addr2
CLR Y ; Set Y to 00H
CLR Z ; Set Z to 00H
@@:
MOVC
B0BSET FC ; Clear C flag
ADD DATA1, A ; Add A to Data1
MOV A, R
ADC DATA2, A ; Add R to Data2
JMP END_CHECK ; Check if the YZ address = the end of code
AAA:
INCMS Z ; Z=Z+1
JMP @B ; If Z != 00H calculate to next address
JMP Y_ADD_1 ; If Z = 00H increase Y
END_CHECK:
MOV A, END_ADDR1
CMPRS A, Z ; Check if Z = low end address
JMP AAA ; If Not jump to checksum calculate
MOV A, END_ADDR2
CMPRS A, Y ; If Yes, check if Y = middle end address
JMP AAA ; If Not jump to checksum calculate
JMP CHECKSUM_END ; If Yes checksum calculated is done.
Y_ADD_1:
INCMS Y ; Increase Y
NOP
JMP @B ; Jump to checksum calculate
CHECKSUM_END:
…
…
END_USER_CODE: ; Label of program end
Table of contents
Other SONIX Microcontroller manuals

SONIX
SONIX SN32F769 User manual

SONIX
SONIX SN8P2714_2715 User manual

SONIX
SONIX SN8P1829 User manual

SONIX
SONIX SN8P1700 Series User manual

SONIX
SONIX SN8P26L38 User manual

SONIX
SONIX SN8P2977 User manual

SONIX
SONIX SN8P26L00 Series User manual

SONIX
SONIX SN32F260 Series User manual

SONIX
SONIX SN32F280 Series User manual

SONIX
SONIX SN8P2308 User manual