3 GB
Notice for users
Program © 2001 Sony Corporation
Documentation ©2001 Sony Corporation
A
ll rights reserved. This manual or the software
described herein, in whole or in part, may not
be reproduced, translated or reduced to any
machine readable form without prior written
approval from Sony Corporation.
IN NO EVENT SHALL SONY CORPORATION
BE LIABLE FOR ANY INCIDENTAL,
CONSEQUENTIAL OR SPECIAL DAMAGES,
WHETHER BASED ON TORT, CONTACT, OR
OTHERWISE, ARISING OUT OF OR IN
CONNECTION WITH THIS MANUAL, THE
SOFTWARE OR OTHER INFORMATION
CONTAINED HEREIN OR THE USE THEREOF.
By breaking the seal of the envelope of the CD-
ROM package, you accept all the terms and
conditions of this agreement. If you do not
accept these terms and conditions, please
return this disk envelope unopened, along with
the rest of the package, immediately to the
dealer where you obtained it.
Sony Corporation reserves the right to make
any modification to this manual or the
information contained herein at any time
without notice.
The software described herein may also be
governed by the terms of a separate user license
agreement.
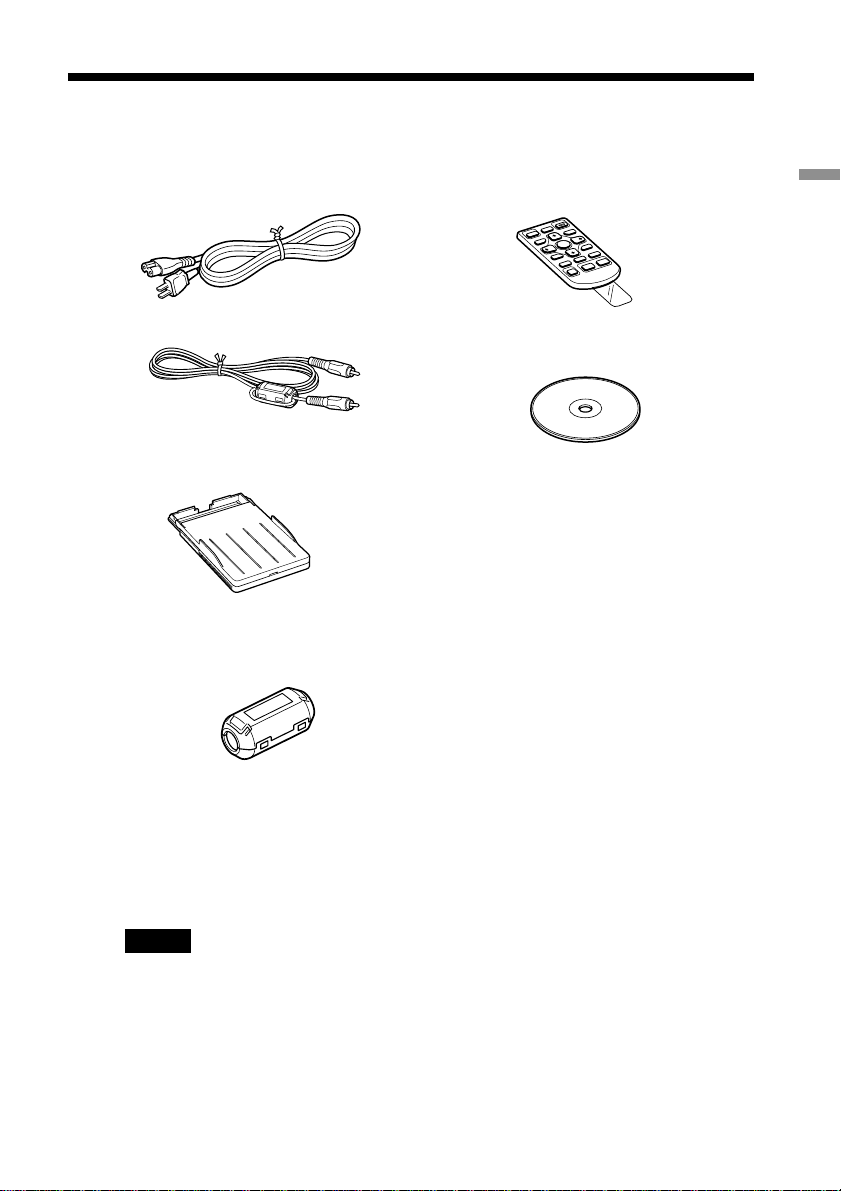
User Registration
To receive customer services, complete and
return the registration card included in your
package.
Any design data such as sample pictures
provided in this software cannot be modified or
duplicated except for the purpose of personal
use. Any unauthorized duplication of this
software is prohibited under copyright law.
Please note that unauthorized duplication or
modification of others’ portraits or copyrighted
work could infringe the rights reserved by right
holders.
•Microsoft, MS, MS-DOS and Windows®
are registered trademarks of Microsoft
Corporation in the United States and
other countries.
•IBM and PC/AT are registered
trademarks of International Business
Machines Corporation.
•MMX and Pentium are registered
trademarks of Intel Corporation.
•Apple, Macintosh, Power Macintosh,
and Mac OS are registered trademarks of
Apple Computer, Inc.
• “Memory Stick, “MagicGate Memory
Stick and their logo marks are the
trademarks of Sony Corporation.
•Aplix and PacketMan™ is the registered
trademarks of Aplix Co., Ltd.
•All other companies and product names
mentioned herein may be the
trademarks or registered trademarks of
their respective companies. Furthermore,
“™ and “® are not mentioned in each
case in this manual.
CAUTION
To prevent electric shock, match wide blade
of plug to wide slot, fully insert.
CAUTION
The nameplate is located on the bottom
enclosure.
Declaration of Conformity
Trade Name: SONY
Model No.: DPP-SV88
Responsible Party:
Sony Electronics Inc.
Address: 1 Sony Drive, Park Ridge,
NJ 07656 U.S.A.
Telephone No.: 201-930-6972
This device complies with part 15 of the
FCC Rules. Operation is subject to the
following two conditions:
(1) this device may not cause harmful
interference, and (2) this device must
accept any interference received, including
interference that may cause undesired
operation.
GB