South Galaxy G2 User manual

Galaxy G2
- 1 -
Galaxy G2 Measuring System
User Manual
Copyright ©SOUTH Surveying & Mapping Instrument CO.,LTD.
*All Rights Reserved

Galaxy G2
- 2 -
Contents
Contents ....................................................................................................................................... - 2 -
ChapterⅠ Preface ........................................................................................................................ - 4 -
§1.1 Introduction ................................................................................................................. - 4 -
§1.2 Applications ................................................................................................................. - 4 -
§1.3 Main Features .............................................................................................................. - 5 -
ChapterⅡ Hardware Component ................................................................................................ - 7 -
§2.1 Front Components ....................................................................................................... - 8 -
§2.2 Bottom Components .................................................................................................... - 9 -
ChapterⅢ Hardware Operation ................................................................................................. - 10 -
§3.1 Power on/off .............................................................................................................. - 10 -
§3.2 Check working mode ................................................................................................. - 10 -
§3.3 Mode selection ........................................................................................................... - 10 -
§3.4 Self-check .................................................................................................................. - 12 -
§3.5 USB mode setting ...................................................................................................... - 13 -
§3.6 Factory reset............................................................................................................... - 14 -
ChapterⅣ Web UI Management ............................................................................................... - 15 -
§4.1 Overview ................................................................................................................... - 15 -
§4.2 Access by WiFi .......................................................................................................... - 15 -
§4.3 Access by USB .......................................................................................................... - 16 -
§4.4 Web UI main interface ............................................................................................... - 21 -
§4.4.1 Status ............................................................................................................... - 22 -
§4.4.2 Configuration .................................................................................................. - 24 -
§4.4.3 Satellite Information ....................................................................................... - 33 -
§4.4.4 Data Record .................................................................................................... - 35 -
§4.4.5 Data Transfer .................................................................................................. - 36 -
§4.4.6 Network Config .............................................................................................. - 42 -
§4.4.7 Radio Config ................................................................................................... - 48 -
§4.4.8 Firmware Update ............................................................................................ - 49 -
§4.4.9 Track Manage ................................................................................................. - 51 -
§4.4.10 Coordinate System(reserve) .......................................................................... - 53 -
§4.4.11 Online Service(reserve) ................................................................................ - 54 -
§4.4.12 User Management ......................................................................................... - 54 -
§4.4.13 Help............................................................................................................... - 55 -
ChapterⅤ Data Collector -- H5 ................................................................................................. - 56 -
§5.1 Get to start ................................................................................................................. - 57 -
§5.2 Accessories of H5 ...................................................................................................... - 59 -

Galaxy G2
- 3 -
§5.3 Software installation .................................................................................................. - 60 -
§5.4 Bluetooth Connection ................................................................................................ - 62 -
ChapterⅥ External UHF Radio—S1 ........................................................................................ - 65 -
§6.1 Overview ................................................................................................................... - 65 -
§6.2 Hardware component ................................................................................................. - 65 -
§6.3 Hardware operation ................................................................................................... - 67 -
6.3.1 Channel (CH) .................................................................................................... - 67 -
6.3.2 Frequency ......................................................................................................... - 67 -
6.3.3 Power mode (L W) ............................................................................................ - 67 -
6.3.4 Air (Air baudrate) ............................................................................................. - 67 -
6.3.5 Protocol ............................................................................................................. - 68 -
6.3.6 Serial port baudrate (Ser:) ................................................................................. - 68 -
6.3.7 Power voltage ................................................................................................... - 68 -
6.3.8 Bluetooth........................................................................................................... - 68 -
6.3.9 reset ................................................................................................................... - 68 -
§6.4 Accessories ................................................................................................................ - 69 -
§6.5 Specifications ............................................................................................................. - 69 -
§6.6 Application Notice ..................................................................................................... - 70 -
ChapterⅦ Accessories ............................................................................................................. - 71 -
§7.1 Instrument Case ......................................................................................................... - 71 -
§7.2 Charger&Adapter....................................................................................................... - 71 -
§7.3 Differential Antennas ................................................................................................. - 72 -
§7.4 Cables ........................................................................................................................ - 72 -
ChapterⅧ Hardware Registration ........................................................................................... - 73 -
ChapterⅨ Firmware Update ...................................................................................................... - 74 -
Appendix A Galaxy G2 technical specifications ....................................................................... - 76 -
Appendix C Technical Terms ..................................................................................................... - 78 -
FCC Statement ........................................................................................................................... - 80 -

Galaxy G2
- 4 -
ChapterⅠ Preface
Read this chapter, you will have a brief knowledge of South Company and Galaxy G2
measurement system.
§1.1 Introduction
Welcome to South Surveying&Mapping Instruments Co., Ltd, which is China’s leading
manufacturer of surveying equipment including GNSS receivers and Total Stations. To know
more about SOUTH, please visit our official website http://www.southinstrument.com/
This manual takes Galaxy G2 measuring system for example, to explain how to install, set up and
uses the RTK system as well as the use of the accessories. We recommend that you read these
instructions carefully before using the instrument.
§1.2 Applications
Control Survey: dual-band (dual-frequency) system static measurements can accurately complete
the high-precision deformation observation, photo-control point measurement.
Highway Survey: quickly complete the encryption of the control points, road topographic
mapping, cross-section measurement, profile measurement with EGStar.
CORS Application: provide more stable and convenient data link for field operations. It is
seamlessly compatible with all types of domestic CORS applications.
Data acquisition measurement: perfect match South’s various measurement software to do quick
and easy data acquisition.
Stakeout shot: large-scale point, line, plane lofting.
Electric Power Measurement: power line measurement orientation, ranging, angle calculation.
Marine application: oceanographic research, dredging, piling, inserted row, making the marine
operations more convenient and easy.

Galaxy G2
- 5 -
§1.3 Main Features
Intelligent Platform
New generation of embedded Linux operating system platform improves RTK performance and
work efficiency. Its operating efficiency is higher; a unique core processing mechanism which can
respond to more than one command at one time; it starts faster and more responsive in real time.
While the stability of system is much higher, it can be adapted to the job of longer uninterrupted
power.
Internal Web UI management
Embedded Web UI management platform supports WIFI and USB mode connection. Users can
monitor the receiver status and configure it via the internal Web UI management platform.
Bluetooth
Galaxy G2 is equipped with dual-mode Bluetooth v4.0 standard which is able to connect the other
smart devices and compatible with Bluetooth v2.1 standard. It not only enlarges the work range
but also makes the data communication become more stable.
WiFi
As the new feature and technology adopted on Galaxy G2, it not only can be used as data link to
access to internet, but also can be as a hotspot which can be accessed by any other smart devices
to configure the receiver.
Advanced InBuilt UHF module
Galaxy G2 adopts new and excellent datalink system, which is compatible with current radio
protocols in the market, and realizes the random switching of the radio range 410MHZ-470MHZ
and the power level as well. And the new protocol—“Farlink” is able to achieve the working
range as 8km.
Upgraded network module
Standard 4G module is integrated which supports TDD-LTE/FDD-LTE 4G network and
downward compatible with 3G and 2G network. Also supports all kinds of network types to
access CORS seamlessly.

Galaxy G2
- 6 -
Speed Dial
Smart PPP dialing technology can auto dial which makes the Galaxy G2 keeping online
continuously during the survey.
Intelligent Interaction
Support to access the internal web UI manage page of receiver with WiFi and USB connection,
monitor host state real-time, configure receiver freely.
Full Constellations Tracking
Equipped with most advanced GNSS boards, Galaxy G2 system can track most signal from all
kinds of running satellite constellation, especially support B1, B2 and B3 signal from BeiDou,
also get position result with only BeiDou signal.
Electronic Bubble & Tilt Compensation
Galaxy G2 is integrated with a new generation IMU module which makes tilt measurement more
stable, accurate and fast that without strict leveling the receiver to measure the point at will, it
helps surveyors boost productivity by 30 percent.
Worry-free surveying
The new generation of SoC platform gives RTK more stable performance and lower power
consumption. The built-in 6800mAh high-performance battery can support 15 hours of
continuous operation. G2 adopts Type-C charging interface which supports PD rapid charging, the
battery can be full charged in 3 hours that lasts full-day work.
Intelligent Storage
The raw data including STH, Rinex2.01 and Rinex3.02 not only can be saved in the internal
memory (8G SSD), but also can be stored into an external USB device (OTG). The configurable
sample frequency is really up to 20Hz.
Amazing Housing
With highly integrated and layered design, Galaxy G2 is smaller than typical Galaxy series
receivers. And coupled with the magnesium alloy body shell, the weight of G2 is only 850g
including internal battery, extremely light and convenient to carry.
NFC Function
The internal NFC module can make the complicated Bluetooth communication easier and more
simple.

Galaxy G2
- 7 -
ChapterⅡ Hardware Component
Reading this chapter, you can grasp the components, installation and the function of
Galaxy G2 measuring system
The overall appearance of Galaxy G2 is round and flat, with a height of 85mm and a diameter of
130mm. It looks elegant, strong and durable. And it adopts a combination design of voice and
buttons, easier to operate. The bottom of the receiver has commonly used interfaces.

Galaxy G2
- 8 -
§2.1 Front Components
Ref
Component Description
①
GNSS Antenna Grasps satellites signals
②
Satellites Indicator
Flashes in red to indicate that the satellites are tracking by 0.2s
interval, repeat in every 10s.
③
Data Indicator
UHF mode: Flashes in red to indicate that the signal is
receiving/transmitting with the interval.
GPRS mode: 1) Rapidly flashes in red to indicate that the
receiver is dialing; 2) Flashes in red with the signal
receiving/transmitting interval when successful dial.
WiFi mode: 1) Rapidly flashes in red to indicate that the
receiver is establishing WiFi connection; 2) Flashes in red with
the signal receiving/transmitting interval when successful
connection.
Static mode: Flashes by the data sampling interval to indicate
the data file is recording.
④
Bluetooth Indicator
Glows in red to indicate that Bluetooth connection has
established between controller and receiver
⑤
Power Indicator Glows in red to indicate that there is enough power for working;
Flashing in red means low power.
⑥
Charging Indicator
Glows in blue to indicate that the battery is charging, and turning
into green means the battery is full charged.
①
③
②
④
⑤
⑥

Galaxy G2
- 9 -
§2.2 Bottom Components
Ref Component Description
①
Power button Power on/off receiver; Switch and confirm working
mode; Perform self-check operation.
②
SN label Apply for a registration code, Bluetooth ID
③
Speaker Mode setting and working status prompt
④
Screw hole
Fix the mainframe to the tribrach or the pole
⑤
Type-C USB port
&
SIM card slot
USB for data transmission, OTG interface and
Ethernet port for login web interface, battery charging
port.
Inserting a Micro SIM card when the receiver is set in
GPRS mode
⑥
UHF antenna interface Install UHF antenna
⑦
5-pin LEMO port
1, As a power port connected with an external power
supply device; 2, as a differential transmission port
connected with an external radio; 3, as a serial port to
check data output and debug
③
⑦
①
④
⑤
⑥
②

Galaxy G2
- 10 -
ChapterⅢ Hardware Operation
§3.1 Power on/off
Power on
Press the power button for once, all the indicators glow in red, after few seconds (around 10
seconds), the instrument completes initializing along with voice prompt about the working mode
(for example, “Rover, internal radio mode”). After a while, instrument starts to track satellites.
Power off
Press the power button and hold for a while, after 3 beeps and the “Power off” voice prompt at the
third beeping, release power button, the instrument will switch off.
§3.2 Check working mode
Press the power button for once in the state of power-on, the instrument will prompt with voice
message about current working mode (for example, “Rover, internal radio mode”).
§3.3 Mode selection
Rover
Press and hold the power button for about 5 seconds and pass over the state of power off (do not

Galaxy G2
- 11 -
release the button even the instrument says power off), then Galaxy G2 will say “start to set work
mode”, at this moment, release power button, the working mode will be repeated from Rover to
Static on control panel. When the Bluetooth indicator glows in red accompany with “Rover” voice
message, press the power button to confirm.
Base
Press and hold the power button for about 5 seconds and pass over the state of power off (do not
release the button even the instrument says power off), then Galaxy G2 will say “start to set work
mode”, at this moment, release power button, the working mode will be repeated from Rover to
Static on control panel. When the Bluetooth indicator glows in red accompany with “Base” voice
message, press the power button to confirm.
Static
Press and hold the power button for about 5 seconds and pass over the state of power off (do not
release the button even the instrument says power off), then Galaxy G2 will say “start to set work
mode”, at this moment, release power button, the working mode will be repeated from Rover to
Static on control panel. When the Bluetooth indicator glows in red accompany with “Static” voice
message, press the power button to confirm.

Galaxy G2
- 12 -
After that, press the power button for once to make sure if the working mode is correctly setup.
Note: Galaxy G2 only supports the working mode selected by control panel, without datalink
configuration.
§3.4 Self-check
Self-check is an useful operation to simply check the main hardware components if the instrument
is abnormal or not working properly.
Press and hold the power button for about 10 seconds and pass over the state of power off and
mode selection (do not release the button even the instrument says power off and start to set work
mode), then Galaxy G2 will say “start to self-check”, at this moment, release power button, the
instrument will perform self-check automatically for the modules one by one.
The sequence of modules checking is:
OEM board checking
Network module checking (GPRS module checking)
UHF module checking
Sensors checking
WiFi module checking
Bluetooth module checking
If all the modules are normal during self-check, the instrument will get into the state of power-on.

Galaxy G2
- 13 -
§3.5 USB mode setting
Press and hold the power button for about 15 seconds and pass over the foregoing states (power
off, mode selection, self-check), Galaxy G2 will get into USB mode setting with voice message
saying “start to set USB mode”, at this moment, release power button, the instrument repeats
“ USB disk” and “ USB network interface” for optional, choose the proper mode and press power
button to confirm.
U
SB disk
U
SB
network interface

Galaxy G2
- 14 -
§3.6 Factory reset
Press and hold the power button for about 20 seconds and pass over the foregoing states (power
off, mode selection, self-check, USB mode setting), Galaxy G2 will get into factory reset progress
with voice message saying “start to restore factory default”, at this moment, release power button,
all the indicators glows and the instrument is performing the factory reset automatically. After this
progress complete, the instrument will restart automatically with the factory default settings.

Galaxy G2
- 15 -
ChapterⅣ Web UI Management
§4.1 Overview
Because of using the smart embedded Linux operating system and SOUTH intelligent cloud
technology, the web UI allows users to configure and monitor the status of Galaxy G2 in real-time.
The accessing way is not only by WiFi connection, but also can be USB mode.
§4.2 Access by WiFi
The WIFI hotspot is default broadcasted by Galaxy G2, search the WIFI hotspot which named
with SOUTH_xxxx using smartphone, tablet or laptop, then establish the WIFI connection, input
the default IP (10.1.1.1) into broswer, on the login interface, apply “admin” for the username and
password.
For example, search the WIFI hotspot broadcasted by a Galaxy G2 receiver using a laptop PC,
choose the WIFI hotspot and click on connect button to establish the connection without
password.

Galaxy G2
- 16 -
Run IE broswer on computer and input the default IP (10.1.1.1) into address bar, after a while, the
system login interface is refreshed, then apply “admin” for username and password to login.
§4.3 Access by USB
On this mode, the Type-C USB port of Galaxy G2 must work as an Ethernet port, then internal
web UI shall be accessed via USB cable connection with computer.
First of all, a corresponding driver is required to install to the computer, then this function could
be activated.
Due to different operating system is installed on computer, the drivers should be applied to a
suitable one. The file bugvista64.inf is applied to 64bit operating system, and linux.inf is for 32bit
operating system.
Make sure that the USB port (Type-C) is switched into USB network interface (please refer to
section 3.5, USB mode setting).
IP Address: 10.1.1.1
Username: admin
Password: admin

Galaxy G2
- 17 -
Choose the folder which contains the drivers

Galaxy G2
- 18 -
NOTE: The driver can be downloaded from official website automatically or please contact with
us for more supports.
If the driver has been successfully installed, the USB port of Galaxy G2 will be recognized as
Linux USB Ethernet/RNDIS Gadget, and a local area connection will generate in Network
Connections on the computer. For example, Local Area Connection 138 generates after
connecting Galaxy G2 receiver to computer via USB network interface.
However, sometimes the computer cannot detect the receiver by USB network interface because
there is something wrong with acquiring IP automatically, therefore, we need to do something to
avoid such problem, that is to set a fixed LAN IP for the connection:
Right click on the local area connection which newly generates, choose properties to call out the
local area connection properties window.

Galaxy G2
- 19 -
Then double click on Internet Protocol Version 4 (TCP/IPv4) option or click on properties button
to call out Internet Protocol Version 4 (TCP/IPv4) properties window, set the fixed LAN IP
address as shown in following, then click OK button and confirm the settings, return to the IE
browser and use the IP address 192.168.155.155 to access the internal web UI.
Run IE broswer on computer and input the default IP (192.168.155.155) into address bar, after a
while, the system login interface is refreshed, then apply “admin” for username and password to
login.

Galaxy G2
- 20 -
Remote Login
If users would like to remote login the web UI of Galaxy G2, then Galaxy G2 has to connect to
the internet and forward its 80 port to the public network. For example, if the IP address
222.196.35.76 is the public network IP which Galaxy G2 has connected, and the 80 port of
Galaxy G2 has been bounded with 8000 in public network, then users can input the public
network IP address into IE explorer along with the forwarding port for login. (http://
222.196.35.76:8000)
NOTE: The IE explorer is recommended to use for the Web UI login.
IP Address: 192.168.155.155
Username: admin
Password: admin
Table of contents
Other South Measuring Instrument manuals
South
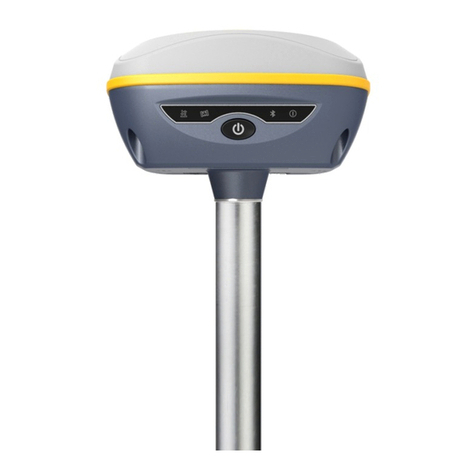
South GALAXY G7 User manual

South
South ET-02 User manual

South
South N9 Series User manual

South
South Galaxy G1 User manual

South
South Galaxy G6 User manual
South
South NTS-960R User manual

South
South N40 Series User manual

South
South A1 Series User manual
South
South N3 Series User manual

South
South N6+ Series User manual
Popular Measuring Instrument manuals by other brands
physa
physa EIU1-1 Owner's Manual & Installation Instructions

Asist
Asist LM030 Instructions for use

Tecnosystemi
Tecnosystemi Toolsplit TSF1 user manual

KPS
KPS KPS-PA20 MINI instruction manual
GW Instek
GW Instek GSP-730 operating instructions

Kingspan
Kingspan TMS300 MULTI-TANK CS User and installation manual

