8
Anchorage at foot level.
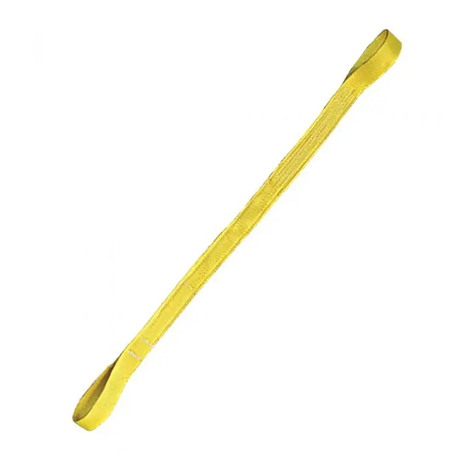
1. Access casualty’s anchorage point.
2. Attach the anchor sling to a suitable anchor point
above the casualty.
3. The rescuer will use their legs to help pull in the rope.
The single pulley is clipped to the anchor sling.
4. Adjust pole to the required length.
5. Attach the red clip to the end of the pole, and clip the
double pulley into the webbing.
6. Adjust ropes in-between the pulleys to the same
length as the pole.
7. Set the red clip to open.
8. Using the pole, attach the red clip to the casualty’s
harness attachment.
9. Remove the pole from the red clip.
10. Attach the GRIGRI to the rescuers harness.
11. Pull the slack rope through the GRIGRI to tension the
system, and squat down.
12. The rescuer now stands up, thus raising the casualty.
13. With one hand, the rescuer holds the rope below the
GRIGRI, close to the attachment sling. With the
other hand they take in the slack rope as they squat
down.
14. Once the casualty’s weight has been transferred to
the GOTCHA™ then their lanyard can be
disconnected.
15. The casualty can now be lowered as follows.
16. To lower the casualty the rescuer must take hold o
the rope that exits the GRIGRI, and this is used to
control the descent.
17. With the other hand releases the black handle on the
GRIGRI until the rope can be fed at a controllable
speed. This thus lowers the casualty.(Please see
note)
INSTALLATION & USE : INSTRUCTIONS
LOW
ANCHOR
Green Pulley to Anchor Sling
5
7
11-13
8
17
NOTE: In order to carry out a rescue the rescuer requires a harness with a front point of attachment for locating the GRIGRI.
If the anchor point for the GOTCHA™ is such that the casualty must be lowered, then the rope length in the kit must
be four times the distance from the anchorage to the point of safety.
Gotcha Distanz-
Rettungsvorrichtung
14. Nach der Gewichtsverlagerung des Verunglückten auf
GOTCHA™ kann seine Leine abgenommen werden.
15. Der Verunglückte kann wie folgt abgeseilt werden.
16. Zum Abseilen des Verunglückten muss der Retter das
ausdem GRIGRI austretende Seil fassen und damit das
Abseilenkontrollieren.
17. Mit der anderen Hand wird der schwarze Griff am
GRIGRIgelöst, bis das Seil kontrolliert abgewickelt werden
kann.So wird der Verunglückte abgeseilt. (Bitte den
Hinweisbeachten)
HINWEIS: Zur Durchführung einer Rettung benötigt
der Retter einen Gurt mit einem vorderen Ankerpunkt
für die Befestigung des GRIGRI. Wenn der Ankerpunkt
für GOTCHA™ nur ein Abseilen des Verunglückten
zulässt, muss die Länge des Seils der Vorrichtung
das Vierfache des Abstands vom Anker zur sicheren
Bergungsstelle betragen.
Bewahren Sie diese Anleitungen oder eine Kopie mit dem
GOTCHA™ für zukünftige Prüfungen und Untersuchungen
auf. Die Ausrüstung muss bei der Lieferung an
Arbeitsstellen/Werke sowie vor jedem Einsatz einer
visuellen und taktilen Prüfung unterzogenwerden.
SpanSet empfiehlt alle 6 Monate eine dokumentierte
Inspektion durch einen Spezialisten.
Besondere Aufmerksamkeit ist dabei auf folgendes zu
richten:
Metallteile – Prüfung auf Anzeichen von Schäden/
Verbiegungen/Korrosion und ordnungsgemäße Funktion und
Verriegelung derVerbindungen.
Rope* – Untersuchung auf Anzeichen von Verschleiß/
Abnutzung, einschließlich Verschleiß des Seils, Spliss,
Dehnung undVerschmelzung.
* Punktuelle Abnutzung kann anders als genereller
Verschleiß durch die Führung des Seils über scharfe Kanten
oder Vorsprüngeverursacht werden und die Zugkraft
schwerwiegend beeinträchtigen. Eine leichte Beschädigung
der äußeren Fasern und sporadischerSpliss können noch als
unschädlich gelten; eine Abnahme des Seildurchmessers
oder gravierende Deformationen des Flechtmustersmüssen
jedoch zur Rückweisung führen.
Persönliche Schutzausrüstung muss unverzüglich
ausgemustert werden, wenn sie schweren Schlägen oder
Stößen ausgesetzt war oderwenn Zweifel an ihrem Zustand
bestehen. (Siehe die Punkte oben)
Der GOTCHA™ kann im Bedarfsfall gereinigt werden. Die
folgenden Maßnahmen müssendabei beachtet werden:
Verwenden Sie ein mildes Reinigungsmittel in lauwarmem
Wasser und wischen Sie den GOTCHA™ mit einem Tuch oder
Schwamm ab. Er darf dabei nichtübermäßig nass werden.
Dieser Vorgang muss zum Abspülen mit klarem Wasser
wiederholt werden. Dann wird die Vorrichtung an derLuft
getrocknet – keiner direkten Wärmequelle aussetzen. Sollten
Sie weitere Informationen benötigen, wenden Sie sich bitte
an SpanSet.
Anchorage at foot level.
1. Access casualty’s anchorage point.
2. Attach the anchor sling to a suitable anchor point
above the casualty.
3. The rescuer will use their legs to help pull in the rope.
The single pulley is clipped to the anchor sling.
4. Adjust pole to the required length.
5. Attach the red clip to the end of the pole, and clip the
double pulley into the webbing.
6. Adjust ropes in-between the pulleys to the same
length as the pole.
7. Set the red clip to open.
8. Using the pole, attach the red clip to the casualty’s
harness attachment.
9. Remove the pole from the red clip.
10. Attach the GRIGRI to the rescuers harness.
11. Pull the slack rope through the GRIGRI to tension the
system, and squat down.
12. The rescuer now stands up, thus raising the casualty.
13. With one hand, the rescuer holds the rope below the
GRIGRI, close to the attachment sling. With the
other hand they take in the slack rope as they squat
down.
14. Once the casualty’s weight has been transferred to
the GOTCHA™ then their lanyard can be
disconnected.
15. The casualty can now be lowered as follows.
16. To lower the casualty the rescuer must take hold o
the rope that exits the GRIGRI, and this is used to
control the descent.
17. With the other hand releases the black handle on the
GRIGRI until the rope can be fed at a controllable
speed. This thus lowers the casualty.(Please see
note)
INSTALLATION & USE : INSTRUCTIONS
LOW
ANCHOR
Green Pulley to Anchor Sling
5
7
11-13
8
17
NOTE: In order to carry out a rescue the rescuer requires a harness with a front point of attachment for locating the GRIGRI.
If the anchor point for the GOTCHA™ is such that the casualty must be lowered, then the rope length in the kit must
be four times the distance from the anchorage to the point of safety.
