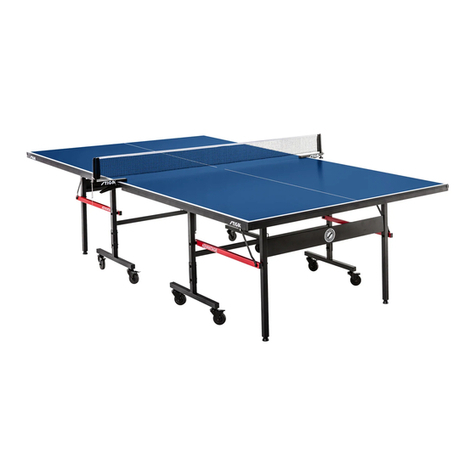
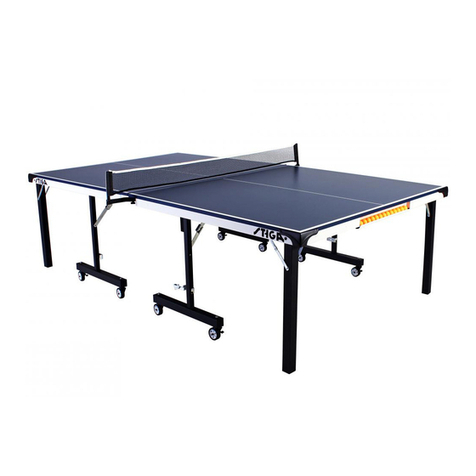
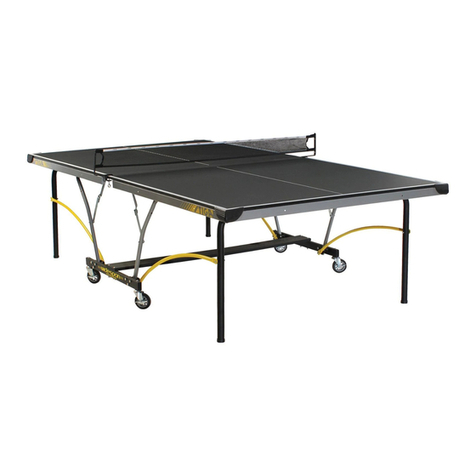
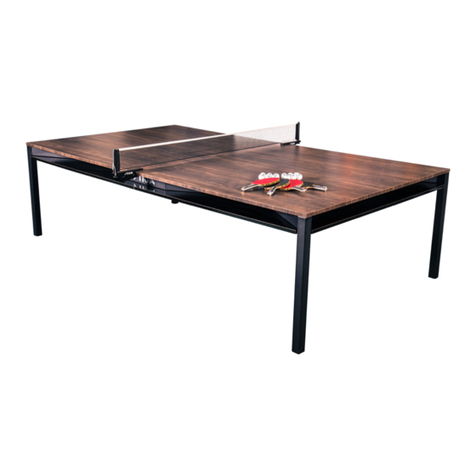
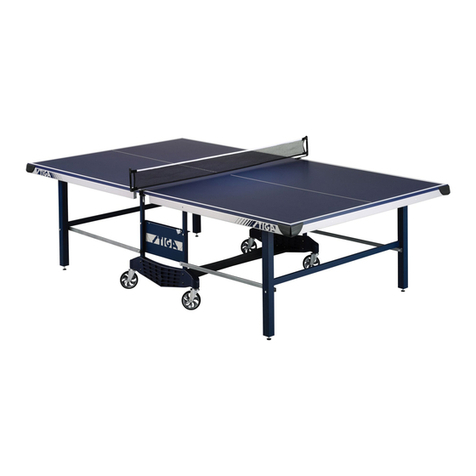
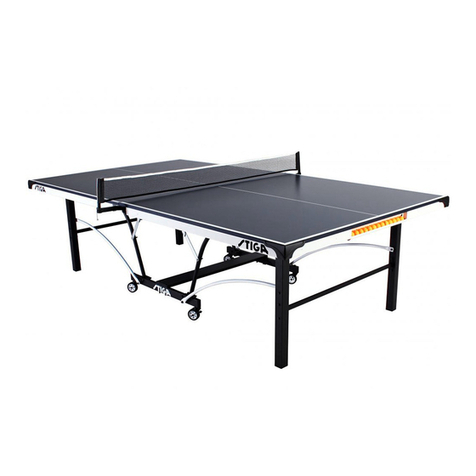
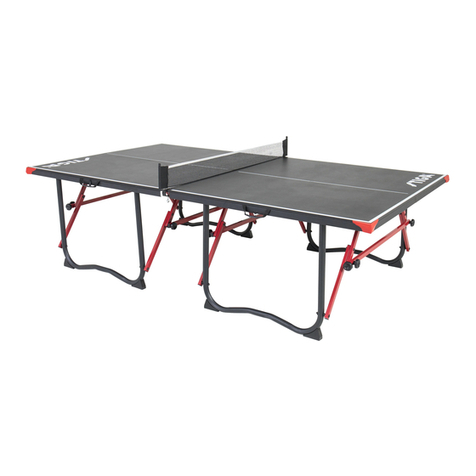
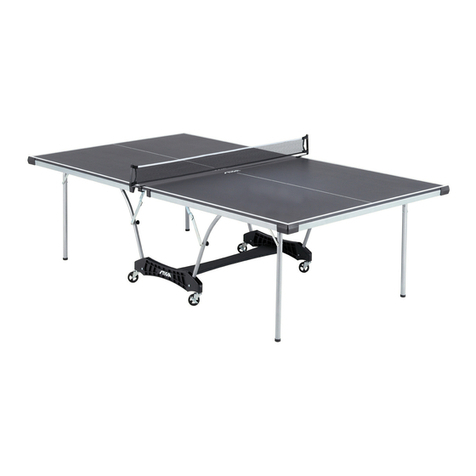
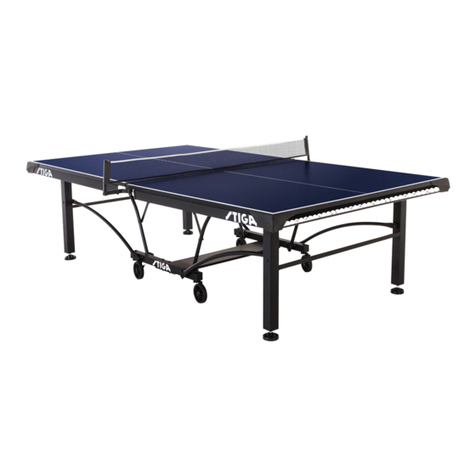
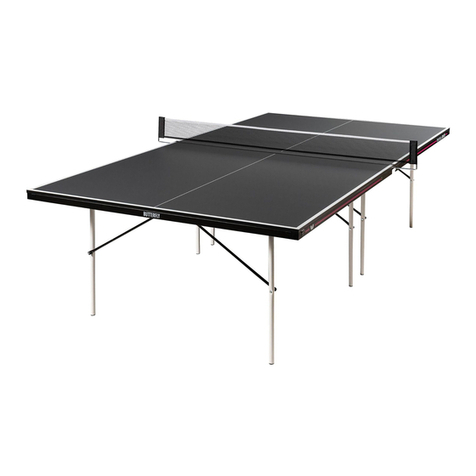
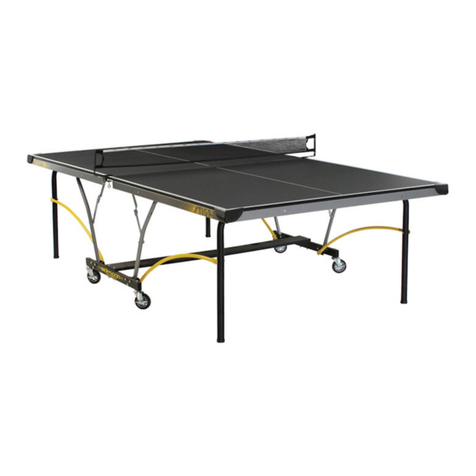
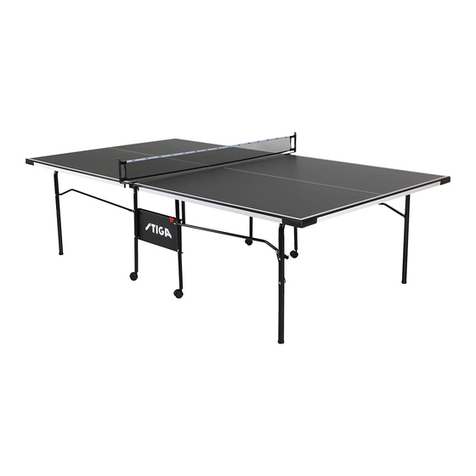
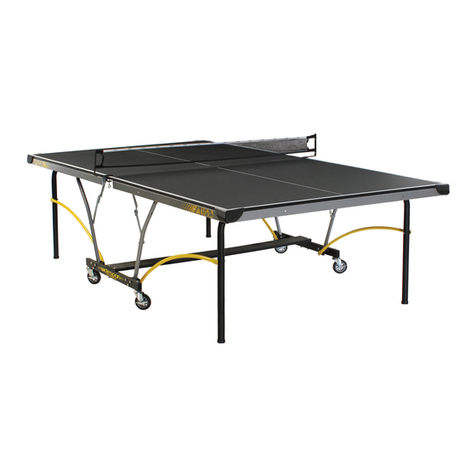
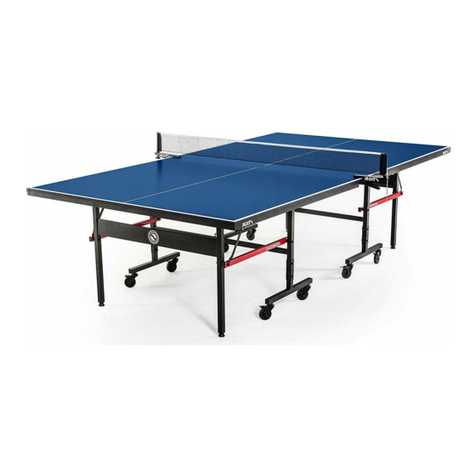
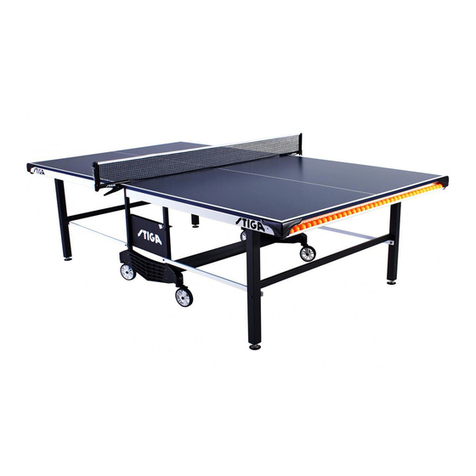
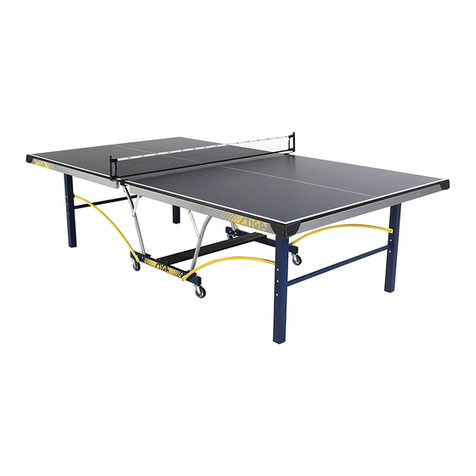
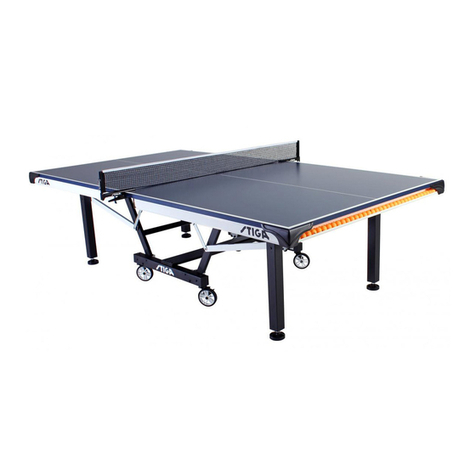
Stiga T8611 User manual

1. Read this manual carefully before starting assembly. Read each step completely before
beginning each step.
2. Some smaller parts may be shipped inside larger parts. Check inside all parts and
cartons before assembling or ordering parts.
3. To make assembly easier, use the Hardware Identifier on page 11 to identify and sort all
fasteners. Check all cartons for kits. All hardware may not be located in one kit.
4. Do not tighten hardware until instructed to do so. If hardware is tightened too soon, mounting
holes may not align and parts may not easily fit together. Leave locknuts slightly loose until you are
instructed to tighten them.
5. Tools required for assembly: Phillips Screwdriver, Two 7/16 Wrenches, One 3/8 Wrench (an.
adjustable wrench may be substituted for the wrenches).
6. Do not use power tools to drive screws into wood tops. Hand tighten screws only. Tighten
screws snug, but do not overtighten causing screws to strip.
OWNER'S MANUAL
MODEL NOS.
TABLE TENNIS TABLE
Please Do Not Return This Product To The Store!
Contact Escalade®Sports customer service department at:
Phone: 1-866-873-3528 Toll – Free !
Fax: 1-866-873-3533 Toll – Free !
E-mail: tabletennis@escaladesports.com
Mailing Address (correspondence only):
Escalade Sports
PO Box 889
Evansville, IN 47706
Please visit our World Wide Web site at: www.escaladesports.com
ON-LINE TROUBLE SHOOTING TECHNICAL ASSISTANCE
ON-LINE PARTS REQUESTS FREQUENTLY ASKED QUESTIONS
ADDITIONAL ESCALADE®SPORTS PRODUCT INFORMATION
2L-5024-01
Escalade® Sports products may be manufactured and/or licensed under the following patents.
6120397, 5816957, 5769744, 5119741, 4911085, 4717157, D460140, D420563
Additional patents may be pending. One or more of the listed patents and/or pending patents may cover specific product.
2010 Escalade Sports
T8611

1. Lay table top #1 painted side down, on a smooth, flat
surface. Use the shipping container to protect the
painted surface of the table top.
2. Assemble the two “L” tubes and the center tubes that
make up the “U” Support and the “U” Leg. Align on
Table Top as shown in Figure 1. Note: “U” Leg is
larger and wider than the U Support. The U-
leg should be installed on the end of the table
half with the end stripe on top side
3. Put plastic caps #13 on the end of U-leg #2.
Figure 1
2
U-Leg
7
U-Support
13
13
Stripe on End
DO NOT USE POWER TOOLS TO DRIVE SCREWS INTO
WOOD TOPS. HAND TIGHTEN SCREWS ONLY.
TIGHTEN SCREWS SNUG, BUT DO NOT OVER-
TIGHTEN, CAUSING SCREWS TO STRIP IN WOOD.
CAUTION :
The middle of the table is the end that
does not have the stripe on top.
2
IMPORTANT: U-Leg is wider than U-support.
Make sure they are assembled exactly as
shown. If not, there will be a large gap between
table halves and table will not operate properly!
Figure 2
7
U-support
All screws shown
are (#20) sheet
metal screws.
3
3
3
3
3
3
20
CAUTION:
WHEN ASSEMBLING TABLE, IT IS EXTREMELY IMPORTANT THAT THE U-
CLIPS (#3) BE TURNED AS SHOWN HERE. IF U-CLIPS ARE TURNED
INCORRECTLY, YOU WILL DO IRREPARABLE DAMAGE TO YOUR TABLE
WHEN YOU ATTEMPT TO OPEN IT TO THE PLAYING POSITION.
If you want to see a video on how to position the U-Clips go to:
http://www.escaladesports.com/customer-service/videos.html
3
Be sure that slot in the six U-clips #3 all face the same
direction (toward the middle of the table with the U-
support) as shown.
This end is the middle of the table
and has no stripe or pilot holes.
IMPORTANT:
4. Align the holes in the Large U-clips #3 with pilot holes in
table top assembly and secure with twenty four screws #20
as shown. All four holes in each U-Clip must align with four
pilot holes in top.
2
U-Leg
This end will be the
middle of the table when
completely assembled.

3
7. Attach hinge and brackets #6 and #4 to U-leg #2 as
shown in Figure 4. NOTE: Hinges are right hand
and left hand and must be attached as shown.
Left hand hinge #6 has the letter “L stamped on it and”
the right hand hinge has “R”. Attach with screws #14,
plastic washers #21 and locknuts #16. Tighten nuts
until snug, but do not overtighten. Hinges must pivot.
See Figure 4.
Figure 4
14 6
21
16
14
4
21
16
2
Right hand
hinge has “R”
stamped on it.
Left hand
hinge has “L”
stamped on it.
14
4
21
16
14
6
21
16
5. Rotate U-support #7 until you see the screw hole in the
slot of U-clip # 3. Slide U-support #7 side to side if
necessary.
6. Insert screw #19 through slot in U-clip #3 and into U-
support #7. Thread it all the way into U-support #7
until it touches the back of the tube. There should be
about 3/8 inch of screw #19 left sticking out. Repeat
for U Leg #2.
Figure 3
7
U-Support
Wider
U-Leg
U-Support
2
U-Leg
Note: Slide U-support back and forth until you
see the hole if necessary.
19
19
3
3
If you want to see a video on how to insert Screw (#19) go to:
http://www.escaladesports.com/customer-service/videos.html
Note: To aid in assembly you can use a cordless drill and
Phillips bit for Step 6 only. Wear safety glasses.
This end will be the
middle of the table when
completely assembled.

4
8. Screw left hand hinge brackets #6 to table top follow-
ing these steps:
A. Push U-leg #2 and hinge assembly flat against
top. See Figure 5.
B. Place a spacer that is about 1/16” thick between
hinge legs. Suggestion: either a nickel or a quarter
is an ideal spacer. See Figure 6.
C. With hinge bracket, hinge and leg flat against table
top and spacer between hinge legs, screw bracket
to table with five #20 screws. See Figure 6.
D. Open leg and lock leg hinge. See Figure 7. Re-
move spacer that you used between hinge legs.
9. Repeat step 8 to attach right hand hinge bracket to
table.
Figure 5
Figure 7 Figure 6
6
Bracket and Leg
flat against table
Hinge
U-Leg
2
20 2
Spacer between
hinge legs
U-Leg
Hinge
Pull To
Lock Hinge
Figure 9
Figure 8
This end will be the
middle of the table when
completely assembled.
g s anLon er Di t ce
hort r i taS e D s nce
This smaller Corner
included in the hardware kit is
not used for this table, please
discard it. Use Corner Protector
shown in Figure 8 &9.
Protector
NOTE:
11. Line up holes in rails with pilot holes in top and secure using
eighteen screws #20. See Figure 8.
12.
Lay Corner Caps #22 on table as shown in Figure 9. If Corner
Cap sticks above table top surface of table, flip over so shorter
distance is against edge. Secure to bottom of table with three
screws #21.
10b. Slide #27 and Vinyl End #28 Caps onto the ends of
the Side Rails #25 as shown.
Right Left
10a. Lay out rails #25 and 26, as shown in Figure 8, around edges
of table top.
20
27 (RH)

13.Attach name panel #5 to inside of U-supports #7.
Secure with hex bolts #9 and locknuts #15. Tighten
nuts but be careful not to crush tubes. See Figure 10.
7
5
5
2
15 9
9
9
9
Figure 10
First Table
Half
5
This end will be the
middle of the table when
completely assembled.

6
17. Repeat steps 1 through 12 on second table half.
18. Gently tap caster sockets #12 into U-support #7 on second table
half until flange on sockets touches the edge of the tube. DO NOT
HIT CASTER SOCKETS TOO HARD WITH A HAMMER. Cast-
ers could break if hit too hard.
19. Insert casters #11 into caster sockets #12 on second table half.
Figure 11
14. Gently tap caster sockets #12 into U-support #7 until flange on
sockets touches the edge of the tube. DO NOT HIT CASTER
SOCKET DIRECTLY WITH A HAMMER! SET A PIECE OF
WOOD ON CASTER SOCKET AND HIT PIECE OF WOOD
TO DRIVE CASTER SOCKET INTO U-SUPPORT.
See Figure 11.
15. Insert casters #11 into caster sockets #12. See Figure 11.
16. Prepare an area for the assembly of the second table top half. If
necessary, move the first table top half aside with the aid of a
helper. Be sure to place it in a location where it won't be disturbed
or damaged. If setting on its side, be sure to place the bottom edge
no less than 12 inches away from the wall. Also be sure to place
carpet or pieces of the shipping carton down to protect table top
edges. If floor is not carpeted, brace table top half with a heavy
object to keep it from sliding.
AT LEAST TWO ADULTS ARE NEEDED
TO MOVE TABLE HALF!
CAUTION:
Figure 12
7
12
11
2
7
Second
Table Half
This end will be the
middle of the table when
completely assembled.

7
Figure 13
20. Make sure the legs on the first table top half (the half with the name panel #5) are open and hinges are locked. With one person on each side
of the table, lift and set table half on its legs. Place table against a wall as shown above to help stabilize table top half while second half is being
attached. Be sure there is enough room to connect second half. You must hold table half up. It will not stand on its own until other half is
connected.
21. Place two hex bolts #9 and locknuts #15 on floor next to caster wheels (on both sides of the table half) so they will be handy for the next step.
22. With a person on both sides of the second table half, slide the second table half against the first table half. Align holes in name panels #5 (on
first table half) with holes in U-supports (on second table half). Secure second table half to name panel #5 with the two hexbolts #9 and locknuts
#15 you placed on the floor earlier. Tighten locknuts snug but do not overtighten. These joints must pivot. At this point go back and tighten hex
bolts #9.
BE SURE THE FIRST TABLE HALF YOU ASSEMBLED (WITH NAME PANELS #5
ATTACHED) IS STABLE AND AGAINST A WALL. DO NOT LEAVE TABLE HALF
STANDING UNATTENDED. IT WILL NOT STAND ON ITS OWN.
CAUTION:
UNTIL THE TABLE HALVES ARE CONNECTED THEY WILL NOT STAND ON THEIR
OWN. AT LEAST THREE PEOPLE ARE NEEDED TO CONNECT TABLE HALVES. TWO
TO STABILIZE TABLE AND ONE TO BOLT TABLE TOGETHER.
CAUTION:
CAUTION :
AT LEAST THREE ADULTS ARE NEEDED
TO COMPLETE THE REMAINDER OF THE
ASSEMBLY! READ AND UNDERSTAND
STEPS 20, 21 AND 22 BEFORE
CONTINUING WITH ASSEMBLY.
Second Table Half
You Assembled
YOU MUST HOLD THIS END
OF TABLE HALVES UP.
TOPS WILL NOT STAND ON
THEIR OWN UNTIL THEY
ARE CONNECTED.
First Table Half
You Assembled
Place This Half
Against A Wall
79
7
5
15

8
INSTALL SAFETY LATCHES #8 AS SHOWN ABOVE FOR PROPER USE OF
TABLE! DO NOT SKIP THIS STEP! DO NOT OPERATE TABLE UNTIL SAFETY
LATCHES ARE INSTALLED AND ASSEMBLY IS COMPLETE!
CAUTION:
23. Choose a name panel #5 on either side of the table and install
one safety latch #8 into the right-hand hole on that name panel
as shown in Figures 14 & 15. Use one screw #10 one washer
#17 and one hex nut #16. NOTE: Flange on safety latch
must extend over top of name panel as shown in Figure 14.
Safety latch must pivot freely.
24. Go to the other side of the table and install the second safety latch
into the right-hand hole on the other name panel #5. NOTE:
Safety latches must be attached diagonally across from
each other. (See Figure 15).
Figure 15
Figure 14
SAFETY
LATCH
#8
16
17
7
10
5
DO NOT OVERTIGHTEN
SAFETY LATCHES #8.
THEY MUST PIVOT FREELY!
Name Panel #5
Safety Latch #8
(Flange extends over
Name Panel #5)
Top View
Attach safety latches #8
diagonally across from
each other.
Name Panel #5
Name Panel #5 Safety Latch #8
(in right-hand hole)
Safety Latch #8
(in right-hand hole)
Top View Of Table

9
TO OPEN:
1. Open legs and lock hinges.
2. Stand behind the table near the safety latch.
3. Hold table half with one hand and pivot safety latch enough
to allow the edge of the table half to pass over it.
4. While keeping an eye on the safety latch, pivot table half
until it moves past the safety latch. Once edge of table has
passed over safety latch, stop pivoting table half.
5. With both hands on the table half, center yourself along the
table half and lower the table half to the floor.
6. Repeat for the other table half.
7. Attach net and post.
TO CLOSE:
1. Remove net and post.
2. Lift table half upward and inward
to vertical position.
3. Unlock leg hinges and close legs.
4. Repeat for the other table half.
OPENING AND CLOSING INSTRUCTIONS
WARNING! DO NOT ALLOW CHILDREN TO OPEN TABLE! DO NOT CLIMB,
SIT, STAND OR JUMP ON TABLE! SERIOUS OR FATAL INJURY
MAY RESULT! THIS IS NOT A TOY! TABLE IS TO BE OPENED OR
CLOSED BY ADULTS ONLY! FAILURE TO COMPLY WITH OPENING AND CLOSING
INSTRUCTIONS COULD RESULT IN PERSONAL INJURY OR PROPERTY DAMAGE.
See
Detail
Views
Table edge passes
over safety latch.
Pivot safety latch
until table edge can
pass over it.
CAUTION
THIS IS A GAME TABLE. DO NOT SIT, STAND, LEAN, WALK OR JUMP ON
TABLE! FAILURE TO COMPLY WITH THIS CAUTION COULD RESULT IN
PERSONAL INJURY AND/OR PROPERTY DAMAGE!

10
90 DAY LIMITED WARRANTY
This consumer warranty extends to the original consumer purchase of any ESCALADE®SPORTS Product
(hereinafter referred as the "Product").
WARRANTY DURATION: This Product is warranted to the original consumer purchase of a period of ninety
(90) days from the original purchase.
WARRANTY COVERAGE:
ESCALADE SPORTS warrants to the original Consumer Purchaserthat any Product
of its manufacture is free from defects in material and workmanship when used for the intended purpose under
normal use and conditions. THIS WARRANTY IS VOID IF THE PRODUCT HAS BEEN DAMAGED BY ACCIDENT,
UNREASONABLE USE, NEGLIGENCE, IMPROPER SERVICE, FAILURE TO FOLLOW INSTRUCTIONS PRO-
VIDED WITH THE PRODUCT OR OTHER CAUSES NOT ARISING OUT OF DEFECTS IN MATERIAL AND
WORKMANSHIP.
WARRANTY PERFORMANCE: During the above ninety (90) day warranty period, ESCALADE SPORTS shall
repair or replace with a comparable model, and Product, or component thereof, which may prove defective
under normal use and proper care, and which our examination shall disclose to our satisfaction to be thus
defective, please contact our Warranty Dept.
1-866-873-3528 / Warranty Dept.
Or Write us at:
Escalade® Sports, Inc. - P.O. Box 889, Evansville, IN 47706 - Attn: Warranty Dept.
Or E-mail us at:
customerservice@escaladesports.com
Other than shipping requirements no charge will be made for such repair or replacement of in-warranty
Products. ESCALADE® SPORTS strongly recommends that the Product is insured for value prior to mailing.
WARRANTY DISCLAIMERS: ANY IMPLIED WARRANTIES ARISING OUT OF THIS SALE, INCLUDING BUT
NOT LIMITED TO THE IMPLIED WARRANTIES OF MERCHANTABILITY AND FITNESS FOR A PARTICULAR
PURPOSE, ARE LIMITED IN DURATION TO THE ABOVE NINETY (90) DAY WARRANTY PERIOD. ESCALADE®
SPORTS SHALL NOT BE LIABLE FOR LOSS OF USE OF THE PRODUCT OR OTHER CONSEQUENTIAL OR
INCIDENTAL COSTS, EXPENSES OR DAMAGES INCURRED BY THE CONSUMER OF ANY OTHER USE.
Some states do not allow the exclusion or limitation of implied warranties or consequential or incidental
damages, so the above limitations or exclusions may not apply to you.
LEGAL REMEDIES: This warranty gives you specific legal rights and you may also have other rights which
may vary from state to state.

11
CARE AND MAINTENANCE
You have purchased a quality product that will give you years of enjoyment. By following these simple maintenance steps, you wi ll add to the life of
your new table.
THE TABLE TOP
The top (playing surface) of your table is made of particle board. Like all products made of wood, it can be affected by atmospheric changes in both
temperature and humidity. This may cause a slight sag or distortion as the top expands or contracts. This is normal and should not cause concern
as it does not detract from the play or utility value of the table. After assembly of the table, you can minimize the effects of temperature and humidity
changes by storing the table in the folded up position in a dry area when table is not in use.
STORAGE OF YOUR TABLE
This table must be stored indoors to prevent damage to the playing surface. Dampness and extreme temperature changes can cause the wood to
warp, swell, crack or blister. When your table is not in use, it should be folded up in a dry area. Due to the nature of partic le board, table top may
bow. Damp and humid conditions will amplify this. This is normal and will not affect playability of table.
CLEANING YOUR TABLE
To clean your table use a soft, damp (NOT WET) cloth only. To prevent damage to your table's playing surface, DO NOT USE ANY CHEMICALS,
ABRASIVE OR CLEANING PRODUCTS on your table's playing surface.
MAINTENANCE OF YOUR TABLE
Be sure to oil all moving parts of your table including the pivot points. This will insure the safety and ease of use of your t able.
This table must be kept indoors to prevent damage to the playing surface. Dampness and extreme temperature changes which occur on patios or
similar areas can cause wood to warp, swell, crack or blister.
UNLEVEL FLOORS
If table does not seem level, it is probably due to uneven or unlevel floors. Set the table in its PLAYING POSITION and move ta ble several inches in
different directions to find the best location for the table. If the floor is extremely unlevel, table may not play or operate properly. If table is high in
the center, shim up under the outer U-legs.
HARDWARE IDENTIFIER
#10-24 x ¾
Rd. Hd. Screw
1/4-20
Locknut
#10 Flat
Washer
#10-24
Locknut
Plastic
Washer
#8-32 x 1-1/4
S.M.S.
KEY
NO.
14
15
1/4-20 x 1-1/2
Hex Hd. Bolt
#10-24 x 1-1/2
Phillips Pan Head Screw
10
23
20
17
16
21
19
#8 X 7/16
Sheet Metal
Screw
24

12 2L-5024-01
PRODUCT PARTS LIST T8611
Key # Part# Description Qty. Key # Part# Description Qty.
Table Top - Green for T8611
U-Leg
1” U-Clip
RH Hinge & Bracket Assembly
Name Panel - 6”
LH Hinge & Bracket Assembly
U-Support
Safety Latch
1/4-20 x 1 1/2 Hex Head Bolt
#10-24 x 3/4 Phil Rd Hd Screw
Caster
Caster Socket
1" Leg Cap
#10-24 x 1 1/2 Phil Pan Hd Screw
1/4-20 Locknut
#10-24 Locknut
#10-24 Washer
#8-32 x 1 1/4 Sheet Metal Screw
#8 x 7/16 Sheet Metal Screw
Plastic Washer
Corner Cap
Owner’s Manual
#8 X 5/8 Sheet Metal Screws
3/4 Side Rail-Black
3/4 End Rail-Black
3/4” Vinyl End Cap-Right Hand
3/4” Vinyl End Cap-Left Hand
4A-5467-02
8S-6754-00
2S-6879-01
4A-7040-00
2S-6780-00
4A-7041-00
8S-6755-00
2S-6264-02
701-47
801-120B
2Q-6084-00
3M-6115-00
704-18
1B-6761-00
701-26
601-80B
701-1B
701-141
1B-6451-00
2B-6087-00
3M-6494-00
2L-5024-01
1B-6449-00
2S-6384-10
2S-6385-10
3M-4152-00
3M-4153-00
2
8
104
4
4
1
12
4
2
2
2
2
2
12
2
2
2
2
2
8
2
4
4
4
4
8
6
1
2
3
4
5
6
7
8
9
10
11
12
13
14
15
16
17
19
20
21
22
23
24
25
26
27
28
28
27
24

Por favor no devuelva este producto a la tienda!
ÓÓ ÒÒ
2010 Escalade Sports
MANUAL DEL USARIO
Los productos Escalade® Sports se pueden fabricar y/o producir bajo las siguientes patentes.
6120397, 5816957, 5769744, 5119741, 4911085, 4717157, D460140, D420563
Puede haber patentes en trámite. Una o más patentes mencionadas y/o en trámite pueden cubrir productos específicos.
MESA
NÚMERO DE MODELÓ
T8611
DE TENIS
Contacte al departamento de servicio al cliente de Escalade® Sports:
Teléfono: 1-866-873-3528 ¡Sin costo alguno!
Fax: 1-866-873-3533 ¡Sin costo alguno!
E-mail: [email protected]
Apartado postal (sólo para correspondencia):
Escalade Sports
PO Box 889
Evansville, IN 47706
Visite nuestra página Web internacional: www.escaladesports.com
SOLUCIÓN DE PROBLEMAS POR INTERNET ASISTENCIA TÉCNICA
PEDIDO DE PARTES POR INTERNET PREGUNTAS FRECUENTES
MÁS INFORMACIÓN SOBRE PRODUCTOS DE ESCALADE® SPORTS
1. Lea este manual cuidadosamente antes de empezar a ensamblar. Lea completamente cada uno de los
pasos antes de empezar cada paso.
2. Algunas partes pequeñas pueden ser empacadas dentro de las partes grandes . Verifique en el interior
de todas las partes y cartones antes de ensamblar o solicitar partes.
3. Para que el ensamblado le sea más fácil, utilice la lista de partes de la página 11 para la identificación
y clasificación de las partes y sus componentes. Busque los juegos de tornillos en todos los cartones.
Todos los tornillos y sus componentes no se encuentren en un sólo juego.
4. No ajuste las partes hasta que las instrucciones se lo indiquen. Si las partes se ajustan antes de lo indicado,
es posible que los orificios no queden alineados, resultando que las partes queden fuera de su lugar y fácilmente no
coincidan. Deje las tuercas de seguridad levemente flojas hasta que las instrucciones le indiquen ajustarlas.
5. Herramientas necesarias: Desarmador Phillips, una llave de 3/8” y dos llaves de 7/16” (Puede utilizar una llave
ajustable en vez de llaves).
2L-5024-01
6. No utilice herramientas eléctricas para atornillar los tornillos en el tablero de madera. Sólo aprietelos con
un desatornillador de mano. Apriete los tornillos seguramente, pero no los sobre apriete.
...

7
Soporte en U
20
3
3
Figura 2
2
Pata en U
IMPORTANTE: La Pata en U es más ancha que el
Soporte en U. Esté seguro de que éstos estén
ensamblados exactamente como están mostrados.
De lo contrario quedará un espacio grande entre
las dos mitades de la mesa y la mesa no operará
apropiadamente.
Todos los tornillos
mostrados son los (#20)
Tornillos para lamina de
metal
2
Figura 1
13
13
1.
2.
3.
Coloque sobre una superficie plana y lisa con
la cara pintada hacia abajo. Use la caja en donde venía la
mesa para proteger la pintura de la superficie de la mesa.
el tablero #1
Ensamble los dos tubos en “L” y los dos tubos del centro que
harán el soporte en “U” y la pata en “U”. Alinéelos sobre el
tablero como está mostrado en la figura 1. Nota: La pata
en “U” es más grande y más ancha que el soporte
en “U”. La pata en “U” deberá ser instalada del
lado extremo de la mitad de la mesa y del lado del
los orificios del riel.
Ponga las Tapaderas de plástico #13 en la parte de abajo
de las patas en “U” #2.
ADVERTENCIA:
CUANDO ENSAMBLE LA MESA, ES EXTREMADAMENTE IMPORTANTE QUE
TODAS LAS (6) ABRAZADERAS “U” (#3) ESTÉN PUESTAS COMO ESTÁN
MOSTRADAS EN LA FIGURA DE ABAJO. SI LAS ABRAZADERAS “U” ESTÁN
COLOCADAS INCORRECTAMENTE, USTED LE OCASIONARA DAÑOS
IRREPARABLES A SU MESA CUANDO TRATE DE ABRIRLA EN LA POSICIÓN DE
JUEGO.
IMPORTANTE:
Esté seguro que la ranura de todas las seis abrazaderas
“U” #3 estén de frente en la misma dirección (hacia la
mitad de la mesa con el tubo de soporte en “U” ) como está
mostrado.
ranura en la
abrazaderas
“U”
3
4.
Tablero
1
Soporte en U
7
2
Pata en U
NO USE DESARMADOR ELÉCTRICO CUANDO ATORNILLE EN
LA MADERA DE LOS TABLEROS. ÚNICAMENTE ATORNÍLLELOS
MANUALMENTE. ATORNILLE LOS TORNILLOS HASTA QUE
QUEDEN AJUSTADOS, PERO NO LOS SOBRE APRIETE YA QUE
CAUSARÍA QUE LOS TORNILLOS DESTRUYAN LA MADERA
HACIENDO LOS ORIFICIOS DEMASIADO GRANDES.
ADVERTENCIA:
Este extremo ser el centro
de la mesa cuando esté
completamente
ensamblada
á
3
3
3
3
Si desea ver un vídeo de como poner la abrazadera en “U” vaya a:
http://www.escaladesports.com/customer-service/videos.html
Alinee los orificios de las abrazaderas en “U” #3 con los
orificios que están de guía ensamblados en el tablero y
atornillelos con los veinticuatro tornillos #20 como están
mostrados. Los cuatro orificios en cada abrazadera en U
deben de estar alineados con los cuatro orificios en el
Tablero.
Este extremo es el en
centro de la mesa y no
tiene orificios o raya.
Este extremo es el en
centro de la mesa y no
tiene orificios o raya.

3
5.
6.
Figura 3
7. Figura 4
7
2
19
19
3
3
14 6
21
16
14
4
21
16
2
14
4
21
16
14
6
21
16
Rote el soporte en forma de U #7 hasta que se
vean los orificios a través de las ranuras de las
abrazaderas en U #3 donde irán los tornillos.
Mueva el Soporte en forma de U #7 de lado a
lado si es necesario. Ver Figura 5.
Inserte el tornillo # 19 a través de las ranuras de la
abrazadera “U” #3 y dentro del soporte en forma
de U #7. Atornillelo al soporte en U hasta que
toque el fondo del tubo. El tornillo # 19 debe
sobresalir acerca de ⅜de pulgada. Repita lo mismo
para la pata en “U” #2.
Soporte en U
Pata en U
(mas ancha) Pata en
U
Soporte en U
Nota: Si es necesario deslice el Soporte en U hacia
adelante y hacia atrás hasta que vea el orificio.
Una las bisagras y los soportes # 6 y #4 a la pata
en “U” como se muestra en la figura 4. NOTA:
Las bisagras son lado derecho y las otras
lado izquierdo y deben ser colocadas como
están mostradas. La bisagra izquierda #6 tiene
estampada la letra “L” y la bisagra derecha tiene
estampada la letra “R”. Unalas con los tornillos #
14, la rondana de plástico #21 y la tuerca de
seguridad #16. Apriete las tuercas hasta que
queden ajustadas, pero no las sobre apriete. Las
bisagras deben girar. Ver Figura 4.
La letra “R”
está
estampada en
la bisagra de
mano derecha.
La letra “L” está
estampada en la
bisagra de mano
Izquierda.
Este extremo ser el centro
de la mesa cuando esté
completamente
ensamblada
á
Si desea ver un vídeo de como insertar el Tornillo (#19) vaya a:
http://www.escaladesports.com/customer-service/videos.html
Nota: Para facilitar el ensamblado se puede utilizar un
taladro inalámbrico y una broca Phillips únicamente
para el paso 6. Use anteojos de seguridad.

4
A.
B.
C.
D.
9.
Figura 5
Figura 7
Figura 6
6
Bisagra
Pata en U
2
20 2
Bisagra
10b.
11.
Figura 9
Figura 8
NOTA:
Abajo de la mesa
Distancia mas larga
D tis ancia mas corta
(Riel de )48”
(Riel de )48”
(Riel de )53”
Todos los tornillos
mostrados son los (#20)
Tornillos para lámina de
metal
25
25
26
Deslice las Tapas de Riel (de mano izquierda #28 y derecha
#27) en el extremo de cada Riel #25 como esta mostrado.
Alinee los orificios de los rieles con los orificios de guía del
tablero, atornillelos y asegúrelos con los dieciocho tornillos
#20. Ver figura 8.
Coloque los Protectores de Esquina #22 al tablero como están
mostrados en la figura 9. Si el protector de la esquina
sobresale de la superficie del tablero, volteélo así que la parte
más corta esté en contra del borde. Atornillelos y asegúrelos
por la parte de abajo de la mesa con los tornillos #21.
12.
El protector de esquinas mas chico
que está incluido en el conjunto de
tornillos no se usa para esta mesa,
por favor descartelo. Use el
Protector de Esquinas que está
mostrado en la Figura 8 & 9.
8. Atornille la bisagra de soporte del lado izquierdo #6 al tablero
siguiendo estos pasos:
Presione la pata en “U” #2 y la bisagra hasta que estén
planas contra la mesa. Ver figura 5.
Ponga un separador de alrededor de 1/16” de grueso
entre las patas de la bisagras. Sugerencia: con cualquier
moneda de cinco centavos ó de 25 centavos sería un
separador ideal. Ver Figura 6.
Con la escuadra de la, la bisagra y la pata plana contra la
mesa a, atornille el soporte a la mesa con los cinco tornillos
#20. Ver Figura 6.
Abra la pata (#2) y enganche la bisagra. Ver Figura 7.
Remueva el separador que usó para separar las patas de la
bisagra.
Repita el paso # 8 para instalar la bisagra de la mano
derecha a la mesa.
Jale para
enganchar
la bisagra
Pata en U
Separador entre las
patas de la bisagra
Escuadra y pata de la
bisagra están planas
contra la mesa
Este extremo ser el centro
de la mesa cuando esté
completamente
ensamblada
á
20
27 (Derecha) 10a.Coloque los rieles #25 y #26, alrededor de los bordes del
tablero, como están mostrados en la figura 8.

13.
7
5
5
2
15 9
9
9
9
Figura 10
Primera mitad
de la mesa
5
Una la placa #5 al interior de los soportes en forma
de U #7. Atornille los tornillos hexagonales # 9, y las
tuercas de seguridad # 15. Apriete las tuercas, pero
esté seguro de no doblar los tubos. Ver figura 10.
Este extremo ser el centro
de la mesa cuando esté
completamente
ensamblada
á

6
17.
18.
19.
Figura 11
14.
Vea Figura 11.
15.
16.
Figura 12
7
12
11
2
7
Segunda mitad
de la mesa
Inserte cuidadosamente el casquillo de la llanta #12 dentro del soporte en
forma de U #7 hasta que el borde del casquillo toque el borde del tubo.
NO GOLPEE EL CASQUILLO DIRECTAMENTE CON EL MARTILLO!
COLOQUE UN PEDAZO DE MADERA SOBRE EL CASQUILLO Y
GOLPE SOBRE EL PEDAZO DE MADERA PARA INSERTAR EL
CASQUILLO ADENTRO DEL SOPORTE EN FORMA DE U.
Inserte las llantas #11 adentro del casquillo #12.
Prepare una área para el ensamblado de la Segunda mitad de la mesa.
Si es necesario mueva el primer tablero a un lado con la ayuda de otra
persona. Asegúrese de ponerlo en una lugar donde no estorbe y no se
dañe. Y si se coloca de lado, asegurese de poner el borde inferior a no
menos de 12 pulgadas de distancia de la pared. También esté seguro
de poner un pedazo de alfombra o una colchoneta abajo de los
bordes de la mesa para protegerlos. Si el piso no está alfombrado
ponga un objeto pesado sosteniendo la mesa para que no se resbale.
ADVERTENCIA:
¡POR LO MENOS SE REQUIERE DE DOS (2)
ADULTOS PARA MOVER LA MITAD DE LA MESA!
Repita los pasos del 1 al 12 para el segundo tablero.
Inserte cuidadosamente el casquillo de la llanta #12 dentro soporte en
forma de U #7 en la Segunda mitad hasta que el borde del casquillo
toque el borde del tubo. NO GOLPEE EL CASQUILLO
DIRECTAMENTE CON EL MARTILLO! PONGA UN PEDAZO DE
MADERA SOBRE EL CASQUILLO Y GOLPE SOBRE EL PEDAZO
DE MADERA PARA INSERTAR EL CASQUILLO ADENTRO DEL
SOPORTE EN FORMA DE U.
Inserte las llantas #11 adentro del casquillo #12 en la segunda mitad
de la mesa.
Este extremo ser el centro
de la mesa cuando esté
completamente
ensamblada
á

7
Figura 13
21.
22.
79
5
15
Recargue esta mitad
contra la pared.
La Primera Mitad de
la mesa que
ensamblo. La Segunda Mitad de
la mesa que
ensamblo.
USTED TIENE QUE DETENER
ESTOS EXTREMOS DE LOS
TABLEROS. LAS MESAS NO SE
VAN A PARAR SOLAS HASTA
QUE ESTE CONECTADAS
ADVERTENCIA:ADVERTENCIA:EST SEGURO QUE LA PRIMERA MITAD DE LA MESA QUE USTED ENSAMBLO
(CON LAS PLACAS #5) ESTÉ ESTABLE Y CONTRA LA PARED. NO DEJE LA
MITAD DE LA MESA DESATENDIDA.
É
HASTA QUE LAS DOS MITADES DE LA MESA ESTÉN COLOCADAS NO PUEDEN
ESTAR PARADAS SOLAS. SE RECOMIENDA QUE TRES (3) PERSONAS PARA UNIR
LAS DOS MITADES DE LA MESA. DOS PERSONAS PARA SOSTENER LA MESA Y UNA
PERSONA PARA ATORNILLAR LOS TORNILLOS A LA MESA.
ADVERTENCIA:
Esté seguro que las patas de la primera mitad de la mesa (la mitad con la placa #5) estén abiertas y que las bisagras estén atrancadas.
Con una persona en cada lado de la mesa, levante y ponga la mitad de la mesa sobre sus propias patas. Coloque la mesa contra la
pared como está mostrado arriba, para ayudar a estabilizar la mitad de la mesa mientras que la Segunda mitad esta siendo colocada.
Asegúrese que haya suficiente espacio para colocar la segunda mitad de la mesa. Se tiene que detener la mitad de la mesa. No se van a
parar solos hasta que la otra mitad este conectada.
20.
Inserte el tornillo hexagonal # 9 y las tuercas de seguridad # 15 sobre el piso a un lado de las llantas (en ambos lados de la mitad de la
mesa) así las tendrá a la mano para el próximo paso.
Con una persona en cada uno de los lados de la Segunda mitad de la mesa, deslice la Segunda mitad o tablero contra de la primera mitad.
Alinee los orificios de la Placa #5 (en la primera mitad de la mesa) con los orificios en el Soporte en U (en la segunda mitad de la mesa).
Asegure la Segunda mitad de la mesa con el orificio de abajo de la Placa #5 con los dos tornillos hexagonales # 9 y las tuercas de seguridad
# 15 que usted puso en el piso con anterioridad. Asegurándose que las tuercas estén apretadas y seguras. Pero no las sobre apriete. estás
uniones deben moverse. Hasta este punto regrese y apriete los tornillos hexagonales # 9.
POR LO MENOS TRES ADULTOS SE
NECESITAN PARA COMPLETAR LO QUE
FALTA DEL ENSAMBLADO. LEA Y
ENTIENDA LOS PASOS 20, 21 Y 22 ANTES
DE CONTINUAR CON EL ENSAMBLADO.
ADVERTENCIA:

8
23.
24.
Figura 15
Figura 14
#8
16
17
7
10
5
ADVERTENCIA:
INSTALE LOS PASADORES DE SEGURIDAD #8 COMO SE MUESTRA ARRIBA
PARA EL USO APROPIADO DE LA MESA! NO OMITA ESTE PASO! NO USE LA
MESA HASTA QUE LOS PASADORES DE SEGURIDAD ESTÉN INSTALADOS Y
HASTA QUE HAYA TERMINADO DE ENSAMBLAR LA MESA.
Vista de
Arriba
Placa #5
Pasador de
Seguridad #8
(el borde se extiende sobre
la placa #5)
NO SOBRE AJUSTE EL
PASADOR DE SEGURIDAD #8.
DEBE DE GIRAR LIBREMENTE!
PASADOR
DE SEGURIDAD
Escoja la Placa #5 en cualquiera de los lados de la mesa instale
el Pasador de seguridad #8 dentro del lado derecho del orificio
sobre la Placa como está mostrado en las figuras 14 y 15. Use
uno de los tornillos #10, una rondana #17 y una tuerca
hexagonal #16. NOTA: EL BORDE DEL PASADOR DE
SEGURIDAD DEBE IR EXTENDIDO SOBRE DE LA PLACA
COMO ESTÁ MOSTRADA EN FIGURA 14. EL PASADOR DE
SEGURIDAD DEBE MOVERSE LIBREMENTE.
Vaya al otro lado de la mesa e instale el segundo Pasador de
seguridad #8 dentro del lado derecho del orificio sobre la Placa
#5. NOTA: Los Pasadores de seguridad deben ir unidos
diagonalmente cruzados de cada uno. (Ver figura 15)
Vista de Arriba de la mesa
Placa #5
Pasador de Seguridad #8
(en el orificio de lado derecho )
Una los Pasadores de
Seguridad #8
diagonalmente enfrente
de si mismo.
Una los Pasadores de
Seguridad #8
diagonalmente enfrente
de si mismo.
Pasador de Seguridad #8
(en el orificio de lado derecho )
Placa #5
This manual suits for next models
2
Table of contents
Languages:
Other Stiga Robotics manuals

Stiga
Stiga T8125 User manual

Stiga
Stiga T8742 User manual

Stiga
Stiga T8107 User manual

Stiga
Stiga Play The Best T8780Q User manual

Stiga
Stiga G02238W User manual

Stiga
Stiga T8613 User manual

Stiga
Stiga Play The Best T8725W/F User manual

Stiga
Stiga T8523 User manual

Stiga
Stiga T8524 User manual

Stiga
Stiga T8580 User manual