manuals.online logo
Brands
  1. Home
  2. •
  3. Brands
  4. •
  5. Suncast
  6. •
  7. Outdoor Storage
  8. •
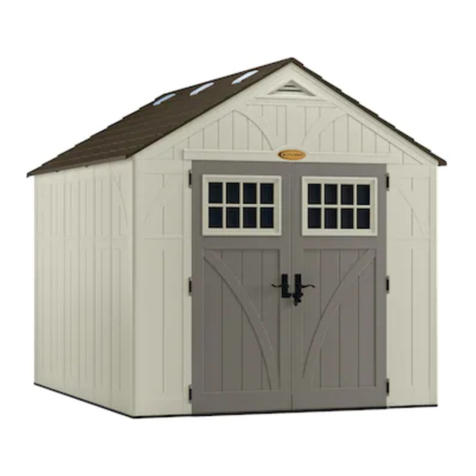
  9. Suncast Brilliant Everett BMS6511 User manual

Suncast Brilliant Everett BMS6511 User manual

BMS6511 /
BMS6512
Everetfm
Storage
Shed
ASSEMBLY
INSTRUCTIONS
Tools
Required
Easy
Bolt
Easy
Driver
010210410
Brilliant
by
Design'
un
0
2022
Suncast
Corporation,
Batavia,
IL
0361685B
Register
your
product
for
Limited
Warranty!
Must
register
product
within
90
days
of
purchase
for
limited
warranty
Enregistrez
votre
produit
au
programme
de
garantie
limitée
Vous
devez
enregistrer
votre
produit
au
programme
de
garantie
limitée
dans
les
90
jours
suivant
votre
achat.
iRegistre
su
producto
para
obtener
una
garantía
limitada!
Debe
registrar
el
producto
dentro
de
los
90
días
posteriores
a
la
compra
para
obtener
una
garantie
limitada
Scan
for
updated
Limited
Warranty
Scanner
pour
obtenir
la
grantie
limitée
à
jour
Escanear
para
obtener
garantía
limitada
actualizada
www.suncast.com/warranty
or
call
US
1 (
800)
846-2345
www.suncast.com/warranty
ou
appelez-nous
1 (
800)
846-2345
www.suncast.com/warranty
o
Ilamenos
1 (
800)
846-2345
Have
Questions?
We
are
here
to
help.
Check
out
our
resource
library
along
with
helpful
tips,
videos
and
FAQ's.
You
may
call
the
Contact
Center
directly
at:
1 (
800)
846-2345
or
write
Suncast
Corporation,
Contact
Center,
701
N.
Kirk
Road,
Batavia,
IL
60510 (
USA)
Des
questions?
Nous
pouvons
vous
aider.
Consultez
notre
bibliothèque
de
ressources
où vous
trouverez
des
conseils
utiles,
des
vidéos
et
une
FAQ.
Vous
pouvez
communiquer
directement
avec
le
centre
d'appels
au:
1-800-846-2345
ou
écrire
à
Suncast
Corporation,
Contact
Center,
701
N.
Kirk
Road,
Batavia,
IL
60510 (
États-Unis)
¿Alguna
pregunta?
Estamos
aquí
para
ayudarle.
Consulte
nuestra
biblioteca
de
recurses
junto
con
sugerencias
útiles,
videos
y
preguntas
frecuentes.
Puede
llamar
al
Centro
de
atención
directamente
al:
1 (
800)
846-2345
o
escribir
a
Suncast
Corporation,
Contact
Center,
701
N.
Kirk
Road,
Batavia,
IL
60510 (
EE.UU.)
To
purchase
Suncast
replacement
parts
and
learn
about
other
Suncast
products
visit
us
online or
call.
Pour
acheter
des
pièces
de
rechange
Suncast
et
pour
plus
d'informations
sur
d'autres
articles
Suncast,
rendez-vous
sur
notre
site
Internet
ou
appelez-nous.
Para
comprar
piezas
de
repuesto
Suncast
y
obtener
más
información
acerca
de
otros
productos
Suncast,
visítenos
en
línea
o
llámenos
por
teléfono.
`fc
www.suncast.com
1-800-846-2345
or
1-630-381-6309.
1-800-846-2345
ou
le
1-630-381-6309.
1-800-846-2345
o
al
1-630-381-6309.
A
Before
You
Begin...
•
Consult
your
local
authorities
for
any
permits
required
to
construct
shed.
Prior
to
the
construction
of
your
shed,
check
with
the
local
building
code
official
to
review
any
required
permits
or
building
limitations.
• A
level
and
sturdy
foundation
is
required
before
shed
construction
can
begin.
Review
the
site
preparation
information
within
the
manual
before
beginning
assembly.
•
Read
instructions
thoroughly
prior
to
assembly.
This
kit
contains
parts
that
can
be
damaged
if
assembled
incorrectly
or
in
the
wrong
sequence.
•
Please
follow
instructions.
Suncast
is
not
responsible
for
replacing
parts
lost
or
damaged
due
to
incorrect
assembly.
lb, •
•
Assistance
is
required
during
entire
assembly.
9111-X
)
IMPORTANT
IF
FOUNDATION
IS
REQUIRED,
COMPLETE
SITE
PREPARATION
AND
FOUNDATION
CONSTRUCTION
BEFORE
UNPACKING
ALL
PARTS.
OPEN
ALL
BOXES
FIRST
AND
NEATLY
LAYOUT
PARTS.
SMALL
PARTS
MAY
BE
CONTAINED
IN
EACH
BOX.
PLEASE
REFERENCE
THE
PARTS
LIST
WITHIN
THIS
MANUAL
TO
VERIFY
ALL
PARTS
ARE
PRESENT.
A
Caution
•
Proper
site
preparation
required.
•
Shed
not
intended
for
use
in
extreme weather
conditions.
•
Shed
not
intended
for
storage
of
flammable
or
caustic
chemicals.
•
Store
heavy
items
near
the
bottom
of
shed.
•
Shed
not
intended
for
use
by
children.
•
Do
not
stand,
sit,
or
store
items
on
storage
shed
roof.
•
Treat
carefully
in
extreme
temperatures.
•
Repair
or
replace
broken
parts
immediately.
•
Suncast
is
not
responsible
for
damage
caused
by
weather
or
misuse.
•
At
regular
intervals,
inspect
your
shed
to
make
sure
that
assembly
integrity
has
been
maintained.
•
Periodically
check
that
the
location
you
have
chosen
to
set
your
shed
is
still
level.
•
This
kit
contains
parts
with
metal
edges. Please
be
careful
when
handling.
3
A
Care
Instructions
•
Hot
items,
such
as
recently
used
grills,
blowtorches,
etc.,
must
not
be
stored
in
the
shed.
•
Heavy
articles
should
not
be
leaned
against
the
walls,
as
this
may
cause
panel
distortion
and
permanent
damage.
•
Keep
roof
clean
of
snow
and
leaves.
•
Your
product
is
made
of
materials
that
will
withstand
outdoor
use.
Exposure
to
the
elements
(such
as
dust,
plant
and
animal
life,
moisture
and
sunlight)
encourages
moss,
algae,
and
mold
to
grow
on
outdoor
items.
To
maintain
the
look
of
your
product,
we
recommend
clean-
ing
it
each
year
with
mild
soap
and
water.
DO
NOT
use
bleach,
ammonia,
or
other
caustic
cleaners,
and
DO
NOT
use
stiff
bristle
brushes.
Failure
to
perform
annual
cleaning
could
result
in
permanent
staining
of
the
plastic.
This
is
not
a
manufacturing
defect
and
is
not
covered
under
warranty.
A
Assembly
Day
Tips
•
Complete
site
preparation
and
foundation
construction
before
unpacking
parts
and
beginning
assembly.
•
DO
NOT
attempt
to
assemble
on
a
day
with
strong
winds.
•
DO
NOT
attempt
to
assemble
on days
when
temperature
is
below
32
degrees.
•
Set
aside
appropriate
amount
of
time
to
completely
assemble
shed.
•
Make
sure
you
have
assistance
nearby
to
lift
and
secure
parts
in
place.
•
Wear
light
duty
work
gloves
while
assembling
shed.
•
Once
roof
is
assembled,
a
flashlight
may
be
of
use
when
assembling
smaller
components
inside
shed.
•
DO
NOT
use
a
power
drill
to
tighten
provided
Easy
Bolts.
Use
010210410
EZ
Bolt
Easy
Driver
tool (
provided)
ONLY.
•
Suncast
provides
extra
hardware
for
small
fasteners
for
customer
convenience.
In
some
cases,
there
will
be
extra
small
fasteners
once
the
assembly
is
complete.
Note:
This
product
contains
parts
that
are
used
in
different
orientations
to
construct
the
shed.
Please
take note
of
the
orientation
of
the
parts
shown
throughout
this
instruction
manual.
Failure
to
follow
instructions
could
result
in
damage
to
parts.
Suncast
is
not
responsible
for
replacing
parts
lost
or
damaged
due
to
incorrect
assembly.
4
Parts -
Walls
and
Floor
IMPORTANT
OPEN
ALL
BOXES
FIRST
AND
NEATLY
LAYOUT
PARTS.
SMALL
PARTS
MAY
BE
CONTAINED
IN
EACH
BOX.
PLEASE
REFERENCE
THE
PARTS
LIST
WITHIN
THIS
MANUAL
TO
VERIFY
ALL
PARTS
ARE
PRESENT.
COMPLETE
SITE
PREPARATION
AND
FOUNDATION
CONSTRUCTION
BEFORE
UNPACKING
ALL
PARTS.
o
OB000342
Left
Front
Corner
o o e
OB00341
Side
Panel
x2
OB00334
Left
Back
Corner
;
'
n
n ,
.-
-6-
-1- -
1- -1- -
1-
49. '
' ' '
' -
-1- '
•
°
o
OB00338 OB00340
Front
Floor
j
Rear
Floor
OB00343
Right Front
Corner
OB00344
Back
Panel
OB00335
Right
Back
Corner
5
Parts -
Doors
IMPORTANT
OPEN
ALL
BOXES
FIRST
AND
NEATLY
LAYOUT
PARTS.
SMALL
PARTS
MAY
BE
CONTAINED
IN
EACH
BOX.
PLEASE
REFERENCE
THE
PARTS
LIST
WITHIN
THIS
MANUAL
TO
VERIFY
ALL
PARTS
ARE
PRESENT.
COMPLETE
SITE
PREPARATION
AND
FOUNDATION
CONSTRUCTION
BEFORE
UNPACKING
ALL
PARTS.
o
OB00336
Left
Door
0440631
D-
ring
Slide
Bolt
x2
0
0440544B
Window
x2
OB00337
Right
Door
0440546A
Window
Gasket
x2
6
Parts -
Header
IMPORTANT
OPEN
ALL
BOXES
FIRST
AND
NEATLY
LAYOUT
PARTS.
SMALL
PARTS
MAY
BE
CONTAINED
IN
EACH
BOX.
PLEASE
REFERENCE
THE
PARTS
LIST
WITHIN
THIS
MANUAL
TO
VERIFY
ALL
PARTS
ARE
PRESENT.
COMPLETE
SITE
PREPARATION
AND
FOUNDATION
CONSTRUCTION
BEFORE
UNPACKING
ALL
PARTS.
0
1
MPG00001
Header
Bracket
x2
OB00332
Front
Header
0
1
MRG01005
Ridge
Beam
x
0440630
Vent
Screen
x2
o
OB00333
Rear
Header
1
MRG02002
Header
Beam
x2
7
Parts -
Roof
IMPORTANT
OPEN
ALL
BOXES
FIRST
AND
NEATLY
LAYOUT
PARTS.
SMALL
PARTS
MAY
BE
CONTAINED
IN
EACH
BOX.
PLEASE
REFERENCE
THE
PARTS
LIST
WITHIN
THIS
MANUAL
TO
VERIFY
ALL
PARTS
ARE
PRESENT.
COMPLETE
SITE
PREPARATION
AND
FOUNDATION
CONSTRUCTION
BEFORE
UNPACKING
ALL
PARTS.
1MRG09004
Roof
Support
x4
o
1MPG00003
Truss
Bracket
1MRG06002
Truss
Cross
Brace
o
OB00331
Left
Roof
x2
1MPG00004
Truss
Strap
x2
0102231
Skylight
x2
o
1MRG05002
Truss
Leg
x2
0510700
Gasket
x2
1MRG00024
Side
Adapter
Bracket
x2
OB00330
Right
Roof
x2
8
Hardware
OMP000002 —
Hardware
Bag
El?
Metal
Hinge
Plate
x6
0480340
—
Hardware
Bag
t
:s
e
di)
.25"
x
2"
Hex
Bolt
x4
CID
.25"
x
1"
Hex
Bolt
x2
CC,
.25"
Locking
Nut
x6
0480342
—
Hardware
Bag
.75"
Sealing
Screw
x6
Rubber
Washer
x6
0480549
—
Hardware
Bag
EZ
Bolt
7/8"
x26
*EZ
Bolt
Easy
Driver
0480298A -
Hardware
Bag -
x42
0480336 -
Hardware
Bag -
x125
.625"
Truss
Head
Screw
0480337
—
Hardware
Bag
.25"
x .
75"
Machine
Screw
x6
(C2)
.25"
Locking
Nut
x6
0480374 —
Hardware
Bag
-0
rl
.25"
x
2"
Hex
Bolt
x2
.25"
Locking
Nut
x2
Hardware
shown
at
actual
size (*
Unless
otherwise
noted.)
Extra
hardware
provided.
Not
all
are
used.
9
Door
Handle
Kit
0463282
Hardware
0480370
010235310
Left
Handle
01
023541
0
Right
Handle
3
CL
)
.25"
Washer
x4
(i)
.25"
x
1"
Pan
Head
Screw
x4
Hardware
shown
at
actual
size (*
Unless
otherwise
noted.)
Extra
hardware
provided.
Not
all
are
used.
10
Site
Preparation
and
Platform
Construction
Materials
NOT
supplied
with
Shed
Kit
Important:
•
Site
preparation
is
required
for
this
shed.
Placing
the
shed
on
a
properly
constructed,
square,
flat
and
level
foundation,
as described
below,
is
required.
Without
a
properly
constructed,
square,
flat
and
level
foundation,
settling
will
eventually
occur,
causing
distortion
and
damage
to
the
shed.
Suncast
is
not
responsible
for
replacing
parts
damaged
or
property
lost
due
to
incorrect
foundation
construction.
Warranty
requires
a
properly
constructed
foundation
as
described
below.
•
Complete
the
site
preparation
and
foundation
construction
before
unpacking
parts
and
beginning
assembly.
For
tips
on
site
preparation,
go
to
www.suncast.com,
consult
retailer,
or
local
codes.
Site
Preparation
1.
Consult
your
local
authorities
for
building
codes
and
covenants
before
beginning
foundation
or
erecting
shed.
2.
Before
any
digging,
check
with
local
utilities
to
determine
location
of
buried
cables,
pipes,
etc.
3.
Decide
which
type
of
foundation
is
most
suitable
for
your
installation.
The
foundation
surface
must
be
square,
flat
and
level.
Follow
the
below
guidelines
for
foundation
options:
Concrete
Slab
•
Construct
a
slab
of
at least
4"
thickness.
•
The
use
of
reinforcement
bar
is
recommended.
Wood
Platform
•
Use
exterior
grade
wood.
•
Set
the
wood
platform
on
pier
blocks
or
footing.
4.
Complete
the
foundation
preparations
as
follows:
• A
vapor
barrier
may
be
applied
over
the
foundation
to
prevent
excessive
condensation
in
the
shed.
Follow
local
building
codes
for
a
proper
vapor
barrier.
•
The
ground
should
slope
away
from
the
foundation
area
to
provide
drainage.
Anchoring
the
Floor
Panels
to
the
Foundation
•
Shed
floor
panels
include
flattened
areas
where
anchors
or
lag
screws
are
to
be
secured.
These
flat
areas
must
be
drilled
through
prior
to
securing
the
floor
panels
to
the
foundation.
Concrete
Slab
•
Secure
shed
to
concrete
slab
using
3/8"
masonry
anchors
with
1"
washers.
Masonry
anchors
and
1"
washers
are
avail-
able
at
most
local
hardware
retailers.
8
masonry
anchors
are
required
for
the
Suncast
BMS6511
Shed.
Anchor
section
example
Wood
Platform
•
Secure
shed
to
wood
platform
using
1/4" -
3/8"
x
3"
lag
screws
with
1"
washers.
Lag
screws
and
1"
washers
are
available
at
most
local
hardware
retailers.
8
lag
screws
are
required
for
the
Suncast
BMS6511
Shed.
Note:
Shed
floor
fastening
locations
are
designed
to
align
with
the
under-
structure
layout.
Be
sure
the
front
of
the
base
panels
are
oriented
correctly
on
the
platform
to
ensure
lag
bolts
engage
with
the
under-
structure.
"
Dimensions
allow
for
shed
to
fit
within
the
nearest
1"
on
each
side.
11
Site
Preparation
and
Platform
Construction (
continued)
Materials
NOT
supplied
with
Shed
Kit
Wood
platform
critical
spacing
•
Check
all
critical
spacing
measurements
carefully.
6
4 —
4"
5+"
I
27"
I
1
„
14
71
11T
1 "
(
APPROXIMATI
t
1 A 1
1 •-
r 4
..
27"
FRONT"
k
el
4
72"
Wood
platform
materials
list
Item
Qty
Size
a 1
24"
x
65
1/4" x 3/4"
b 1
48"
x
65"
1/4 x 3/4"
c 6
2"
x
6"
x
69"
d 4
2"x
6"x
11
1/4"
e 2
2"
x
6"
x
65
1/4"
•
Please
note,
2 x 6
dimensional
lumber
is
actually
1/2"
smaller
than
noted
sizes.
Dimensions
given
presume
standard
1.5"
x
5.5"
actual
size
lumber.
Lumber
dimensions
can
vary.
Check
lumber
dimensions
before
cutting
and
make
appropriate
adjustments
to
achieve
given
dimensions.
Cut
sizes
are
actual
size.
)
12
Door
Pre-
Assembly
If
window
film
is
present,
peel
film
from
both
sides
of
window (
I).
Lay
left
door (
N)
on
flat
ground
with
window
screw
attachments
facing
up.
Place
window
gasket (
B)
into
door
channel,
then
place
window (
I).
Cut
excess
gasket
length.
Through
backside
of
door,
secure
layers
with
thirteen
screws (
LL)—
start
with
four
corner
screws
and
then
finish
with
remaining
screws.
DO
NOT
over
tighten
screws.
Repeat
on
right
door (
M).
Note:
The
cut
portion
of
window
gasket (
B)
MUST
be
assembled
on
top
of
door
channel.
At
top
interior
side
of
left
door,
attach
D-
ring
slide
bolt (
P)
with
four
screws (
LL)
through
provided
holes.
At
bottom
interior
side
of
left
door,
attach
D-
ring
slide
bolt
(P)
with
four
screws (
LL)
through
provided
holes.
13
Header
Pre-
Assembly
Insert
header
beam (
V)
into
header (
K).
Attach
using
six
screws (
LL).
DO
NOT
over
tighten
screws.
Lay
front
header (
K)
on
ground
with
lettering
facing
up.
Place
vent
screen (
U)
into
rear
opening
in
front
header (
K).
Secure
through
back
of
header
with
eight
screws (
LL).
DO
NOT
over
tighten
screws.
Slide
roof
ridge
beam
bracket (
S)
under
tabs
on
inside
peak
of
front
header (
K)
and
secure
with
two
screws (
LL).
DO
NOT
over
tighten
screws.
Repeat
steps
4-6
for
rear
header (
L).
14
Truss
Pre-
Assembly
Attach
truss
bracket (
W)
to
end
of
one
truss
leg
(
Y)
with
1"
hex
bolt (
GG)
and
nut (
HH).
REPEAT
WITH
OTHER
TRUSS
LEG.
Note:
Make
sure
side hole
is
at
other
end,
as
shown
in
step
8.
Attach
truss
cross
beam (
Z)
to
two
truss
legs
(
Y)
using
two
hex
bolts
(
FF)
and
two
nuts (
HH).
Stand
truss
and
check
cross
beam
is
level.
15
Truss
Pre-
Assembly
(
continued)
Place
side
adaptor
bracket (
BB)
at
end
of
left
truss
leg
(
Y).
Secure
adaptor
bracket
with
one
2"
hex
bolt
(
FF)
and
one
nut (
HH).
Repeat
for
remaining
side
adaptor
bracket (
BB).
Note:
DO
NOT
over
tighten
side
adaptor
bracket (
BB)
onto
end
of
truss
leg
(
Y).
Roof
panels
will
assemble
to
truss
legs
(Y)
in
later
step.
After
shed
assembly
is
completed,
check
that
all
hardware
is
securely
fastened.
Place
skylight
gasket (
DDD)
into
skylight (
CCC).
Place
sky-
light (
CCC)
onto
right
roof
panel (
0).
Secure
from
under-
side with
eight
screws (
LL).
Make
sure
rib
on
roof
panel
is
seated
fully
against
gasket
on
skylight.
Repeat
for
remaining
roof
panels.
16
Shed
Assembly/Walls
Critical:
When
installing
corners,
flex
corner hinges
back and
forth
several
times.
This
will
help
provide
a
square
corner
and
ensure
proper
fit
of
remaining
panels.
Important:
DO
NOT
flex
in
reverse
position,
as
this
can
crack
the
panel.
Push
front
floor (
A)
and
rear
floor (
C)
panels
together
and
secure
with
four
screws (
LL).
Note:
Refer
to
pages
9
and
10
to
secure
floors
to
foundation.
17
Shed
Assembly/Walls
(
continued)
Align
tab
on
bottom
right
side
of
left
front
corner ( D)
with
slot
on
front
floor (
A).
Lower
panel
into slot
and
lock
in
place
by
sliding
panel
toward
door
opening.
7
Note:
Use
a
rubber
mallet
to "
push"
left
front
corner
(D)
into
locked
position.
Tip
left
front
corner ( D)
back
to
vertical
position
and
align
lower
tabs
on
right
side
with
slots
in
floor.
Tip
left
front
corner (
D)
back
to
vertical
position
and
align
lower
tabs
on
right
side
with
slots
in
floor.
18
Shed
Assembly/Walls
(
continued)
16
Before
proceeding,
make
sure
corner
is
square (
top
view)
where
it
meets
the
floor
and
that
panel
is
flush
(side
view)
with
floor.
If
not,
repeat
Steps
13-15
until
square
and
flush.
Top
view
e v 0 0
Side
view
1
Align
tabs
on
bottom
of
side
panel (
E)
with
slots
along
front
and
rear
floors.
Lower
panel
into
slots
and
lock
in
place
by
sliding
panel
toward
front
corner.
7
Note:
Use
a
rubber
mallet
to "
push"
side
panel (
E)
into
locked
position.
Secure
side
panel
with
four
easy
bolts (
JJ),
working
from
floor
to
roof.
DO
NOT
use
torque
wrench.
Use
easy
bolt
easy
driver (
KK)
and
hand
tighten.
Easy
bolt
head
will
be
flush
when
fully
seated.
DO
NOT
over
tighten
easy
bolts.
Note:
You
may
hear
a
click
when
easy
bolt
has
been
tightened
completely.
19
Shed
Assembly/Walls
(
continued)
19
Hardware
Needed
e
x20
Repeat
Steps
13-18
for
remaining
panels.
20

This manual suits for next models

1

Other Suncast Outdoor Storage manuals

Suncast Covington BMS7425 User manual

Suncast

Suncast Covington BMS7425 User manual

Suncast Brilliant by Design BMS9000 Series User manual

Suncast

Suncast Brilliant by Design BMS9000 Series User manual

Suncast Vista V7572PK User manual

Suncast

Suncast Vista V7572PK User manual

Suncast BMS8125 User manual

Suncast

Suncast BMS8125 User manual

Suncast DB5025P User manual

Suncast

Suncast DB5025P User manual

Suncast HomePlace Vintage Garden Building User manual
Suncast

Suncast HomePlace Vintage Garden Building User manual

Suncast GS1000 User manual

Suncast

Suncast GS1000 User manual

Suncast BMS5700 User manual

Suncast

Suncast BMS5700 User manual

Suncast BMDB200 User manual

Suncast

Suncast BMDB200 User manual

Suncast Sierra BMS6550 User manual

Suncast

Suncast Sierra BMS6550 User manual

Suncast GS8000 User manual

Suncast

Suncast GS8000 User manual

Suncast DB6300 User manual

Suncast

Suncast DB6300 User manual

Suncast GLIDETOP BMS4900 User manual

Suncast

Suncast GLIDETOP BMS4900 User manual

Suncast BMDB134004 User manual

Suncast

Suncast BMDB134004 User manual

Suncast ACS24 User manual

Suncast

Suncast ACS24 User manual

Suncast BMS4700X User manual

Suncast

Suncast BMS4700X User manual

Suncast Brilliant by Design Stow-Away BMS4780 User manual

Suncast

Suncast Brilliant by Design Stow-Away BMS4780 User manual

Suncast Brilliant by Design Deck Box DB7000 User manual

Suncast

Suncast Brilliant by Design Deck Box DB7000 User manual

Suncast 774098 User manual

Suncast

Suncast 774098 User manual

Suncast BMS4700 User manual

Suncast

Suncast BMS4700 User manual
Suncast GLIDETOP BMS4950 Series User manual

Suncast

Suncast GLIDETOP BMS4950 Series User manual

Suncast Brilliant by Design Cloverdale BMS7727 User manual

Suncast

Suncast Brilliant by Design Cloverdale BMS7727 User manual

Suncast Vista BMS7402 User manual

Suncast

Suncast Vista BMS7402 User manual
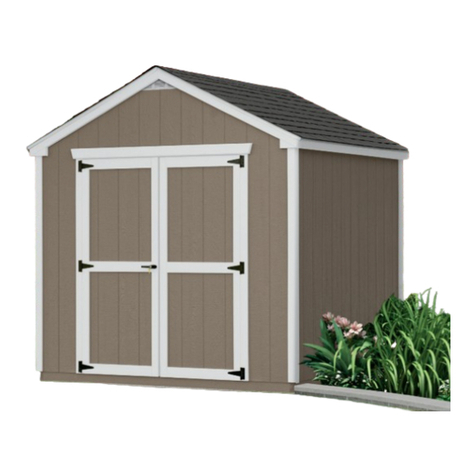
Suncast Everett BMS6510 User manual

Suncast

Suncast Everett BMS6510 User manual

Popular Outdoor Storage manuals by other brands

Duratuf MK4 Assembly instructions

Duratuf

Duratuf MK4 Assembly instructions

Lifetime 60354 Assembly instructions

Lifetime

Lifetime 60354 Assembly instructions

garofalo TUSCANY user manual

garofalo

garofalo TUSCANY user manual

Karibu 71753 Building instructions

Karibu

Karibu 71753 Building instructions

Creative Play TRIKE STORE Assembly and installation instructions

Creative Play

Creative Play TRIKE STORE Assembly and installation instructions

ABSCO SHEDS J30082SECO Assembly instructions

ABSCO SHEDS

ABSCO SHEDS J30082SECO Assembly instructions

USP Duramaxx 7 Ft Store Max Plus owner's manual

USP

USP Duramaxx 7 Ft Store Max Plus owner's manual

Moebelix T-PSF56-H154 Assembly instructions

Moebelix

Moebelix T-PSF56-H154 Assembly instructions

USP Duramax 8 Ft Palladium Double Door Owner's manual/ instructions for assembly

USP

USP Duramax 8 Ft Palladium Double Door Owner's manual/ instructions for assembly

Lifetime 60028 owner's manual

Lifetime

Lifetime 60028 owner's manual

Riverlea Duratuf Sentry Sheds SL1520 Assembly instructions

Riverlea

Riverlea Duratuf Sentry Sheds SL1520 Assembly instructions

Outsunny 845-426V01 Assembly & instruction manual

Outsunny

Outsunny 845-426V01 Assembly & instruction manual

Walton 01OVLPA0806SDFW-V1 General instructions

Walton

Walton 01OVLPA0806SDFW-V1 General instructions

Lifetime 60076 manual

Lifetime

Lifetime 60076 manual

Yardline RIDGEPOINTE Assembly manual

Yardline

Yardline RIDGEPOINTE Assembly manual

Palram CANOPIA RUBICON 6x10 / 2x3 How to assemble

Palram

Palram CANOPIA RUBICON 6x10 / 2x3 How to assemble

Rutland County MORCOTT Assembly instructions

Rutland County

Rutland County MORCOTT Assembly instructions

Arrow ED106 Owner's manual & assembly instructions

Arrow

Arrow ED106 Owner's manual & assembly instructions

manuals.online logo
manuals.online logoBrands
  • About & Mission
  • Contact us
  • Privacy Policy
  • Terms and Conditions

Copyright 2025 Manuals.Online. All Rights Reserved.