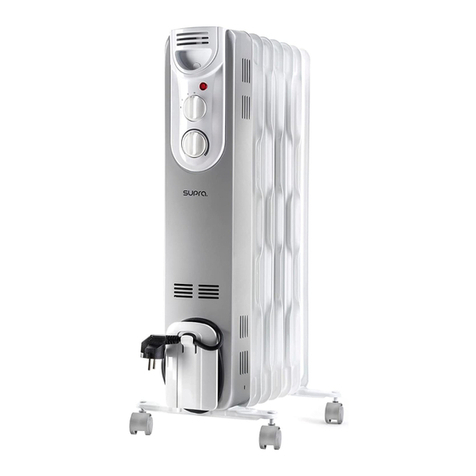
Supra OASIS 1503 User manual


Français
DESCRIPTION
A. Poignée de transport
B. Bouton de commande puissance
C. Bouton de commande thermostat
D. Voyant lumineux
E. Range-cordon d’alimentation
F. Bloc de roulettes
G. Système de xation des roulettes
H. Vis papillon (x4)
Attention: Ne jamais utiliser l’appareil sans ses roues
Caractéristiques techniques
Modèle: OASIS
Type: Radiateur à bain d’huile
Tension: 220-240V ~50/60Hz
Protection: Classe I; IPX0
Usage interdit en salle de bains ou buanderie
Fonctionnement: 3 allures de chaue; fonction hors-gel
et thermostat mécanique
Sécurité: Anti-surchaue et anti-basculement
Cordon: Longueur 150 cm
Pièces à monter: 1 bloc de roulettes avant + 1 bloc de roulettes
arrière + 2 systèmes de xation des blocs roulettes + 4 vis papillons
Modèle P max. W NB
éléments
LxHxP (mm) Poids net
(kg)
Surface
traitée *
jusqu’à
OASIS 1503 1500 W 5390x650x250 8,75 30 m2
OASIS 2003 2000 W 7470x650x250 10,20 40 m2
OASIS 2503 2500 W 9550x650x250 11,88 50 m2
Fixation des roulettes
MONTER LES ROULETTES:
- Mettre l’arceau au niveau du 1er élément du corps de chauffe (g. 3).
- Mettre en place les roulettes avant et l’emboiter sur l’arceau. Vérier que les 2 encoches des
roulettes soient vers l’extérieur du corps de chauffe (g. 4).
- Bien plaquer les roulettes sur le corps de chauffe.
- Visser les deux vis papillons au système de xation des roulettes.

Range cordon
- Ouvrir le compartiment du range cordon en tirant vers l’avant
- Extraire le cordon d’alimentation.
installation
- Respecter impérativement les consignes de sécurité.
- Dérouler la totalité du câble d’alimentation.
- Brancher l’appareil sur une prise .
- Poser l’appareil sur un sol horizontal (pas sur une moquette épaisse).
Fonctionnement
- Fonctionnement du thermostat:
- Tourner le bouton du thermostat C (g. 7) dans le sens horaire jusqu’à l’arrêt en position maximum.
- Sélectionner la puissance en tournant le sélecteur de puissance B (g. 7).
- Lorsque la température de la pièce correspond à la température souhaitée, tourner le bouton du
thermostat C dans le sens anti-horaire jusqu’au
- déclenchement du ‘clic’. La température souhaitée est alors programmée. Le radiateur régulera
automatiquement à cette température. Si la température ambiante descend en dessous de la
température programmée, le radiateur se remet automatiquement en marche jusqu’à ce que la
température programmée soit à nouveau atteinte.
- Sélection de la puissance:
- Brancher l’appareil.
- Choisir la puissance de chauffe avec le sélecteur de puissance
Puissance MINIMALE:
- Sélectionner la puissance I.
- Tourner le bouton C du thermostat sur la température souhaitée.
Puissance MOYENNE:
- Sélectionner la puissance II.
- Tourner le bouton C du thermostat sur la température souhaitée.
Puissance MAXIMALE:
- Sélectionner la puissance III.
- Tourner le bouton C du thermostat sur la température souhaitée.
Tableau des puissances OASIS 1503 OASIS 2003 OASIS 2503
Puissance I Minimale 600 W 800 W 1000 W
Puissance II Moyenne 900 W 1200 W 1500 W
Puissance III Maximale 1500 W 2000 W 2500 W
Fonction Hors-gel
- Sélectionner la puissance souhaitée et mettre le thermostat sur la postion horsgel. Pour cela tourner
le thermostat dans le sens antihoraire jusqu’à la position minimale.
- Dès que la température ambiante atteint 5°C environ, l’appareil se met à chauffer. Il maintient la
température au-dessus de 5°C environ et protège ainsi les installations sanitaires du gel.

Arrêt de l’appareil
- Mettre le sélecteur de puissance sur 0. L’appareil arrête de chauffer.
Sécurité anti-surchauffe
- En cas d’accumulation de chaleur, un dispositif de protection contre la surchauffe arrête
automatiquement le fonctionnement de l’appareil. En cas de déclenchement de ce dispositif:
- Eteindre l’appareil.
- Mettre l’appareil hors tension en coupant l’alimentation électrique.
- Supprimer la cause de surchauffe (appareil couvert, …).
- Laisser refroidir l’appareil.
- Remettre l’appareil sous tension.
- Remettre l’appareil en fonctionnement.
Sécurité anti-basculement
- En fonctionnement, si l’appareil bascule, le dispositif de sécurité anti-basculement s’enclenche.
- Le radiateur à bain d’huile OASIS s’éteint.
- Redresser le radiateur, l’appareil se remet en fonctionnement automatiquement
Entretien
- Le radiateur à bain d’huile OASIS ne nécessite qu’un nettoyage extérieur régulier. Les détériorations
résultant d’un mauvais entretien de l’appareil ne seront pas prises en charge par la garantie.
- Avant tout nettoyage ou entretien, éteindre l’appareil.
- Débrancher l’appareil.
- Attendre que l’appareil soit froid.
- Ne jamais immerger l’appareil dans l’eau.
- Eviter impérativement que de l’eau n’entre dans l’appareil.
- Utiliser un chiffon légèrement humide.
- Veiller à ne pas mouiller les grilles d’entrée et de sortie d’air.
- Ne pas employer de détergents, d’abrasifs, de produits chimiques (alcool, essence...).
- Aspirer régulièrement les entrées et sorties d’air. L’accumulation de pousières nuit au bon
fonctionnement de l’appareil.

English
DESCRIPTION
A. Carry handle
B. Power control knob
C. Temperature control knob
D. Pilot light
E. Cable housing
F. Caster frame
G. Caster attachment system
H. Wing nuts (x4)
Caution: Do not use the appliance without the casters.
Technical characteristics
Model: OASIS
Type: Oil radiator
Voltage: 220-240V ~50/60Hz
Protection: Class I; IPX0;
Not to be used in bathrooms or laundries
Operation: 3 heating levels; anti-frost function
and mechanical thermostat
Safety: Overheating and tip-over safety system
Cable Length 150 cm
Parts to assemble 1 Front caster block + 1 Rear caster block + 2
Caster block attachment systems + 4 wing nuts
Model Max.
Power (W)
No. of
elements
LxHxD
(mm)
Net
weight
(kg)
Treated
area * up
to
OASIS 1503 1500 W) 5390x650x250 8.75 30 m2
OASIS 2003 2000 W 7470x650x250 10.20 40 m2
OASIS 2503 2500 W) 9550x650x250 11.88 50 m2
Fitting the casters
ASSEMBLING THE CASTERS
- Place the U-hook in through the rst element of the radiator (g. 3)
- Fit the front casters onto the bracket and insert the ends of U-hook through the holes in the bracket.
Make sure that the 2 slots for the casters are facing towards the outside of the radiator (g. 4).
- Press the casters rmly against the radiator body.
- Fit the two wing nuts to the caster attachment system.

Cable housing
- Open the cable housing compartment by pulling on it.
- Remove the cable
Installation
- Respect the safety instructions.
- Unwind the power cable fully.
- Plug the appliance into a mains outlet.
- Stand the appliance on a level surface (never on a thick carpet).
Operation
- Thermostat operation
- Turn thermostat C (g. 7) clockwise until it stops at maximum.
- Select the power by turning power knob B (g. 7).
- When the room reaches the desired temperature, turn thermostat C anticlockwise until it clicks.
- The temperature has now been set. The radiator will automatically adjust to this temperature. If the
temperature drops below this setting, the radiator will automatically switch on until the set temperature
is reached.
- Power selection:
- Connect the appliance to the mains supply.
- Use the power knob to choose the heating level.
MINIMUM power:
- Select power I
- Turn the thermostat knob C until it is at the desired temperature.
MEDIUM power:
- Select power II
- Turn the thermostat knob C until it is at the desired temperature.
MAXIMUM power:
- Select power III
- Turn the thermostat knob C until it is at the desired temperature.
Power table OASIS 1503 OASIS 2003 OASIS 2503
Power I Minimum 600 W 800 W 1000 W
Power II Medium 900 W 1200 W 1500 W
Power III Maximum 1500 W 2000 W 2500 W
Anti-frost function
- Select the desired power and set the thermostat to the anti-frost position. To do this, turn the
thermostat anticlockwise to the minimum position.
- The appliance will switch on when the room temperature reaches approx. 5°C. This keeps the
temperature above 5°C and stops water pipes from freezing.
Switching the appliance off
- Turn the power knob to 0. The appliance stops heating.

Overheat protection
- In the event of a heat build-up, an overheat protection device automatically switches off the appliance.
If this protection device is triggered:
- Turn the appliance off.
- Unplug it from the mains socket.
- Remove the cause of overheating (covered appliance, etc.).
- Allow the appliance to cool down.
- Plug the appliance back in.
- Switch the appliance back on.
Tip-over safety switch
- Should the appliance tip over when in use, the tip-over safety switch is triggered.
- The OASIS oil radiator switches off.
- When the radiator is stood back up, it will switch back on automatically.
Maintenance
- The OASIS oil radiator only requires regular external cleaning. The warranty does not cover damage
caused by improper maintenance of the appliance.
- Before any cleaning or maintenance operations, switch the appliance off. Unplug it from the mains
supply. Wait until the appliance is cold.
- Never immerse the appliance in water.
- Do not allow water to get inside the appliance.
- Use a slightly damp cloth. Do not wet the air inlet/outlet grilles.
- Do not use detergents, abrasives or chemicals (alcohol, petrol, etc.).
- Vacuum the air inlets and outlets regularly. A build-up of dust will adversely affect correct operation
of the appliance.

Español
DESCRIPCIÓN
A. Asa de transporte
B. Mando de control de potencia
C. Mando de control de temperatura
D. Piloto luminoso
E. Recogecable
F. Estructura ruedas
G. Sistema de jación de las ruedas
H. Tornillo de mariposa (x4)
Atención: No utilice nunca el aparato sin ruedas
Características técnicas
Modelo: OASIS
Tipo: Radiador de aceite
Tensión: 220-240V ~50/60Hz
Protección: Clase I; IPX0;
No utilizar nunca en cuartos de baño ni lavanderías
Funcionamiento: 3 niveles de calentamiento; función antihielo
y termostato mecánico
Seguridad: Sistema contra el sobrecalentamiento y antivuelco.
Cable Longitud 150 cm
Piezas a montar 1 Estructura de patas delanteras + 1 estructura de
patas traseras + 2 sistemas de jación de las estructuras de las patas + 4
tornillos de mariposa
Modelo Potencia
máx (W)
Nº de
elementos
LxAxP (mm) Peso neto
(kg)
Supercie
tratada *
hasta
OASIS 1503 1500 W) 5390x650x250 8,75 30 m2
OASIS 2003 2000 W 7470x650x250 10,20 40 m2
OASIS 2503 2500 W) 9550x650x250 11,88 50 m2
Fijación de las ruedas
MONTAJE DE LAS RUEDAS
- Sitúe el gancho en U en el primer elemento del radiador (g.3)
- Coloque las ruedas delanteras en el soporte e introduzca el gancho en U por los oricios del mismo.
Asegúrese de que las 2 ranuras de las ruedas estén orientadas hacia el exterior del radiador (g. 4).
- Presione fuertemente las ruedas contra el cuerpo del radiador.
- Atornille los dos tornillos de mariposa al sistema de jación de las ruedas.

Recogecable
- Abra el compartimento recogecable tirando de él.
- Extraiga el cable.
Instalación
- Respete las normas de seguridad.
- Desenrolle en su totalidad el cable.
- Conecte el aparato en una toma de corriente.
- Coloque el aparato sobre una supercie plana (nunca sobre una alfombra espesa)
Funcionamiento
- Funcionamiento del termostato
- Gire el termostato C (g. 7), en sentido horario, hasta situarlo en el máximo.
- Seleccione la potencia girando el selector de potencia B (g.7).
- Cuando en la habitación se alcance la temperatura deseada, gire el termostato C en sentido
antihorario hasta que haga «clic»
- La temperatura ha quedado programada. El radiador se ajustará automáticamente a esta
temperatura. Si la temperatura desciende por debajo de la programada, el radiador se pondrá en
marcha automáticamente hasta alcanzar la temperatura programada.
- Selección de la potencia:
- Conecte el aparato a la red eléctrica.
- Elija la potencia de calentamiento con el selector de potencia.
Potencia MÍNIMA
- Seleccione la potencia I.
- Gire el mando del termostato C hasta situarlo en la temperatura deseada.
Potencia MEDIA:
- Seleccione la potencia II.
- Gire el mando del termostato C hasta situarlo en la temperatura deseada.
Potencia MÁXIMA:
- Seleccione la potencia III.
- Gire el mando del termostato C hasta situarlo en la temperatura deseada.
Tabla de potencias OASIS 1503 OASIS 2003 OASIS 2503
Potencia I Mínima 600 W 800 W 1000 W
Potencia II Media 900 W 1200 W 1500 W
Potencia III Máxima 1500 W 2000 W 2500 W
Función antihielo
- Seleccione la potencia deseada y coloque el termostato en la posición antihielo. Para ello, gire el
termostato en sentido antihorario hasta el mínimo.
- Cuando la temperatura ambiente alcanza 5 °C aprox., el aparato se pone en marcha. De esta
manera, mantiene la temperatura por encima de los 5°C y protege las instalaciones sanitarias contra
la congelación.
Apagar el aparato
- Coloque el selector de potencia en 0. El aparato deja de calentar.

Seguridad contra el sobrecalentamiento
- En caso de acumulación de calor, el dispositivo de protección contra el sobrecalentamiento detiene
automáticamente el aparato. Si este dispositivo se activa:
- Apague el aparato.
- Desconéctelo de la corriente eléctrica.
- Elimine la causa del sobrecalentamiento (aparato cubierto, ...).
- Deje enfriar el aparato.
- Vuelva a conectarlo.
- Ponga el aparato nuevamente en marcha.
Seguridad antivuelco
- Si el aparato llegara a inclinarse cuando está en funcionamiento, el dispositivo de seguridad
antivuelco se activa.
- El radiador de aceite OASIS se apaga.
- Al enderezar el radiador, el aparato vuelve a funcionar automáticamente.
Mantenimiento
- El radiador de aceite OASIS sólo requiere una limpieza externa regular. La garantía no cubre los
daños derivados de un mantenimiento inadecuado del aparato.
- Antes de proceder a su limpieza o mantenimiento, apague el aparato. Desconéctelo de la red.
Espere hasta que el aparato se enfríe.
- Nunca sumerja el aparato en agua.
- No permita que entre agua en el aparato.
- Utilice un paño ligeramente humedecido. No moje las rejillas de entrada y salida de aire.
- No utilice detergentes, abrasivos ni productos químicos (alcohol, gasolina, etc.).
- Aspire regularmente las entradas y salidas de aire. La acumulación de polvo es perjudicial para el
buen funcionamiento del aparato.

Deutsch
BESCHREIBUNG
A. Tragegriff
B. Leistungsregelungsknopf
C. Temperaturregler
D. Betriebsanzeige
E. Kabelfach
F. Struktur Räder
G. Radbefestigungssystem
H. Flügelschraube (x4)
Achtung: Verwenden Sie das Gerät niemals ohne Räder
Technische Eigenschaften
Modell: OASIS
Typ: Ölradiator
Spannung: 220-240V ~50/60Hz
Schutz: Klasse I; IPX0;
Niemals in Bädern oder Wäschereien verwenden.
Betrieb: 3 Heizstufen; Anti-Frost-Funktion und mechanisches Thermostat
Sicherheit: Anti-Überhitzungs- und Anti-Kipp-System.
Kabel Länge 150 cm
Zu montierende Teile 1 vorderer Beinrahmen + 1 hinterer Beinrahmen + 2 Beinrahmen-
Befestigungssysteme + 4 Flügelschrauben
Modell Max.
Leistung
(W)
Az.
Elemente
LxBxT
(mm)
Nettogewicht
(kg)
Oberäche
behandelt
* bis
OASIS
1503
1500 W 5390x650x250 8,75 30 m2
OASIS
2003
2000 W 7470x650x250 10,20 40 m2
OASIS
2503
2500 W 9550x650x250 11,88 50 m2
Anbringung der Rollen
MONTAGE DER ROLLEN
- Setzen Sie den U-Haken auf das erste Heizkörperelement (Abb.3).
- Setzen Sie die Vorderräder auf die Halterung und führen Sie den U-Haken durch die Löcher in der
Halterung. Achten Sie darauf, dass die 2 Schlitze an den Rädern vom Heizkörper abgewandt sind
(Abb. 4).
- Drücken Sie die Räder fest gegen das Heizkörpergehäuse.
- Schrauben Sie die beiden Flügelschrauben an das Radbefestigungssystem.

Kabelfach
- Öffnen Sie das Kabelstaufach, indem Sie es aufziehen.
- Entnehmen Sie das Kabel.
Installation
- Beachten Sie die Sicherheitsvorschriften.
- Rollen Sie das Kabel vollständig aus.
- Gerät an das Netz anschließen.
- Stellen Sie das Gerät auf eine ebene Fläche (niemals auf einen dicken Teppich).
Betrieb
- Funktionsweise des Thermostats
- Drehen Sie den Thermostat C (Abb. 7) im Uhrzeigersinn auf die maximale Einstellung.
- Wählen Sie die Leistung durch Drehen des Leistungswahlschalters B (Abb.7).
- Wenn die gewünschte Raumtemperatur erreicht ist, drehen Sie das Thermostat C gegen den
Uhrzeigersinn, bis es “einrastet”.
- Die Temperatur wurde programmiert. Der Heizkörper wird automatisch auf diese Temperatur
eingestellt. Wenn die Temperatur unter die eingestellte Temperatur fällt, läuft der Heizkörper
automatisch an, bis die eingestellte Temperatur erreicht ist.
- Wahl der Leistung:
- Schließen Sie das Gerät an das Stromnetz an.
- Wählen Sie die Heizleistung mit dem Leistungswähler.
MINIMALE Leistung
- Wählen Sie die Leistung I.
- Drehen Sie den Drehknopf am Thermostat C auf die gewünschte Temperatur.
MITTLERE Leistung
- Wählen Sie Leistung II.
- Drehen Sie den Drehknopf am Thermostat C auf die gewünschte Temperatur.
MAXIMALE Leistung:
- Wählen Sie Leistung III.
- Drehen Sie den Drehknopf am Thermostat C auf die gewünschte Temperatur.
Leistungsübersicht OASIS 1503 OASIS 2003 OASIS 2503
Leistung I Niedrigste
Stufe
600 W 800 W 1000 W
Leistung II Mittel 900 W 1200 W 1500 W
Leistung III Maximal 1500 W 2000 W 2500 W
Gefrierschutzfunktion
- Wählen Sie die gewünschte Leistung und stellen Sie den Thermostat auf die Position “Frostschutz”.
Drehen Sie dazu das Thermostat gegen den Uhrzeigersinn auf das Minimum.
- Wenn die Umgebungstemperatur ca. 5 °C erreicht, läuft das Gerät an. Auf diese Weise hält es die
Temperatur über 5°C und schützt die sanitären Anlagen vor dem Einfrieren.

Das Gerät ausschalten
- Stellen Sie den Leistungswahlschalter auf 0. Das Gerät hört auf zu heizen.
Schutz vor Überhitzung
- Im Falle eines Hitzestaus schaltet eine Überhitzungsschutzeinrichtung das Gerät automatisch ab.
Wenn dieses Gerät aktiviert ist:
- Schalten Sie das Gerät aus.
- Trennen Sie es von der Spannungsversorgung.
- Beseitigen Sie die Ursache der Überhitzung (abgedecktes Gerät, ...).
- Lassen Sie das Gerät abkühlen
- Schließen Sie es wieder an.
- Schalten Sie das Gerät wieder ein.
Kippsicherung
- Wenn das Gerät während des Betriebs kippt, wird die Kippsicherung aktiviert.
- Das Ölheizgerät OASIS schaltet sich aus.
- Wenn der Heizkörper ausgerichtet ist, beginnt das Gerät automatisch wieder zu arbeiten.
Instandhaltung
- Das Ölheizgerät OASIS muss nur regelmäßig von außen gereinigt werden. Die Garantie deckt keine
Schäden ab, die durch unsachgemäße Wartung des Geräts entstehen.
- Schalten Sie das Gerät vor der Reinigung oder Wartung aus. Trennen Sie das Gerät vom Netz.
Lassen Sie den Ofen auskühlen.
- Das Gerät nicht in Wasser tauchen.
- Lassen Sie kein Wasser in das Gerät gelangen.
- Verwenden Sie ein leicht angefeuchtetes Tuch. Lassen Sie die Luftein- und -auslassgitter nicht nass
werden.
- Verwenden Sie keine Reinigungsmittel, Scheuermittel oder Chemikalien (Alkohol, Benzin usw.).
- Saugen Sie den Lufteintritt und –austritt regelmäßig frei. Staubansammlungen beeinträchtigen den
einwandfreien Betrieb des Geräts.

Italiano
DESCRIZIONE
A. Maniglia per il trasporto
B. Controllo della potenza
C. Controllo della temperatura
D. Spia luminosa
E. Avvolgicavo
F. Struttura ruote
G. Sistema di ssaggio delle ruote
H. Vite ad alette (x4)
Attenzione: Non utilizzare mai l’apparecchio senza le ruote.
Caratteristiche tecniche
Modello: OASIS
Tipo: Radiatore ad olio
Tensione: 220-240V ~50/60Hz
Protezione: Classe I; IPX0;
Non utilizzare mai in bagni né lavanderie
Funzionamento 3 livelli di riscaldamento; funzione antigelo e
termostato meccanico
Sicurezza: Sistema anti-surriscaldamento e antiribaltamento
Cavo Lunghezza 150 cm
Parti da montare 1 Struttura piedini anteriori + 1 struttura piedini
posteriori + 2 sistemi di ssaggio delle strutture dei piedini + 4 viti a farfalla
Modello Potenza
max. (W)
N.
elementi
LxAxP (mm) Peso
netto
(kg)
Supercie
trattata *
no
OASIS 1503 1500 W 5390x650x250 8,75 30 m2
OASIS 2003 2000 W 7470x650x250 10,20 40 m2
OASIS 2503 2500 W 9550x650x250 11,88 50 m2
Fissaggio delle ruote
MONTAGGIO DELLE RUOTE
- Collocare il gancio a U nel primo elemento del radiatore (g. 3)
- Collocare le ruote anteriori sul supporto e inserire il gancio a U nei fori del supporto. Assicurarsi che
le 2 scanalature delle ruote siano orientate verso l’esterno del radiatore (g. 4).
- Premere con forza le ruote contro il corpo del radiatore.
- Stringere le viti a farfalla al sistema di ssaggio delle ruote.

Avvolgicavo
- Aprire lo scomparto avvolgicavo tirandolo.
- Estrarre il cavo.
Installazione
- Rispettare le norme di sicurezza.
- Svolgere completamente il cavo di alimentazione.
- Collegare l’apparecchio a una presa di corrente.
- Posizionare l’apparecchio su un pavimento livellato (mai su un tappeto spesso).
Funzionamento
- Funzionamento del termostato
- Girare il termostato C (g. 7) in senso orario, no a collocarlo sul massimo.
- Selezionare la potenza, girando il relativo selettore B (g. 7).
- Quando la stanza arrivi alla temperatura desiderata, ruotare il comando del termostato C in senso
antiorario no a sentire un “clic”.
- La temperatura è ora programmata. Il radiatore si regolerà automaticamente a questa temperatura.
Se la temperatura scende al di sotto di quella programmata, il radiatore si avvia automaticamente no
a raggiungere la temperatura programmata.
- Selezione della potenza:
- Collegare l’apparecchio alla rete elettrica.
- Scegliere la potenza di riscaldamento mediante il selettore di potenza.
Potenza MINIMA
- Selezionare la potenza I.
- Girare il comando del termostato C no a posizionarlo sulla temperatura desiderata.
Potenza MEDIA:
- Selezionare la potenza II.
- Girare il comando del termostato C no a posizionarlo sulla temperatura desiderata.
Potenza MASSIMA:
- Selezionare la potenza III.
- Ruotare il termostato C no a collocarlo nella posizione desiderata.
Tabella delle potenze OASIS 1503 OASIS 2003 OASIS 2503
Potenza I Minima 600 W 800 W 1000 W
Potenza II Media 900 W 1200 W 1500 W
Potenza III Massima 1500 W 2000 W 2500 W
Funzione antigelo
- Selezionare la potenza desiderata e girare il termostato sulla posizione antigelo. .A tale ne, girare il
termostato in senso antiorario no al minimo.
- Non appena la temperatura ambiente raggiunge i 5 ºC circa, l’apparecchio si avvia. In questo modo,
mantiene la temperatura al di sopra dei 5 ºC circa e protegge gli impianti sanitari dal gelo.
Spegnimento dell’apparecchio
- Girare il selettore della potenza sullo 0. L’apparecchio smette di riscaldare.
Sicurezza contro il surriscaldamento
- In caso di accumulo di calore, un dispositivo di protezione contro il surriscaldamento arresta

automaticamente l’apparecchio. Se si attiva questo dispositivo:
- Spegnere l’apparecchio.
- Scollegarlo dalla rete elettrica.
- Eliminare la causa del surriscaldamento (apparecchio coperto, ecc.).
- Lasciare raffreddare l’apparecchio.
- Collegarlo nuovamente.
- Riavviare l’apparecchio.
Sicurezza antiribaltamento
- Se l’apparecchio dovesse oscillare durante il funzionamento, si attiverebbe il dispositivo di sicurezza
antiribaltamento.
- Il radiatore ad olio OASIS si spegne.
- Dopo aver raddrizzato il radiatore, questo si riavvia automaticamente.
Manutenzione
- Il radiatore OASIS richiede solamente una pulizia esterna regolare. La garanzia non copre i danni
derivanti da una manutenzione impropria dell’apparecchio.
- Prima di pulirlo o di eseguire la manutenzione, spegnere l’apparecchio. Scollegarlo
dall’alimentazione. Lasciare che si raffreddi.
- Non immergere l’apparecchio in acqua.
- Non consentire l’entrata di acqua nell’apparecchio.
- Utilizzare un panno leggermente inumidito. Non bagnare le griglie di entrata e uscita dell’aria.
- Non utilizzare detersivi, abrasivi, né prodotti chimici (alcol, benzina, ecc.).
- Aspirare regolarmente le entrate e le uscite dell’aria. L’accumulo di polvere è dannoso per il buon
funzionamento dell’apparecchio.

Português
DESCRIÇÃO
A. Pega para transporte
B. Comando regulador de potência
C. Comando regulador da temperatura
D. Indicador luminoso
E. Recolha do cabo
F. Estrutura das rodas
G. Sistema de xação das rodas
H. Parafuso de aletas (x4)
Atenção: Nunca utilize o aparelho sem as rodas.
Características técnicas
Modelo: OASIS
Tipo: Radiador a óleo
Tensão: 220-240V ~50/60Hz
Proteção: Classe I; IPX0;
Nunca utilizar em casas de banho nem lavandarias
Funcionamento: 3 níveis de aquecimento; função anticongelação e
termóstato mecânico.
Segurança: Sistema contra o sobreaquecimento e antiqueda.
Cabo Comprimento 150 cm
Peças a montar 1 Estrutura de pés dianteiros + 1 estrutura de pés
traseiros + 2 sistemas de xação das estruturas dos pés + 4 parafusos de aleta
Modelo Potência
máx. (W)
N.º de
elementos
LxAxP (mm) Peso
líquido
(kg)
Superfície
tratada *
até
OASIS 1503 1500 W 5390x650x250 8,75 30 m2
OASIS 2003 2000 W 7470x650x250 10,20 40 m2
OASIS 2503 2500 W 9550x650x250 11,88 50 m2
Fixação das rodas
MONTAGEM DAS RODAS
- Coloque o gancho em U no primeiro elemento do radiador (g.3)
- Coloque as rodas dianteiras no suporte e introduza o gancho em U pelos orifícios do mesmo.
Verique se as 2 ranhuras das rodas estão orientadas para o exterior do radiador (g. 4).
- Empurre com força as rodas contra o corpo do radiador.
- Aparafuse os dois parafusos de aletas ao sistema de xação das rodas.
Recolha do cabo
- Abra o compartimento do cabo puxando-o.

- Retire o cabo
Instalação
- Respeite as normas de segurança.
- Desenrole totalmente o cabo de alimentação.
- Ligue o aparelho a uma tomada elétrica.
- Coloque o aparelho sobre uma superfície plana (nunca sobre uma carpete grossa).
Funcionamento
- Funcionamento do termóstato
- Rode o termóstato C (g. 7) no sentido dos ponteiros do relógio, até à posição de máximo.
- Selecione a potência, rodando o seletor da potência B (g. 7).
- Quando a temperatura desejada for alcançada, rode o comando do termóstato C no sentido contrário
ao dos ponteiros do relógio até que faça «clique».
- A temperatura cou programada. O radiador regula-se automaticamente a esta temperatura. Se a
temperatura descer abaixo da programada, o radiador entra automaticamente em funcionamento até
alcançar a temperatura programada.
- Seleção da potência:
- Ligue o aparelho à corrente elétrica.
- Selecione a potência de aquecimento com o seletor da potência.
Potência MÍNIMA
- Seleccione a potência I.
- Gire o comando do termóstato C até à posição correspondente à temperatura desejada.
Potência MÉDIA
- Seleccione a potência II.
- Gire o comando do termóstato C até à posição correspondente à temperatura desejada.
Potência MÁXIMA
- Seleccione a potência III.
- Gire o comando do termóstato C até à posição correspondente à temperatura desejada.
Ajuste da potência OASIS 1503 OASIS 2003 OASIS 2503
Potência I Mínima 600 W 800 W 1000 W
Potência II Média 900 W 1200 W 1500 W
Potência III Máxima 1500 W 2000 W 2500 W
Função Anticongelação
- Selecione a potência desejada e coloque o termóstato na posição anticongelação. Para isso, rode o
termóstato no sentido contrário ao dos ponteiros do relógio até à posição de mínimo.
- Quando a temperatura ambiente alcançar 5 °C aprox., o aparelho entra em funcionamento. Deste
modo, mantém a temperatura acima dos 5°C, aproximadamente, e, assim, protege as instalações
sanitárias da congelação.
Desligar o aparelho
- Coloque o seletor de potência na posição 0. O aparelho deixa de aquecer.
This manual suits for next models
2
Table of contents
Languages:
Other Supra Heater manuals

Supra
Supra CORAIL 1503 User manual

Supra
Supra CERAMINO 1522 User manual

Supra
Supra ORSO 1500 User manual
Supra
Supra Dalbeo WiControl 1022 User manual

Supra
Supra Dalbeo Presence 1022 User manual

Supra
Supra HAITO User manual

Supra
Supra OLIA 1000 User manual

Supra
Supra QUICKFIX 500 User manual

Supra
Supra ORSO 1500 User manual

Supra
Supra TINO CERAM PTC606E User manual