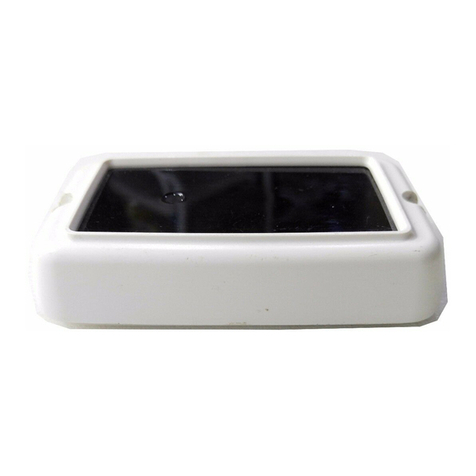
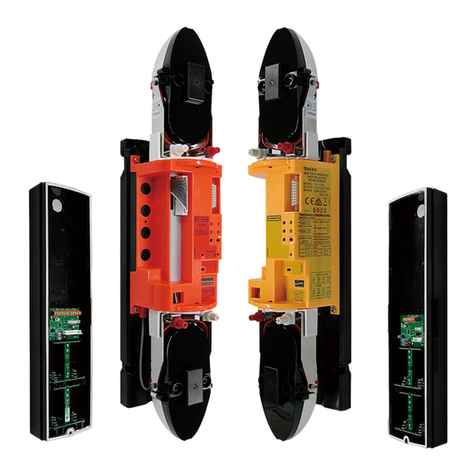
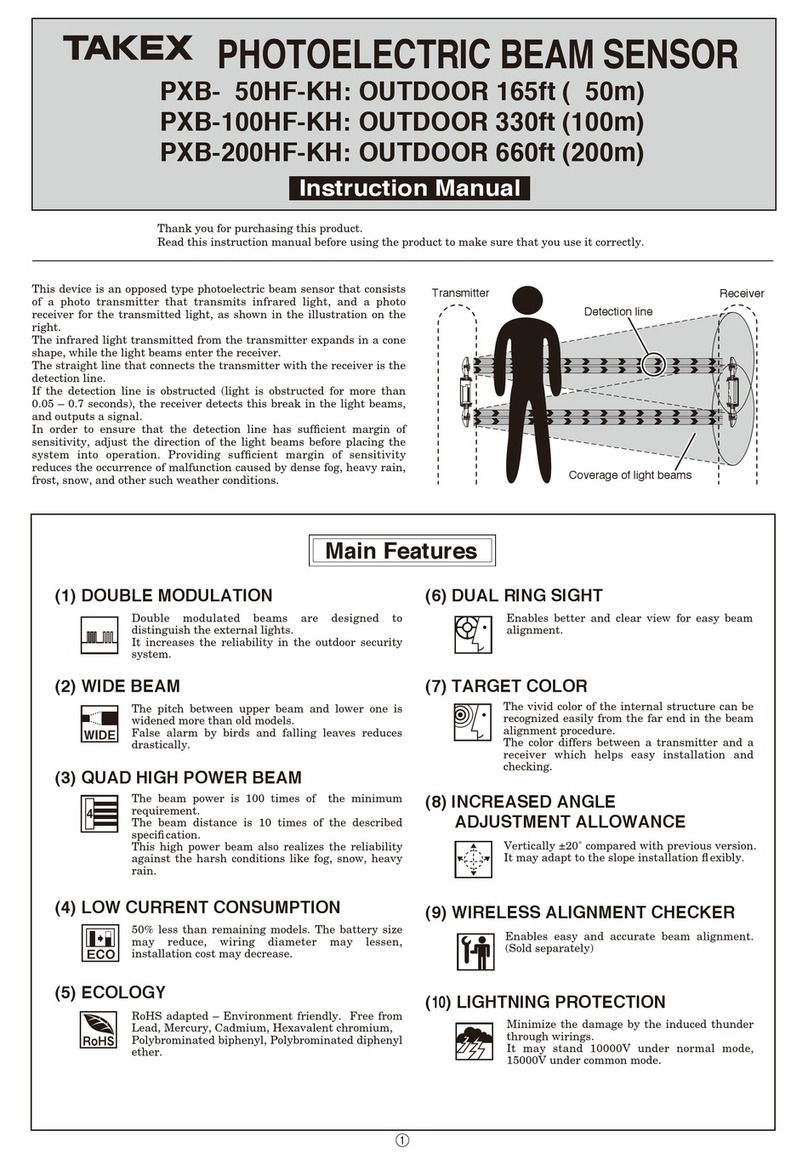
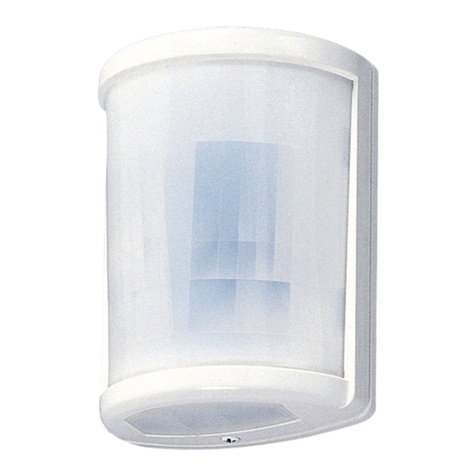
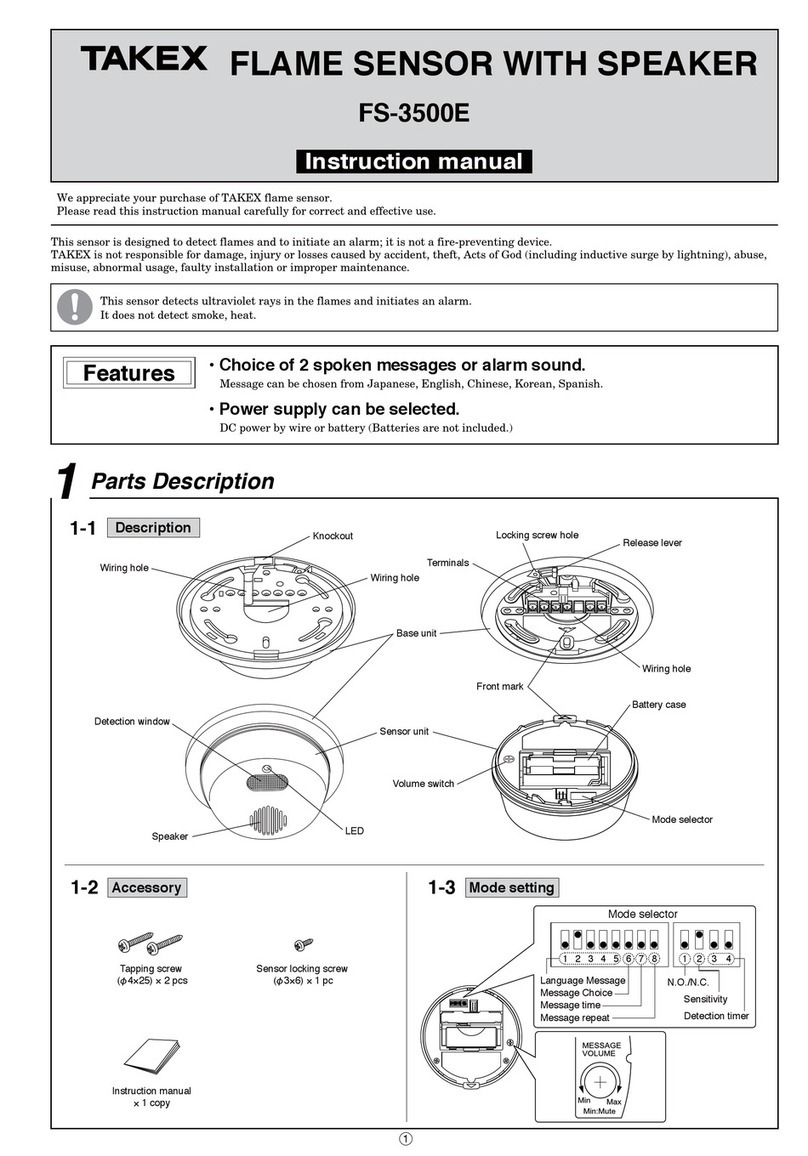
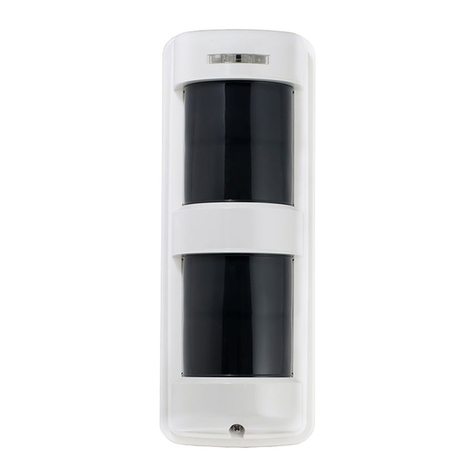
Takex TX-124R User manual

①
Cross head screw
Mounting box
Ball lock
Detection
window
Built-in operation LED (Red)
Grip bolt
CAUTION
6HH,QVWUXFWLRQ0DQXDO
6\PPHWU\
9(57,&$/
+25,=217$/
°
'RZQ°
'RZQ°
'RZQ°
'RZQ°
*
*
'RQRWWRXFKWKH
GHWHFWLRQZLQGRZ
EDUHKDQGHG
'HWHFWLRQ
ZLQGRZ
'RZQ°
°
°
°
°
°
°
°
°°
°
°
°
'
%
&
$
$5($0$6.6($/
833(5
°
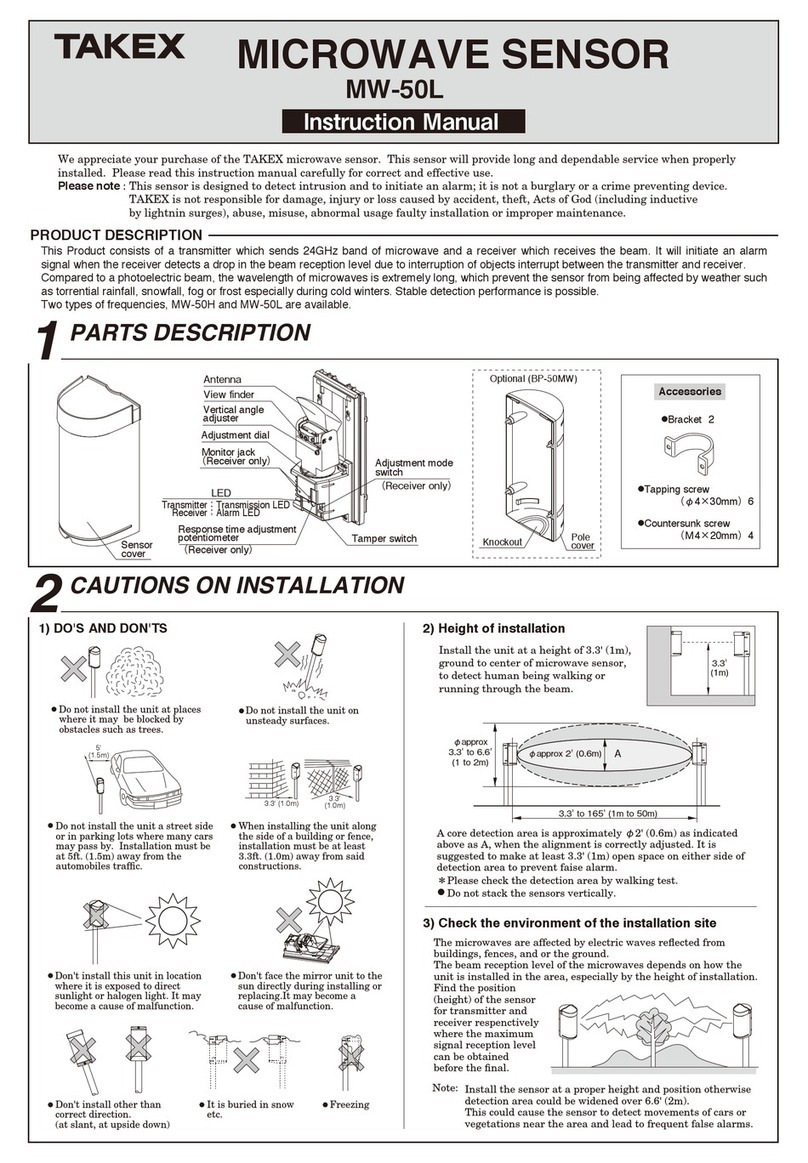
We appreciate your purchase of a TAKEX flame sensor. This sensor will provide long and dependable service when properly installed.
Please read this Instruction Manual carefully for correct and effective use.
Please note : This sensor is designed to detect flames and to initiate an alarm. It is not a fire-preventing device.
TAKEX is not responsible for damage, injury or losses caused by accident, theft, natural disasters (including inductive
surge by lightning), abuse, misuse, abnormal usage, faulty installation or improper maintenance.
CAUTION
*Do not install in locations that cannot withstand the
weight of this product. It may fall and cause an
accident.
*Do not disassembly or modify this product. This
may cause fire, electric shock, etc.
*Follow the voltage of the indicated power supply.
lncorrect voltage may cause fire, electric shock, etc.
*Do not connect equipment that exceeds the indicated
output capacity. It may cause fire.
The flame sensor TX-124R detects ultraviolet rays contained in flames and activates an external output. It can be installed either
indoors or outdoors. Selecting the setting that is best suited to the environment the sensor is installed in from the 8 types will reduce
the possibility of false detection of other kinds of ultraviolet rays.
The TX-124R is a low current consumption device that is designed to be equipped with a wireless transmitter in the back box.
Please confirm that this unit matches with the transmitter to be used. Some transmitters may not perceive the output of this unit.
Area mask seal: 1 pc
Tapping screw
φ6 × 30: 4 pcs
Accessory
Knockout
Adjustment box
352'8&7'(6&5,37,21
Battery holder: 1 pc
(for CR123A × 2)
Sensor
Sensor
Built-in setting switches
zDetection timer
zSensitivity
zOperation LED
Mounting base
Back box
Battery input (+)
Wire color: Red
Battery input (-)
Wire color: Black
Detection signal output
(non-polarity)
Wire color: Blue
Detection signal output
(non-polarity)
Wire color: White
Back box
Space for transmitter
and battery holder.
Hook
3$576'(6&5,37,21
Instruction Manual
BATTERY OPERATED FLAME SENSOR
TX-124R
Instruction manual

②
35(&$87,216
●Ultraviolet rays are invisible. They may be released from
unexpected objects. Set the sensitivity to "L" and the detection
timer to the next longer time when the sensor does not operate
properly, such as generating an alarm when there is no flame
or when none of the "possible causes of false alarm" listed
below are present.
●In the case of an explosion, the sensor may be damaged before
detecting flames.
PRODUCT CLASSIFICATION
●Do not install the unit near
railways. Sparks from
pantographs may cause false
detection.
●Do not install the unit near
high voltage power lines.
Sparks from pylons may
cause false detection.
●Keep the detection window
straight and the adjusting
part at the bottom.
●Do not pour water directly on the sensor. (It is rain proof, but
not water tight.)
●Do not install the unit in locations where high amounts of
steam stagnate (bathrooms etc.).
●Do not install the unit in areas where the temperature is under
-20°C (-4°F) or over +50°C (+122°F).
●Do not install the unit in an environment subject to electrical
noise or intense vibration.
●After adjusting the angle, tighten the screws and bolts to
prevent the unit from falling and to maintain resistance to
rain.
●A high installation location is recommended to prevent
vandalism. (over 2.5m)
●This product is for installation on walls, ceilings, and under
eaves. Use the optional attachment for installation at uneven
places.
●If a person who is undergoing isotope therapy (radioiodine
therapy) comes near the unit, they may emit radiation
sufficient to trigger the sensor. Set the sensitivity to "L" in
cases where such persons may be near the sensor.
●Do not install the unit in locations where sparks or flames are
usually used (kitchen, incinerator, etc.).
●Do not install the unit in locations subject to severe shock or
electric noise.
●Do not install the unit in locations where a shield object (glass,
transparent resin, etc.) is in front of the sensor.
●The unit is designed for ceiling and wall mounting.
Please make sure the base surface is protected with
reinforcements. In case of installation on concrete or gypsum
board, please use anchors and screws suitable for the material.
●Keep the sensor angle somewhere between completely
horizontal and completely vertical when installed outdoors.
●The detection window is made of specialized glass and is
fragile.
●Do not touch the detection window barehanded. Oil from hands
may cause low sensitivity. Wipe the detection window with a
soft cloth with alcohol if it is dirty. After installation, wipe
again when necessary.
●The sensitivity will decrease in cases of rain or snow in the
detection area.
●In cases where the detection window is covered with frost, ice,
etc., the sensitivity will become very low and the sensor may
not detect properly.
●This sensor detects ultraviolet rays at a very sensitive level, so
it will possibly detect objects other than flames. In addition,
this sensor does not detect burning objects that are not
producing flames.
OBJECTS TO BE DETECTED
OTHERS
(The factory setting is 6 sec.)
* There are many other ultraviolet rays in outdoors that may
cause unexpected detection. Therefore, it is recommended that
the detection timer be set to longer than 6 sec. when the unit is
installed outdoors.
INSTALLATION
This sensor is designed to detect ultraviolet rays contained in
flames and to issue a signal. This unit is not a fire-preventing
device. It will not detect smoke or heat. TAKEX is not
responsible for damage, injury or losses caused by fire, accident,
calamity, natural disasters (including inductive surge by
lightning), abuse, misuse, abnormal usage, faulty installation or
improper maintenance.
●Sparks from areas nearby where welding is being performed
may cause false detection.
*+DORJHQODPS
*(OHFWULFGLVFKDUJHODPSVXFKDV
DPHUFXU\ODPS
*(OHFWULFVWHULOL]HUODPS
*:HOGLQJVSDUNV
*(OHFWULFVSDUNVFDXVHGE\
PRWRUSDQWRJUDSK
*6XQOLJKW
*(OHFWULFGLVFKDUJHIURPOLJKWQLQJ
*5DGLDWLRQ
*+LJKHOHFWULFDOILHOG
3RVVLEOHFDXVHRIIDOVHDODUP'R
QRWLQVWDOOWKHVHQVRUQHDUWKH
IROORZLQJ
)ODPHVZKLFKFDQQRWEH
GHWHFWHG
*)ODPHVWKURXJKJODVVRU
WUDQVSDUHQWUHVLQ
*/LWSRUWLRQRIFLJDUHWWH
*%XUQLQJFKDUFRDORU
EULTXHW
*(OHFWULFVWRYH
*%XUQLQJREMHFWZLWKRXW
IODPHV
,167$//('
287'2256 '(7(&7,21
7,0(5
6(16,7,9,7<
VHF1RWUHFRPPHQGHG
VHFRUPRUH2.
+1RWUHFRPPHQGHG
/2.
10°
10°
Possible angles
NG
NG
NG
OK
OK
OK NG
NG
NG NG
③
'(7(&7,21$5($
[SIDE VIEW]
[TOP VIEW]
●There are many ultraviolet rays in outdoors that may cause unexpected detection. In case there are objects in the area that cause
unexpected detection that cannot be avoided through adjustment, use the accessory "area masks" to cover the area.
●There are 6 horizontal masks and 4 vertical masks. These 2 types can also be used in combination.
●Affix the area mask on the edge of the detection window while holding the tab, and tear off the tab after affixing the area mask.
●After affixing the area mask, check operation of the sensor.
●Wear gloves and do not touch the detection window barehanded.
●The detection distance depends on the size and duration of the flame. Bigger flames with longer durations can be detected at longer
distances. Smaller flames with shorter durations can only be detected at shorter distances.
* [N-HEPTANE FLAME]: Flame that burns the flammable liquid "n-heptane" that is a component of gasoline.
Takenaka uses this flame as the standard flame for measurement. Flame size fluctuates, so the above
detection areas are averages.
[Sensitivity: H]
[Sensitivity: H]
$5($0$6.,1*
[SIDE VIEW]
[TOP VIEW]
[SIDE VIEW]
[TOP VIEW]
[Sensitivity: H] [Sensitivity: L]
510 15 20 25 30 (m)
15°
5 1015202530(m)
15°
GAS FLAME OF
LIGHTER
2.75" (7cm)
GAS FLAME OF
LIGHTER
2.75" (7cm)
GAS FLAME OF
LIGHTER
2.75" (7cm)
GAS FLAME OF
LIGHTER
2.75" (7cm)
FLAME OF N-HEPTANE
23.62" (60cm)
FLAME OF
N-HEPTANE
23.62" (60cm)
FLAME OF
N-HEPTANE
23.62" (60cm)
FLAME OF
N-HEPTANE
23.62" (60cm)
AREA MASK SEAL
HORIZONTAL
AREA MASK SEAL
VERTICAL
(m)
15°
5 1015202530 (2) (1)
(3)
(3)
(A)
(B)
(C)
(D)
6HH,QVWUXFWLRQ0DQXDO
6\PPHWU\
9(57,&$/
+25,=217$/
°
'RZQ°
'RZQ°
'RZQ°
'RZQ°
*
*
'RQRWWRXFKWKH
GHWHFWLRQZLQGRZ
EDUHKDQGHG
'HWHFWLRQ
ZLQGRZ
'RZQ°
°
°
°
°
°
°
°
°°
°
°
°
'
%
&
$
$5($0$6.6($/
833(5
°
6HH,QVWUXFWLRQ0DQXDO
6\PPHWU\
9(57,&$/
+25,=217$/
°
'RZQ°
'RZQ°
'RZQ°
'RZQ°
*
*
'RQRWWRXFKWKH
GHWHFWLRQZLQGRZ
EDUHKDQGHG
'HWHFWLRQ
ZLQGRZ
'RZQ°
°
°
°
°
°
°
°
°°
°
°
°
'
%
&
$
$5($0$6.6($/
833(5
°
66'
(20 m)
49'
(15 m)
33'
(10 m)
16.5'
(5 m)
16.5'
(5 m)
33'
(10 m)
49'
(15 m)
66'
(20 m)
66'
(20 m)
49'
(15 m)
33'
(10 m)
16.5'
(5 m)
16.5'
(5 m)
33'
(10 m)
49'
(15 m)
66'
(20 m)
16.5'
(5 m)
33'
(10 m)
49'
(15 m)
66'
(20 m)
83'
(25 m)
100'
(30 m)
16.5'
(5 m)
33'
(10 m)
49'
(15 m)
66'
(20 m)
83'
(25 m)
100'
(30 m)
16.5'
(5 m)
33'
(10 m)
49'
(15 m)
66'
(20 m)
83'
(25 m)
16.5'
(5 m)
33'
(10 m)
49'
(15 m)
66'
(20 m)
83'
(25 m)
66'
(20 m)
49'
(15 m)
33'
(10 m)
16.5'
(5 m)
16.5'
(5 m)
33'
(10 m)
49'
(15 m)
66'
(20 m)
16.5'
(5 m)
33'
(10 m)
49'
(15 m)
66'
(20 m)
83'
(25 m)
16.5'
(5 m)
33'
(10 m)
49'
(15 m)
66'
(20 m)
83'
(25 m)
100'
(30 m)

④
:,5,1*
(2) Connect the 4 wires from the sensor to the battery and terminals of the transmitter.
zDetection signal output
Connect the detection signal output to the transmitter.
The detection output signal from the sensor is N.C.
It is a non-polarity signal. Please connect the transmitter directly.
When the sensor detects something, the output signal changes to OPEN.
Connect battery as follows.
Use a common battery for TX-124R and a transmitter.
Use CR123A lithium batteries only!
When inserting or replacing batteries, be sure to use two new batteries. Do not mix used and new batteries.
WARNING
(1) Take the 2 screws (cross head screws) off the
mounting base and detach the mounting box.
(3) Store the transmitter and battery in the
mounting box and fasten the screws.
(Ref.: 6. INSTALLATION)
(4) After connecting the transmitter, please
check operation.
zBattery input
The "+" of transmitter's battery or the "+" of attached battery holder.
The "-" of transmitter's battery or the "-" of attached battery holder.
Input terminal of transmitter (non-polarity)
Output when detecting ultraviolet
Real Time + delay time (approx 2 sec.)
Solid state switch N.C. 3VDCs0.01A Max
b) Share 2 × CR123A battery using attached battery holder.
Transmitter
Red
Black
Battery
holder
Transmitter
Red
Black
Battery
holder
Transmitter
Red
Black POWER
Transmitter
Blue
White
ALARM
Red: Battery input (+)
Black: Battery input (-)
Blue: Detection signal output
White: Detection signal output
a) Share the battery of the transmitter.
Battery
Transmitter

⑤
,167$//$7,21
23(5$7,21&+(&.
1) Select the most suitable installation position and method according to the purpose.
2) Loosen the 2 screws
(Cross head screw) and
take the mounting base
off from the mounting box.
4) Fit the projection on the mounting base to the
hook on the mounting box, then fix the mounting
base to the mounting box using 2 screws.
5) Set the sensor up temporarily and then check the detection area and it's operation.
Make sure the detection window is pointing lower than the horizontal, refer to "Precautions" and "Detection
Area", and then fix it in place.
3) Make a hole through knock out in the mounting box, and fix
the mounting box by attaching the tapping screws to the
surface.
(In case of wall mount, the hook should point upwards. For
ceiling mount, the hook should point towards the detection
area.)
Check how the sensor operates after wiring and installation.
Use a lighter for longer than the detection timer period within the detection area.
Check the angle and size of area with the operation LED and connected transmitter.
Check how the sensor operates around the edge of the detection area.
If areas that do not need to be in the detection area are in the detection area, make
adjustments by changing the angle or masking the area.
Check the operation not only of the transmitter but also of the receiver.
If the sensor is subjected to a strong impact, damage may be caused to the sensor, the
sensor may malfunction, or the sensor's performance may be reduced.
Do not handle the sensor a rough manner.
●The detection area can be adjusted to have a wide angle which allows
the sensor to be installed in various locations.
●Loosen the Grip bolt and ball lock and refer to section 3 when
installing. Do not forget to tighten then lock when the
installation is finished.
CAUTION
Do not use a lighter in a no fire zone because it is dangerous.
If the sensor has been installed in a no fire zone, the operation test
must be done in a different place with the use of only the sensor only.
CAUTION
Thedirectionofrotationoftheleftandrightgripboltsisthesame.
Pleasedonotrotateeachintheoppositedirection.
Please refer to the direction of rotation described on the body
sticker.
Tapping screw
Knock out
Hook
Hook
loosen
tighten
Ball
lock
180°
movable
180°
movable
Ball lock
Grip
bolt
90°
movable
RX
Grip Bolt
Lock
Unlock

⑥
)81&7,216(77,1*
This function is used to set the minimum period of time it takes to
generate an alarm from the time a flame is detected. An alarm is
output when a flame continues to be detected for more than the
set time. An alarm will not be issued if the flame is extinguished
before the period of time set has elapsed.
There are two steps that this function can be set according
to the size of the detected flame.
The sensitivity setting is chosen according to the size of the
target flame because there is a correlation in the size of the
flame and the detection area.
The sensor's operation may be unstable when the setting is
"H" if there is a continuously weak ultraviolet ray noise
where the sensor is installed.
Changing the setting to "L" is effective in the cancellation of
such noise.
*When the sensor detects a weak ultraviolet ray, the warning may be delayed for longer than the time the timer is set at.
*Intermittent ultraviolet rays that do not continue for as long as the set time will not cause the alarm to sound regardless of their
strength.
*When it is used outside, the recommended setting for the detection timer is 6 seconds or more.
*When the operation is unstable and the cause is uncertain when you are using the sensor, set the sensitivity to "L" and readjust
the current setting of the detection timer to one up, and then check the situation again.
* Assuming an identical flame, the detecting distance for
"L" is half of the detecting distance for "H".
DETECTION TIMER SENSITIVITY
LED
The following 4 levels are selectable:
This product outputs an alarm when it detects ultraviolet rays emitted from flames. Outdoor installation causes much more false
detection than is experienced with indoor installation, as there are many other sources of ultraviolet rays and few shielding objects.
The 8 selectable sensitivity levels composed of 2 sensitivity settings and 4 detection timer settings have been included to prevent
false detection in such uncertain conditions outdoors. Select the set up that most suits the environment and purpose.
When the sensor issues unwanted alarms, set the sensitivity to "L" and the detection timer to the time setting that is the next longest
to the present setting.
* When the switch is ON,
The LED lights every time there is a detection.
Detection Function
Operatin LED disable
)$&725<6(7
'(7(&7,217,0(5
6(16,7,9,7<
/('
21
2))
+
/
Adjustment box
2)) 2))
2))
21
21
2))
21 21
●)ODPHRIOLJKWHUPDWFK
GHWHFWLRQDWQRQVPRNLQJ
DUHDV
●)/$0(2)1+(37$1(
>)DFWRU\VHW@
●,IWKHUHLVXQFHUWDLQW\
DERXWWKHDERYHWZR
OHYHOVXVHWKLVOHYHO
●)LUHGHWHFWLRQLQXQFHUWDLQ
HQYLURQPHQWV
VHF
VHF
VHF
VHF
Switch 1, 2 PURPOSE/EXAMPLEDETECTION TIME
+
/
Switch 3 SENSITIVITY
/
+
>)DFWRU\VHW@
Switch 4 Lighting Operation
'LVDEOH
/LJKWLQJLVV\QFKURQL]HGZLWKGHWHFWLRQ
8VHIRURSHUDWLRQFKHFN
>)DFWRU\VHW@
2))
21
Adjustment box

⑦
Product Name
Model
Detection System
Distance
Angle
Adjustment range
Sensitivity
Detection timer
Supply Voltage
Current Consumption
Detection output
Operation LED
Ambient temperature
Installation
Weight
Appearance
BATTERY OPERATED FLAME SENSOR
TX-124R
Ultraviolet rays detection (Detected wave length: 185 to 260nm)
33ft. (10m): (Gas Flame of Lighter in front of sensor: approx. : 2.75" (7cm))
100ft. (30 m): (Flame of N-heptane on fire plate 15cm × 15cm: approx. : 23.62" (60cm)) *The flame size is rough.
Vertical: approx. 75° (upward: 15°, downward: approx. 60°) Horizontal: approx. 100°
Vertical: downward 90° (horizontal-vertical) Horizontal: 180°
H (100%), L (50%) [selectable by switch]
1 sec, 6 sec, 15 sec, 30 sec [selectable by switch]
(Red/Black wires)
DC3V (CR123A)
Standby: 55μA Max, Detection: 1mA Max
(Blue/White wires)
Solid State Switch N.C 3VDC s0.01A Max
Output when detecting Ultraviolet, Real time + delay time 2 sec
Detection: Red LED
Real time + delay time 2 sec
-4°F to +122°F (-20°C to 50°C)
Indoor, Outdoor
approx. 17.9 oz (510g)
Resin (White)
Detection
Area
Sensitivity
Adjustment
63(&,),&$7,216
Solve possible problems according to the following table:
If normal operations cannot be restored by these corrective actions, contact either the dealer from whom you bought the unit or TAKEX.
7528%/(6+227,1*
Maintenance
Trouble
Completely inactive
Sometimes inactive
Activated without
flame
Check
●No battery connected
●Low battery
●No power supply (Broken wire or improper wire)
●An object that is obstructing the rays is in front of
detection area
(Glass and transparent resin block ultraviolet rays)
●The interior of the sensor is wet due to condensation,
etc.
●Improper area setting
●Detection window has dust on it
●Low battery
●Large electrical noise source such as a radio station
or high-voltage wire nearby
●Unexpected ultraviolet rays nearby
(Ref : 3, PRECAUTIONS)
●The interior of the sensor is wet due to condensation,
etc.
●Connect battery
●Change battery
●Correct power supply or replace broken wire
●Remove the object obstructing the rays
●Dry out the sensor's interior, and remove the cause
of the water ingress
●Readjust the sensor to an appropriate position
●Remove the dust
●Change battery
●Relocate the sensor
●Remove the source of the ultraviolet rays, the
ultraviolet rays that are interrupting, or relocate the
sensor
●Dry out sensor inside, and remove the cause of the
wet
Corrective action
When the sensor is dirty clean the cover with a soft cloth
moistened with a small amount of cleaning solution.
Do not use chemicals such as thinners or alcohol.
Check operation once a week.
Do not fail to check operation whenever furniture in the
vicinity is moved.
When the battery is low, change it for a new one
immediately.
If the battery is not changed, the sensor may not operate.

⑧
Limited Warranty :
TAKEX products are warranted to be free from defects in material and workmanship for 12 months from original date of shipment. Our warranty does not cover
damage or failure caused by natural disasters, abuse, misuse, abnormal usage, faulty installation, improper maintenance or any repairs other than those
provided by TAKEX. All implied warranties with respect to TAKEX, including implied warranties for merchantability and implied warranties for fitness, are
limited in duration to 12 months from original date of shipment. During the Warranty Period, TAKEX will repair or replace, at its sole option,free of charge, any
defective parts returned prepaid. Please provide the model number of the products, original date of shipment and nature of difficulty being experienced. There
will be charges rendered for product repairs made after our Warranty Period has expired.
No.05-636 B9015
(;7(51$/',0(16,216
WiringHole
φ3.29
(φ83.5)
4.17
(106)
Solid
angle
Adjustmentbox
4.06
(103)
3.35
(85)
8.31
(211)
45°
90°
15.83MAX
(402)
2.83
(φ72)
4.41
(φ112)
MountingBox
4-φ0.24
(φ6 )
1.61
(41)
1.42
(36)
180°
Variable
Delaytime
Daylight
MountingBase
MountingBox
Detectionwindow
OperationLED(red)
MemoryLED(yellow)
,Q-DSDQ
Takex America Inc.Takenaka Engineering Co., Ltd.
KWWSVZZZWDNH[HQJFRMS
Takex America Inc.
KWWSVZZZWDNH[FRP
Takex Europe Ltd.
KWWSVZZZWDNH[FRP
,QWKH86 ,QWKH8.
,Q$XVWUDOLD
$YLDU\&RXUW:DGH5RDG
%DVLQJVWRNH+DPSVKLUH5*3(8.
7HO
)D[
+RZOH\V5RDG1RWWLQJ+LOO
9,&
7HO
)D[
KWWSVZZZWDNH[FRP
*RMR'RUL6RWRNDQ1LVKLLUX+LJDVKLQR
<DPDVKLQDNX.\RWR-DSDQ
7HO
)D[
6DQ=HQR:$<
6XQQ\YDOH&$86$
7HO
)D[
Table of contents
Other Takex Accessories manuals

Takex
Takex MS-12TE User manual

Takex
Takex MW-50L User manual

Takex
Takex PR-5B User manual

Takex
Takex DA-303S User manual

Takex
Takex TXF-125 Series User manual

Takex
Takex MS-12TE User manual

Takex
Takex PA-15WE User manual

Takex
Takex TXF-20TDM User manual

Takex
Takex ASW-SG85F User manual

Takex
Takex MS-100E User manual

Takex
Takex PR-30BE User manual

Takex
Takex PB-IN-50HFA User manual

Takex
Takex PB-30TK User manual

Takex
Takex PR-11BE User manual

Takex
Takex TX-114TR User manual

Takex
Takex PIR-T40NAM(W) User manual

Takex
Takex F71R User manual

Takex
Takex PA-470L User manual

Takex
Takex FS-3500E User manual

Takex
Takex MW-100AL Manual