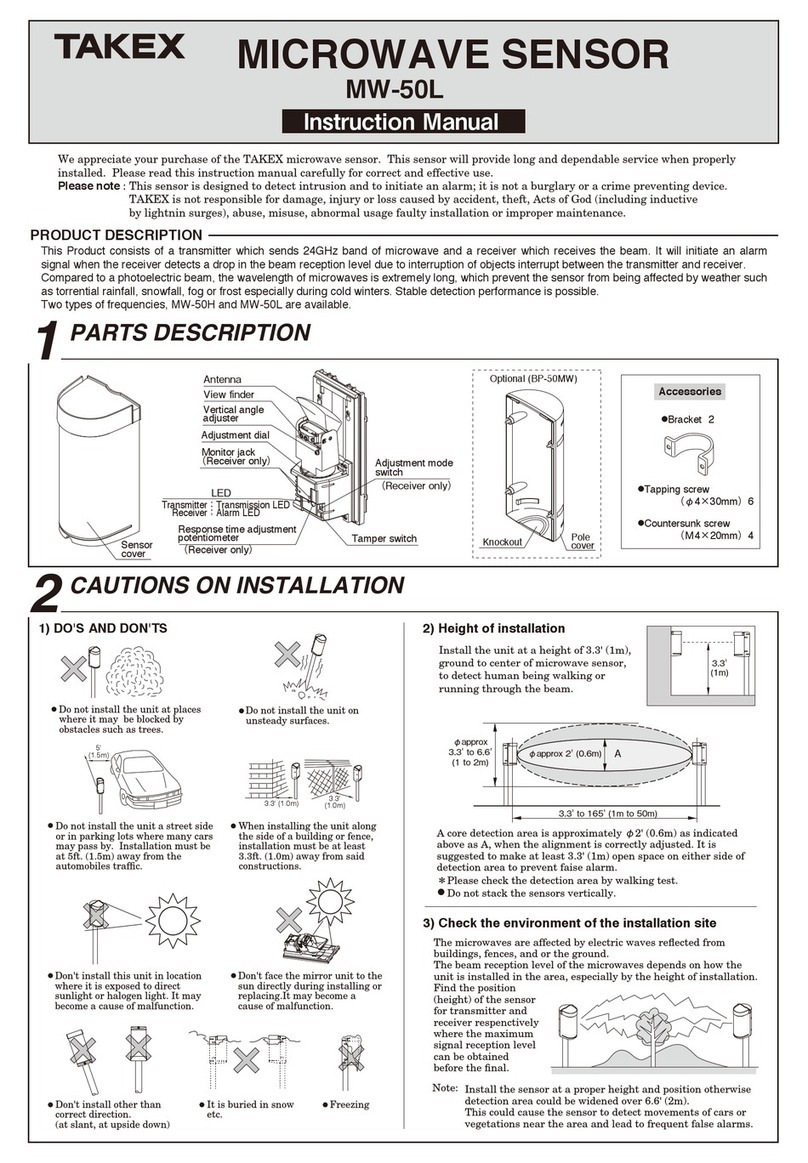
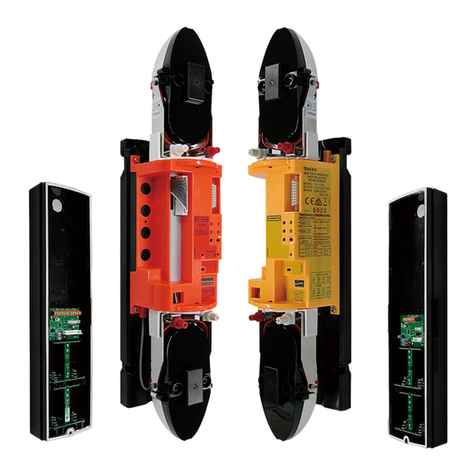
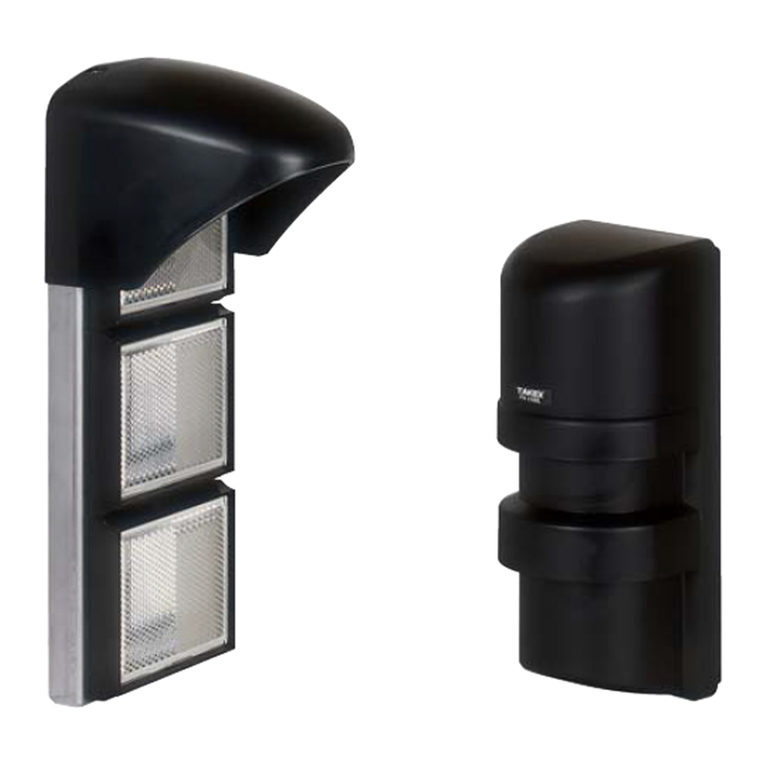
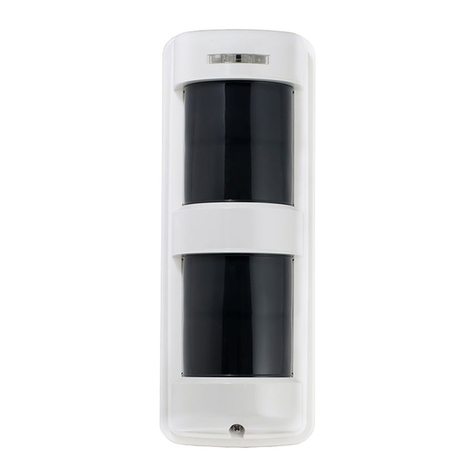
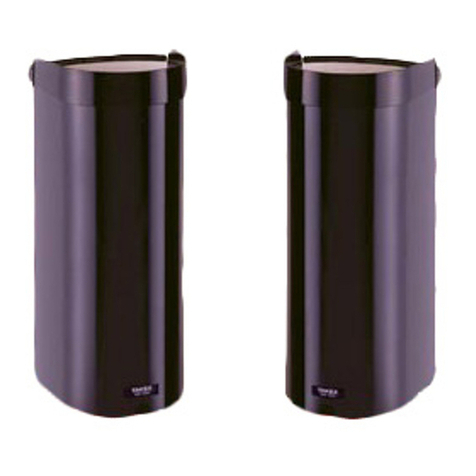
Takex PXB-50HF-KH User manual

Main Features
(1) DOUBLE MODULATION
(2) WIDE BEAM
(3) QUAD HIGH POWER BEAM
(4) LOW CURRENT CONSUMPTION
(5) ECOLOGY
(6) DUAL RING SIGHT
(7) TARGET COLOR
(8) INCREASED ANGLE
ADJUSTMENT ALLOWANCE
(9) WIRELESS ALIGNMENT CHECKER
(
10
) LIGHTNING PROTECTION
The vivid color of the internal structure can be
recognized easily from the far end in the beam
alignment procedure.
The color differs between a transmitter and a
receiver which helps easy installation and
checking.
Enables easy and accurate beam alignment.
(Sold separately)
Minimize the damage by the induced thunder
through wirings.
It may stand 10000V under normal mode,
15000V under common mode.
Vertically ±20˚ compared with previous version.
It may adapt to the slope installation exibly.
Enables better and clear view for easy beam
alignment.
This device is an opposed type photoelectric beam sensor that consists
of a photo transmitter that transmits infrared light, and a photo
receiver for the transmitted light, as shown in the illustration on the
right.
The infrared light transmitted from the transmitter expands in a cone
shape, while the light beams enter the receiver.
The straight line that connects the transmitter with the receiver is the
detection line.
If the detection line is obstructed (light is obstructed for more than
0.05 – 0.7 seconds), the receiver detects this break in the light beams,
and outputs a signal.
In order to ensure that the detection line has sufcient margin of
sensitivity, adjust the direction of the light beams before placing the
system into operation. Providing sufcient margin of sensitivity
reduces the occurrence of malfunction caused by dense fog, heavy rain,
frost, snow, and other such weather conditions.
Double modulated beams are designed to
distinguish the external lights.
It increases the reliability in the outdoor security
system.
The pitch between upper beam and lower one is
widened more than old models.
False alarm by birds and falling leaves reduces
drastically.
The beam power is 100 times of the minimum
requirement.
The beam distance is 10 times of the described
specication.
This high power beam also realizes the reliability
against the harsh conditions like fog, snow, heavy
rain.
50% less than remaining models. The battery size
may reduce, wiring diameter may lessen,
installation cost may decrease.
RoHS adapted – Environment friendly. Free from
Lead, Mercury, Cadmium, Hexavalent chromium,
Polybrominated biphenyl, Polybrominated diphenyl
ether.
Instruction Manual
PHOTOELECTRIC BEAM SENSOR
PXB- 50HF-KH: OUTDOOR 165ft ( 50m)
PXB-100HF-KH: OUTDOOR 330ft (100m)
PXB-200HF-KH: OUTDOOR 660ft (200m)
Thank you for purchasing this product.
Read this instruction manual before using the product to make sure that you use it correctly.
Coverage of light beams
Detection line
Receiver
Transmitter

—TABLE OF CONTENTS —
• Optical Axis Fine Adjustment Using the Sound Check ..... 10
• Optical Axis Fine Adjustment Using the Monitor
Output Voltage................................................................... 11
• Optical Axis Fine Adjustment Using the Alignment
Wireless Checker (Sold Separately).................................. 11
7 OPERATION CHECK.................................................................. 12
8 EXPLANATION OF FUNCTIONS
8-1
MODULATION FREQUENCY CHANGEOVER FUNCTION
........ 13
8-2 TRANSMISSION POWER SELECTION FUNCTION.......... 13
8-3 ALARM MEMORY DISPLAY FUNCTION ........................... 13
8-4 SOUND CHECK FUNCTION .............................................. 14
8-5 RESPONSE TIME ADJUSTMENT FUNCTION .................. 14
8-6 UPPER/LOWER CHANGEOVER FUNCTION.................... 14
8-7 AUTO GAIN LOCK FUNCTION .......................................... 14
8-8 TRANSMITTER LED SWITCH............................................ 15
8-9 LIGHT SENSITIVITY SIGNAL FUNCTION ......................... 15
8-10 PROGRAMMABLE AGC FUNCTION ................................. 15
8-11
EXTERNAL ENVIRONMENT DIAGNOSTIC FUNCTION
....... 15
8-12 ALIGNMENT WIRELESS CHECKER CONNECTION
FUNCTION .......................................................................... 15
9 TROUBLESHOOTING ................................................................ 15
10 SPECIFICATIONS....................................................................... 16
11 EXTERNAL DIMENSIONS Unit: inch (mm) ................................ 16
1 PRODUCT COMPONENTS
1-1 PARTS DESCRIPTION ......................................................... 2
1-2 ACCESSORIES..................................................................... 2
1-3 NAMES OF OPERATION SECTION..................................... 3
2 OPERATING PRECAUTIONS
2-1 EXAMPLE OF INCORRECT INSTALLATION....................... 3
3 PRECAUTIONS
3-1 PROTECTION DISTANCE AND RANGE OF LIGHT
BEAM COVERAGE ............................................................... 4
3-2 MOUNTING HEIGHT ............................................................ 4
3-3 OPTICAL AXIS ADJUSTMENT RANGE ............................... 5
3-4 EXAMPLE OF PRACTICAL APPLICATION.......................... 5
4 INSTALLATION METHOD
4-1 INSTALLATION INTO HOUSING.......................................... 6
5 WIRING METHOD
5-1 POSITION AND RATING OF TERMINALS........................... 6
5-2 WIRING DISTANCE BETWEEN SENSOR AND
POWER SUPPLY.................................................................. 6
5-3 WIRING DISTRIBUTION DIAGRAM (WIRING DIAGRAM) .. 7
6 OPTICAL AXIS ADJUSTMENT
6-1 NAMES AND FUNCTIONS OF OPTICAL AXIS
ADJUSTMENT PARTS ......................................................... 8
6-2 OPTICAL AXIS ADJUSTMENT USING
THE ALIGNMENT MECHANISM .......................................... 9
Check that the following transmitter, receiver, and accessories are included in the box when you first
unpack the product.
1-1 PARTS DESCRIPTION
1-2 Accessories
1PRODUCT COMPONENTS This section describes the contents of the product package and the names and functions of
the parts that appear in this instruction manual.
Instruction Manual
(This Manual)
: 1 pc
Panhead screw
(M3×12mm)
: 8 pcs
View finder
Reflector
Horizontal angle fine
adjustment screw (White)
Vertical angle
adjustment screw (Red)
Wiring terminal
Wiring terminal Swivel base (White)
(Horizontal angle
adjustment)
Sensor body : 2 pcs (Transmitter: 1 pc, Receiver: 1 pc)
Swing arm (Red)
(Vertical angle adjustment)
Upper optical unit
Lower optical unit
TRANSMITTER RECEIVER
Fluorescent yellow Fluorescent orange
1-3 NAME OF OPERATION
SETTING
Auto gain lock switch
Transmitter LED switch

Light reception authorization LED: Red
(Upper/Lower)
Monitor jack
Sound check switch (Factory setting: OFF)
Transmitter power changeover switch
(Factory setting: H)
Transmitter LED switch
Transmitter channel changeover switch
(Factory setting: 1CH)
Detection response time adjustment volume
Upper/lower changeover switch
[Transmitter]
[Receiver]
Not used
“8 EXPLANATION OF FUNCTIONS
(8-1 MODULATION FREQUENCY
CHANGEOVER FUNCTION)”
“8 EXPLANATION OF FUNCTIONS
(8-2 TRANSMITTER POWER
SELECTION FUNCTION)”
“8 EXPLANATION OF FUNCTIONS
(8-6 UPPER/LOWER CHANGEOVER FUNCTION)”
(Factory setting: Standard position [0.05 secs])
“8 EXPLANATION OF FUNCTIONS
(8-6 UPPER/LOWER CHANGEOVER
FUNCTION)”
“8 EXPLANATION OF FUNCTIONS
(8-5 DETECTION RESPONSE TIME
ADJUSTMENT FUNCTION)”
“8 EXPLANATION OF FUNCTIONS
(8-3 ALARM MEMORY DISPLAY FUNCTION)”
“8 EXPLANATION OF FUNCTIONS
(8-4 SOUND CHECK FUNCTION)”
Alarm memory changeover switch (Factory setting: Remote)
Light reception channel changeover switch (Factory setting: 1CH)
“8 EXPLANATION OF FUNCTIONS
(8-1 MODULATION FREQUENCY CHANGEOVER FUNCTION)”
2
NAMES OF OPERATION SECTION
1-3
Transmitter LED: Red
(Upper/Lower)
Alarm LED
: Red
Auto gain
lock switch
Sensitivity
attenuation LED
: Red
Memory LED
: Red
Do not use the sensors powered with a voltage level other
than the indicated power supply voltage specied (between
10 to 30V DC). Doing so may cause a re or electrical shock.
Do not connect a device that exceeds the capacity shown to
the output contact of this device. Doing so may cause a re or
electrical shock.
Do not touch the terminal section with wet hands.
Doing so may cause an electrical shock.
Do not disassemble or modify this device. Doing so may cause
a re, electrical shock, or malfunction of the device.
If smoke or an abnormal odor or sound is found, leaving it
unattended may cause a re or electrical shock. Immediately
turn off the power to the device and conrm that the abnormal
state has been corrected, and then ask the place of purchase for
repair.
EXAMPLE OF INCORRECT INSTALLATION
2-1 DON'TS Do not install as shown below. This will cause
erroneous detection or detection failure.
OPERATING PRECAUTIONS This manual describes the precautions to be observed for safe operation of this
device by classifying them into the following categories. As these are important, be
sure to read and strictly observe them.
Warning
Caution
Description of the Display
Indicates information that if ignored and the device is handled incorrectly, may result in death or serious injury.
Indicates information that if ignored and the device is handled incorrectly, may result in injury or damage to property alone.
This symbol indicates a prohibited action, with the specic action shown near the symbol.
Indicates the useful information.
Example: Do not disassemble
Warning
Caution
(1) When using multi-level protection, use sensors of the same model for both upper and lower sensors, and set the
same transmission power (H/L) for all of them.
(2) Using these sensors together with sensors from a different series (e.g. PB-HF-KH) may cause interference between
the sensors.
Do not install this device in a location that cannot support its
weight. Doing so may cause the device to fall and cause an
injury or malfunction of the device.
Installation in locations
shaded by trees etc.
Installation in location where
strong light such as sunlight or
light from vehicle headlights can
directly enter the receiver
Installation in areas where
objects that move with the
wind (the laundry etc) can
obstruct the optical axis
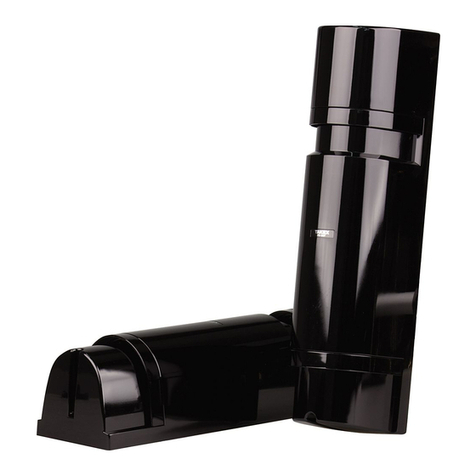
3
MOUNTING HEIGHT
3-2 As these sensors are designed to detect humans, install so that the center of the sensors are at a height of
approximately 2.6ft (0.8 m) from the ground when installing both on a wall and on a pole.
PRECAUTIONS In order to use these sensors correctly, thoroughly read this instruction manual and select the mounting position and
protection distance.
A: Protection Distance
165ft ( 5 0 m )
330ft (100 m)
660ft (200 m)
Approx. 4ft (1.2 m)
Approx. 8ft (2.4 m)
Approx. 16ft (5.0 m)
B: Coverage of light beam
Installing so that the center of the sensor is
approximately 2.6ft (0.8 m) from the ground means
that the protection line is at waist height for
humans, enabling reliable detection.
If the installation position is too high or too low, the
protection line will be above shoulder height or below
knee height, making it more dif cult for reliable
detection.
WRONG
CORRECT
1. In areas where there are trees or weeds, the infrared may get obstructed by overgrown branches or leaves.
As this may cause erroneous detection, be sure to trim down leaves and branches according to the growth of the plants.
Furthermore, the infrared may get obstructed by swaying branches or leaves due to wind. Keep in mind the swaying of leaves and
branches when trimming them.
2. Vine type plants may wrap around the photoelectric beam sensors causing erroneous detections. Therefore, be sure to prune such plants
regularly.
3. Other natural phenomena such as insects or bird droppings may soil the sensors causing miss detection. Be sure to clean the sensors
regularly.
Cautions when using the outdoor photoelectric beam sensor (Daily maintenance)
Installation on uneven
ground
Slanted installation Overhead wiring Installation close to a wall
Installation in locations where the
unit may be splashed by dirty
water or direct sea spray
Using PXB-HF-KH together with other
beam sensors or different protection
distance beam sensors in stacking
Installation directly above
a wall
Installation in an
unstable, wobbling location
PROTECTION DISTANCE AND
RANGE OF LIGHT BEAM COVERAGE
3-1 As the infrared light leaves the transmitter, it expands into conic shape light beams.
The optical axis is in the center of the light beams. Arrange the reflector so that the
device on the opposite side is in the center of the light beams.
If the optical axis is not aligned correctly, there will
be insufcient margin of sensitivity even if the
receiver is at the center of the light beams, making
the system more susceptible to adverse effects of the
environment resulting in a malfunction.
If the optical axis (center of the light beams) is
aligned correctly, a detection line with sufcient
margin of sensitivity is formed.
CORRECT WRONG
CORRECT
WRONG
WRONG
Approx. 2.6'(0.8m)
4.45" (113mm)
4.45" (113mm)
7.24" (184mm)
A
B
Other than
PXB-HF-KH
PXB-HF-KH

Transmitter
1CH
Transmitter
1CH
Transmitter
3CH
Transmitter
1CH
Transmitter
3CH
Transmitter
1CH
Transmitter
2CH
4CH
Transmitter
2CH
4CH
Transmitter
1CH
3CH
Transmitter
1CH
3CH
Transmitter
3CH
Transmitter
1CH
Receiver
1CH
Receiver
1CH
Receiver
3CH
Receiver
1CH
Transmitter
3CH
Receiver
3CH
Receiver
1CH
Receiver
2CH
4CH
Receiver
1CH
3CH
Receiver
2CH
4CH
Receiver
1CH
3CH
Receiver
3CH
Receiver
3CH
Receiver
1CH
Transmitter
1CH
Transmitter
1CH
Transmitter
2CH
Receiver
1CH
Receiver
1CH
Receiver
2CH
Transmitter
3CH
Transmitter
3CH
Transmitter
4CH
Receiver
3CH
Receiver
3CH
Receiver
4CH
t 8IFO VTJOH NVMUJMFWFM QSPUFDUJPO PS JOTUBMM TUSBJHIU MJOF QSPUFDUJPO BU NVMUJQMF TQBOT VTF B TFOTPS GPS XIJDI UIF
NPEVMBUJPOGSFRVFODZDBOCFTXJUDIFE*OBEEJUJPOTFUBOBQQSPQSJBUFDIBOOFMBOEJOTUBMMBUSBOTNJUUFSBOEBSFDFJWFSJO
BQQSPQSJBUFMPDBUJPOTBDDPSEJOHUPUIFGPMMPXJOHFYBNQMFT*GBOJOBQQSPQSJBUFDIBOOFMJTTFUJUNBZDBVTFNBMGVODUJPO
t 'PS UIF NPEVMBUJPO GSFRVFODZ DIBOOFMT GPS VQQFS BOE MPXFS TFOTPST XIFO NVMUJMFWFM QSPUFDUJPO JT VTFE TFU TFQBSBUF
DIBOOFMTTVDIBTiwBOEiwPSiwBOEiw
t .VUVBM JOUFSGFSFODF PS XSBQBSPVOE PG UIF QIPUPFMFDUSJD CFBNT DBO CF QSFWFOUFE CZ DIBOHJOH UIF DIBOOFMT i
&91-"/"5*0/ 0' '6/$5*0/4 .0%6-"5*0/ '3&26&/$: $)"/(&07&3 '6/$5*0/w /PUF 4FU
DPSSFTQPOEJOHUSBOTNJUUFSTBOESFDFJWFSTUPUIFTBNFDIBOOFM
t 'PSUIFJOTUBMMBUJPONFUIPETOPUEFTDSJCFEJOUIFJOTUSVDUJPONBOVBMJOTUBMMBUJPOPGTUSBJHIUMJOFQSPUFDUJPOXJUITQBO
PSNPSFMFWFMQSPUFDUJPOPSNPSFPSPUIFSTDPOUBDUUIFQMBDFPGQVSDIBTFPS5",&9
EXAMPLE OF PRACTICAL APPLICATION
3-4
External Perimeter Protection
Straight Line Protection 2 Level Straight Line Protection
2 Level External Perimeter Protection
2 Level Protection
• In order to minimize the occurrence of malfunctions, refer to the protection diagram below for
optimal operation.
Using the sensors incorrectly may cause malfunction. (Light beams are drawn in simplified form)
t$POTVMUXJUI5",&9EJTUSJCVUPSPS5",&9SFHJPOBMPGĀDFBCPVU
UIF GSFRVFODZ TFMFDUJPO GPS JOTUBMMBUJPOT OPU NFOUJPOFE JO UIJT
JOTUSVDUJPO NBOVBM *OBQQSPQSFBUF DIPJDF PG GSFRVFODZ NBZ
DBVTFNBMGVODUJPO
OPTICAL AXIS ADJUSTMENT RANGE
3-3
-
90°
Range where the optical
axis is shielded
-
20°
-
20°
+90° +20°
+20°
(180°)
Top View Side view
<<Caution>>
5IF PQUJDBM BYJT NBZ CF TIJFMEFE EFQFOEJOH PO UIF TIBQF PG
UIFIPVTJOHBOENPVOUJOHTVSGBDF
$IFDL UIF PQUJDBM BYJT SBOHF DBSFGVMMZ BOE TUBSU JOTUBMMBUJPO
CFGPSFVTF

4-1
INSTALLATION METHOD
4
Panhead screw
(M3×12mm)
: 4 pcs
(ACCESSORIES)
Housing
(Frame)
INSTALLATION INTO HOUSING
Read the instruction manual for your housing carefully, and install the product into the housing correctly.
Wiring is required based on the sensor installation.
Refer to "6 WIRING METHOD" for wiring and connection.
Refer to "9 EXPLANATION OF FUNCTIONS" for switching channels and transmitting beam power.
5WIRING METHOD
WIRING DISTANCE BETWEEN SENSOR AND POWER SUPPLY
5-2
POSITION AND RATING OF TERMINALS
5-1
Alarm memory control input
11
10
8
7
6
NO
NC
COM
9
5
4
3
NO
NC
COM
2
1
<Transmitter> <Receiver>
12 to 30V DC
Power input
(no polarity)
Current consumption: PXB- 50HF-KH: 9mA
PXB-100HF-KH:11mA
PXB-200HF-KH:13mA
12 to 30V DC
Power input
(no polarity)
Current consumption: PXB- 50HF-KH: 21mA
PXB-100HF-KH: 21mA
PXB-200HF-KH: 21mA
Alarm output
30V (AC/DC) 0.25A (Resistance load)
No-voltage relay contact: c contact
Built-in contact protection resistance
Environmental output
30V (AC/DC) 0.25A (Resistance load)
No-voltage relay contact: c contact
Built-in contact protection resistance
Auto gain lock control
2
1
Size of
electrical cable used
Part No.
Supply voltage
Up to 16,000ft. ( 4,880m)
Up to 2,200ft. ( 670m)
Up to 15,000ft. ( 4,570m)
AWG 20 (Dia,0 . 8 mm)
Up to 25,000ft. ( 7,500m)
Up to 3,500ft. (1,070m)
Up to 24,000ft. ( 7,320m)
AWG 18 (Dia,1 . 0 mm)
Up to 31,000ft. ( 9,500m)
Up to 4,200ft. (1,280m)
Up to 29,500ft. ( 8,990m)
AWG 17 (Dia,1 . 1 mm)
Up to 40,000ft. (12,000m)
Up to 5,300ft. (1,600m)
Up to 38,000ft. (11,600m)
AWG 16 (Dia,1.25 mm)
Up to 51,000ft. (15,500m)
Up to 6,800ft. (2,070m)
Up to 47,000ft. (14,300m)
AWG 15 (Dia,1 . 4 mm)
Up to 66,000ft. (20,000m)
Up to 8,900ft. (2,710m)
Up to 62,000ft. (18,900m)
AWG 14 (Dia,1 . 6 mm)
PXB-50HF-KH
Up to 2,500ft. ( 750m)
Up to 17,000ft. ( 5,200m)
Up to 2,300ft. ( 700m)
Up to 3,800ft. (1,160m)
Up to 27,500ft. ( 8,380m)
Up to 3,700ft. (1,130m)
Up to 4,800ft. (1,460m)
Up to 33,000ft. (10,000m)
Up to 4,500ft. (1,370m)
Up to 6,200ft. (1,890m)
Up to 43,000ft. (13,100m)
Up to 5,800ft. (1,770m)
Up to 7,800ft. (2,380m)
Up to 53,000ft. (16,000m)
Up to 7,300ft. (2,350m)
Up to 10,000ft. (3,000m)
Up to 71,000ft. (21,600m)
Up to 9,500ft. (2,900m)
12V DC 24V DC 12V DC 24V DC 12V DC 24V DC
PXB-100HF-KH PXB-200HF-KH
tWhen 2 or more units are connected, the wiring distance is calculated as follows: [Above value/number of units]

Alarm memory
External control switch
Transmitter
Transmitter
Receiver
Transmitter Receiver
Power supply
(12 V DC)
Alarm signal
(N.C.)
Power supply
(12 V DC)
Power supply
(12 V DC)
Alarm signal
(N.C.)
Power supply
(12 V DC)
Alarm signal
(N.C.)
Receiver
(When short circuit occurs: display)
Environment signal (N.C.)
(Controller)
(Controller)
(Controller)
(Controller)
(Controller)
(1CH)
(1CH)
(3CH)
(3CH)
(1CH) (3CH)
WIRING DISTRIBUTION DIAGRAM (WIRING DIAGRAM)
5-3
Basic connections When multiple sensor units are connected to the same circuit
Basic connections for 2 level protection
For environmental output, tamper output, and alarm memory display in the remote mode
When multiple sensor units are connected to separate
circuits
[Precautions for Installation]
(1) Signal output for the upper and lower levels of the receiver cannot be output separately.
(2) For outdoor wiring installation, carry out pipe laying work whenever possible.
(3) Never use overhead wiring.
Transmitter Transmitter Transmitter
Transmitter Transmitter
Receiver Receiver Receiver
Receiver Receiver
Alarm signal 1
(N.C.)
Alarm signal 2
(N.C.)
Power supply (12 V DC)
Alarm signal (N.C.)
Auto gain lock control (N.O.)

–10°
+10°
Rough adjustments
+90° +5°
–90°
–5°
–10°
+10°
Names of the Operation Section
Note: This section describes the name and function of each part used during optical axis adjustment.
Upper transmission/reception authorization LED
Lower transmission/reception authorization LED
Each time the switch is pressed, the optical unit that transmits the light switches.
Transmitter
Receiver
Upper/lower changeover switch
Swing arm
(Red)
Note: For vertical
angle
adjustments
Horizontal angle fine adjustment screw
(White)
Note: For horizontal angle adjustments
Vertical angle adjustment screw
(Red)
Note: For vertical angle
adjustments
Swivel base
(White)
Note 1: For horizontal angle
adjustments
Note 2: Single notch is
equivalent to 3°
Near
Far Note: Sequence of
adjustment
Near
Far
When the view nder is
looked closely, view appears
as the diagram on the right.
Adjust the angle so that the
target color appears in the
center of the ring.
When the view nder is
looked from a distance, the
view appears as the diagram
on the right.
Adjust the angle so that the
target color appears in the
center of the ring.
(The accuracy high)
Double Ring Alignment Mechanism
Visible from the view finder
6-1 NAMES AND FUNCTIONS OF OPTICAL AXIS ADJUSTMENT PARTS
OPTICAL AXIS ADJUSTMENT
Names of the Optical Unit
View finder
Horizontal
Reflector Section Horizontal/Vertical Angle Adjustment Method
Vertical
Coarse adjustments can be made
by moving the swivel base
within the range of 0˚ to ±90˚.
Next, ne adjustments of 0˚ to ±5˚
can be made using the horizontal
angle adjustment screw.
Fine adjustments
Horizontal angle fine
adjustment screw
Rough adjustments Fine adjustments
The inclination of the reector can
be switched between -10˚ and +10˚
by pushing it forwards or
backwards.
Next, ne adjustments of 0˚ to ±10˚
can be made using the vertical
angle adjustment screw.
6By aligning the optical axis correctly, a protection line with sufficient margin
of sensitivity can be created, reducing the occurrence of malfunction.
Always adjust the optical axis on both upper and lower levels.
Alarm LED
Note: Only available
on the receiver
• Lights up when an
alarm is output.
Sensitivity attenuation
LED
Note: Only available on
the receiver
• Lights up when the
sensitivity is
insufficient.
The corresponding LED lights up when the
light transmission/reception is authorized.
(The upper and lower can be switched by
he upper/lower changeover switch.)
Transmit from both upper and lower
Only transmit
from upper
Only transmit
from lower
No transmission
Received on both upper/lower
Only received on lowerOnly received on upper
Each time the switch is pressed, the optical unit that receives the light is switched.
Monitor jack Note: Only available on the receiver
• The monitor output voltage can be checked by using a commercially available tester.
Transmitter:
• Transmitter LED switch
Receiver:
• Auto gain lock switch Sound check switch Note: Only available on the receiver
• Light reception level can be checked by the sound tone.
In the walk test mode, the beep sound is generated according to the alarm output.

Or
Vertical angle adjustment
Horizontal angle fine adjustment
Or
Vertical angle adjustment
Horizontal angle adjustment
Vertical angle adjustment
Horizontal angle fine adjustment
Or
Lit
Transmitter
Lit
Receiver
If the LED of the receiver indicates as follows, take an appropriate measure according to the following description.
6-2
Move the swivel base and swing arm so that the opposite device is roughly aligned with the view nder.
Look closely through the view nder, and adjust the position so that the sensor of the opposite device is visible at the center of the ring
using the horizontal and vertical angle ne adjustment screws.
Look through the view nder from a distance, and readjust so that the sensor of the opposite device is visible at the center of the ring
using the horizontal and vertical angle ne adjustment screws.
Turn on the power to the transmitter and receiver, check that the LEDs of both the transmitter and receiver are lit.
OPTICAL AXIS ADJUSTMENT USING THE ALIGNMENT MECHANISM
1
2
3
4
Receiver
Description of the Display Remedy
(1) The light enters the receiver, but the light reception
level is insufficient
(The optical axis is misaligned)
(1) Go to step and fine adjust the optical axis
(1) Different channels are set for the transmitter and
receiver
(2) The photoelectric beams are interfered
(1) Set the same channel for the transmitter and
receiver
(2) Change to a channel that is not influenced by
other factors
(1) The light does not enter the receiver at all
(The optical axis is not adjusted correctly)
5
Go back to step and adjust the optical axis again
1

Optical Axis Fine Adjustment Using the Sound Check
5To improve accuracy of optical axis
Perform the procedure of “Optical Axis Adjustment Using the Sound Check”, “Optical Axis Fine Adjustment Using the Monitor
Output Voltage”, or “Optical Axis Fine Adjustment Using the Alignment Wireless Checker”.
The sound check function indicates the light reception level by using high and low pitch tones.
The sound check function is only installed on the receiver.
<<Caution>>
First, check only the transmission on the upper level and reception on the upper level , and then check only the transmission on the
lower level and reception on the lower level.
(When the light can be received on both the upper and lower levels, the beep sound at the total light reception level of the upper and lower levels are
generated.)
1. Turn the sound check switch on the receiver
to the ON position.
When the optical axis is roughly aligned, the
beep sound can be heard.
The optical axis is greatly misaligned if no
sound can be heard.
2. Fine adjust the upper level optical axis.
(1) Press the upper/lower changeover switch on
the transmitter to select [Only transmit from
upper].
(2) Press the upper/lower changeover switch on
the receiver to select [Reception authorization
on upper only].
(3) Turn the adjustment screw to ne adjust until
the tone reaches the highest pitch.
(Adjust both the transmitter and receiver.)
3. Fine adjust the lower level optical axis.
(1) Press the upper/lower changeover switch on
the transmitter to select [Only transmit from
lower].
(2) Press the upper/lower changeover switch on
the receiver to select [Reception authorization
on lower only].
(3) Turn the adjustment screw to ne adjust until
the tone reaches the highest pitch.
(Adjust both the transmitter and receiver.)
4. Check if the light from another transmitter enters the receiver.
(1) Press the upper/lower changeover switch on the transmitter
to select [No transmission].
(2) Press the upper/lower changeover switch on the receiver to
select [Reception authorized for both upper and lower].
(3) Check that the alarm LED lights up when the receiver
outputs an alarm signal, and that the sensitivity attenuation
LED also lights up.
If no alarm is activated or the sensitivity attenuation LED is not lit
When using multi-level protection, there may be some effects
of other photoelectric beam sensors. In such case, readjust the
other photoelectric beam sensors to reduce the effects to the
minimum possible.
In addition, check that an appropriate channel is set.
Sound check
switch
Lit
Lit Lit
Lit
Receiver
Transmitter
4
ON
Lit
Lit
Receiver
Transmitter
Lit
Lit
Receiver
Transmitter
Lit
Off
Receiver
Transmitter
Light reception level
Intermitten tone
Pip (tone : long ←→ short) Bleep
Continuous tone
(Good)
High-pitched tone
(Best)
MuchLittle
Pip
(Long tone)
Bleep
(High-pitched
tone)
Bleep
(High-pitched
tone)

More than 2.5 V DC
2.3 to 2.5V DC
Less than 2.3V DC
Monitor Output Voltage
Best
Good
Poor, re-adjust
Light Sensitivity
Optical Axis Fine Adjustment Using the Monitor Output Voltage
See the following table for the monitor output voltage.
Lit
Off
Lit
Lit
Monitor
Lit
Monitor
Lit
Optical Axis Fine Adjustment Using the Alignment Wireless Checker: ER-02 (Sold Separately)
Receiver
Receiver
Receiver
Transmitter
Transmitter
Transmitter
Accurate adjustments of the optical axis can be achieved by checking
the light reception level value using the voltage of the monitor output.
<<Caution>>
First, check only the transmission on the upper level and reception on the upper level , and then check only the transmission on the
lower level and reception on the lower level.
(The values are not displayed correctly when the light can be received for both the upper and lower levels.)
1. Insert a commercially available tester into the monitor
jack on the receiver.
<<Caution>>
The monitor jack is polarized.
Check the polarity of the tester pin before inserting it.
Use a tester with an internal resistance of over 100 kΩ.
2. Fine adjust the upper level optical axis.
(1) Press the upper/lower changeover switch
on the transmitter to select [Only transmit
from upper].
(2) Press the upper/lower changeover switch
on the receiver to select [Reception
authorization on upper only].
(3) Turn the adjustment screw to ne adjust
until the monitor output voltage reaches
the highest value.
(Adjust both the transmitter and receiver.)
3. Fine adjust the lower level optical axis.
(1) Press the upper/lower changeover switch
on the transmitter to select [Only transmit
from lower].
(2) Press the upper/lower changeover switch
on the receiver to select [Reception
authorization on lower only].
(3) Turn the adjustment screw to ne adjust
until the monitor output voltage reaches
the highest value.
(Adjust both the transmitter and receiver.)
4. Check if the light from another transmitter enters the receiver.
(1) Press the upper/lower changeover switch on the transmitter to
select [No transmission].
(2) Press the upper/lower changeover switch on the receiver to
select [Reception authorized for both upper and lower].
(3) Check that the alarm LED lights up when the receiver
outputs an alarm signal, and that the sensitivity attenuation
LED also lights up. Also check the monitor output voltage.
If no alarm is activated or the sensitivity attenuation LED is not lit
When using multi-level protection, the monitor output voltage
may become close to “1 V” due to effects of other photoelectric
beam sensors. In such case, readjust the other photoelectric
beam sensors to reduce the effects to the minimum possible.
In addition, check that an appropriate channel is set.
Accurate adjustments of the optical axis can be achieved by checking the light reception level value using the voltage of the monitor output.
As the light reception level value can also be checked using the voltage on the transmitter, more accurate adjustments of the optical axis can be
achieved.
Using the alignment wireless checker enables easy and accurate beam alignment.
Providing sufficient margin of sensitivity increases resistance to the dense fog, snow, and heavy rain, which makes it possible to construct a
highly reliable intrusion alarm system.
Note: For detailed operation procedure of the alignment wireless checker, refer to the instruction manual for the alignment wireless checker ER-02.
Monitor
Receiver
Bleep
(High-pitched
tone)
Bleep
(High-pitched
tone)

OPERATION CHECK
7Be sure to perform an operation check after the optical axis adjustment.
An alarm is output
Light on
The sensor beams are
not obstructed
Light entrance due to
wrap around of the beams
(Due to light entrance caused
by reflection)
1
2
3
4
Turn off the power to the
transmitter and check that
an alarm is output.
Change the height or location of the sensor so
that the light on the detection line can be
obstructed completely.
Change over a channel or synchronized timing.
Readjust the optical axis, and move the direction
of the optical axis away from the reflection surface
within the allowable range.
(Perform this for both the transmitter and receiver)
Spill-over light entrance
No alarm is output * It results from the same channel and the same synchronized timing settings.
If no alarm is output
Transmitter
Beep
(high pitch
beep)
Light ON
Shield the light
Shield the light
Light enters
Light enters
Spill-over
No alarm is output
No alarm is output
Wrap around
Walls, etc.
Receiver
Light entrance due to beam wraparound Spill-over light entrance
Transmitter
Transmitter
Transmitter
Transmitter
Receiver
Receiver
Receiver
Receiver
Set Transmitter LED switch of the transmitter to [OFF] and mount the cover (housing).
When Transmitter LED switch is set to [OFF], the LED light turns off, but the upper
and lower beams are transmitted.
After the optical adjustment is completed, set Auto Gain Lock switch
to [ON] under the light beam reception condition, and wait for
approximately 5 seconds.
During this period, do not shield the optical axis.
A one-time short beep sound [Pi
-
] shows that the auto gain lock is
completed correctly.
(After the auto gain lock, the upper and lower LEDs light off.)
Set Reception authorization LED switch of the receiver to [OFF].
Obstruct the sensor beams near the sensor or the center
of the detection line and check that an alarm can be
output correctly.
In using the environmental output,
conrm that the environmental output
is generated when the optical axes in
both the upper and lower sections are
shielded for 20 seconds or more.
If the sound check switch is set to ON, after the auto gain lock
has been completed normally, the walk test mode is activated
for 5 minutes. The beep sound is generated in synchronization
with the alarm output.
The alarm LED lights up according to the alarm output.
After the auto gain lock is completed correctly, the walk test mode is activated
for 5 minutes regardless of whether the cover is mounted or not. During the
walk test mode, the beep sound is generated when the alarm LED lights on by
the alarm output. After approximately 5 minutes has elapsed, the walk test
mode ends. Even if Auto Gain Lock switch is not set to [ON], set Reception
authorization LED switch to [OFF] activate the walk test mode for 5 minutes.
How to set Auto Gain Lock by remote control.
The units has terminals for Auto Gain Lock by remote control.
1. Attached the housing cover of receiver side.
*Set the Auto Gain Lock switch “OFF” and set the Auto Gain Lock terminal
“Open”
2. Change the Auto Gain Lock terminal to “Close”, and wait for 5 sec.
If a “beep” tone sounds once after 5 sec. the Auto Gain Lock is completed.
*Don’t block the optical axis while 5 sec for initialize.
The intermittent beep sound like “PiPiPi........” shows
that the beam reception volume is not enough. In this
case, the LED on the side of the insufcient reception
volume blinks. Set Auto Gain Lock switch to [OFF], and
adjust the optical axis again.
In the multi-level protection, when the light enters from
other units than the opposing transmitter, turn off the
power of the other transmitter to stop transmitting the
light beam, then set Auto Gain Lock switch to [ON].
<<Caution>>
Transmitter
ON
OFF
Transmitter LED switch
Receiver After 5 seconds
ON
OFF
"Pi-" : PASS
"PiPiPi......" : FAIL
Auto-gain Lock
switch
Bleep
(High-pitched
tone)

3
33
HL
8-2 TRANSMISSION POWER SELECTION FUNCTION Note: Only installed on the transmitter
Note: Installed on the transmitter and the receiver
8-1 MODULATION FREQUENCY CHANGEOVER FUNCTION
Alarm memory
Response time
12 1CH 2CH 3CH 4CH
12 12 12 12
Transmission power
Channel
Setting item
Sound check
Whether to set on
transmitter or receiver
Both transmitter and receiver
Transmitter only
Receiver only
Setting
1CH 2CH 3CH 4CH
Function setting switch
(Factory setting: 1CH)
Function setting switch
(Factory setting: H)
8EXPLANATION OF FUNCTIONS
This device features the functions that must be set for operating the device, as well as those that are necessary for adjustment procedures.
Perform setting and adjustment by checking the following table.
Changing the channel changes the modulation frequency, which can prevent mutual interference or wraparound of the photoelectric beams.
Set corresponding transmitters and receivers to the same channel.
Timer
ON OFF
HL
Remote
0.05 secs (Standard) 0.3 secs 0.7 secs Other
This function switches the transmission power relative to the protection distance.
Interference or spill-over transmission of photoelectric beams can be prevented by setting an appropriate transmission power.
PXB- 50HF-KH
Over 25m but within 165ft (50 m)
Over 75m but within 330ft (100 m)
Over 150m but within 660ft (200 m)
Within 83ft (25 m)
Within 250ft (75 m)
Within 500ft (150 m)
Model
LH
Power
PXB-100HF-KH
PXB-200HF-KH
<<E.g.>>
200' (60 m)
295' (90 m)
When PXB-100HF-KH is set at a distance of 295ft (90 m), set to H
When PXB-100HF-KH is set at a distance of 200ft (60 m), set to L
This section describes the detailed information of the functions that appear in
this instruction manual. Set each function according to the description below.
Note: Only installed on the receiver 1. Timer
2. Remote
(Do not re-trigger)
ALARM MEMORY DISPLAY FUNCTION
8-3
If an alarm is output while the memory LED is lit, the beep sound is generated.
Alarm output
Alarm output
Alarm memory input
Memory LED
Beep sound when
a warning occurs
(Sound check switch ON)
Memory LED
55 mins (flashing)
Short-circuited Short-circuited
Open Open Open
55 mins (flashing)
5 mins 5 mins
60 mins (Re-trigger
operation)
You can check whether an alarm has been output while the alarm memory input
is open by shorting the alarm memory input to light the memory LED.
(The alarm memory input does not light up if there is an alarm output when it is
being shorted.)
When multiple sensors are used, this function allows
you to check which sensor was activated by ashing or
lighting of the memory LED.
Note: In order to activate a beep sound in synchronization
with the alarm output, set the sound check setting to
[ON] in the remote mode.
If you do not wish to use the memory display function,
select remote, and open terminal (9) (alarm memory
input) on the receiver.
3
33
Remote Timer
Function setting switch
(Factory setting: Remote)
Lit
Open/Short circuit between the alarm memory terminal and
power supply terminal

(Sec)
0.05 0.7
0.3
Note: Only installed on the receiver
Running at full speed Walking normally Walking slowly
Response time adjustment volume
(Factory setting: 0.05)
Transmit from both
upper and lower
(When power is on)
Only transmit
from lower
No transmission
Only transmit
from upper Reception authorization
on both upper and lower
(When power is on)
Reception
authorization on
lower only
Reception authorization
on upper only
Note: Installed on the transmitter and the receiver
Lit
Lit
Lit
Lit
Lit
Lit
Lit
Off
[Transmitter] [Receiver]
8-6
8-5
Interruption time:
0.05 secs
Interruption time:
0.3 secs
Interruption time:
0.7 secs
Lit
Off
The detectable interruption time can be adjusted
(Refer to the diagram below to adjust the response time)
<<Caution>>
(1) If the interruption time is shorter than the response time, the obstructing object is not detected.
(2) In areas where there are large objects that could be blown and obstruct the optical axis (e.g., birds, a lot of paper, and
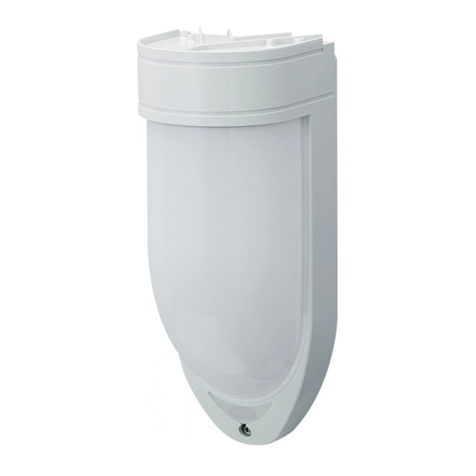
cardboard), set the response time slightly slower by taking the installation condition into consideration. (However, if the
response time is too slow, the units may not detect an intruder.)
RESPONSE TIME ADJUSTMENT FUNCTION
UPPER/LOWER CHANGEOVER FUNCTION
This function allows you to switch the optical unit to transmit/receive the light by pressing the upper/lower changeover switch.
Note: The sensors switch as shown in the diagram below when the upper/lower changeover switch is pressed.
Upper/lower changeover
switch
Transmitter LED/reception
authorization LED
(Different displays for
upper and lower)
Note: Only installed on the receiver
The margin of sensitivity on this device is set so that an appropriate sensitivity can be obtained when the optical axis is aligned while the
device is installed in the maximum protection distance. However, if the actual distance is shorter than the maximum rated protection
distance, excessive margin of sensitivity is secured, which could make the device more susceptible to adverse effects of the reection from
the ground or walls. The auto gain lock function helps to adjust to an appropriate margin of sensitivity and x the setting in the same
manner as when the device is installed in the maximum rated protection distance, regardless of the actual installation distance (below the
maximum rated protection distance). (However, it is always required that the optical axis is correctly aligned.)
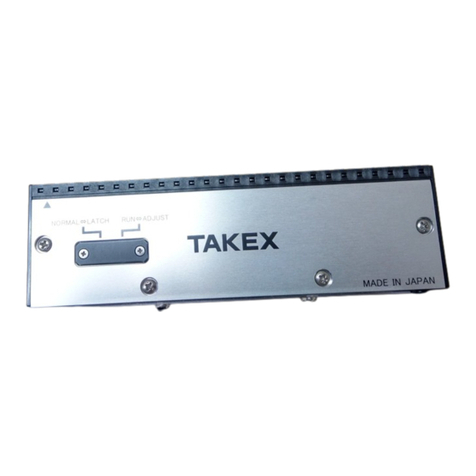
AUTO GAIN LOCK FUNCTION
8-7
Shorter than the maximum
rated protection distance Maximum rated protection distance
Same margin of sensitivity
OFF ON
Note: Only installed on the receiver
Item
8-4
Function setting switch
(Factory setting: OFF)
Light reception level
Walk test mode
Alarm memory display
Operation (status) Other settings
SOUND CHECK FUNCTION
You can be notied of the light reception status or current alarm
operation on the receiver by the sound of alarms. 4
44
Light reception level can be checked by the sound tone.
(The tone pitch becomes higher as the light reception level
increases.)
The beep sound is generated according to the alarm output.
(Activated for approximately 5 minutes after auto gain lock)
While the receiver cover is removed.
Set the alarm memory display function to the remote
mode.
If an alarm is output while the memory LED is lit, the beep
sound is generated.

Sensitivity
attenuation LED
Note: Only installed on the receiver
8-9
: Lit
Note: Installed on the transmitter and the receiver
8-12
Note: Only installed on the receiver
8-10
Note: Only installed on the receiver
8-11
Beep
(high pitch beep)
(1 sec)
Beep-beep-beep
(high pitch beep)
(Intermittent sound
for 20 seconds)
Beep sound
Result
Auto gain lock pass/fail criteria
Pass
Fail
Cause Remedy
Light reception
authorization LED
Off for both
upper and lower
(2) Light reception level is low
due to misalignment of the
optical axis.
Note: The sensitivity
attenuation LED is also lit
(1) Light was being obstructed
when the receiver cover
was attached.
(2) Also, remove the cover from the
transmitter, check the actual
protection distance and
transmission power before
adjusting the optical axis again.
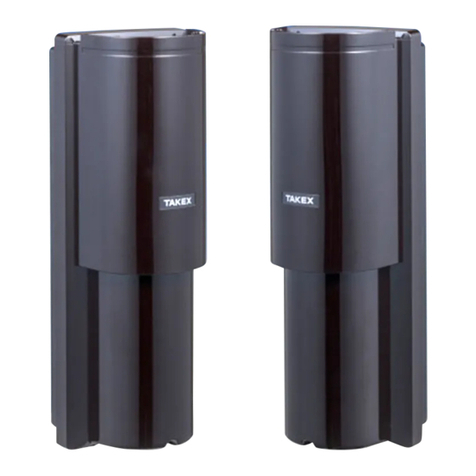
(1) Remove the item that is
obstructing the light beams,
re-attach the receiver cover, and
check the beep sound.
TROUBLESHOOTING
Daily Inspections
9
(1) Power is not on
(2) Poor wiring or breaking of wire, short
(3) Transmitter is set to [Do not transmit]
(1) Connect the power source
(2) Check again
(3) Press the upper/lower changeover switch
(1) Connect the power source
(2) Check again
(3) Remove the reflecting object, or change the
installation location or optical axis direction
(4) Obstruct four levels simultaneously
(5) Shorten the detection response time
(1) Power is not on
(2) Poor wiring or breaking of wire, short
(3) Photoelectric beam is reflected by some object and entering the receiver
(4) Four levels are not obstructed simultaneously
(5) Sensor beam is obstructed for less time than the detection response
time setting in the receiver
(1) Optical axis (alignment) is not aligned correctly
(2) There is an obstruction between the transmitter and receiver
(3) Transmitter/receiver cover or reflection section is dirty
(4) Frequency channel settings on the transmitter and receiver do not match
(1) Poor wiring connection
(2) Change of supply voltage
(3) Obstruction between transmitter and receiver (objects such as branches
that move with the wind)
(4) The wiring of the transmitter/receiver is located nearby a power line
(5) Unstable sensor installation
(6) Transmitter/receiver cover or reflection section is dirty
(7) Improper alignment of optical axis
(8) A large bird or cat may obstruct the beams
(9) Transmission power switch is set to L, which does not keep enough
margin of sensitivity
(1) Check again
(2) Stabilize the supply voltage
(3) Remove the object
(4) Change the wiring route
(5) Fix in a stable location
(6) Clean using a soft cloth
(7) Perform optical axis adjustment again, set the gain lock
and secure the margin of sensitivity
(8) Set the response time to be slightly longer (however, this
is not possible if there is a possibility that an intruder
could run through at top speed)
(9) Set the transmission power switch to H, remove the
receiver cover and set the gain lock again
(1) Perform angle adjustment again and set the gain lock
(2) Remove the object
(3) Clean using a soft cloth
(4) Readjust the frequency channels so they are the same
Transmitter LED does not light
(cover is open)
Alarm LED does not go out
(Alarm output does not stop)
Continually activated
Status Cause Remedy
Alarm LED does not light even if
the photoelectric beam is obstructed
• Check the device by referring to the table below. If you cannot restore the device to a normal
condition after the check, contact the place of purchase or TAKEX.
To clean the device, use a soft, wet cloth and then wipe off any water drops.
If the device is particularly dirty, dip the soft cloth in water that includes a weak neutral detergent. Wipe the device gently with the cloth, then
wipe off any detergent that remains. Do not use substances such as thinner or benzene. (The plastic parts may deform, discolor or change
their properties.)
Perform operation checks on a regular weekly basis.
PROGRAMMABLE AGC FUNCTION
LIGHT SENSITIVITY SIGNAL FUNCTION
EXTERNAL ENVIRONMENT DIAGNOSTIC FUNCTION
ALIGNMENT WIRELESS CHECKER CONNECTION FUNCTION
: Off : Lit : Flashing
When the receiver cover is attached, the
display appears and the beep sound is
generated in approximately 5 seconds
according to the pass/fail result.
For detailed information, refer to the
table on the right.
Note: The beep sound is generated
regardless of the setting of the
sound check switch.
Light reception level for
both the upper and lower
beams is insufficient
Light reception level
for the upper beam is
insufficient
Light reception level
for the lower beam is
insufficient
During adverse environmental conditions such as dense fog or heavy rain, this function temporarily increases the sensitivity of the
receiver.
Note: The margin of sensitivity is maintained even if there is a sudden worsening in weather conditions.
The LED lights up when the light reception level is considered to be insufcient
in order to notify the operator of that an inspection is necessary.
The light reception level falls below the specied level under adverse environmental conditions such as dense fog or heavy rain. This function issues
an environmental output if such conditions are maintained.
Note: The environmental output continues until the light reception level for both the upper and lower beams recovers to the specied level (for 5
seconds at the shortest).
Using the alignment wireless checker that is sold separately enables easy and accurate optical axis adjustment.
Providing sufcient margin of sensitivity increases the resistance to the dense fog, snow, and heavy rain, which makes it possible to construct a
highly reliable intrusion alert system.
8-8 TRANSMITTER LED SWITCH
The transmitter LED can be turned off.

EXTERNAL DIMENSIONS Unit: inch (mm)
3.31" (84mm)
2.91" (74mm)
2.83" (72mm)
(4-Ø3mm)
4-Ø0.12"
Panhead screws
3.31" (84mm)
Transmitter Receiver
Reference installation drawing
■Options : Alignment wireless checker : ER-02
16.38" (416mm)
16.38" (416mm)
5.91" (150mm)
11
10 SPECIFICATIONS
Model
Detection system
Infrared beam
Protection distance
Max. arrival distance
Response time
Alarm output
Current consumption
Power supply
PXB-50HF-KH
Double modulation pulsed beam by LED
Near infrared pulsed beam interruption system
(TR-RE 4 beam simultaneous interruption)
PXB-100HF-KH PXB-200HF-KH
Outdoor 330' (100 m) or less Outdoor 660' (200 m) or less
3300' (1000 m) 6600' (2000 m)
Attenuation LED
Environmental output
Alarm LED
Ambient temperature range
Beam adjustment
Functions
Wiring
Weight
Appearance
Mounting positions
Outdoor 165' (50 m) or less
1650' (500 m)
0.05 sec. to 0.7 sec. (Variable at pot)
12 to 30V DC (Non-polarity)
30 mA or less 32 mA or less 34 mA or less
Dry contact relay output form C
Contact action : Interruption time (Min.2sec.)
Contact capacity : 30V (AC/DC) 0.25A (resistive load)
Protective resistor
Dry contact relay output form C
Action : Activated when weather condition gets worse
Contact capacity : 30V (AC/DC) 0.25A (resistive load)
Protective resistorv
Red LED (Receiver) ON : when beam is attenuated
Red LED (Receiver) ON : when an alarm is initiated
–31°F to+151°F (–35°C to+66°C)
Horizontal: ±90°, Vertical: ± 20°
Terminals
Transmitter : 12.6 oz (360g) Receiver : 15.8 oz (450g)
Optical unit : Resin Body : Resin
Outdoor, Indoor
Modulated beam frequency selection,Tone indicator, Environmental
module, Beam power selection,Transmitting power adjutment, Alarm
memory indication, Programmed AGC, Auto-gain lock function,
Monitorjack, Response time adjustment, Upper/Lower beam switch,
Wireless checker
No.05-734
In Japan
Takex America Inc.Takenaka Engineering Co., Ltd.
http : // www. takex-eng. co. jp /
Takex America Inc.
http : // www. takex. com
Takex Europe Ltd.
http : // www. takex. com
In the U.S. In the U.K.
In Australia
1801
Aviary Court, Wade Road,
Basingstoke, Hampshire. RG24 8PE, U.K.
Tel : (+44) 01256-475555
Fax : (+44) 01256-466268
4/15 Howleys Road, Notting Hill,
VIC, 3168
Tel : +61 (03) 9544-2477
Fax : +61 (03) 9543-2342
83-1, Gojo-sotokan, Higashino,
Yamashina-ku, Kyoto 607-8156, Japan
Tel : 81-75-501-6651
Fax : 81-75-593-3816
151, San Zeno WAY
Sunnyvale, CA 94086, USA
Tel : 408-747-0100
Fax : 408-734-1100
Limited Warranty :
TAKEX products are warranted to be free from defects in material and workmanship for 12 months from original date of shipment. Our warranty does not cover
damage or failure caused by natural disasters, abuse, misuse, abnormal usage, faulty installation, improper maintenance or any repairs other than those provided
by TAKEX. All implied warranties with respect to TAKEX, including implied warranties for merchantability and implied warranties for tness, are limited in
duration to 12 months from original date of shipment. During the Warranty Period, TAKEX will repair or replace, at its sole option,free of charge, any defective
parts returned prepaid. Please provide the model number of the products, original date of shipment and nature of difculty being experienced. There will be
charges rendered for product repairs made after our Warranty Period has expired.
This manual suits for next models
2
Table of contents
Other Takex Accessories manuals

Takex
Takex MS-12TE User manual

Takex
Takex PXB-50F User manual

Takex
Takex PB-IN-50HFA User manual

Takex
Takex PA-450EA User manual

Takex
Takex FS-1000E User manual

Takex
Takex F71R User manual

Takex
Takex MW-50L User manual

Takex
Takex DA-303S User manual

Takex
Takex PIR-T40NAM(W) User manual

Takex
Takex PB- 50FA User manual

Takex
Takex MS-100E User manual

Takex
Takex PR-5B User manual

Takex
Takex MW-100AL Manual

Takex
Takex PA-6612E User manual

Takex
Takex TXF-125 Series User manual

Takex
Takex TX-114TR User manual

Takex
Takex PXB-100ATC User manual

Takex
Takex ASW-SG85F User manual

Takex
Takex PIR-T40NAM User manual

Takex
Takex PR-11BE User manual