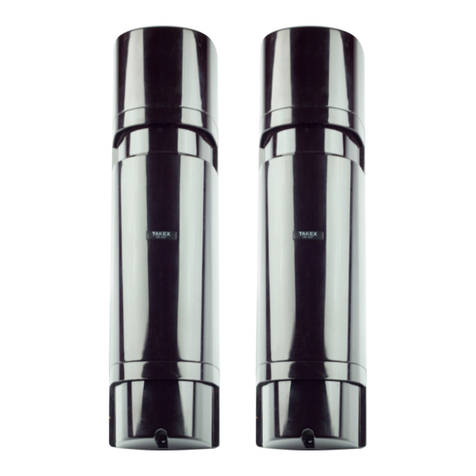
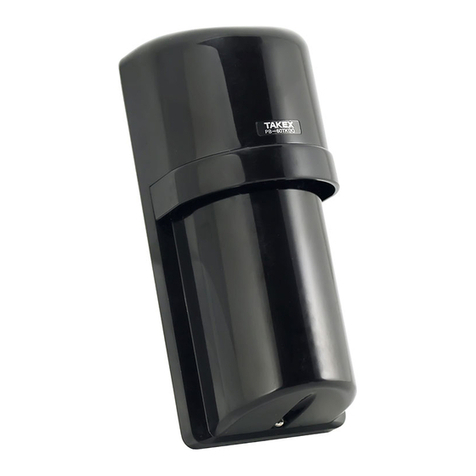
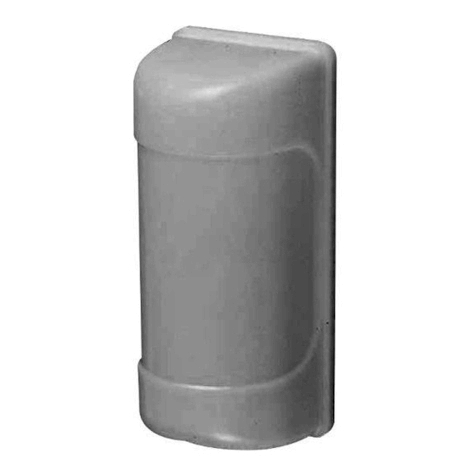
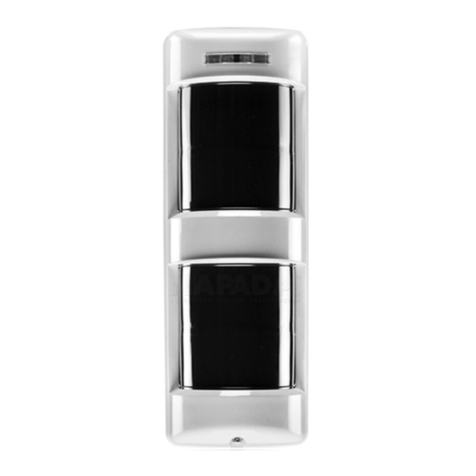
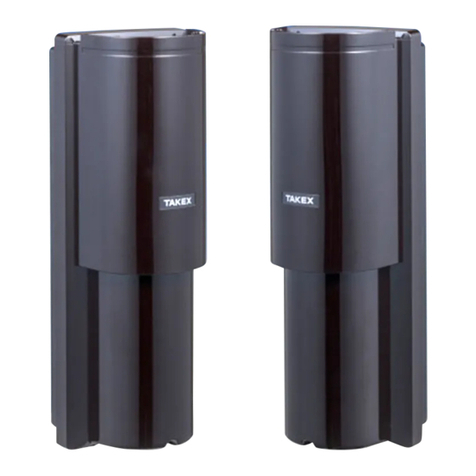
Takex MW-100AL Manual

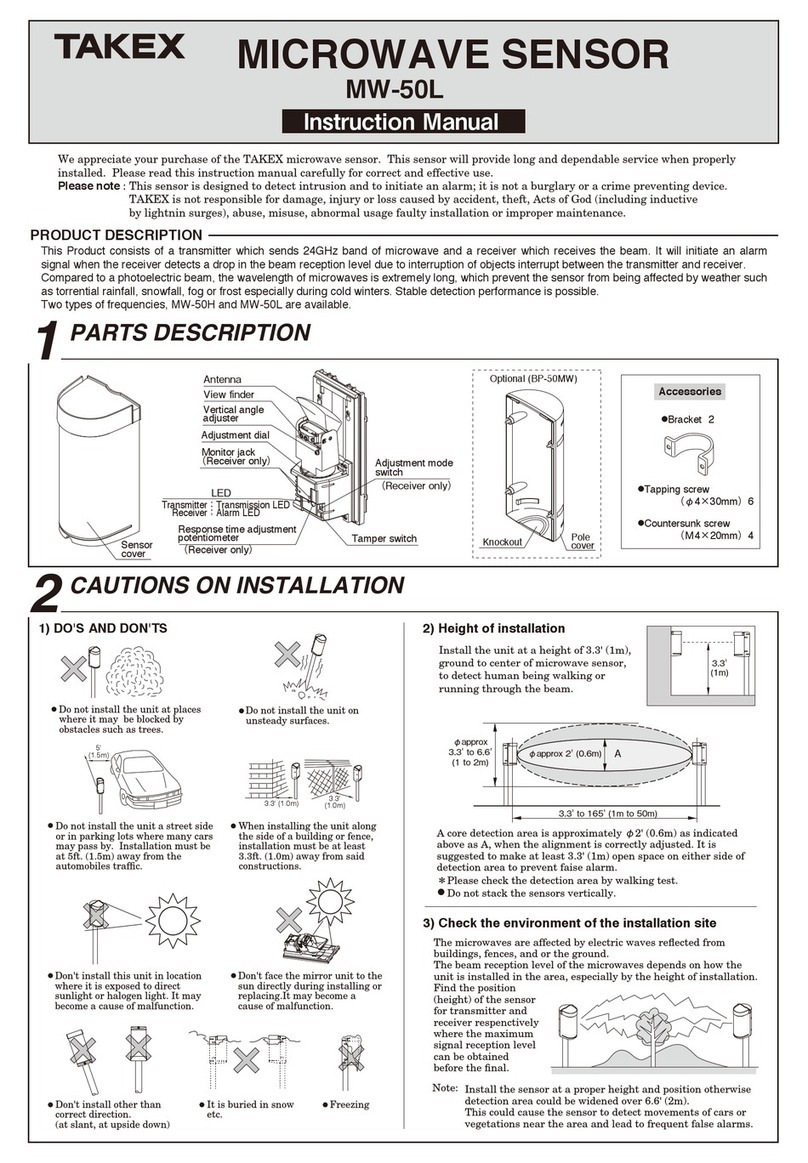
1) DO'S AND DON'TS 2) Height of installation
Install the unit at a height of 3.3' (1m),
ground to center of microwave sensor,
to detect human being walking or
running through the beam.
・Do not install the unit at places
where it may be blocked by
obstacles such as trees.
・Do not install the unit a street side
or in parking lots where many cars
may pass by. Installation must be
at 5ft. (1.5m) away from the
automobiles trafc.
・Do not install the unit on
unsteady surfaces.
・When installing the unit along
the side of a building or fence,
installation must be at least
3.3ft. (1m) away from said
constructions.
3.3'
(1m)
3) Check the environment of the installation site
The microwaves are affected by electric waves reected from
buildings, fences, and or the ground.
The beam reception level of the microwaves depends on how the
unit is installed in the area, especially by the height of installation.
Find the position (height) of the sensor for transmitter and
receiver
respenctively where
the maximum signal
reception level can
be obtained before
the nal.
3.3' (1.0m) 3.3' (1.0m)
5'
(1.5m)
Pole
cover
3CAUTIONS ON INSTALLATION
2PARTS DESCRIPTION
1PRODUCT DESCRIPTION
InstructionManual
We appreciate your purchase of the TAKEX microwave sensor. This sensor will provide long and dependable service when properly
installed. Please read this instruction manual carefully for correct and effective use.
Please note : This sensor is designed to detect intrusion and to initiate an alarm; it is not a burglary or a crime preventing device.
TAKEX is not responsible for damage, injury or loss caused by accident, theft, Acts of God (including inductive
by lightnin surges), abuse, misuse, abnormal usage faulty installation or improper maintenance.
MICROWAVE SENSOR
MW-100AL
This Product consists of a transmitter which sends 24GHz band of microwave and a receiver which receives the beam. It will initiate an alarm
signal when the receiver detects a drop in the beam reception level due to interruption of objects interrupt between the transmitter and receiver.
Compared to a photoelectric beam, the wavelength of microwaves is extremely long, which prevent the sensor from being affected by weather
such as torrential rainfall, snowfall, fog or frost especially during cold winters. Stable detection performance is possible.
Two types of frequencies, MW-100AH and MW-100AL are available.
Cover
Knockout
Top and bottom
Accessories
●Tapping screw
(φ4×30mm)6
●Countersunk screw
(M4×20mm)4
●Bracket2
Optional (BP-100MW)
3.3' (1m) or less
Vertical angle
adjustment screw
Adjustment dial
Adjustment mode
switch
Monitor jack
(Receiver only)
Tamper switch
Response time adjustment
potentiometer
Transmitter:
Transmission LED
Receiver :Alarm LED
LED
(Receiver only)
(Receiver only)
Antenna
View finder
Install the sensor at a proper height and position otherwise
detection area could be widened over 6.6' (2m).
This could cause the sensor to detect movements of cars or
vegetations near the area and lead to frequent false alarms.
Note:
A core detection area is approximately φ2' (0.6m) as indicated
above as A, when the alignment is correctly adjusted. It is
suggested to make at least 3.3' (1m) open space on either side of
detection area to prevent faise alarm.
*Please check the detection area by walking test.
Do not stack the sensors vertically.
16.5'to330'(5mto100m)
A
●
Don't install this unit in location
where it is exposed to direct
sunlight or halogen light. It may
become a cause of malfunction.
Don't face the mirror unit to the
sun directly during installing or
replacing.It may become a cause
of malfunction.
Don't install other than
correct direction.
(at slant, at upside down)
It is buried in snow
etc.
Freezing
φapprox
3.3'to6.6'
(1to2m) φapprox2'(0.6m)
Don't operate less than 3.3' (1m) detection
distance between transmitter and receiver
even for operation checking.

When two or more sets are used, two frequencies (L and H types) should be used in order
to avoid cross talk or interference. Refer to the following example.
H type should be used for TR3 and RE3 when TR1 and RE1 are L type.
Do not install the transmitter and
the receiver at a same corner.
Microwave sensor with the same
frequency can be used for this case.
Mounting
3) Wall mount
4) Pole mount
5) Pole mounting back to back.
①Make holes in the wall.
・Place the mounting plate the wall as a template for drilling
and mark the screw holes. (Allow a space of 1" (25mm)
above and below the plate.
This will provide easy detachment of the cover after
installation.)
②Install the sensor.
・Insert tapping screws to 0.59" (15mm) under the screw head.
・Install the mounting plate on the
wall after pulling the wire
through it.
・Connect terminals.
・Attach cover.
②Install sensor on the pole.
・Attach the U brackets to pole and x the mounting plate
with screws.
・Fix the sensor the body to the mounting plate.
・Connect the terminals.
・Attach the sensor and pole covers.
(Break the knockouts on the cover
and pole cover to adapt to pole's
diameter and conguration.)
・Attach the two U brackets to
the poles, one on top of the
other, facing opposite
directions.
(See illustration.)
①Make a wiring hole in the pole. Pull
through wire.
2) Turn the anntenna of
each unit by 90 degrees
right or left.
Then loosen the screws
(2 places) to remove the
mounting plate from
the body.
1) Detach cover with a screw driver.
Wood
φ0.12"
(φ3mm)
Concrete
Use plug etc.
Installation example
●Linear protection (long distance)
●Perimeter protection
1.38" (35mm) or more
1" (25mm) or more
0.59" (15mm)
*The grommet is compatible with a wire of φ0.12" (φ3mm)
to φ0.24" (φ6mm) outer diameter.
When a wire of more than φ0.24"
(φ6mm) outer dia. is used, cut
off the dotted line portion as
illustrated using pliers or the
like. Then use caulking to
prevent insects from entering
into unit.
Grommet
4INSTALLATION
・Pre-drill in wall.
Concrete wall : Refer to specications of the securing plug used.
Wooden wall : 0.12" (3mm) diameter.
TR1
TR
TR
TR
TR
TR3
TR2
RE2
(Ltype)
(Ltype)
(Htype)
330' (100m)
330' (100m)
330' (100m)
1' (0.3m)
1'to16.5'
(0.3mto5m)
RE1 RE3
RE
RE
RE
RE
(Ex.1) (Ex.2) (Ex.3)
Protected
site
・Do not use different frequencies (H and L) in a detection line.
Use a pair of same frequency : TR(H) and RE(H) OR TR(L) and RE(L).
・Do not stack the sensors vertically.
(Top view)
(Top view)
±90°
±10°
90°
90°
(Option)
Knockout
φ1.77"(φ45mm)
φ1.50"(φ38mm)

1) Basic connection
The equipment must be powered from an LPS in accordance with EN60950-1 : 2001
2) When two or more sets are connected to
the same line.
3) When two or more sets are connected
to separate lines.
}
}
}
}
}
}
}
Wiring
4) Wiring distance
Terminal arrangement
Size of wire used Power voltage
12V DC 24V DC Max. wiring distance, when two or
more sets are connected, is the above
value divided by the number of sets.
The signal line can be wired to a
distance of up to 6,000ft. (2,000m)
with AWG 20 (dia.0.8mm) telephone
wire.
1) Supply power with covers off.
2) Look through the view nder on the transmitter unit and move it
until the receiver unit is visible.
Repeat the procedure on the receiver unit.
3) Set the adjustment mode switch on the receiver to "adjustment mode".
Connect the digital volt meter to the monitor jack and check the
monitor output voltage (beam reception level).
When the output voltage is low, adjust the installation height of the
transmitter and receiver so that the output voltage will reach the
highest level. (Make sure that the angle of the antenna does not
change.)
4) After adjustment, make sure that the adjustment switch is set to
"Operation mode".
N.C.
N.O.
COM.
①
②
③
④
⑤
⑥
⑦
①
②
⑥
⑦
7
5
OPERATION CHECK
WIRING
6
SET-UP OF FUNCTIONS AND
BEAM ALIGNMENT
After adjustment, set the adjustment mode switch to "Operation mode".
Install the sensor at a proper height and position otherwise
detection area could be widened over 6.6' (2m).
This could cause the sensor to detect movements of cars or
vegetations near the area and lead to frequent false alarms.
AWG 20 (Dia. 0.8mm)
AWG 18 (Dia. 1.0mm)
AWG 17 (Dia. 1.1mm)
AWG 16 (Dia. 1.25mm)
AWG 15 (Dia. 1.4mm)
AWG 14 (Dia. 1.6mm)
Up to 660ft. (200m)
Up to 1,000ft. (300m)
Up to 1,350ft. (400m)
Up to 1,800ft. (550m)
Up to 2,300ft. (700m)
Up to 2,950ft. (900m)
Up to 5,300ft. (1,600m)
Up to 7,800ft. (2,400m)
Up to 9,500ft. (2,900m)
Up to 12,500ft. (3,800m)
Up to 17,000ft. (5,100m)
Up to 21,000ft. (6,400m)
TR TR TR TR
TR
RE RE RE RE
RE
Power
(DC12V)
Power
(DC12V)Power
(DC12V)
Alarm
signal
(N.C.)(N.C.)
Alarm
signal
Alarm signal
1(N.C.)
Alarm signal
2(N.C.)
(Control panel)
(Control panel)
(Control panel)
Note : 1)
2)
[Transmitter] [Receiver]
Tamper output
Dry contact relay output N.C.
30V (AC/DC) 0.1A
Tamper output
Dry contact relay output N.C.
30V (AC/DC) 0.1A
Alarm output
Dry contact relay Form C
30V (AC/DC) 0.25A
Power 12to28VDC
(non-polarity)
Power 12to28VDC
(non-polarity)
Voltage reading
2.1V or more
1.8V to 2.1V
1.8V or less
Sensitivity
Best
Good
Poor, re-adjust
①②③④①②
①②③④ ①②③④①② ①② ①②③④ ①②③④
①② ①②
Vertical angle
adjustment screw
Adjustment dial
Digital voltmeter
Antenna
Note:
2)
Check by both the alarm LED and control panel
1) Check by alarm LED only.
After the installation and angle adjustment are
nished, test operation by performing a walking
test throug walk testing the sensor.
Two methods may be used.
When cover is attached, the sensor is switched
to be in an operation mode automatically.
Note:
RE
TR Light
Control panel
RE
TR Light

11
10
1. No power supply
2. Bad wiring connection or broken
wire, short
Solve possible problems according to the following table.
If normal operations cannot be restored by this means, contact either the dealer from
whom you bought the unit or TAKEX.
1. Turn on the power
2. Check wire
1. Turn on the power
2. Check wire
3. Remove the object
causing the reflection, or
change the place for
installation
1. No power supply
2. Bad wiring connection
3. Microwave is reflected off another
object and sent into the receiver
1. No power supply to the transmitter
2. Angle adjustment of transmitter
and receiver is not appropriate.
3. Obstacles between transmitter
and receiver
1. Bad wiring connection
2. Change of supply voltage
3. Shading objects between the
transmitter and receiver
4. A large electric noise source such
as power machine is located near
the transmitter and receiver
5. Installation height, installation site
or angle adjustment is inapporiate
1. Check again
2. Stabilize supply voltage
3. Remove object the
causing the shade
4. Change the place of
installation
5. Readjust
1. Turn on the power on the
transmitter
2. Readjust angle
3. Remove obstacles.
Transmitter
LED does not
light
Receiver LED
continues to light
(the does
not stop)
Intermittent
alarm
Symptoms Possible causes Remedies
Receiver LED
does not light
when the beam
is broken
With this switch, a speedy check of the
beam reception level is possible.
When aligning the beam, turn the switch
to the "Adjustment mode".
(Factory set : Operation mode)
1. Adjustment mode switch
2. Response time adjustment
volume
EXTERNAL DIMENSIONS
8
9
FUNCTIONS DESCRIPTION
TROUBLESHOOTING
SPECIFICATION
Run at full speed Walk with quick steps
Response time:0.04 sec. Response time:0.3 sec.
Response time
adjustment potentiometer
0.3(sec.)
0.04
(sec.)
Operation
mode
Adjustment
mode
Type
Model
Protection distance
Max. arrival distance
Microwave
Detection system
Response time
Alarm signal
Supply voltage
Power consumption
Tamper signal
Alarm LED (Receiver)
Transmission LED
(Transmitter)
Functions
Weight
Appearance
5.12" (130mm)
12.9" (307mm)
2-φ0.16"
(2-φ4mm)
5.20" (132mm)
2.91" (74mm)
1.38" (35mm)
Wiring hole
φ0.79" (φ20mm)
0.17" (4.2mm)
1.57" (40mm)
0.94"(24mm)
2.36" (60mm)
4.96" (126mm)
2.01"
(51mm)
φ1.50"toφ1.77"
(φ38mmtoφ45mm)
MOUNT HOLE
To clean the device, use a soft, wet cloth and then wipe off any water drops.
If the device is particularly dirty, dip the soft cloth in water that includes a weak neutral detergent.
Wipe the device gently with the cloth, then wipe off any detergent that remains.
Do not use substances such as thinner or benzene.
(The plastic parts may deform, discolor or change their properties.)
Periodically (approximutely weekly) confirm operation.
DAILY INSPECTIONS
Limited Warranty :
TAKEX products are warranted to be free from defects in material and workmanship for 12 months from original date of shipment. Our warranty does not cover damage or failure caused by
natural disasters, abuse, misuse, abnormal usage, faulty installation, improper maintenance or any repairs other than those provided by TAKEX. All implied warranties with respect to
TAKEX, including implied warranties for merchantability and implied warranties for tness, are limited in duration to 12 months from original date of shipment. During the Warranty
Period, TAKEX will repair or replace, at its sole option,free of charge, any defective parts returned prepaid. Please provide the model number of the products, original date of shipment and
nature of difculty being experienced. There will be charges rendered for product repairs made after our Warranty Period has expired.
(Factory set : 0.04)
Unit: inch (mm)
●
●
12 SPECIAL NOTES
1.FCC
(1)FCC Regulation Statement : This equipment has been tested and found to comply with the limits for a Class B digital device, pursuant to part 15 of the FCC Rules. These limits are
designed to provide reasonable protection against harmful interference in a residential installation.This equipment generates, uses and can radiate radio frequency energy and, if not
installed and used in accordance with the instructions, may cause harmful interference to radio communications. However, there is no guarantee that interference will not occur in a
particular installation. If this equipment does cause harmful interference to radio or television reception, which can be determined by turning the equipment off and on, the user is
encouraged to try to correct the interference by one or more of the following measures : -Reorient or relocate the receiving antenna. -Increase the separation between the equipment and
receiver. -Connect the equipment into an outlet on a circuit different from that to which the receiver is connected. -Consult the dealer or an experienced radio/TV technician for help.
WARNING : Changes or modifications not expressly approved by the party responsible for compliance could void the user's authority to operate the equipment.
(2)RF Exposure Warning Statement : This equipment complies with FCC radiation exposure limits set forth for an uncontrolled environment. End users must follow the specific operating
instructions for satisfying RF exposure compliance. This transmitter must be at least 20 cm from the user and must not be co‐located or operating in conjunction with any other antenna
or transmitter.
The information in this guide may change without notice. The manufacturer assumes no responsibility for any errors that may appear in this guide.
Microwave sensor
MW-100AL
16.5ft. (5m) to 330ft. (100m)
Approx. 660ft. (200m)
24.12GHz
Microwave
0.04sec. to 0.3sec. (Variable using POT)
Dry contact relay output 1C N.O. / N.C. COM.
Contact action : Interruption time output
Contact capacity : 30V (AC/DC) 0.25A or less
12 to 28V DC
100mA
・Transmitter : 40mA
・Receiver : 60mA
Dry contact output N.C.
Contact capacity : 30V (AC/DC) 0.1A
Red LED Lighting at alarm
Green LED Lighting at signal transmission
Monitor output, Adjustment mode switch
Transmitter 36.8oz (1,050g) Receiver 38.5oz (1,100g)
Resin (Wine red)
No.06-016
In Japan
Takex America Inc.Takenaka Engineering Co., Ltd.
http : // www. takex-eng. co. jp /
Takex America Inc.
http : // www. takex. com
Takex Europe Ltd.
http : // www. takex. com
In the U.S. In the U.K.
In Australia
1711
Aviary Court, Wade Road,
Basingstoke, Hampshire. RG24 8PE, U.K.
Tel : (+44) 01256-475555
Fax : (+44) 01256-466268
4/15 Howleys Road, Notting Hill,
VIC, 3168
Tel : +61 (03) 9544-2477
Fax : +61 (03) 9543-2342
83-1, Gojo-sotokan, Higashino,
Yamashina-ku, Kyoto 607-8156, Japan
Tel : 81-75-501-6651
Fax : 81-75-593-3816
151, San Zeno WAY
Sunnyvale, CA 94086, USA
Tel : 408-747-0100
Fax : 408-734-1100
This manual suits for next models
1
Table of contents
Other Takex Accessories manuals

Takex
Takex PIR-T40NAM User manual

Takex
Takex PXB-50F User manual

Takex
Takex GS-1100E User manual

Takex
Takex TX-114TR User manual

Takex
Takex PR-5B User manual

Takex
Takex MW-50L User manual

Takex
Takex TX-124R User manual

Takex
Takex PA-480S User manual

Takex
Takex MS-12TE User manual

Takex
Takex PB-IN-50HFA User manual

Takex
Takex PS-520E User manual

Takex
Takex PB-30TK User manual

Takex
Takex F85R User manual

Takex
Takex FS-1000E User manual

Takex
Takex MS-100E User manual

Takex
Takex PR-5B User manual

Takex
Takex PR-30BE User manual

Takex
Takex PA-4810E User manual

Takex
Takex PXB-100ATC User manual

Takex
Takex PA-15WE User manual