manuals.online logo
Brands
  1. Home
  2. •
  3. Brands
  4. •
  5. Target
  6. •
  7. Indoor Furnishing
  8. •
  9. Target carson CAMEDIWDEB User manual

Target carson CAMEDIWDEB User manual

>>
carson
large tv stand
assembly instructions
style CAMEDIWDEB (black)
dpci 249-10-2021
style CAMEDIWDES (espresso)
dpci 249-10-2022
style CAMEDIWDGY (grey)
dpci 249-10-2023
style CAMEDIWDBR (rustic)
dpci 249-10-2024
style CAMEDIWDWL (walnut)
dpci 249-10-2025
style CAMEDIWDWH (white)
dpci 249-10-2026
© 2018 Target. The Bullseye Design is a trademark of Target Brands, Inc. All rights reserved.
2
Congratulations on your latest Target purchase.
Now what? Don’t start sweating over this box of parts. This will be easy. We did the hard work for you.
All you need to do is follow our simple instructions and you’ll be on your way to transforming your
room in no time. Good luck—though we’re condent you won’t need it.
before you begin
1. Check for damaged or missing parts. Call 1-855-MYTGTHOME (855-698-4846) to order missing supplies.
2. Use the carton as a working surface to prevent product damage during assembly.
3. Read through and review assembly steps.
4. Gather all tools prior to assembly.
tools needed
3
table of contents
introduction 2
hardware 4
parts list 5
how to use the cam lock system 6
assembly 7-18
QUESTIONS? Just call 1-855-MYTGTHOME (855-698-4846) for parts and service. For faster service, have the style number and dpci number ready when calling.
4
hardware
(H1) x 46
wooden dowel
(H2) x 50
cam bolt
(H3) x 50
cam
(H4) x 20
short pan head screw
(H5) x 2
knob
(H6) x 2
knob bolt
(H7) x 8
at head screw
(H8) x 2
washer
(H9) x 1
wall anchor
(H10) x 1
long pan head screw
(H11) x 1
wall screw
(H12) x 1
wall strap
exploded diagram
ITEM DESCRIPTION QUANTITY
1 top panel 1
2 left side panel 1
3 right side panel 1
4 bottom panel 1
5 bottom front rail 1
6 bottom rear rail 1
7 back panel 1
8 upper front rail 1
9 upper rear rail 1
10 partition panel 1
11 xed shelf 2
12 front shelf rail 2
13 rear shelf rail 2
14 drawer front 2
15 left drawer side 2
16 right drawer side 2
17 drawer back 2
18 drawer bottom 2
5
1.
how to use the cam lock system
Screw cam bolt into panel
2.
Align cam bolt(s) with cross-bored
hole(s) and insert all the way until
panels are ush
3.
Push cam into panel - arrow feature
on cam top points to panel edge
4.
Rotate cam(s) clockwise 180° to
lock panels together
5.
Panels should be tight against each
other and connection should be rigid
6
1. 2. 3.
4. 5.4. 5.
7
step 1: attach bottom front rail and bottom rear rail to bottom panel
(H1) x 4
wooden dowel
(H2) x 6
cam bolt
(H3) x 6
cam
1.1. Carefully tap small wooden dowels into place in bottom front rail and bottom rear rail. Leave 1/2” of the dowels sticking out.
1.2. Screw-In cam bolts must be screwed down ush in bottom front rail and bottom rear rail.
1.3. Refer to page 6 for instructions on how to use the cam lock system.
1.4. Do not over tighten bolts.
front
step 2: attach front shelf rail and rear shelf rail to xed shelf
(H1)
x 8
wooden dowel
(H2) x 8
cam bolt
(H3) x 8
cam
2.1. Carefully tap small wooden dowels into place in front shelf rail and rear shelf rail. Leave 1/2” of the dowels sticking out.
2.2. Screw-In cam bolts must be screwed down ush in front shelf rail and rear shelf rail.
2.3. Refer to page 6 for instructions on how to use the cam lock system.
2.4. Do not over tighten bolts.
8
(H2) x 8
cam bolt
(H3) x 8
cam
9
step 3: attach xed shelves to partition panel
(H1) x 4
wooden dowel
(H2) x 4
cam bolt
(H3) x 4
cam
3.1. Carefully tap small wooden dowels into place in partition panel. Leave 1/2” of the dowels sticking out.
3.2. Screw-In cam bolts must be screwed down ush in partition panel.
3.3. Refer to page 6 for instructions on how to use the cam lock system.
3.4. Do not over tighten bolts.
nished edge
10
step 4: attach bottom panel
(H1) x 2
wooden dowel
(H2) x 2
cam bolt
(H3) x 2
cam
4.1. Carefully tap small wooden dowels into place in bottom panel. Leave 1/2” of the dowels sticking out.
4.2. Screw-In cam bolts must be screwed down ush in bottom panel.
4.3. Refer to page 6 for instructions on how to use the cam lock system.
4.4. Do not over tighten bolts.
front
(H1) x 2
wooden dowel
(H2) x 2
cam bolt
(H3) x 2
cam
step 5: attach right side panel
(H1) x 4
wooden dowel
(H2) x 6
cam bolt
(H3) x 4
cam
5.1. Carefully tap small wooden dowels into place in right side panel. Leave 1/2” of the dowels sticking out.
5.2. Screw-In cam bolts must be screwed down ush in right side panel.
5.3. Refer to page 6 for instructions on how to use the cam lock system.
5.4. Do not over tighten bolts.
11
front
(H1) x 4
wooden dowel
(H2) x 6
cam bolt
(H3) x 4
cam
5.1. Carefully tap small wooden dowels into place in right side panel. Leave 1/2” of the dowels sticking out.
step 6: attach upper front rail and upper rear rail
(H1) x 2
wooden dowel
(H3) x 2
cam
6.1. Carefully tap small wooden dowels into place in right side panel. Leave 1/2” of the dowels sticking out.
6.2. Refer to page 6 for instructions on how to use the cam lock system.
6.3. Do not over tighten bolts.
12
step 7: attach left side panel
(H1) x 6
wooden dowel
(H2) x 6
cam bolt
(H3) x 6
cam
7.1. Carefully tap small wooden dowels into place in left side panel. Leave 1/2” of the dowels sticking out.
7.2. Screw-In cam bolts must be screwed down ush in left side panel.
7.3. Refer to page 6 for instructions on how to use the cam lock system.
7.4. Do not over tighten bolts.
13
(H1) x 6 (H2) x 6 (H3) x 6
wooden dowel cam bolt cam
step 8: attach top panel
(H1) x 12
wooden dowel
(H2) x 10
cam bolt
(H3) x 10
cam
8.1. Carefully tap small wooden dowels into place in top panel. Leave 1/2” of the dowels sticking out.
8.2. Screw-In cam bolts must be screwed down ush in top panel.
8.3. Refer to page 6 for instructions on how to use the cam lock system.
8.4. Do not over tighten bolts.
14
front front
(H1) x 12 (H2) x 10 (H3) x 10
wooden dowel cam bolt cam
Carefully tap small wooden dowels into place in top panel. Leave 1/2” of the dowels sticking out.
8.2. Screw-In cam bolts must be screwed down ush in top panel.
8.3. Refer to page 6 for instructions on how to use the cam lock system.
8.4. Do not over tighten bolts.
8.1.
step 9: attach back panel
Begin by installing all of the screws along one
edge of the back panel. Next, using a square
or tape measure, make sure that the cabinet is
square. (If using a tape measure, the distance
from one corner, diagonally to the other corner
should be the same in both directions.) If not,
apply gentle pressure to the diagonally opposite
corners to shift case into alignment. Re-measure
to ensure equal distances. Install the remaining
screws, starting with the corners.
(H4) x 20
short pan head
screw
9.1. Make sure the short pan head screws go through the pre-drilled holes properly.
9.2. Do not over tighten screws.
15
hole for anti-tip
step 10: assemble drawer box
(H1) x 4
wooden dowel
(H2) x 8
cam bolt
(H3) x 8
cam
(H7) x 8
at head screw
10.1. Carefully tap small wooden dowels into place in drawer front. Leave 1/2” of the dowels sticking out.
10.2. Screw-In cam bolts must be screwed down ush in drawer front.
10.3. Refer to page 6 for instructions on how to use the cam lock system.
10.4. Insert drawer bottom into grooves located on drawer sides and drawer front.
10.5. Align long at head screws with pre-drilled holes to attach drawer back to drawer sides. Do not over tighten screws.
16
step 11: attach knobs and install drawers
(H5) x 2
knob
(H6) x 2
knob bolt
11.1. Align knob bolts with pre-drilled holes to attach knob to drawer front. Do not over tighten bolts.
11.2. Carefully align glides on drawer sides with glides on cabinet to install drawer.
17
step 12: install anti-tip kit
(H10) x 1
long pan head
screw
(H12) x 1
wall strap
(H9) x 1
wall anchor
(H11) x 1
wall screw
(H8) x 2
washer
Position against wall
Mark position of strap hole on wall
Drill 1/4” hole
Tap in wall anchor
Fasten anti-tip strap with wall screw
provided
18
(H11)
(H12)
(H10)
(H8)
(H9)
(H8)
Fasten anti-tip strap with wall screw
provided
Mark position of strap hole on wall

  
 

•   
•    
•    
  
 
•     
 
•    

•     


 
 

 
     
  

   
  
  
 
 I
 
1. WARNING - Death or serious injury may occur when children climb on audio
and/ or video equipment furniture. A remote control or toys placed on the furnishing
may encourage a child to climb on the furnishing and as a result the furnishing may
tip over on to the child.
2. WARNING - Relocating audio and/or video equipment to furniture not specically
designed to support audio and/or video equipment may result in death or serious
injury due to the furnishing collapsing or over turning onto a child.
3. This unit has been designed for the weight shown. Exceeding this recommended
weight could result in excessive “sagging” of the top. Extreme overloading can
cause failure of the top and possible injury.
4. Furniture Care Instructions: Dust with a clean, lint-free cloth. Use a spray
furniture polish as needed.
 A

19
holds at panel TVs
up to 44” or 50 lbs.
30 lbs.
40 lbs.
QUESTIONS?
Just call 1-855-MYTGTHOME (855-698-4846) for parts and service. For faster service, have the style number and DPCI number ready when calling.
© 2018 Target. The Bullseye Design is a trademark of Target Brands, Inc. All rights reserved.

This manual suits for next models

5

Other Target Indoor Furnishing manuals
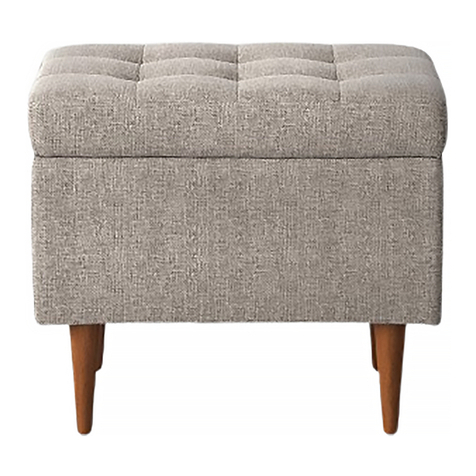
Target warwick FKWWLBCBBR User manual

Target

Target warwick FKWWLBCBBR User manual

Target 5948307T User manual

Target

Target 5948307T User manual

Target Halsted FWS80476 User manual

Target

Target Halsted FWS80476 User manual

Target windham accent cabinet User manual

Target

Target windham accent cabinet User manual

Target DSBSCDSKES User manual

Target

Target DSBSCDSKES User manual

Target osa DA7874 User manual

Target

Target osa DA7874 User manual

Target Fairglen TGFGMEDIWH User manual

Target

Target Fairglen TGFGMEDIWH User manual

Target Paulo TGELSDTBWH User manual

Target

Target Paulo TGELSDTBWH User manual

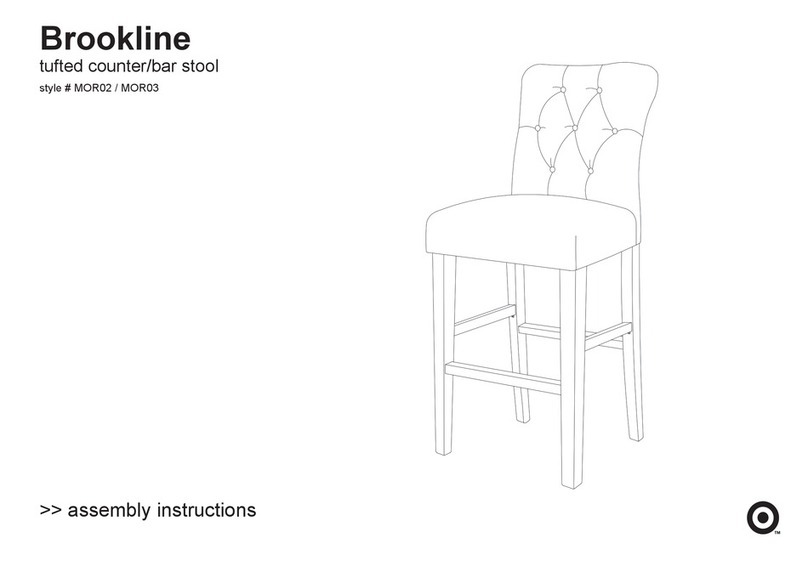
Target Brookline MOR02 User manual

Target

Target Brookline MOR02 User manual
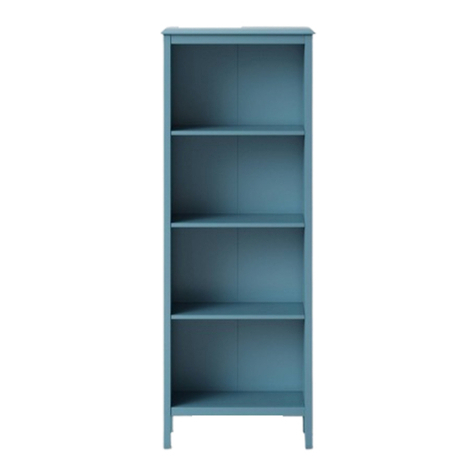
Target Hadley FKVSBC4SWH User manual

Target

Target Hadley FKVSBC4SWH User manual

Target JY-160204 User manual

Target

Target JY-160204 User manual

Target Bullseye Design 249-01-5337 User manual

Target

Target Bullseye Design 249-01-5337 User manual

Target CAHRZLBKES User manual

Target

Target CAHRZLBKES User manual
Target Bullseye SH LPB100PAL1 User manual

Target

Target Bullseye SH LPB100PAL1 User manual

Target hadley FKVSCB2DWH User manual

Target

Target hadley FKVSCB2DWH User manual

Target BK3SHLFXEB User manual

Target

Target BK3SHLFXEB User manual

Target 32 ARCHES CABINET User manual

Target

Target 32 ARCHES CABINET User manual

Target Paulo Open Desk TGELODSKWH User manual

Target

Target Paulo Open Desk TGELODSKWH User manual

Target 249-14-0040 User manual

Target

Target 249-14-0040 User manual

Target Foxborough FTS30700B User manual

Target

Target Foxborough FTS30700B User manual

Target verken UPSMSTKD01 User manual

Target

Target verken UPSMSTKD01 User manual

Target Britanna FRS70595LF User manual

Target

Target Britanna FRS70595LF User manual

Target wiley TGZLMEDXWH User manual

Target

Target wiley TGZLMEDXWH User manual

Target Halsted FTS81068C User manual

Target

Target Halsted FTS81068C User manual

Popular Indoor Furnishing manuals by other brands

Habitat Tedd 827113 manual

Habitat

Habitat Tedd 827113 manual

SOUTHERN WOLF SW1 Product Instruction

SOUTHERN WOLF

SOUTHERN WOLF SW1 Product Instruction

Nurture& The Changing Table Topper instruction manual

Nurture&

Nurture& The Changing Table Topper instruction manual

Dorel Ameriwood Industries 5284012PCOM manual

Dorel

Dorel Ameriwood Industries 5284012PCOM manual

StyleWell SK19304C1r1-V Use and care guide

StyleWell

StyleWell SK19304C1r1-V Use and care guide

fantastic furniture Cloud Dresser Mirror Set 1 Drawer manual

fantastic furniture

fantastic furniture Cloud Dresser Mirror Set 1 Drawer manual

siena GARDEN Porto 254.993 Assembly instruction

siena GARDEN

siena GARDEN Porto 254.993 Assembly instruction

PrimeCables CAB-ET101 installation guide

PrimeCables

PrimeCables CAB-ET101 installation guide

Kohl's SONOMA PRESIDIO LOVESEAT GLIDER 61SRR4504 Assembly instructions

Kohl's

Kohl's SONOMA PRESIDIO LOVESEAT GLIDER 61SRR4504 Assembly instructions

Till-Hilft 88131.511 quick start guide

Till-Hilft

Till-Hilft 88131.511 quick start guide

Kinfine HOMEPOP K6908 Assembly instructions

Kinfine

Kinfine HOMEPOP K6908 Assembly instructions

Monarch Specialties I 2760 Assembly instructions

Monarch Specialties

Monarch Specialties I 2760 Assembly instructions

ExBrite 13MC2432V4LX Installation and operating manual

ExBrite

ExBrite 13MC2432V4LX Installation and operating manual

DITALIA BA-120 Assembly manual

DITALIA

DITALIA BA-120 Assembly manual

Grohe Axor Citterio Lavatory Mixer 39010XX1 Specification sheet

Grohe

Grohe Axor Citterio Lavatory Mixer 39010XX1 Specification sheet

Onespace 50-LD01ESHSHLF Assembly instructions

Onespace

Onespace 50-LD01ESHSHLF Assembly instructions

Furniture of America Sarina CM4309E Assembly instructions

Furniture of America

Furniture of America Sarina CM4309E Assembly instructions

Ameriwood HOME Aldridge 8637337EBL Instruction booklet

Ameriwood HOME

Ameriwood HOME Aldridge 8637337EBL Instruction booklet

manuals.online logo
manuals.online logoBrands
  • About & Mission
  • Contact us
  • Privacy Policy
  • Terms and Conditions

Copyright 2025 Manuals.Online. All Rights Reserved.