manuals.online logo
Brands
  1. Home
  2. •
  3. Brands
  4. •
  5. Tennsco
  6. •
  7. Indoor Furnishing
  8. •
  9. Tennsco 1842 User manual

Tennsco 1842 User manual

RETAIN INSTRUCTIONS FOR FUTURE REFERENCE!
PK-2570110
ASSEMBLY INSTRUCTIONS & PARTS MANUAL #2570110
Tennsco Corp., Dickson, TN 37056-1888 • (615) 446-8000
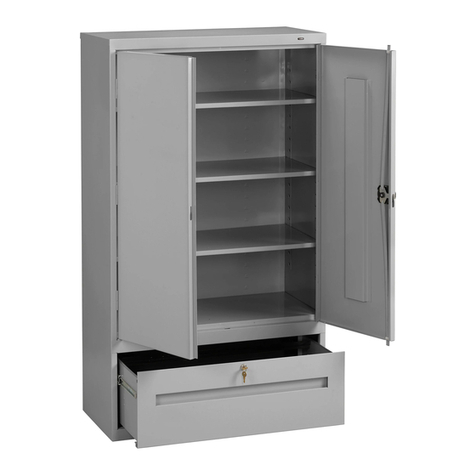
STORAGE CABINET, 42" High
Models 1842 & 2442 Counter-Height
LIMITED WARRANTY
Tennsco warrants goods purchased hereunder to be free of defects in materials and workmanship for a period of one (1) year from the date of shipment,
hereunder. This warranty shall not apply in the event goods are damaged as a result of misuse, abuse, neglect, accident, improper application, modification
or repair by persons not authorized by Seller, where goods are damaged during shipment, or where the date stamps on the goods have been defaced, modified
or removed. UNLESS CONSIDERED UNENFORCEABLE OR UNLAWFUL UNDER APPLICABLE LAW:
a. ALL IMPLIED WARRANTIES, INCLUDING BUT NOT LIMITED TO WARRANTIES OR MERCHANTABILITY AND FITNESS FOR A PARTICULAR
PURPOSE ARE HEREBY EXCLUDED:
b. BUYERS REMEDY, IF ANY, FOR ANY DEFECTIVE GOODS SHALL BE LIMITED TO A REFUND BY SELLER OR REPLACEMENT OF THE GOODS
AT SELLER’S OPTION, AND SHALL IN NO EVENT INCLUDE DAMAGES OF ANY KIND, WHETHER INCIDENTAL, CONSEQUENTIAL OR OTHERWISE.
NO GOODS ACCEPTED FOR RETURN WITHOUT PRIOR APPROVAL. Seller shall have the right to inspect any goods claimed to be defective at Buyers
place of business or require Buyer to return the goods to Seller for inspection on Seller’s premises. Transportation charges covering returned goods will
be borne by Seller only if such goods are proven to be defective, are covered by this warranty and are returned within the warranty period stated above.
Mailing Address: TENNSCO CORP. Shipping Address: TENNSCO CORP.
P.O. Box 1888 201 Tennsco Drive
Dickson, TN 37056-1888 Dickson, TN 37055
(615) 446-8000 (800) 251-8184 (615) 446-8000 (800) 251-8184
GENERAL SAFETY INFORMATION: Some parts may have sharp edges. CARE must be taken when handling various pieces
to avoid injury. For safety, wear a pair of work gloves when assembling or performing any maintenance on your cabinet.
Congratulations on your purchase of a
Counter High Storage Cabinet from
Tennsco! Our cabinets provide abundant
storage space; the Model 1842
is 36"w x
18"d
x 42" tall, while the Model 2442 is
36"w x 24"d x 42" tall. Our cabinets are
rigidly constructed to give you
years of
dependable and
efficient service. Nylon
lock-bar guides ensure smooth,quiet
operation. A locking handle with two keys
provides a three-point locking system for
added security. Sturdy adjustable shelves
provide exceptional strength — up to
150 lbs. per shelf (evenly distributed) on the
18" deep cabinet and up to 200 lbs. per
shelf (evenly distributed) on the 24" deep
cabinet. And our baked-on powder finish adds
even more durability.
Tools needed: An 11/32" nut driver (provided free with unit); a hammer; and a flathead screwdriver.
Two people recommended for installation. Approximate assembly time: 15 to 25 minutes.
INSTALLATION OF 42"H STORAGE CABINET
1. The reference numbers used throughout this
sheet refer to the illustration on the back cover.
This is to help you to identify the various parts as
they are mentioned.
2.
Place the back (Ref.
No.
1) on a
padded
surface
with
the flanges
facing upward.
6. Attach the door frame assembly (Ref. No. 6) to the
cabinet body by placing it over the sides. Align the
weld studs with the slots in the left and right sides,
and attach using four nuts on each side.
3. Attach the left side (Ref. No. 2) to the back by
placing flange (A) around the back and bolting the
back and side together with four bolts and nuts
(Ref. Nos. 16 & 17). Be sure that the lances
on all shelf adjustment
strips (B) point in the
same direction.
5. Place the shelf (Ref. No. 5) into the shelf adjusting
strips somewhere near the center of the cabinet, to
hold the sides in an
upright position
while installing the
door frame assem-
bly and top. Be
sure the channeled
edge of the
shelf is to
the front.
(Don't be
too con-
cerned
about the
position of
the shelf at this
point. You may
move the shelf up or
down as desired later.) Make
sure that the rear and sides of the shelf aref well
seated into all four lances.
NOTE: You may use a flathead screwdriver to
slighty pry the lances outward if they are too tight
to insert the shelf edges into.
Flange goes
under back
A
All lances
point UP on
the back and
on both sides.
B
4. Attach the right side (Ref. No. 3) to the back in
the same manner as you did in step 3, again
making sure that the
lances on the shelf adjust-
ment strips are pointed in
the same direction as
those on the back
and left
side.
Channeled edge of shelf
is toward front of unit.
2. Turn the handle to the
open position, and place
the locking cam (Ref. No. 9) over the
square shank of the door handle. The
latch must be facing
downward as shown.
1. Place the locking handle (Ref. No. 8) on the
right hand door and
fasten with two
11/32"
hex head bolts and
lockwashers (Ref. No. 14).
Tighten with the provided
nut driver.
Handle/LockingSystemInstallationInstructions
4. Place the locking
cam retainer (Ref. No. 12)
over the square shank of
the door handle. Tap on
the edges of the cam
retainer with a hammer
until retainer sits firmly
against the locking cam.
3. With the handle
still in the open
position, hook the locking bars (Ref.
No. 10) to the locking cam (see "A" at
left). Then, hold the lock bars in
position while sliding the nylon lock
bar guide inserts (Ref. No. 11) over
the lock bar ends
and through the
door slots (see "B"
at left).
B
B
A
5. Attach the "dummy"
handle (Ref. No. 13) to
the left door
11/32"
hex-
head bolts and
lockwashers (Ref. No. 17).
8. Open the doors and place the bottom (Ref. No. 4)
in the lowest notch of the shelf adjusting strips on
the sides and back. The flange with the two holes
must face the front, and fits over the base plate of
the frame.
9. Cabinet must be level for doors
to open and close properly.
Insert a flathead screwdriver
into the two leveling holes and
turn the screws until the
cabinet is level.
7. Set the unit upright and attach the top by inserting
the weld-studs
into the holes
provided on
the left and
right sides.
The flange
should fit
over the
outside of
the rear of
the cabinet,
and theoff-
set should
be toward
the front.
Bolt
together by
attaching
nuts to the
weld studs
and inserting
bolts and nuts through the
holes along the back edge.
10. If center shelf is not at desired
level, move up or down as
needed.
Tennscomakeseveryefforttoensurethatallunitsshipcompletewithallpartsandarriveundamaged.However,should
your unit contain missing or damaged parts, replacements may be obtained directly from us. To obtain proper
replacement parts follow the instructions below, or fill out the form at www.tennsco.com/partsorder.html.
TO OBTAIN PROPER REPLACEMENT PARTS, PLEASE PROVIDE THE FOLLOWING INFORMATION:
(This information may be sent to us online using the form at www.tennsco.com/replacement.cfm)


Model Number (1842 or 2442) 

Purchase Date


Description of part(s) needed and part 

Your company name
number(s) as shown in Parts List (above) 

Contact person's name


Color (i.e. Champagne, Medium Grey, etc.) 

Who the product was purchased from


Was item missing, or was it damaged? 

Your shipping address
Tennsco Corp., P.O. Box 1888, Dickson, TN 37056-1888 Customer Service: (866) 446-8686 Fax: (866) 445-7260
If requesting parts by telephone, ask for customer service and have as much of the above information ready as possible.
REPLACEMENTPARTS
Cam Retainer
(Ref. No. 12)
Locking Cam
(Ref. No. 9)
Locking Handle
with Keys
(Ref. No. 8)
REF. NO. PART NO.
DESCRIPTION
1 Back panel 1 842BA 2 842BA
2 Left side 1 218LS 1 224LS
3 Right side 1 218RS 1 224RS
4 Bottom 1 043BO 1 044BO
5 Shelf 2 301 2 302
6 Door and frame assembly 1 2442FA 1 2442FA
7 Top 1 978CT 1 974CT
8 Locking Handle with keys & hardware 1 043LH 1 043LH
9 Locking cam* 1 944LC 1 944LC
10 Locking bar set 1 978LB 1 978LB
11 Locking bar guide insert (nylon)* 2 944GI 2 944GI
12 Cam retainer* 1 944CR 1 944CR
13 Dummy Handle 1 043DH 1 043DH
14 11/32 hex head bolt w/lockwasher* (not shown above) 4** 4**
15 Tennsco nut driver 1 TOOL-2 1 TOOL-2
16 #8-32 x 3/8"bolts* (not shown above) 15 ** 15 **
17 #8-32 nuts* (not shown above) 31 ** 31 **
*Included in Ref. No. 8, locking handle with keys and hardware (Part No. 043LH). **Available Locally
QTY.
Locking Bar Guide
NylonInsert
(Ref. No. 11)
Locking Bar Set
(Ref. No. 10)
Tennsco Nut Driver
(Ref. No. 15)
1842 (18"d cabinet) 2442 (24"d cabinet)
QTY. PART NO.
Right Side
(Ref. No. 3)
Left Side
(Ref. No. 2)
Top
(Ref. No. 7)
Back Panel
(Ref. No. 1)
Bottom
(Ref. No. 4)
Dummy
Handle
(Ref. No. 13)
Door and Frame
Assembly
(Ref. No. 8)

This manual suits for next models

1

Other Tennsco Indoor Furnishing manuals

Tennsco 3018 Instruction Manual

Tennsco

Tennsco 3018 Instruction Manual

Tennsco J2478C Instruction Manual

Tennsco

Tennsco J2478C Instruction Manual

Tennsco J1878A-N-W Instruction Manual

Tennsco

Tennsco J1878A-N-W Instruction Manual

Tennsco RGL-1236S User manual

Tennsco

Tennsco RGL-1236S User manual

Tennsco SR-59 Instruction Manual

Tennsco

Tennsco SR-59 Instruction Manual

Tennsco Imperial Shelving User manual

Tennsco

Tennsco Imperial Shelving User manual

Tennsco 4218 Instruction Manual

Tennsco

Tennsco 4218 Instruction Manual

Tennsco B-3000 Instruction Manual

Tennsco

Tennsco B-3000 Instruction Manual

Tennsco Q Series Instruction Manual

Tennsco

Tennsco Q Series Instruction Manual

Tennsco Standard Combination Cabinet 7220 Instruction Manual

Tennsco

Tennsco Standard Combination Cabinet 7220 Instruction Manual

Tennsco JUMBO Instructions for use

Tennsco

Tennsco JUMBO Instructions for use

Tennsco WELDED 3-PERSON LOCKER Instruction Manual

Tennsco

Tennsco WELDED 3-PERSON LOCKER Instruction Manual

Tennsco Capstone Shelving Units Instruction Manual

Tennsco

Tennsco Capstone Shelving Units Instruction Manual

Tennsco Standard Combination Cabinet CVD7214 Instruction Manual

Tennsco

Tennsco Standard Combination Cabinet CVD7214 Instruction Manual

Tennsco Jumbo Storage Cabinet J2478SU Instruction Manual

Tennsco

Tennsco Jumbo Storage Cabinet J2478SU Instruction Manual

Tennsco STK-151872-1 Instruction Manual

Tennsco

Tennsco STK-151872-1 Instruction Manual

Tennsco 3070 Instruction Manual

Tennsco

Tennsco 3070 Instruction Manual

Tennsco DWR-4218 Instruction Manual

Tennsco

Tennsco DWR-4218 Instruction Manual

Tennsco DWR-6618 Instruction Manual

Tennsco

Tennsco DWR-6618 Instruction Manual

Tennsco 1442 User manual

Tennsco

Tennsco 1442 User manual

Tennsco L&T Hinged Door Kit Instruction Manual
Tennsco

Tennsco L&T Hinged Door Kit Instruction Manual

Tennsco B-8400 User manual

Tennsco

Tennsco B-8400 User manual

Tennsco Z-Line User manual

Tennsco

Tennsco Z-Line User manual
Tennsco EB-12 Instruction Manual

Tennsco

Tennsco EB-12 Instruction Manual

Popular Indoor Furnishing manuals by other brands

Die Hausmarke 711 quick start guide

Die Hausmarke

Die Hausmarke 711 quick start guide

Steelcase Elective Elements Storage manual

Steelcase

Steelcase Elective Elements Storage manual

Sunnydaze Decor SIGONELLA CAST ALUMINUM TABLE YUK-267 Assembly instructions

Sunnydaze Decor

Sunnydaze Decor SIGONELLA CAST ALUMINUM TABLE YUK-267 Assembly instructions

Belair ACTIVATE instruction manual

Belair

Belair ACTIVATE instruction manual

Tenera Continuum installation instructions

Tenera

Tenera Continuum installation instructions

Gami H66-MOKA 250 Assembly instructions

Gami

Gami H66-MOKA 250 Assembly instructions

Dormakaba UNIVERSAL GK 41 Mounting instructions

Dormakaba

Dormakaba UNIVERSAL GK 41 Mounting instructions

HOMCOM 831-337V82 manual

HOMCOM

HOMCOM 831-337V82 manual

Hanover Glasbodenpaneel 100 Assembly instructions

Hanover

Hanover Glasbodenpaneel 100 Assembly instructions

THB 4P manual

THB

THB 4P manual

Otto Box-System Nightfall 695862 Assembly instructions

Otto

Otto Box-System Nightfall 695862 Assembly instructions

Brizo 69550 quick guide

Brizo

Brizo 69550 quick guide

RTA Techni Mobili 2706A Assembly instruction

RTA

RTA Techni Mobili 2706A Assembly instruction

CONFORAMA MILIS 2D Assembling instructions

CONFORAMA

CONFORAMA MILIS 2D Assembling instructions

Justwise Archie 599/7259 Assembly instructions

Justwise

Justwise Archie 599/7259 Assembly instructions

Plinth 2000 How to replace

Plinth

Plinth 2000 How to replace

LDI Safco 1874 Assembly instructions

LDI

LDI Safco 1874 Assembly instructions

Furniture of America FGI-18603C21-M Assembly instructions

Furniture of America

Furniture of America FGI-18603C21-M Assembly instructions

manuals.online logo
manuals.online logoBrands
  • About & Mission
  • Contact us
  • Privacy Policy
  • Terms and Conditions

Copyright 2025 Manuals.Online. All Rights Reserved.