manuals.online logo
Brands
  1. Home
  2. •
  3. Brands
  4. •
  5. Tennsco
  6. •
  7. Indoor Furnishing
  8. •
  9. Tennsco BK6-121512-3 Instruction Manual

Tennsco BK6-121512-3 Instruction Manual

RETAIN INSTRUCTIONS FOR FUTURE REFERENCE!
REPLACEMENT PARTS
We make every effort to ensure that all units ship complete and arrive undamaged. However, should your
unit contain missing or damaged parts, replacements may be obtained directly from us. To obtain proper
replacementparts,followtheinstructionsbelow,orfillouttheformatwww.tennsco.com/partsorder.html.
G
G
G
G
TO OBTAIN PROPER REPLACEMENT PARTS, PLEASE PROVIDE THE FOLLOWING INFORMATION:
Model Number Purchase Date
Description of part(s) needed and part Your company name
number(s) as shown in Parts List (above) Contact person's name
Color (i.e. Medium Grey, Sand, etc.) Company the product was purchased from
Was item missing, or was it damaged?
Tennsco Corp., P.O. Box 1888, Dickson, TN 37056-1888 E-mail address: [email protected]
Customer Service: (866) 446-8686 Fax: (866) 445-7260
If requesting parts by telephone, ask for customer service and have as much of the above information ready as possible.
ASSEMBLY INSTRUCTIONS & PARTS MANUAL #1111202
Tennsco Corp., Dickson, TN 37056-1888 • (615) 446-8000
UNASSEMBLED BOX LOCKERS
THREE WIDE UNIT
LIMITEDWARRANTY
Tennsco warrants goods purchased hereunder to be free of defects in materials and workmanship for a period of one (1) year from the date of shipment,
hereunder. This warranty shall not apply in the event goods are damaged as a result of misuse, abuse, neglect, accident, improper application, modification
or repair by persons not authorized by Seller, where goods are damaged during shipment, or where the date stamps on the goods have been defaced,
modified or removed. UNLESS CONSIDERED UNENFORCEABLE OR UNLAWFUL UNDER APPLICABLE LAW:
a. ALL IMPLIED WARRANTIES, INCLUDING BUT NOT LIMITED TO WARRANTIES OR MERCHANTABILITY AND FITNESS FOR A PARTICULAR
PURPOSE ARE HEREBY EXCLUDED:
b. BUYERS REMEDY, IF ANY, FOR ANY DEFECTIVE GOODS SHALL BE LIMITED TO A REFUND BY SELLER OR REPLACEMENT OF THE GOODS
AT SELLER’S OPTION, AND SHALL IN NO EVENT INCLUDE DAMAGES OF ANY KIND, WHETHER INCIDENTAL, CONSEQUENTIAL OR
OTHERWISE.
NO GOODS ACCEPTED FOR RETURN WITHOUT PRIOR APPROVAL. Seller shall have the right to inspect any goods claimed to be defective at Buyers
place of business or require Buyer to return the goods to Seller for inspection on Seller’s premises. Transportation charges covering returned goods will
be borne by Seller only if such goods are proven to be defective, are covered by this warranty and are returned within the warranty period stated above.
TENNSCO Corp., P.O. BOX 1888, DICKSON, TN 37056-1888
(615) 446-8000 or (866) 446-8686 (toll free)
Website: www.tennsco.com E-mail: [email protected]
PARTNO.
DESCRIPTION
QUANTITY
FOR ONE
3-WIDE 5 TIER
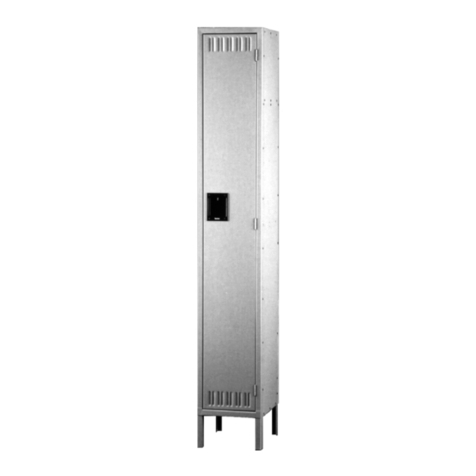
Tennsco box lockers are designed for use in
schools, hospitals, businesses, and institutions
where space is limited. They are highly suitable
for securing small personal items such as books,
shoes, purses, etc. Five or six tier, single and
three wide units are available in 12" and 15"
widths and 12", 15" and 18" depths with or
without legs.
Basic Construction:
All models are constructed of 16 gauge steel frames
and doors and 24 gauge body components. Doors
are louvered for ventilation. Heavy gauge steel
construction with baked-on powder coat finish
assures you years of trouble-free service, even under
the most demanding situations. Each door has a
finger tab pull with a built-in padlock hasp. Optional
built-in key locks or combination locks may be
installed. Other options available are front bases, end
bases and sloping tops.
GENERAL SAFETY INFORMATION
Some parts may have sharp edges. CARE must be
taken when handling various pieces to avoid injury. For
safety, wear a pair of work gloves when assembling or
performing any maintenance on lockers.
1 Back LSTB-wwhh F33
2 Left side LBSL-ddhh F22
3 Rear leg -- leg version unit only LRL-1 4 4
4 Shelf ESL-wwdd F12 15
5 Top/Bottom LTB-wwdd F66
6 Right side LBSR-ddhh F22
7 Door frame assembly LBFA-wwhh-x FF 33
8 Locker Door LB-wwhh F15 18
9 Number plate and clear label cover LNP-1 N15 18
10 Push plug LPP-1 N30 36
11 Finger Pull LFP-1 15 18
12 Tennsco 11/32" nut driver TOOL-2 N11
13 Bolts and Nuts #8-32 X 1/2" ---------- N136 144
REF.NO.
FPart No. is composed of prefix shown plus combination of opening width = ww, depth = dd and height = hh.
FF Door frame assemblies require a further suffix (x) of either 1 or A. "1" indicates frame with legs; "A" indicates frame
without legs. For example: A door frame assembly for locker BK6-121812-1 with legs would be Part No. LBFA-1272-1.
The doorassembly alone without the frame would be Part No. LBD-1212 for the same locker.
NThese items are included in the Hardware pack model# HWBD53- 5 tier locker, # HWBD63- 6 tier locker.
G
G
G
G
12
1
8
2
6
5
5
4
4
4
4
4
3
789
10
11
FIGURE 1 DOOR DETAIL
QUANTITY
FOR ONE
3-WIDE 6 TIER
5.Bolt right side (Ref. No. 6) to the back
so that side flange fits around back,
then attach side to top, bottom and
shelves. Use 23 bolts and
nuts (unit withoutlegs)
to complete this step.
6.If the locker has legs, insert the
leg into the corner between
the bottom and the side as
shown. Bolt the leg to
the side using two
bolts and
nuts per
leg.
7.Place frame
and door
assemblies (Ref. Nos.
7 & 8) over the locker
body. Make certain that body
sides are inside frames not between the frames.
Attach top to frame header and the bottom to frame sill
(one bolt each).
Left side
If leg version do
not bolt through
bottomtwo
holesyet.
Top
Bottom
Door & Frame assembly
slots
Back
Top
Left side
3. Bolt left side (Ref. No. 2)
to the back so that sideflange fits
around back using 7 bolts and nuts
(nuts to the inside); use 9 if the locker
does not have legs.
2.Place back (Ref. No. 1) on a
protected flat
surface so that
the flanges face upward. If
available, place the unit on a pair of "saw
horses" for easier assembly. Keep all parts
level and square during assembly. Make sure
all parts are aligned properly before tightening
the bolts and nuts.
4. Next bolt top, bottom (Ref.No.5)
and shelves (Ref.No.4) to back
and left side panel using 4 bolts and nuts each.
Next bolt an intermediate side and back panel to the
flange on the back of the first locker in 7 places
(9 if no legs). Next attach a top, bottom and shelves to the first
intermediate side and back. These will share bolts with the parts
on either side of them as shown in detail view. Next attach
remaining intermediate side and back to flange of second back.
Attach remaining top, bottom and shelves to the intermediate side.
Care must be taken to assure that lockers
are set plumb and level before anchoring.
9.Stand unit upright and
place in desired location.
Remove temporary bolts
in frames and bolt to
adjacent units together
through frames.
NOTE: If the temporary
bolts are not removed
before the frames are
joined side by side, the
frames will have a 1/8"
gap between them.
10.Anchor units to wall or floor. The units are not
intended to stand free and may topple if not
secured. (Units standing back to back should
be bolted back to back.)
Right side
Top of
part
Bottom
frame
header
frame
sill
header
bolt hole
ASSEMBLY OF BOX LOCKERS -- THREE WIDE UNIT
Tools required: 11/32" nut driver (11/32" socket may be substituted).
Estimated assembly time for two people is 30 min.
Intermediate
side
8.If joining a 3-wide unit beside another unit,
temporarily install a bolt and nut into the third and
sixth holes down from the top of the outer frame(s)
that will be joined to the adjacent locker frame(s).
The center locker frame can be bolted complete. If
locker is just a stand alone three wide unit finish
attaching the frames using 38 bolts and nuts.
Check and tighten all permanent bolts.
1.All reference numbers refer to the illustrations in Figure 1, the door
detail, and the chart on the back cover. This is to help you identify the
various parts as they are mentioned. Unpack all parts, locate and
identify the left and right sides and seperate them. The top of the sides
and back panel can be determined by the three holes closest to the
end as shown.
Shelf
Shelf
Shelf
Shelf
Shelf
11.If units are not pre-numbered, optional number
plates and plastic cover (Ref. No. 9) may be
attached using push plugs (Ref. No. 10).
Custom number can be ordered from factory.
RETAIN INSTRUCTIONS FOR FUTURE REFERENCE!
REPLACEMENT PARTS
We make every effort to ensure that all units ship complete and arrive undamaged. However, should your
unit contain missing or damaged parts, replacements may be obtained directly from us. To obtain proper
replacementparts,followtheinstructionsbelow,orfillouttheformatwww.tennsco.com/partsorder.html.
G
G
G
G
TO OBTAIN PROPER REPLACEMENT PARTS, PLEASE PROVIDE THE FOLLOWING INFORMATION:
Model Number Purchase Date
Description of part(s) needed and part Your company name
number(s) as shown in Parts List (above) Contact person's name
Color (i.e. Medium Grey, Sand, etc.) Company the product was purchased from
Was item missing, or was it damaged?
Tennsco Corp., P.O. Box 1888, Dickson, TN 37056-1888 E-mail address: [email protected]
Customer Service: (866) 446-8686 Fax: (866) 445-7260
If requesting parts by telephone, ask for customer service and have as much of the above information ready as possible.
ASSEMBLY INSTRUCTIONS & PARTS MANUAL #1111202
Tennsco Corp., Dickson, TN 37056-1888 • (615) 446-8000
UNASSEMBLED BOX LOCKERS
THREE WIDE UNIT
LIMITEDWARRANTY
Tennsco warrants goods purchased hereunder to be free of defects in materials and workmanship for a period of one (1) year from the date of shipment,
hereunder. This warranty shall not apply in the event goods are damaged as a result of misuse, abuse, neglect, accident, improper application, modification
or repair by persons not authorized by Seller, where goods are damaged during shipment, or where the date stamps on the goods have been defaced,
modified or removed. UNLESS CONSIDERED UNENFORCEABLE OR UNLAWFUL UNDER APPLICABLE LAW:
a. ALL IMPLIED WARRANTIES, INCLUDING BUT NOT LIMITED TO WARRANTIES OR MERCHANTABILITY AND FITNESS FOR A PARTICULAR
PURPOSE ARE HEREBY EXCLUDED:
b. BUYERS REMEDY, IF ANY, FOR ANY DEFECTIVE GOODS SHALL BE LIMITED TO A REFUND BY SELLER OR REPLACEMENT OF THE GOODS
AT SELLER’S OPTION, AND SHALL IN NO EVENT INCLUDE DAMAGES OF ANY KIND, WHETHER INCIDENTAL, CONSEQUENTIAL OR
OTHERWISE.
NO GOODS ACCEPTED FOR RETURN WITHOUT PRIOR APPROVAL. Seller shall have the right to inspect any goods claimed to be defective at Buyers
place of business or require Buyer to return the goods to Seller for inspection on Seller’s premises. Transportation charges covering returned goods will
be borne by Seller only if such goods are proven to be defective, are covered by this warranty and are returned within the warranty period stated above.
TENNSCO Corp., P.O. BOX 1888, DICKSON, TN 37056-1888
(615) 446-8000 or (866) 446-8686 (toll free)
Website: www.tennsco.com E-mail: [email protected]
PARTNO.
DESCRIPTION
QUANTITY
FOR ONE
3-WIDE 5 TIER
Tennsco box lockers are designed for use in
schools, hospitals, businesses, and institutions
where space is limited. They are highly suitable
for securing small personal items such as books,
shoes, purses, etc. Five or six tier, single and
three wide units are available in 12" and 15"
widths and 12", 15" and 18" depths with or
without legs.
Basic Construction:
All models are constructed of 16 gauge steel frames
and doors and 24 gauge body components. Doors
are louvered for ventilation. Heavy gauge steel
construction with baked-on powder coat finish
assures you years of trouble-free service, even under
the most demanding situations. Each door has a
finger tab pull with a built-in padlock hasp. Optional
built-in key locks or combination locks may be
installed. Other options available are front bases, end
bases and sloping tops.
GENERAL SAFETY INFORMATION
Some parts may have sharp edges. CARE must be
taken when handling various pieces to avoid injury. For
safety, wear a pair of work gloves when assembling or
performing any maintenance on lockers.
1 Back LSTB-wwhh F33
2 Left side LBSL-ddhh F22
3 Rear leg -- leg version unit only LRL-1 4 4
4 Shelf ESL-wwdd F12 15
5 Top/Bottom LTB-wwdd F66
6 Right side LBSR-ddhh F22
7 Door frame assembly LBFA-wwhh-x FF 33
8 Locker Door LB-wwhh F15 18
9 Number plate and clear label cover LNP-1 N15 18
10 Push plug LPP-1 N30 36
11 Finger Pull LFP-1 15 18
12 Tennsco 11/32" nut driver TOOL-2 N11
13 Bolts and Nuts #8-32 X 1/2" ---------- N136 144
REF.NO.
FPart No. is composed of prefix shown plus combination of opening width = ww, depth = dd and height = hh.
FF Door frame assemblies require a further suffix (x) of either 1 or A. "1" indicates frame with legs; "A" indicates frame
without legs. For example: A door frame assembly for locker BK6-121812-1 with legs would be Part No. LBFA-1272-1.
The doorassembly alone without the frame would be Part No. LBD-1212 for the same locker.
NThese items are included in the Hardware pack model# HWBD53- 5 tier locker, # HWBD63- 6 tier locker.
G
G
G
G
12
1
8
2
6
5
5
4
4
4
4
4
3
789
10
11
FIGURE 1 DOOR DETAIL
QUANTITY
FOR ONE
3-WIDE 6 TIER

This manual suits for next models

4

Other Tennsco Indoor Furnishing manuals

Tennsco 1420 Instruction Manual

Tennsco

Tennsco 1420 Instruction Manual

Tennsco B-3000 Instruction Manual

Tennsco

Tennsco B-3000 Instruction Manual

Tennsco 7114 Instruction Manual

Tennsco

Tennsco 7114 Instruction Manual

Tennsco RGL-1236S Instruction Manual

Tennsco

Tennsco RGL-1236S Instruction Manual

Tennsco 1842 User manual

Tennsco

Tennsco 1842 User manual

Tennsco ZA7-4824S-4D Instruction Manual

Tennsco

Tennsco ZA7-4824S-4D Instruction Manual

Tennsco FS350 Instruction Manual

Tennsco

Tennsco FS350 Instruction Manual

Tennsco 1470RH Instruction Manual

Tennsco

Tennsco 1470RH Instruction Manual

Tennsco 7218 Instruction Manual

Tennsco

Tennsco 7218 Instruction Manual

Tennsco WBHC-1516-MGY Instruction Manual

Tennsco

Tennsco WBHC-1516-MGY Instruction Manual

Tennsco LSS-361872 Instruction Manual

Tennsco

Tennsco LSS-361872 Instruction Manual

Tennsco Open Foreman's Desk Instruction Manual

Tennsco

Tennsco Open Foreman's Desk Instruction Manual

Tennsco DWR-6618 Instruction Manual

Tennsco

Tennsco DWR-6618 Instruction Manual

Tennsco J2478C Instruction Manual

Tennsco

Tennsco J2478C Instruction Manual

Tennsco CC-30 Instruction Manual

Tennsco

Tennsco CC-30 Instruction Manual

Tennsco J1878A-N-W Instruction Manual

Tennsco

Tennsco J1878A-N-W Instruction Manual

Tennsco FB-12 Instruction Manual

Tennsco

Tennsco FB-12 Instruction Manual

Tennsco SINGLE TIER Instruction Manual

Tennsco

Tennsco SINGLE TIER Instruction Manual

Tennsco EB-12 Instruction Manual

Tennsco

Tennsco EB-12 Instruction Manual

Tennsco Sliding Door Jumbo Storage Cabinet JSD2478SU Instruction Manual

Tennsco

Tennsco Sliding Door Jumbo Storage Cabinet JSD2478SU Instruction Manual

Tennsco CINCO NIVELES Instruction Manual

Tennsco

Tennsco CINCO NIVELES Instruction Manual

Tennsco Q Series Instruction Manual

Tennsco

Tennsco Q Series Instruction Manual

Tennsco Jumbo Storage Cabinet J2478SU Instruction Manual

Tennsco

Tennsco Jumbo Storage Cabinet J2478SU Instruction Manual

Tennsco 1470 Instruction Manual

Tennsco

Tennsco 1470 Instruction Manual

Popular Indoor Furnishing manuals by other brands

Rauch M1742 Assembly instructions

Rauch

Rauch M1742 Assembly instructions

Safavieh Furniture COF7304 manual

Safavieh Furniture

Safavieh Furniture COF7304 manual

Kvik MH832,060 Assembly guide

Kvik

Kvik MH832,060 Assembly guide

J.Burrows JBPHDHBFBK Assembly instructions

J.Burrows

J.Burrows JBPHDHBFBK Assembly instructions

BLUM METABOX quick start

BLUM

BLUM METABOX quick start

JR Knight ZKOC-01 user manual

JR Knight

JR Knight ZKOC-01 user manual

BDI SEQUEL 20 6112 instruction manual

BDI

BDI SEQUEL 20 6112 instruction manual

Nibe F370 installation instructions

Nibe

Nibe F370 installation instructions

Seville Classics NSF WEB452 Assembly instructions

Seville Classics

Seville Classics NSF WEB452 Assembly instructions

Dormiente VIVA Assembly instruction

Dormiente

Dormiente VIVA Assembly instruction

IKEA BONDE instructions

IKEA

IKEA BONDE instructions

Teknik Spanish Style Desk 5420114 Instruction booklet

Teknik

Teknik Spanish Style Desk 5420114 Instruction booklet

Rauch MZ056 Assembly instructions

Rauch

Rauch MZ056 Assembly instructions

Kallista Inigo P7430 installation instructions

Kallista

Kallista Inigo P7430 installation instructions

Coaster 300480 Assembly instructions

Coaster

Coaster 300480 Assembly instructions

Germania 1003 Assembly instruction

Germania

Germania 1003 Assembly instruction

BRW Sypialnia HARMONIA Assembly manual

BRW

BRW Sypialnia HARMONIA Assembly manual

Vivo DESK-V402P V402P instruction manual

Vivo

Vivo DESK-V402P V402P instruction manual

manuals.online logo
manuals.online logoBrands
  • About & Mission
  • Contact us
  • Privacy Policy
  • Terms and Conditions

Copyright 2025 Manuals.Online. All Rights Reserved.