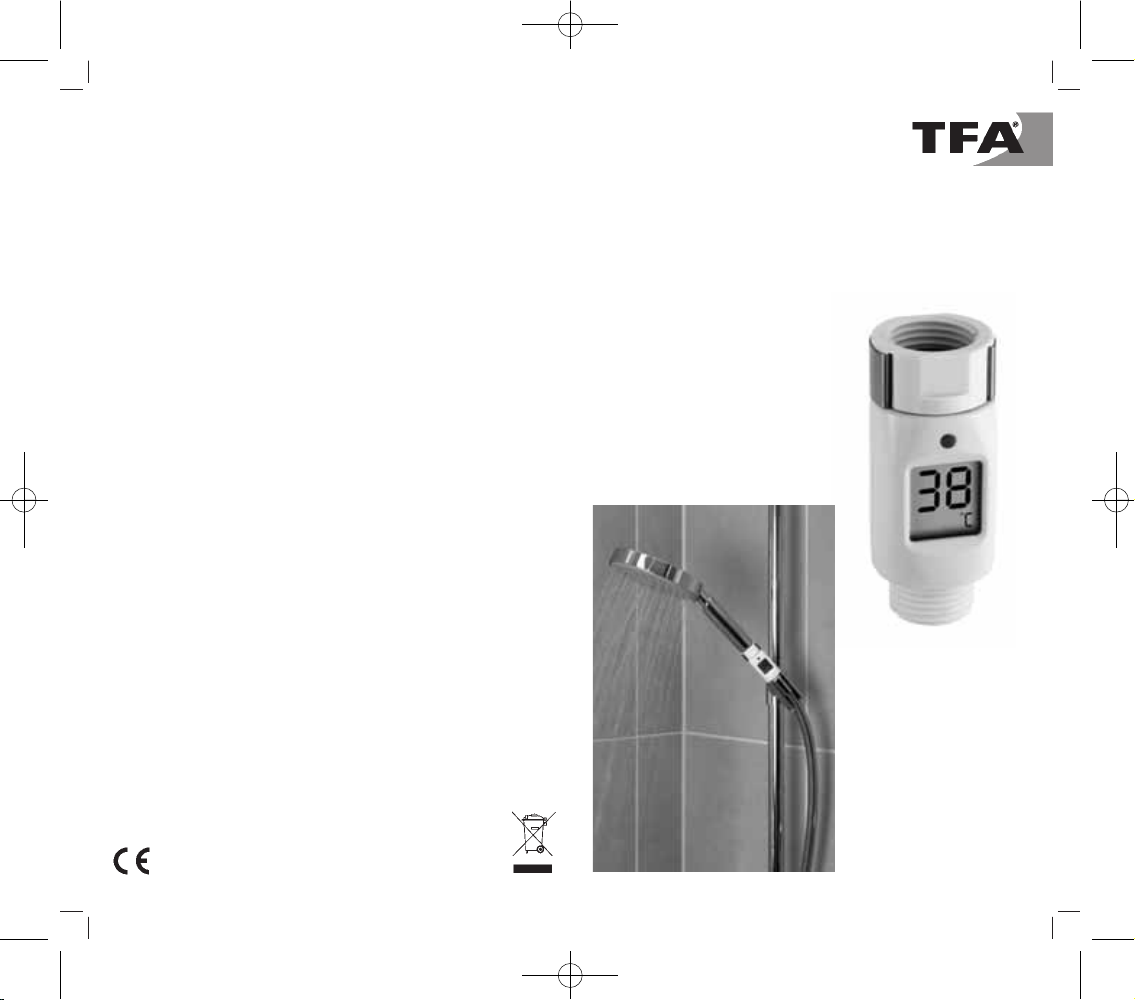
Termometro da doccia digitale
17
6. Montaggio
Il termometro da doccia è adatto a tutti gli impianti doccia stan-
dard. In caso di problemi durante il montaggio, rivolgetevi al
vostro installatore.
1. Estraete le due guarnizioni
circolari
dal dado di raccordo.
2. Rimuovete il soffione dal tubo della doccia.
3. Avvitate il termometro da doccia tra il soffione e il tubo della
doccia come illustrato in figura. Assicuratevi che entrambe le
guarnizioni siano inserite correttamente.
4. Ruotate il termometro fino a quando il display con l’indica-
zione della temperatura non sarà in una posizione perfetta-
mente visibile.
5. Ora il dispositivo è pronto per l'uso.
7. Utilizzo
•
Durante la doccia verrà visualizzata la temperatura dell’acqua.
•
Qualora la temperatura dell’acqua sia ≥41°C, si accenderà
una spia luminosa LED sopra al display.
•
In caso di mancato utilizzo viene attivata la modalità di
risparmio energetico e il dispositivo si spegne.
•
Per disattivare la modalità di risparmio energetico, muovete
leggermente il dispositivo e sul display apparirà di nuovo la
temperatura.
8. Cura e manutenzione
•
Per pulire il dispositivo utilizzate solo un panno morbido leg-
germente inumidito. Non usate solventi o abrasivi.
•
Rimuovete le batterie se non utilizzate il termometro per un
periodo prolungato.
8.1 Sostituzione delle batterie
•
Quando le indicazioni sul display cominciano a diventare più
deboli, sostituite le batterie.
•
Con l’ausilio di un cacciavite aprite il vano batterie posto
sulla parte posteriore del dispositivo. Rimuovete il coperchio
del vano batterie facendo pressione sull'apertura con un
oggetto appuntito.
•
Inserite due batterie a bottone nuove (LR44). Accertatevi di
aver rispettato la corretta polarità (osservate le indicazioni:
+=polo positivo verso il basso, - =polo negativo verso il basso).
Avvitate di nuovo con cura il coperchio del vano batterie.
Termometro da doccia digitale
16
•
Il prodotto non deve essere collegato allo scaldabagno. Siete
pregati di informarvi presso il vostro installatore prima di
procedere al collegamento.
Avvertenza!
Pericolo di lesioni:
•
Tenete il dispositivo e le batterie lontani dalla portata dei
bambini.
•
L’ingerimento delle batterie può costituire un pericolo morta-
le. Nel caso in cui venga ingerita una batteria, bisogna richie-
dere immediatamente l’intervento medico.
•
Non gettate le batterie nel fuoco, non polarizzatele in
maniera scorretta, non smontatele e non cercate di ricaricar-
le. Pericolo di esplosione!
•
Le batterie contengono acidi nocivi per la salute. Sostituite
quanto prima le batterie quasi scariche, in modo da evitare
che si scarichino completamente. Non utilizzate mai contem-
poraneamente batterie usate e batterie nuove, né batterie di
tipi diversi. Rimuovete le batterie se non utilizzate il termo-
metro per un periodo prolungato. Quando maneggiate bat-
terie esaurite, indossate sempre guanti resistenti alle sostan-
ze chimiche e occhiali di protezione!
Importanti avvertenze
sulla sicurezza del prodotto!
•
Il tempo necessario per una misurazione stabile della tempe-
ratura può arrivare fino a 4 secondi.
•
Non esponete il dispositivo a temperature elevate, vibrazioni
e urti.
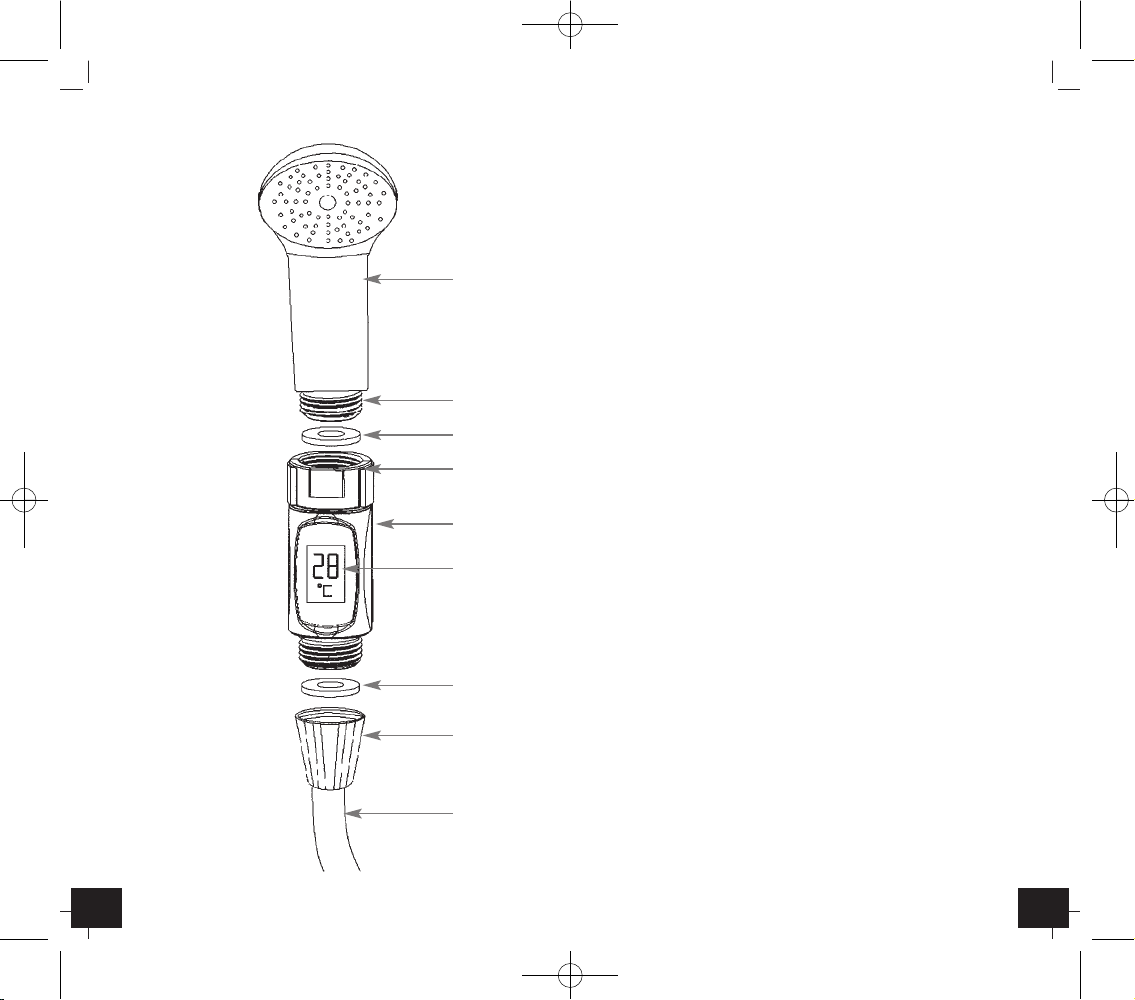
5. Componenti (Fig. 1)
A 1: Tubo della doccia
A 2: Raccordo a vite
A 3: Guarnizione circolare
A 4: Display: temperatura dell’acqua in °C
A 5: Termometro da doccia
A 6: Dado di raccordo
A 7: Guarnizione circolare
A 8: Raccordo a vite
A 9: Soffione della doccia
TFA_No. 30.1046_Anleitung 21.04.2011 14:05 Uhr Seite 9