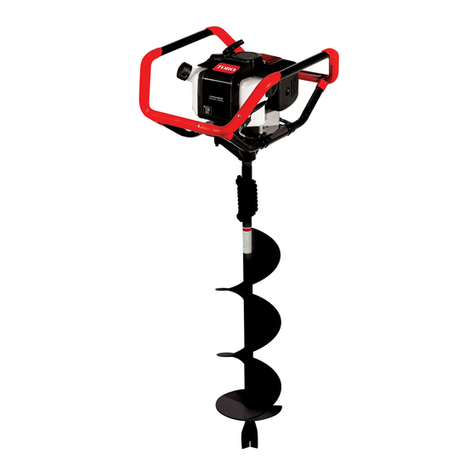
Toro 22805 User manual

FormNo.3364-811RevB
AugerHeadandUniversalSwivel
AugerHead
forCompactUtilityLoaders
ModelNo.22805—SerialNo.310000001andUp
ModelNo.22806—SerialNo.310000001andUp
ToregisteryourproductordownloadanOperator'sManualorPartsCatalogatnocharge,gotowww.Toro.com.OriginalInstructions(EN)

ThisproductcomplieswithallrelevantEuropean
directives,fordetailspleaseseetheseparateproduct
specicDeclarationofConformity(DOC)sheet.
DANGER
Theremaybeburiedpower,gas,and/ortelephone
linesintheworkarea.Shockorexplosionmay
occurifyoudigintothem.
Havethepropertyorworkareamarkedforburied
linesanddonotdiginmarkedareas.Contactyour
localmarkingserviceorutilitycompanytohavethe
propertymarked(forexample,intheUnitedStates,
call811forthenationwidemarkingservice).
Introduction
Themachineisahydraulicallypoweredaugerattachment
forTorocompactutilityloaders.Itisdesignedtodig
verticalholesinearthfortheinstallationofposts,plants,
andotherconstructionandlandscapingneeds.Itisnot
intendedtodrillholesinpavement,concrete,orice.
Readthisinformationcarefullytolearnhowtooperate
andmaintainyourproductproperlyandtoavoidinjury
andproductdamage.Youareresponsibleforoperating
theproductproperlyandsafely.
YoumaycontactTorodirectlyatwww.Toro.comfor
productandaccessoryinformation,helpndinga
dealer,ortoregisteryourproduct.
Wheneveryouneedservice,genuineToroparts,or
additionalinformation,contactanAuthorizedService
DealerorToroCustomerServiceandhavethemodel
andserialnumbersofyourproductready.Figure1
identiesthelocationofthemodelandserialnumbers
ontheproduct.Onaugersandextensions,themodel
andserialnumberplateislocatedontheupperportion
oftheshaft.Writethenumbersinthespaceprovided.
Figure1
1.Modelandserialnumberlocation
ModelNo.
SerialNo.
Thismanualidentiespotentialhazardsandhas
safetymessagesidentiedbythesafetyalertsymbol
(Figure2),whichsignalsahazardthatmaycauseserious
injuryordeathifyoudonotfollowtherecommended
precautions.
Figure2
1.Safetyalertsymbol
Thismanualuses2otherwordstohighlightinformation.
Importantcallsattentiontospecialmechanical
informationandNoteemphasizesgeneralinformation
worthyofspecialattention.
Contents
Introduction.................................................................2
Safety...........................................................................3
StabilityRatings....................................................4
SafetyandInstructionalDecals.............................5
ProductOverview........................................................5
Specications.......................................................5
Operation.....................................................................6
InstallinganAuger...............................................6
DiggingaHole.....................................................7
©2010—TheToro®Company
8111LyndaleAvenueSouth
Bloomington,MN55420
2
Contactusatwww.Toro.com.
PrintedintheUSA.
AllRightsReserved

RemovinganAuger..............................................8
Maintenance.................................................................9
RecommendedMaintenanceSchedule(s)..................9
GreasingtheCradleArmPivotPoints...................9
ChangingPlanetaryGearCaseOil........................9
Storage.......................................................................10
Troubleshooting.........................................................11
Safety
Improperuseormaintenancebytheoperatoror
ownercanresultininjury.Toreducethepotential
forinjury,complywiththesesafetyinstructionsand
thoseinthetractionunit
Operator’sManual
.Always
payattentiontothesafetyalertsymbol,which
means
Caution
,
Warning
,or
Danger
—personal
safetyinstruction.Failuretocomplywiththe
instructionmayresultinpersonalinjuryordeath.
DANGER
Contactwithamovingaugercancause
entanglement,severewounds,and/ordeath.
Keepallothersatleast10feetawayfromtheauger
duringoperation.Also,donotreplacethesupplied
boltwhichsecurestheaugertothedriveheadwith
alongerboltasthismayincreasethechancefor
entanglement.
DANGER
Theremaybeburiedpower,gas,and/ortelephone
linesintheworkarea.Shockorexplosionmay
occurifyoudigintothem.
Havethepropertyorworkareamarkedforburied
linesanddonotdiginmarkedareas.Contactyour
localmarkingserviceorutilitycompanytohavethe
propertymarked(forexample,intheUnitedStates,
call811forthenationwidemarkingservice).
WARNING
Whentheengineisoff,attachmentsintheraised
positioncangraduallylower.Someonenearbymay
bepinnedorinjuredbytheattachmentasitlowers.
Alwayslowertheattachmentlifteachtimeyoushut
offthetractionunit.
WARNING
Whengoingupordownhill,themachinecould
overturniftheheavyendistowardthedownhill
side.Someonemaybepinnedorseriouslyinjured
bythemachineifitoverturns.
Operateupanddownslopeswiththeheavyend
ofthemachineuphill.Anattachedaugerbitwill
makethefrontendheavy.
3

WARNING
Lightningcancausesevereinjuryordeath.If
lightningisseenorthunderisheardinthearea,do
notoperatethemachine;seekshelter.
StabilityRatings
Todeterminethedegreeofslopeyoucantraversewith
theaugerinstalledonatractionunit,ndthestability
ratingforthehillpositionyouwanttotravelinthe
appropriatetablebelow,thenndthedegreeofslope
forthesameratingandhillpositionintheStabilityData
sectionofthetractionunitOperator’sManual.
WARNING
Exceedingthemaximumrecommendedslope
cancausethetractionunittotip,crushingyouor
bystanders.
Donotdrivethetractionunitonaslopesteeper
thanthemaximumrecommendedslope,as
determinedinthefollowingtablesandthetraction
unit
Operator’sManual
.
Stabilitywitha12to30inchAuger
Important:Ifyouhaveatractionunitotherthan
aTXcompactutilityloader,usethecounterweight
onthetractionunitwhenusingtheaugerdrive
headwithalargeaugerinstalled.Failuretouse
thecounterweightwillcausethetractionunitto
becomeunstable.
OrientationStabilityRating
FrontUphill
DRearUphill
DSideUphill
C
StabilityWithoutanAugerorwithan
AugerSmallerthan12inches
Important:Ifyouhaveatractionunitother
thanaTXcompactutilityloader,donotusethe
counterweightonthetractionunitwhenusing
theaugerdriveheadwithoutanaugerorwith
anaugersmallerthan12inches.Ifyouusethe
counterweight,thetractionunitwillbelessstable
inthefrontandsideuphillpositions.
OrientationStabilityRating
FrontUphill
DRearUphill
CSideUphill
B
4

SafetyandInstructional
Decals
Safetydecalsandinstructionsareeasily
visibletotheoperatorandarelocated
nearanyareaofpotentialdanger.
Replaceanydecalthatisdamagedor
lost.
105-0326
1.Warning—readtheOperator’sManual.
2.Entanglementhazard,auger—keepbystandersasafe
distancefromtheauger.
3.Explosionand/orelectricshockhazard—donotdiginareas
withburiedgasorpowerlines.
ProductOverview
Figure3
1.Hoseguide4.Cradlearm
2.Mountingplate5.Drivehead
3.Motor6.Driveshaft
Specications
Note:Specicationsanddesignaresubjecttochange
withoutnotice.
Model22805
Width24.3inches(62cm)
Length15.8inches(40cm)
Height23.3inches(59cm)
Weight182lb(83Kg)
Model22806
Width24.3inches(62cm)
Length16.5inches(42cm)
Height23.4inches(59cm)
Weight196lb(89Kg)
5

Operation
RefertoyourtractionunitOperator’sManualformore
informationoninstallingandremovingattachments
onyourtractionunit.
Note:Alwaysusethetractionunittoliftandmovethe
attachment.Tomoveanaugerwithoutthedrivehead,
slingastrapovereachendoftheaugerandhoistitto
thedesiredlocation.
InstallinganAuger
WARNING
Theaugerheadswingsfreelyinthecradlearms.
Yourhandsorngerscouldgetpinchedand
severelyinjuredoramputatediftheyarecaught
betweenthecradlearmsandtheswingingdrive
head.
Keepyourhandsandngersawayfromthecradle
arms.
1.Ifyouareinstallinganaugeronmodel22806drive
head,positionthedriveheadvertically,slideabolt
(1/2x2-1/2inches)intotheholesinthefront
cradlearms,andsecureitlightlywithaangenut
(1/2inch)(Figure4).
Figure4
1.Drivehead(frontview)3.Frontcradlearm
2.Bolt
2.Raisetheloaderarmssothedriveheadclearsthe
ground.
3.Stoptheengine.
4.Manuallyrotatetheaugerdriveheadup,until
youcanslideabolt(1/2x2-1/2inches)intothe
holeinthecradlearm,securingthedrivehead.
Lightlysecuretheboltwithaangenut(1/2inch)
(Figure5).
Figure5
1.Drivehead3.Boltandangenut
2.Cradlearm
5.Ifusinganextensionwiththeauger,insertthe
endoftheextensionintotheendoftheaugerand
securetheaugertotheextensionwithabolt(7/8x
4-1/2inch)andnut(7/8inch)(Figure6).
Figure6
1.Extension3.Bolt,7/8x4-1/2inch
2.Augershaft4.Nut,7/8inch
6.Starttheengine.
7.Maneuverthedriveshaftintotheendoftheauger
shaftorextension(ifapplicable)(Figure7).
6

Figure7
1.Drivehead2.Augershaft
8.Stoptheengine.
9.Securetheaugertothedriveheadwithabolt(7/8x
4-1/2inch)andnut(7/8inch)(Figure8).
Figure8
1.Bolt,7/8x4-1/2inches3.Bolt(s)andnut(s)
2.Nut,7/8inch
10.Removetheboltsandnutsfromthecradlearms
thatwereinstalledinsteps1(ifapplicable)and4
(Figure8).
11.Starttheengine.
12.Raisetheaugerfreeoftheground(Figure9).
Figure9
13.Whentheaugerisvertical,tilttheattachment
platerearward,untilthedriveheadcontactsthe
attachmentplatetostabilizetheaugerandkeepit
fromswingingfreely(Figure9).
DiggingaHole
DANGER
Theremaybeburiedpower,gas,and/ortelephone
linesintheworkarea.Shockorexplosionmay
occurifyoudigintothem.
Havethepropertyorworkareamarkedforburied
linesanddonotdiginmarkedareas.Contactyour
localmarkingserviceorutilitycompanytohave
thepropertymarked(forexample,intheUnited
States,call811forthenationwidemarkingservice).
Important:Beforedigging,ensurethatthe
groundisfreeofanytrashordebris.
Important:Donotusetheaugerunlesstheauger
pointandteethareintactandingoodcondition.
1.Lowertheaugertothesoilatthesiteofthe
proposedhole.
2.MovethethrottlelevertotheFastposition.
3.Ifyourtractionunithasaspeedselectorlever,move
ittotheSlowposition.
4.Ifyourtractionunithasaowdividercontrol,
moveittothe10:00o’clockposition.
5.Pulltheauxiliaryhydraulicslevertotheoperator
griporreferencebartobegindigging.
6.Lowertheaugerslowlyasthesoilisloosened.As
youdigdeeper,movethetractionunitbackward
orforwardasrequiredtokeeptheaugervertical
(Figure10).
Figure10
7.Whentheaugerbecomesfullofsoil,disengagethe
augerdriveandlifttheaugerfromthehole.Engage
theaugerdrivetospinoffthesoil,thenresume
digging.
Note:Switchingtheauxiliaryhydraulicslever
rapidlyfromforwardtoreversewillhelptoshake
offthesoil.
7

DANGER
Ifyouareusingmodel22806,excessivedownward
forcemaycausethebittowobbleuncontrollably
whichcouldtipthetractionunit.Youorbystanders
couldbepinedorseriouslyinjured.
Whenusingmodel22806,donotuseexcessive
downwardpressureonthebit.Allowthebittopull
itselfintothesoil.
RemovinganAuger
1.Raisetheloaderarmssotheaugercomesoutof
thehole.
Note:Ifyouhavea24inchextensioninstalled
betweenthedriveheadandtheauger,itmaybe
necessarytoraisetheaugerashighaspossibleand
thenmovethetractionunitbackwardtopullthe
augertherestofthewayoutofthehole.
2.Settheaugerdowninitsstoragelocation.
3.Whileloweringthearms,driveslowlybackwards
untiltheaugerishorizontal.
4.Stoptheengine.
5.Removetheboltandnutsecuringthedriveheadto
theaugerorextension.
6.Starttheengineandbackthetractionunitaway
fromtheauger.
7.Ifyouusedanextension,removetheboltandnut
securingitandpullitoffoftheauger.
8

Maintenance
RecommendedMaintenanceSchedule(s)
MaintenanceService
IntervalMaintenanceProcedure
Aftertherst50hours•Changetheplanetarygearcaseoil.
Beforeeachuseordaily
•Greasethecradlearmpivotpoints.(Greaseallttingsimmediatelyafterevery
washing.)
•Checktheaugerteethandreplacethemiftheyaredamagedorworn.
Every1,000hours•Changetheplanetarygearcaseoil.
Beforestorage•Checktheaugerteethandreplacethemiftheyaredamagedorworn.
•Paintchippedsurfaces.
CAUTION
Ifyouleavethekeyintheignitionswitch,someonecouldstarttheengine.Accidentalstartingofthe
enginecouldseriouslyinjureyouorotherbystanders.
Removethekeyfromtheignitionswitchbeforeyoudoanymaintenance.
GreasingtheCradleArmPivot
Points
ServiceInterval:Beforeeachuseordaily(Grease
allttingsimmediatelyafterevery
washing.)
GreaseType:General-purposegrease
1.Stoptheengineandremovethekey.
2.Cleanthegreasettingswitharag.
3.Connectagreaseguntoeachtting.
4.Pumpgreaseintothettingsuntilgreasebeginsto
oozeoutofthebearings.
5.Wipeupanyexcessgrease.
ChangingPlanetaryGearCase
Oil
ServiceInterval:Aftertherst50hours
Every1,000hours
Theplanetarygearcaserequires0.85pintsofamild,
extremepressurelubricant,ratedAPI-GL-5,number
80or90.
1.Supportthedriveheadoveranoilpan(Figure11).
Figure11
1.Planetarygearcase3.Motor
2.Bolts
2.Removethe4boltssecuringthemotorandremove
themotor,allowingalloftheoiltodrainintothepan.
3.Whentheoiliscompletelydrained,turnthedrive
headsothattheopeningisfacingtheup.
4.Add0.85pintsofamild,extremepressurelubricant,
ratedAPI-GL-5,number80or90.
5.Replacethemotorandsecureitwiththefourbolts
removedpreviously.Torquetheboltsto105ft-lb
(142N-m)
9

Storage
1.Beforelongtermstorage,washtheattachmentwith
milddetergentandwatertoremovedirtandgrime.
2.Checkandtightenallbolts,nuts,andscrews.Repair
orreplaceanydamagedorwornpart.
3.Ensurethatallhydrauliccouplersareconnected
togethertopreventcontaminationofthehydraulic
system.
4.Paintallscratchedorbaremetalsurfaces.Paintis
availablefromyourAuthorizedServiceDealer.
5.Storetheattachmentinaclean,drygarageorstorage
area.Coverittoprotectitandkeepitclean.
10

Troubleshooting
ProblemPossibleCauseCorrectiveAction
1.Hydrauliccouplernotcompletely
connected
1.Checkandtightenallcouplers.
2.Defectivehydrauliccoupler2.Checkcouplersandreplaceanythat
aredefective.
3.Anobstructioninahydraulichose3.Findandremovetheobstruction.
4.Kinkedhydraulichose4.Replacethekinkedhose
Thedriveheaddoesnotoperate.
5.Contaminationinthegearbox5.Refertoyourauthorizedservicedealer.
11

ToroCompactUtilityEquipmentWarranty
AOne-YearLimitedWarranty
CUEProducts
ConditionsandProductsCovered
TheT oro®Companyanditsafliate,T oroWarrantyCompany,pursuant
toanagreementbetweenthem,jointlywarrantyourToroCompactUtility
Equipment(“Product”)tobefreefromdefectsinmaterialsorworkmanship.
Thefollowingtimeperiodsapplyfromthedateofpurchase:
ProductsWarrantyPeriod
Loaders,TrenchersandAttachments1yearor1000operating
hours,whicheveroccursrst
KohlerEngines3years
AllotherEngines2years
Whereawarrantableconditionexists,wewillrepairtheProductatnocost
toyouincludingdiagnosis,labor,andparts.
InstructionsforObtainingWarrantyService
IfyouthinkthatyourToroProductcontainsadefectinmaterialsor
workmanship,followthisprocedure:
1.ContactanyAuthorizedT oroCompactUtilityEquipment(CUE)
ServiceDealertoarrangeserviceattheirdealership.T olocatea
dealerconvenienttoyou,accessourwebsiteatwww.T oro.com.
YoumayalsocallourT oroCustomerCareDepartmenttollfree
at888-865-5676(U.S.customers)or888-865-5691(Canadian
customers).
2.Bringtheproductandyourproofofpurchase(salesreceipt)tothe
ServiceDealer.
3.IfforanyreasonyouaredissatisedwiththeServiceDealer’s
analysisorwiththeassistanceprovided,contactusat:
LCBCustomerCareDepartment
ToroWarrantyCompany
8111LyndaleAvenueSouth
Bloomington,MN55420-1196
TollFree:888-865-5676(U.S.customers)
TollFree:888-865-5691(Canadacustomers)
OwnerResponsibilities
YoumustmaintainyourT oroProductbyfollowingthemaintenance
proceduresdescribedintheOperator’sManual.Suchroutine
maintenance,whetherperformedbyadealerorbyyou,isatyourexpense.
Partsscheduledforreplacementasrequiredmaintenance(“Maintenance
Parts”),arewarrantedfortheperiodoftimeuptothescheduled
replacementtimeforthatpart.Failuretoperformrequiredmaintenance
andadjustmentscanbegroundsfordisallowingawarrantyclaim.
ItemsandConditionsNotCovered
Notallproductfailuresormalfunctionsthatoccurduringthewarranty
periodaredefectsinmaterialsorworkmanship.Thisexpresswarranty
doesnotcoverthefollowing:
•Productfailureswhichresultfromtheuseofnon-Tororeplacement
parts,orfrominstallationanduseofadd-on,modied,orunapproved
accessories
•Productfailureswhichresultfromfailuretoperformrequired
maintenanceand/oradjustments
•ProductfailureswhichresultfromoperatingtheProductinan
abusive,negligentorrecklessmanner
•Partssubjecttoconsumptionthroughuseunlessfoundtobe
defective.Examplesofpartswhichareconsumed,orusedup,during
normalProductoperationinclude,butarenotlimitedto,diggingteeth,
tines,sparkplugs,tires,tracks,lters,chains,etc.
•Failurescausedbyoutsideinuence.Itemsconsideredtobeoutside
inuenceinclude,butarenotlimitedto,weather,storagepractices,
contamination,useofunapprovedcoolants,lubricants,additives,or
chemicals,etc.
•Normal“wearandtear”items.Normal“wearandtear”includes,butis
notlimitedto,wornpaintedsurfaces,scratcheddecalsorwindows,
etc.
•Anycomponentcoveredbyaseparatemanufacturer’swarranty
•Pickupanddeliverycharges
GeneralConditions
RepairbyanAuthorizedT oroCompactUtilityEquipment(CUE)Service
Dealerisyoursoleremedyunderthiswarranty.
NeitherTheToro®CompanynorToroWarrantyCompanyisliable
forindirect,incidentalorconsequentialdamagesinconnectionwith
theuseoftheToroProductscoveredbythiswarranty,including
anycostorexpenseofprovidingsubstituteequipmentorservice
duringreasonableperiodsofmalfunctionornon-usepending
completionofrepairsunderthiswarranty.Allimpliedwarranties
ofmerchantabilityandtnessforusearelimitedtotheduration
ofthisexpresswarranty.Somestatesdonotallowexclusionsof
incidentalorconsequentialdamages,orlimitationsonhowlong
animpliedwarrantylasts,sotheaboveexclusionsandlimitations
maynotapplytoyou.
Thiswarrantygivesyouspeciclegalrights,andyoumayalsohaveother
rightswhichvaryfromstatetostate.
ExceptfortheenginewarrantycoverageandtheEmissionswarranty
referencedbelow,ifapplicable,thereisnootherexpresswarranty.The
EmissionsControlSystemonyourProductmaybecoveredbyaseparate
warrantymeetingrequirementsestablishedbytheU.S.Environmental
ProtectionAgency(EPA)ortheCaliforniaAirResourcesBoard(CARB).
ThehourlimitationssetforthabovedonotapplytotheEmissions
ControlSystemWarranty.RefertotheCaliforniaEmissionControl
WarrantyStatementsuppliedwithyourProductorcontainedintheengine
manufacturer’sdocumentationfordetails.
CountriesOtherthantheUnitedStatesorCanada
CustomerswhohavepurchasedToroproductsexportedfromtheUnitedStatesorCanadashouldcontacttheirT oroDistributor(Dealer)toobtain
guaranteepoliciesforyourcountry,province,orstate.IfforanyreasonyouaredissatisedwithyourDistributor’sserviceorhavedifcultyobtaining
guaranteeinformation,contacttheToroimporter.Ifallotherremediesfail,youmaycontactusatToroWarrantyCompany.
374-0261RevA
This manual suits for next models
1
Table of contents
Other Toro Lawn And Garden Equipment manuals
Toro
Toro 02720 User manual

Toro
Toro 02720 User manual

Toro
Toro AERATOR HC 4000 User manual

Toro
Toro Ultra Buggy 2500-T User manual

Toro
Toro Workman 1100 Reference manual

Toro
Toro 09501 User manual

Toro
Toro Z-Stand 105-1621 User manual
Toro
Toro 135-7423 User manual

Toro
Toro 140-4508 User manual

Toro
Toro Bullseye QuickGroom 710 User manual