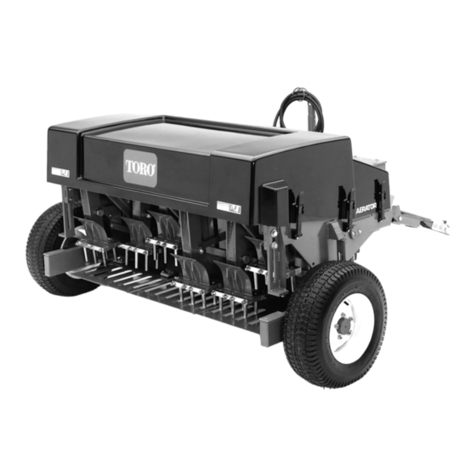
Toro HydroJect 3010 User manual

Part No. 04134SL (Rev. B)
Preface
This publications provides the service technician with
informationfortroubleshooting,testing,andrepairofthe
Hydroject.
REFER TO THE HYDROJECT OPERATOR’S MAN-
UAL FOR OPERATING, MAINTENANCE AND AD-
JUSTMENT INSTRUCTIONS. Space is provided in
Chapter 2 of this book to insert the Operator’s Manual
and Parts Catalog for your machine. A replacement
Operator’s Manual is availableby sending the complete
Model and Serial Number of the machine to:
The Toro Company
8111 Lyndale Avenue South
Bloomington, MN 55420
TheToroCompanyreserves therightto changeproduct
specifications or this publication without notice.
Service Manual
Hydroject ®3010
INSTRUCTION. When you see this symbol,
This safety symbol means DANGER,
WARNING, orCAUTION,PERSONALSAFETY
carefully read the instructions that follow.
Failure to obey the instructions may result in
personal injury.
NOTE: A NOTE will give general information about the
correct operation, maintenance, service, testing or re-
pair of the machine.
IMPORTANT: The IMPORTANT notice will give im-
portant instructions which must be followed to pre-
vent damage to systems or components on the
machine.
©The Toro Company 2005, 2006, 2007

Hydroject 3010

Table Of Contents
Chapter 1 - Safety
Safety Instructions . . . . . . . . . . . . . . . . . . . . . . . . 1 - 1
Chapter 2 - Product Records and Manuals
Product Records. . . . . . . . . . . . . . . . . . . . . . . . . . 2 - 1
Maintenance. . . . . . . . . . . . . . . . . . . . . . . . . . . . . 2 - 1
Equivalents and Conversions. . . . . . . . . . . . . . . . 2 - 2
Torque Specifications . . . . . . . . . . . . . . . . . . . . . . 2 - 3
Chapter 3 - Engine
Specifications . . . . . . . . . . . . . . . . . . . . . . . . . . . . 3 - 1
Repairs. . . . . . . . . . . . . . . . . . . . . . . . . . . . . . . . . 3 - 2
Kohler Engine Service Manual
Chapter 4 - Hydraulic System
Specifications . . . . . . . . . . . . . . . . . . . . . . . . . . . . 4 - 2
General Information . . . . . . . . . . . . . . . . . . . . . . . 4 - 3
Hydraulic Diagram . . . . . . . . . . . . . . . . . . . . . . . . 4 - 6
Special Tools . . . . . . . . . . . . . . . . . . . . . . . . . . . . 4 - 7
Troubleshooting . . . . . . . . . . . . . . . . . . . . . . . . . . 4 - 8
Testing . . . . . . . . . . . . . . . . . . . . . . . . . . . . . . . . . 4 - 9
Adjustments . . . . . . . . . . . . . . . . . . . . . . . . . . . . 4 - 11
Repairs. . . . . . . . . . . . . . . . . . . . . . . . . . . . . . . . 4 - 14
Chapter 5 - Electrical System
Wiring Schematics and Diagrams. . . . . . . . . . . . . 5 - 2
Special Tools. . . . . . . . . . . . . . . . . . . . . . . . . . . . . 5 - 5
Troubleshooting . . . . . . . . . . . . . . . . . . . . . . . . . . 5 - 7
Testing . . . . . . . . . . . . . . . . . . . . . . . . . . . . . . . . 5 - 15
Repairs . . . . . . . . . . . . . . . . . . . . . . . . . . . . . . . . 5 - 24
Chapter 6 - Water System
Specifications . . . . . . . . . . . . . . . . . . . . . . . . . . . . 6 - 2
Water System Schematic . . . . . . . . . . . . . . . . . . . 6 - 3
Special Tools. . . . . . . . . . . . . . . . . . . . . . . . . . . . . 6 - 4
Troubleshooting . . . . . . . . . . . . . . . . . . . . . . . . . . 6 - 9
Testing . . . . . . . . . . . . . . . . . . . . . . . . . . . . . . . . 6 - 12
Adjustments . . . . . . . . . . . . . . . . . . . . . . . . . . . . 6 - 18
Repairs . . . . . . . . . . . . . . . . . . . . . . . . . . . . . . . . 6 - 20
Chapter 7 - Wheels, Steering and Brakes
Adjustments . . . . . . . . . . . . . . . . . . . . . . . . . . . . . 7 - 2
Repairs . . . . . . . . . . . . . . . . . . . . . . . . . . . . . . . . . 7 - 3
Chapter 8 - Electrical Diagrams
Schematic. . . . . . . . . . . . . . . . . . . . . . . . . . . . . . . 8 - 3
Main Harness . . . . . . . . . . . . . . . . . . . . . . . . . . . . 8 - 4
Main Wiring Diagram . . . . . . . . . . . . . . . . . . . . . . 8 - 5
Control Panel Harness . . . . . . . . . . . . . . . . . . . . . 8 - 6
Control Panel Wiring Diagram . . . . . . . . . . . . . . . 8 - 7
Tiller Harness and Wiring Diagram. . . . . . . . . . . . 8 - 8
Hydroject 3010

Hydroject 3000/4000

Chapter 1
Safety
Maintenance and Service . . . . . . . . . . . . . . . . . . . . . 3
SAFETY AND INSTRUCTION DECALS . . . . . . . . . . 4
CAUTION
TO REDUCE THE POTENTIAL FOR INJURY
OR DEATH, COMPLY WITH THE FOLLOWING
SAFETY INSTRUCTIONS.
3. Never operate the machine when under the influ-
ence of drugs or alcohol.
4. Before attempting to start engine engage parking
brake.
5. Remove all debris or other objects that might inter-
fere with operation. Keep all bystanders away from the
work area.
6. Keep all shields and safety devices in place. If a
shield, safety device or decal is defective or damaged,
repair or replace it before operation is commenced. Also
tighten any loose nuts, bolts and screws to assure ma-
chine is in safe operating condition.
7. Do not operate machine while wearing sandals, ten-
nis shoes, sneakers or shorts. Also, do not wear loose
fitting clothing which could get caught in moving parts.
Always wear long pants and substantial shoes. Wearing
safety glasses, safety shoes, ear protection and a hel-
met is advisable and required by some local ordinances
and insurance regulations.
Table of Contents
SAFETY INSTRUCTIONS . . . . . . . . . . . . . . . . . . . . . . 1
Before Operating . . . . . . . . . . . . . . . . . . . . . . . . . . . . 1
While Operating . . . . . . . . . . . . . . . . . . . . . . . . . . . . . 2
Safety Instructions
Although hazard control and accident prevention par-
tially are dependent upon the design and configuration
of the machine, these factors are also dependent upon
the awareness, concern, and proper training of the per-
sonnel involved in the operation, transport, mainte-
nance, and storage of the machine. Improper use or
maintenance of the machine can result in injury or
death. T
o reduce the potential for injury or death, comply
with the following safety instructions.
Before Operating
1. Read and understand the contents of this manual
before starting and operating the machine. Become fa-
miliar with all controls and know how to stop quickly. A
free replacement manual is available by sending com-
plete Model and Serial Numbers to:
The Toro Company
8111 Lyndale Avenue South
Bloomington, Minnesota 55420
Use the Model and Serial Number when referring to your
machine. If you have questions about this Service
Manual, please contact:
The Toro Company
Commercial Service Department
8111 Lyndale Avenue South
Bloomington, Minnesota 55420
2. Never allow children to operate the machine. Do not
allow adults to operate machine without proper instruc-
tion. Only trained operators who have read this manual
should operate this machine.
Hydroject 3010 Page 1 – 1 Safety

8. Fill fuel tank with gasoline before starting the en-
gine. Avoid spilling gasoline. Since gasoline is flam-
mable, handle it carefully.
A. Use an approved gasoline container.
B. Do not fill tank while engine is hot or
running.
C. Do not smoke while handling gasoline.
While Operating
10. DON’T TAKE AN INJURY RISK! When a person or
pet appears unexpectedly in or near the WORKING
area, STOP AERATING.
11. Keep hands and feet away from nozzle and roller
area. High velocity water jets can penetrate hands and
feet. Penetration by the high velocity water jets can
cause serious personal injury. If accidental penetration
occurs, seek medical attention immediately.
12. Never use chemicals in the water supply system.
13. Do not operate water injection system on concrete
or asphalt because water jets will permanently damage
these surfaces.
14. Start engine with parking brake engaged.
15. Do not run the engine in a confined area without ad-
equate ventilation. Exhaust fumes are hazardous and
could possibly be deadly.
16. Using the machine demands attention, and to pre-
vent loss of control:
Maintenance
21. Disconnect wires from spark plugs to prevent acci-
dental starting of the engine when servicing, adjusting or
storing the machine.
22. If machine must be tipped to perform maintenance
or an adjustment, close fuel shut–off valve, drain gaso-
line from fuel tank, oil from crankcase and remove bat-
tery.
23. To reduce potential fire hazard, keep the engine free
of excessive grease, grass, leaves and accumulations
of dirt.
24. Be sure machine is in safe operating condition by
keeping nuts, bolts and screws tight. Check all bolts and
nuts frequently to be sure they are tightened to specifi-
cation.
25. If the engine must be running to perform a mainte-
nance adjustment, keep hands, feet, clothing and other
parts of the body away from any moving parts.
26. Make sure all hydraulic line connectors are tight, and
all hydraulic hoses and lines are in good condition be-
fore applying pressure to the system.
Safety Hydroject 3010
D. Fill fuel tank outdoors and up to about one
inch (25 mm) from top of the tank, not the
filler neck.
E. Wipe up any spilled gasoline.
9. Check interlock switches daily for proper operation.
If a switch fails, replace it before operating the machine.
The interlock system is for your protection, so do not by-
pass it. Replace all interlock switches every two years.
A. Use only in daylight or when there is good
artificial light.
B. Watch for holes or other hidden hazards.
C. Do not transport machine close to a sand
trap, ditch, creek or other hazard.
17. If the machine starts to vibrate abnormally, shut the
engine off. Remove wires from spark plugs to prevent
possibility of accidental starting. Check machine for
damage and defective parts. Repair any damage before
restarting the engine and operating the machine.
18. Do not touch engine or muffler while engine is run-
ning or soon after it is stopped. These areas could be hot
enough to cause a burn.
19. Before leaving the operator’s position–behind han-
dle–engage parking brake.
20. When leaving the machine unattended, engage
parking brake , shut engine OFF and remove key from
ignition switch.
27. Keep body and hands away from pin hole leaks or
nozzles that eject water or hydraulic fluid under high
pressure. Use paper or cardboard, not hands, to search
for leaks. Hydraulic fluid or water escaping under pres-
sure can have sufficient force to penetrate skin and do
serious damage. If either of these fluids are ejected into
the skin they must be surgically removed within a few
hours by a doctor familiar with this form of injury or gan-
grene may result.
28. Before disconnecting or performing any work on the
hydraulic oil system, all pressure in system must be re-
lieved by stopping engine and opening by–pass valve.
29. Make sure all water line connectors are tight, and all
hoses and lines are in good condition before applying
pressure to the system.
Page 1 – 2
30. Before disconnecting or performing any work on the
water system, all pressure in system must be relieved by
stopping engine and opening bleed valve. Opening the
the bleed valve allows any trapped water to escape from
the system and also allows the accumulator piston to
move to the bottom of the accumulator cylinder.
31. The accumulator in this machine contains high
pressure dry nitrogen. Accumulator servicing requires
special tools and precautions. Accumulators do not con-
tain user serviceable components. Improper accumula-
tor servicing can cause dismemberment or death. Do
not attempt to disassemble a accumulator, have this
work done by a Authorized Toro Distributor.
32. Do not overspeed the engine by changing governor
settings. T
o be sure of safety and accuracy, have an Au-
thorized T0R0 Distributor check maximum engine
speed with a tachometer.
33. Engine must be shut off before checking oil or add-
ing oil to the crankcase.
34. Allow engine to cool before storing machine in any
enclosure such as a garage or storage shed. Make sure
the fuel tank is empty if machine is to be stored in excess
of 30 days. Do not store machine near any open flame or
where gasoline fumes may be ignited by a spark. Always
store gasoline in a safety approved, red metal container.
35. When storing or transporting machine (trailering),
make sure fuel shut–off valve is closed.
36. Perform only those maintenance instructions de-
scribed in this manual. If major repairs are ever needed
or assistance is desired, contact an Authorized Toro Dis-
tributor. To ensure optimum performance and safety, al-
ways purchase genuine TORO replacement parts and
accessories to keep the Toro all TORO. NEVER USE
“WILL–FIT” REPLACEMENT PARTS AND ACCESSO-
RIES MADE BY OTHER MANUFACTURERS. Look for
the TORO logo to assure genuineness. Using unap-
proved replacement parts and accessories could void
the warranty of The Toro Company.
Hydroject 3010 Page 1 – 3 Safety

Safety and Instruction Decals
Numerous safety and instruction decals are affixed to
the Hyroject 3010. If any decal becomes illegible or
damaged, install a new decal. Part numbers for replace-
ment decals are listed in your Parts Catalog. Order re-
placement decals from your authorized T
oro Distributor.
Safety Page 1 – 4 Hydroject 3010

Chapter 2
Product Records and Maintenance
Table of Contents
PRODUCT RECORDS . . . . . . . . . . . . . . . . . . . . . . . . . 1 Standard Torque for Dry, Zinc Plated and
MAINTENANCE . . . . . . . . . . . . . . . . . . . . . . . . . . . . . . 1 Steel Fasteners (Inch Series) . . . . . . . . . . . . . . . 4
EQUIVALENTS AND CONVERSIONS . . . . . . . . . . . 2 Standard Torque for Dry, Zinc Plated and
Decimal and Millimeter Equivalents .. . . . . . . . . . . 2 Steel Fasteners (Metric Fasteners) . . . . . . . . . . 5
U.S. to Metric Conversions . . . . . . . . . . . . . . . . . . . 2 Other Torque Specifications . . . . . . . . . . . . . . . . . . 6
TORQUE SPECIFICATIONS . . . . . . . . . . . . . . . . . . . 3 Conversion Factors . . . . . . . . . . . . . . . . . . . . . . . . . 6
Fastener Identification . . . . . . . . . . . . . . . . . . . . . . . 3
Product Records
Insert Operator’s Manual and Parts Catalog for your Hy-
droject 3010 at the end of this chapter. Additionally, if
any optional equipment or accessories have been
installed to your Hyroject, insert the Installation Instruc-
tions, Operator’s Manuals and Parts Catalogs for those
options at the end of this chapter.
Maintenance
Maintenance procedures and recommended service in-
tervals for the Hydroject 3010 covered in the Operator’s
Manual. Refer to that publication when performing regu-
lar equipment maintenance. Refer to the Engine Opera-
tor’s Manual for additional engine specific maintenance
procedures.
Hydroject 3010 Page 2 – 1 Product Records and Maintenance

Equivalents and Conversions
Product Records and Maintenance Page 2 – 2 Hydroject 3010
Torque Specifications
Recommended fastener torque values are listed in the
following tables. For critical applications, as determined
by Toro, either the recommended torque or a torque that
is unique to the application is clearly identified and spe-
cified in this Service Manual.
These Torque Specifications for the installation and
tightening of fasteners shall apply to all fasteners which
do not have a specific requirement identified in this Ser-
vice Manual. The following factors shall be considered
when applying torque: cleanliness of the fastener, use
of a thread sealant (e.g. Loctite), degree of lubrication
on the fastener, presence of a prevailing torque feature,
hardness of the surface underneath the fastener’s head
or similar condition which affects the installation.
Fastener Identification
Grade 1
Inch Series Bolts and Screws
Grade 5 Grade 8
Figure 1
As noted in the following tables, torque values should be
reduced by 25% for lubricated fasteners to achieve
the similar stress as a dry fastener. Torque values may
also have to be reduced when the fastener is threaded
into aluminum or brass. The specific torque value
should be determined based on the aluminum or brass
material strength, fastener size, length of thread en-
gagement, etc.
The standard method of verifying torque shall be per-
formed by marking a line on the fastener (head or nut)
and mating part, then back off fastener 1/4 of a turn.
Measure the torque required to tighten the fastener until
the lines match up.
Class 8.8 Class 10.9
Metric Bolts and Screws
Figure 2
Hydroject 3010 Page 2 – 3 Product Records and Maintenance

Standard Torque for Dry, Zinc Plated and Steel Fasteners (Inch Series)
Grade 1, 5 &
8 with Thin
Height Nuts
SAE Grade 1 Bolts, Screws, Studs &
Sems with Regular Height Nuts
(SAE J995 Grade 2 or Stronger Nuts)
SAE Grade 5 Bolts, Screws, Studs &
Sems with Regular Height Nuts
(SAE J995 Grade 2 or Stronger Nuts)
SAE Grade 8 Bolts, Screws, Studs &
Sems with Regular Height Nuts
(SAE J995 Grade 5 or Stronger Nuts)
in–lb in–lb N–cm in–lb N–cm in–lb N–cm
# 6 – 32 UNC 15 + 2 170 + 20 23 + 2 260 + 20
# 6 – 40 UNF
10 + 2 13 + 2 147 + 23
17 + 2 190 + 20 25 + 2 280 + 20
# 8 – 32 UNC 29 + 3 330 + 30 41 + 4 460 + 45
# 8 – 36 UNF
13 + 2 25 + 5 282 + 30
31 + 3 350 + 30 43 + 4 485 + 45
# 10 – 24 UNC 42 + 4 475 + 45 60 + 6 675 + 70
# 10 – 32 UNF
18 + 2 30 + 5 339 + 56
48 + 4 540 + 45 68 + 6 765 + 70
1/4 – 20 UNC 48 + 7 53 + 7 599 + 79 100 + 10 100 140 + 15 1580 + 170
1/4 – 28 UNF 53 + 7 65 + 10 734 + 10 1300 + 100 160 + 15 1800 + 170
5/16 – 18 UNC 15 105 + 17 169 200 + 25 2250 + 280 300 + 30 3390 + 340
5/16 – 24 UNF 138 + 17 128 + 17 1446 + 192 225 + 25 2540 + 280 325 + 30 3670 + 340
ft–lb ft–lb N–m ft–lb N–m ft–lb N–m
3/8 – 16 UNC 16 + 2 16 + 2 22 + 3 30 + 3 41 + 4 43 + 4 58 + 5
3/8 – 24 UNF 17 + 2 18 + 2 24 + 3 35 + 3 47 + 4 50 + 4 68 + 5
7/16 – 14 UNC 27 + 3 27 + 3 37 + 4 50 + 5 68 + 7 70 + 7 95 + 9
7/16 – 20 UNF 29 + 3 29 + 3 39 + 4 55 + 5 75 + 7 77 + 7 104 + 9
1/2 – 13 UNC 30 + 3 48 + 7 65 + 9 75 + 8 102 + 11 105 + 10 142 + 14
1/2 – 20 UNF 32 + 3 53 + 7 72 + 9 85 + 8 11 120 + 10 163 + 14
65 + 10 88 + 12 16 150 + 15 203 + 20 210 + 20 285 + 27
5/8 – 18 UNF 75 + 10 95 + 15 129 + 20 170 + 15 230 + 20 240 + 20 325 + 27
3/4 – 10 UNC 93 + 12 140 + 20 190 + 27 265 + 25 359 + 34 375 + 35 508 + 47
3/4 – 16 UNF 15 165 + 25 224 + 34 300 + 25 407 + 34 420 + 35 569 + 47
7/8 – 9 UNC 140 + 20 225 + 25 305 + 34 430 + 45 583 + 61 600 + 60 813 + 81
7/8 – 14 UNF 155 + 25 260 + 30 353 + 41 475 + 45 644 + 61 660 + 60 895 + 81
Thread Size
10 + 2
13 + 2
147+23
13 + 2
25 + 5
282+30
18 + 2
30 + 5
339+56
1125 +
113 115 +
115 + 1186 +
115 +
5/8 – 11 UNC 119 +
115 +
NOTE: Reduce torque values listed in the table above
by 25% for lubricated fasteners. Lubricated fasteners
are defined as threads coated with a lubricant such as
oil, graphite or thread sealant such as Loctite.
NOTE: Torque values may have to be reduced when
installing fasteners into threaded aluminum or brass.
The specific torque value should be determined based
on the fastener size, the aluminum or base material
strength, length of thread engagement, etc.
NOTE: The nominal torque values listed above for
Grade 5 and 8 fasteners are based on 75% of the mini-
mum proof load specified in SAE J429. The tolerance is
approximately + 10% of the nominal torque value. Thin
height nuts include jam nuts.
Product Records and Maintenance Page 2 – 4 Hydroject 3010

Standard Torque for Dry, Zinc Plated and Steel Fasteners (Metric Fasteners)
Class 8.8 Bolts, Screws and Studs with Class 10.9 Bolts, Screws and Studs with
Thread Size Regular Height Nuts
(Class 8 or Stronger Nuts)
Regular Height Nuts
(Class 10 or Stronger Nuts)
M5 X 0.8 57 + 5 in–lb 640 + 60 N–cm 78 + 7 in–lb 885 + 80 N–cm
M6 X 1.0 96 + 9 in–lb 1018 + 100 N–cm 133 + 13 in–lb 1500 + 150 N–cm
M8 X 1.25 19 + 2 ft–lb 26 + 3 N–m 27 + 2 ft–lb 36 + 3 N–m
M10 X 1.5 38 + 4 ft–lb 52 + 5 N–m 53 + 5 ft–lb 72 + 7 N–m
M12 X 1.75 66 + 7 ft–lb 90 + 10 N–m 9 ft–lb 12 N–m
M16 X 2.0 15 ft–lb 225 + 20 N–m 229 + 22 ft–lb 310 + 30 N–m
M20 X 2.5 325 + 33 ft–lb 440 + 45 N–m 450 + 37 ft–lb 610 + 50 N–m
Thread Size
Regular Height Nuts
Regular Height Nuts
92 + 125 +
166 +
NOTE: Reduce torque values listed in the table above
by 25% for lubricated fasteners. Lubricated fasteners
are defined as threads coated with a lubricant such as
oil, graphite or thread sealant such as Loctite.
NOTE: Torque values may have to be reduced when
installing fasteners into threaded aluminum or brass.
The specific torque value should be determined based
on the fastener size, the aluminum or base material
strength, length of thread engagement, etc.
NOTE: The nominal torque values listed above are
based on 75% of the minimum proof load specified in
SAE J1199. The tolerance is approximately + 10% of the
nominal torque value.
Hydroject 3010 Page 2 – 5 Product Records and Maintenance

Other Torque Specifications
SAE Grade 8 Steel Set Screws Wheel Bolts and Lug Nuts
Thread Size
Square Head Hex Socket
1/4 – 20 UNC 140 + 20 in–lb 73 + 12 in–lb
5/16 – 18 UNC 215 + 35 in–lb 145 + 20 in–lb
3/8 – 16 UNC 35 + 10 ft–lb 18 + 3 ft–lb
1/2 – 13 UNC 75 + 15 ft–lb 50 + 10 ft–lb
Thread Size
7/16 – 20 UNF
Grade 5
65 + 10 ft–lb 88 + 14 N–m
1/2 – 20 UNF
Grade 5
80 + 10 ft–lb 108 + 14 N–m
M12 X 1.25
Class 8.8
80 + 10 ft–lb 108 + 14 N–m
M12 X 1.5
Class 8.8
80 + 10 ft–lb 108 + 14 N–m
Thread Size
Recommended Torque Recommended Torque**
** For steel wheels and non–lubricated fasteners.
Thread Cutting Screws Thread Cutting Screws
(Zinc Plated Steel) (Zinc Plated Steel)
Thread Size
No. 6 – 32 UNC 20 + 5 in–lb
No. 8 – 32 UNC 30 + 5 in–lb
No. 10 – 24 UNC 38 + 7 in–lb
1/4 – 20 UNC 85 + 15 in–lb
5/16 – 18 UNC 20 in–lb
3/8 – 16 UNC 200 + 100 in–lb
Type 1, Type 23 or Type F
Baseline Torque*
110 +
Thread
Size
Threads per Inch
Size
No. 6 18 20 20 + 5 in–lb
No. 8 15 18 30 + 5 in–lb
No. 10 12 16 38 + 7 in–lb
No. 12 11 14 85 + 15 in–lb
Baseline Torque*
Type A Type B
Baseline Torque*
* Hole size, material strength, material thickness & finish
must be considered when determining specific torque
values. All torque values are based on non–lubricated
fasteners.
Conversion Factors
in–lb X 11.2985 = N–cm N–cm X 0.08851 = in–lb
ft–lb X 1.3558 = N–m N–m X 0.7376 = ft–lb
Product Records and Maintenance Page 2 – 6 Hydroject 3010

&KDSWHU
.RKOHU(QJLQH
7DEOHRI&RQWHQWV
,1752'8&7,21
63(&,),&$7,216
6(59,&($1'5(3$,56
(QJLQH5HPRYDODQG,QVWDOODWLRQ
.2+/(5(1*,1(6(59,&(0$18$/
+\GURMHFW 3DJH² .RKOHU(QJLQH

,QWURGXFWLRQ
7KLV&KDSWHUJLYHVLQIRUPDWLRQDERXWVSHFLILFDWLRQVDQG
UHSDLURIWKH.RKOHUHQJLQHXVHGLQWKH3UR&RUH
*HQHUDOHQJLQHPDLQWHQDQFHSURFHGXUHVDUHGHVFULEHG
LQ\RXU2SHUDWRU·V0DQXDO,QIRUPDWLRQRQHQJLQHWURX
EOHVKRRWLQJ WHVWLQJ GLVDVVHPEO\ DQG UHDVVHPEO\ LV
LGHQWLILHGLQWKH.RKOHU(QJLQH6HUYLFH0DQXDOWKDWLVLQ
FOXGHGDWWKHHQGRIWKLVVHFWLRQ
0RVWUHSDLUVDQGDGMXVWPHQWVUHTXLUHWRROVZKLFKDUH
FRPPRQO\ DYDLODEOH LQ PDQ\ VHUYLFH VKRSV 6SHFLDO
WRROVDUHGHVFULEHGLQWKH.RKOHU(QJLQH6HUYLFH0DQX
DO7KHXVHRIVRPHVSHFLDOL]HGWHVWHTXLSPHQWLVH[
SODLQHG+RZHYHUWKHFRVWRIWKHWHVWHTXLSPHQWDQGWKH
VSHFLDOL]HGQDWXUHRIVRPHUHSDLUVPD\GLFWDWHWKDWWKH
ZRUNEHGRQHDWDQHQJLQHUHSDLUIDFLOLW\
6HUYLFHDQGUHSDLUSDUWVIRU.RKOHUHQJLQHVDUHVXSSOLHG
WKURXJK\RXUORFDO.RKOHUGHDOHURUGLVWULEXWRU
.RKOHU(QJLQH 3DJH² +\GURMHFW

6SHFLILFDWLRQV
,WHP 'HVFULSWLRQ
0DNH'HVLJQDWLRQ .RKOHU&RPPDQG3UR&DUE²VWURNH9²7ZLQ
$LU&RROHG2+9
1XPEHURI&\OLQGHUV
%RUH[6WURNH µ[µPP[PP
7RWDO'LVSODFHPHQW &XELF,QFKHVFF
&RPSUHVVLRQ5DWLR
'U\:HLJKWDSSUR[LPDWH 3RXQGV.LORJUDPV
)XHO 8QOHDGHG5HJXODU*DVROLQH0LQLPXP2FWDQH
)XHO7DQN&DSDFLW\ 86*DOORQV/LWHUV
*RYHUQRU 0HFKDQLFDO
,GOH6SHHGQRORDG ²530
+LJK,GOHQRORDG ²530
(QJLQH2LO 6HH2SHUDWRU·V0DQXDO
2LO3XPS *HDUGULYHQWURFKRLGW\SH
&UDQNFDVH2LO&DSDFLW\ 864XDUW/LWHUVZLWKILOWHU
6WDUWHU 9'&
+\GURMHFW 3DJH² .RKOHU(QJLQH

6HUYLFHDQG5HSDLUV
(QJLQH5HPRYDODQG,QVWDOODWLRQ
3DUNWKHPDFKLQHRQDOHYHOVXUIDFHHQJDJHWKHSDUN
LQJEUDNHDQGUHPRYHWKHKRRG
'LVFRQQHFW ERWK WKH SRVLWLYH DQG QHJDWLYH ²
FDEOHVIURPWKHEDWWHU\/RRVHQWKHEDWWHU\FODPS,WHP
DQGUHPRYHWKHEDWWHU\
'UDLQWKHRLOIURPWKHHQJLQHLQWRDVXLWDEOHFRQWDLQHU
'LVFRQQHFWWKHGULYHFRXSOLQJIURPWKHFOXWFKDGDSWHU
VHH'ULYH&RXSOLQJ5HPRYDODQG,QVWDOODWLRQLQ:DWHU
6\VWHP6HUYLFH
5HPRYH WKH ZDWHU SXPS GULYH EHOW DQG K\GUDXOLF
SXPSGULYHEHOW
'LVFRQQHFWWKHHQJLQHZLULQJKDUQHVVFRQQHFWRU'LV
FRQQHFWDQGSOXJWKHIXHOKRVH
5HPRYHIRXUQXWV,WHPFDSVFUHZV,WHPDQG
ZDVKHUV,WHPVHFXULQJWKHHQJLQHWRWKHIUDPH
$WWDFK DQ HQJLQH OLIWLQJ FKDLQ WR WKH HQJLQH OLIWLQJ
VWUDSV&RQQHFWWKHFKDLQWRDKRLVWRUEORFNDQGWDFNOH
DQGUHPRYHVODFNIURPWKHFKDLQDQGOLIWLQJGHYLFH2QH
SHUVRQVKRXOGRSHUDWHWKHKRLVWRUEORFNDQGWDFNOHDQG
WKHRWKHUSHUVRQVKRXOGKHOSJXLGHWKHHQJLQHRXWRIWKH
IUDPH5HPRYHWKHHQJLQHIURPWKHIUDPH
0RXQWWKHHQJLQHLQDQHQJLQHUHEXLOGLQJVWDQGRUSXW
LWRQDVWXUG\ZRUNEHQFK%HIRUHGLVDVVHPEOLQJWKHHQ
JLQHUHPRYHH[WHUQDODFFHVVRULHVVXFKDVWKHPXIIOHU
DLU FOHDQHU K\GUDXOLF SXPS FOXWFK K\GUDXOLF SXPS
SXOOH\ ZDWHU SXPS FOXWFK DQG FOXWFK NH\ VHH 'ULYH
&RXSOLQJ 5HPRYDO DQG ,QVWDOODWLRQ LQ :DWHU 6\VWHP
6HUYLFH
7RLQVWDOOWKHHQJLQHSHUIRUPVWHSV²LQUHYHUVH
RUGHU
5HSODFHWKHRLOILOWHUDQGILOOWKHHQJLQHZLWKWKHFRU
UHFWRLO
)LJXUH
.RKOHU(QJLQH 3DJH² +\GURMHFW

Chapter 4
Hydraulic System
Table of Contents
SPECIFICATIONS . . . . . . . . . . . . . . . . . . . . . . . . . . 2
GENERAL INFORMATION . . . . . . . . . . . . . . . . . . . 3
Hydraulic Hose and Fitting Information. . . . . . . . 3
Pushing or Towing. . . . . . . . . . . . . . . . . . . . . . . . 5
HYDRAULIC DIAGRAM. . . . . . . . . . . . . . . . . . . . . . 6
SPECIAL TOOLS . . . . . . . . . . . . . . . . . . . . . . . . . . . 7
Hydraulic Tester. . . . . . . . . . . . . . . . . . . . . . . . . . 7
TROUBLESHOOTING . . . . . . . . . . . . . . . . . . . . . . . 8
Transmission Operates in One Direction Only . . 8
System Operates Hot, Looses Power or
Will Not Operate in Either Direction. . . . . . . . . 8
TESTING . . . . . . . . . . . . . . . . . . . . . . . . . . . . . . . . . 9
Hydraulic Tests . . . . . . . . . . . . . . . . . . . . . . . . . 10
ADJUSTMENTS. . . . . . . . . . . . . . . . . . . . . . . . . . . . 11
Traction Cable Adjustment . . . . . . . . . . . . . . . . . 11
Speed Control Adjustment. . . . . . . . . . . . . . . . . 11
Transmission Neutral Adjustment . . . . . . . . . . . 12
Aeration Speed Adjustment. . . . . . . . . . . . . . . . 12
Pump Drive Belt Adjustment . . . . . . . . . . . . . . . 13
REPAIRS . . . . . . . . . . . . . . . . . . . . . . . . . . . . . . . . 14
Pump Drive Belt Replacement . . . . . . . . . . . . . 14
Hydraulic Pump Removal and Installation. . . . . 15
Pump Shaft Seal Replacement . . . . . . . . . . . . 16
Pump Charge Check Valve Service . . . . . . . . . 17
Pump Bypass Valve Service . . . . . . . . . . . . . . . 17
Charge Pump Service . . . . . . . . . . . . . . . . . . . . 18
Major Pump Repair . . . . . . . . . . . . . . . . . . . . . . 18
Wheel Motor Removal and Installation . . . . . . . 22
Wheel Motor Repair. . . . . . . . . . . . . . . . . . . . . . 23
Hydroject 3010 Page 4 - 1 Table of Contents

__________________________________________________________________________________________
________________________________________________________________________________________________________________________________________________________
________________________________________________________________________________________________________________________________________________________
________________________________________________________________________________________________________________________________________________________
Specifications
Item Description
Pump
Rated system pressure 2100 PSI maximum, 1000 PSI continuous
Rated system flow 8.5 GPM maximum at 3500 RPM
Charge relief pressure 25 to 70 PSI psi at 3500 RPM
25 micron screw-on type. No by-pass
Wheel Motor Orbit rotor type
Hydraulic Oil
Reservoir (gear case) Approximately 4 - 5 quarts
Sundstrand Series 70, BDP-10L Variable Displacement Pump
Oil filter
See Operator’s Manual
Specifications Page 4 - 2 Hydroject 3010
Table of contents
Other Toro Lawn And Garden Equipment manuals

Toro
Toro ProCore 864 User manual

Toro
Toro PROCORE 440 User manual

Toro
Toro Pro Control 138-7588 User manual

Toro
Toro 39519 User manual

Toro
Toro Bullseye QuickGroom 550 User manual

Toro
Toro 30639 User manual

Toro
Toro 130-8716 User manual

Toro
Toro 22473 User manual

Toro
Toro Workman 1100 Reference manual

Toro
Toro TimeMaster 21199 User manual