manuals.online logo
Brands
  1. Home
  2. •
  3. Brands
  4. •
  5. Tot Mate
  6. •
  7. Indoor Furnishing
  8. •
  9. Tot Mate TM2432R User manual

Tot Mate TM2432R User manual

1
#0964-3142
3594.TM2432.9/25/18
©2018 Stevens Industries, Inc.
Due to continuing product development, Stevens reserves the right to change specifications without notice.
CAUTION – CHOKING HAZARD
Adult assembly required due to presence
of small parts and sharp edges.
ATTENTION
Please unpack and assemble in an area away from children's activities. Remove all tools
and excess materials from work area after assembly of unit is complete. Dispose of pallet
and packaging materials in an environmentally friendly manner. If any parts are missing
or damaged, please call Stevens for immediate parts replacement (1-800-350-3270).
When ordering parts, give the Model Number and Color of the unit.
by Stevens Industries, Inc.
704 West Main St.
Teutopolis, IL 62467
P: 800.350.3270
P: 217-857-7100 • F: 217-857-7101
www.totmate.com
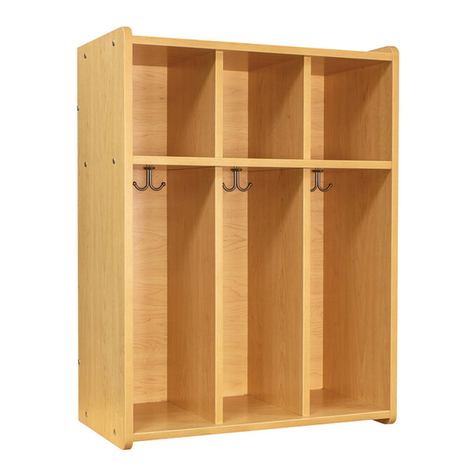
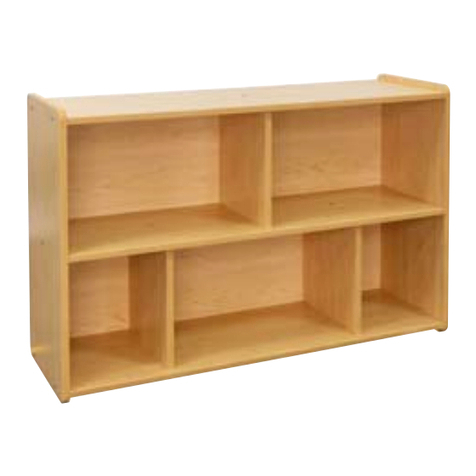
TM2432R
IMPORTANT!
Be sure to keep all parts supported during assembly to avoid damage.
Do not over-tighten screws or it will damage the pre-drilled holes;
snug fit is adequate.
2-PERSON ASSEMBLY RECOMMENDED.
TM2432R
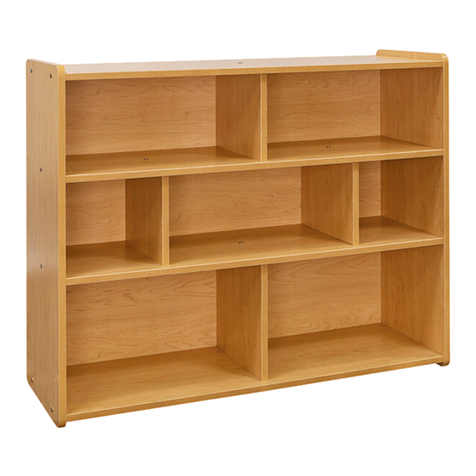
Toddler Floor Locker
076,QYHQWRU
\
3DUWV/LVW
Parts List
3$5747<,7(0
;;
;;
;;
;;
;;
;;
;;







'(6&5,37,21
(QG8
7RS%RW
%DFN
%DFN6KRUW
6KHOI0LG
'LYLGHU6KRUW
'LYLGHU/RQJ
+RRN$GYWJ&RDW'EO+RU]1L
6FUHZ7DSS3K2Y1,[
6FUHZ&RQQ+[)O=1PP[PP
6FUHZ&RQQ+['F1LPP[PP
6FUHZ7D
SS
3K:K=LQF;
HARDWARE / TOOLS INCLUDED
Confirmat Bolt (11)
(Screw Conn HxDc Ni 7mmx50mm)
Hex Wrench
Flat Head Confirmat Bolt (10)
(Screw Conn HxFl ZN 7mmx50mm)
Coat Hook Screw (9)
(Screw Tapp PhOv NI #10x.75)
Coat Hook (8)
(Hook Advtg Coat Dbl Horz Ni)
Back Screw (12)
(Screw Tapp PhWh Zinc #8x1.25)
(Phillips screwdriver required but not included.)
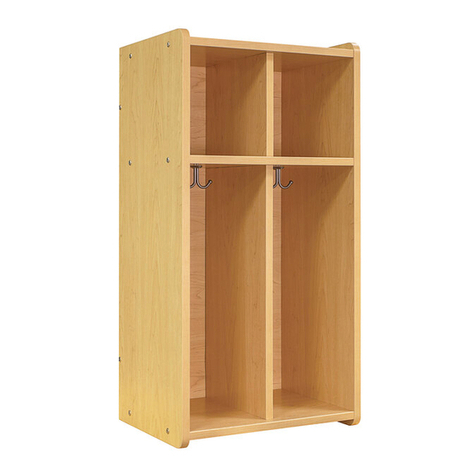
TM2432R
STEP-BY-STEP ASSEMBLY
2#0964-3142
©2018 Stevens Industries, Inc.
Due to continuing product development, Stevens reserves the right to change specifications without notice. 3594.TM2432.9/25/18
channel
channel
joint
IMPORTANT!
Be sure to keep all parts supported during assembly to avoid damage.
Do not over-tighten screws or it will damage the pre-drilled holes;
snug fit is adequate.
2-PERSON ASSEMBLY RECOMMENDED.
076,QYHQWRU
\
3DUWV/LVW
Parts List
3$5747<,7(0
;;
;;
;;
;;
;;
;;
;;







'(6&5,37,21
(QG8
7RS%RW
%DFN
%DFN6KRUW
6KHOI0LG
'LYLGHU6KRUW
'LYLGHU/RQJ
+RRN$GYWJ&RDW'EO+RU]1L
6FUHZ7DSS3K2Y1,[
6FUHZ&RQQ+[)O=1PP[PP
6FUHZ&RQQ+['F1LPP[PP
6FUHZ7D
SS
3K:K=LQF;
TM2432R
STEP-BY-STEP ASSEMBLY
3
#0964-3142
©2018 Stevens Industries, Inc.
Due to continuing product development, Stevens reserves the right to change specifications without notice.3594.TM2432.9/25/18
Lay Shelf (5) flat on floor, with side having the
most holes facing down.
STEP
1
Secure Top-Bottom (2) to two center Short
Dividers (6) with two Confirmat Bolts (11), using
the included Hex Wrench.
STEP
4
Insert dowels on Short Dividers (6) into holes on
Shelf (5). Make sure all raw edges are facing the
same direction (will be toward back of unit). Press
firmly into place.
STEP
2
raw edge
raw edges
Align holes on one Top-Bottom (2) with dowels
on Short Dividers (6). Make sure raw edges on
Short Dividers (6) and Shelf (5) are facing toward
routed channel on Top-Bottom (2). Press firmly
into place.
STEP
3
raw edges
channel
Lay one End (1) flat on floor, with side having the
most holes facing up.
STEP
6
Carefully turn assembly over, so Shelf (5) is facing
up. Secure Shelf (5) to two center Short Dividers
(6) with two Flat Head Confirmat Bolts (10). This
will be referred to as the Divider Assembly in
Step 7.
STEP
5
TM2432R
STEP-BY-STEP ASSEMBLY
4#0964-3142
©2018 Stevens Industries, Inc.
Due to continuing product development, Stevens reserves the right to change specifications without notice. 3594.TM2432.9/25/18
Insert dowels on other Top-Bottom (2) into holes
on End (1). Make sure channel is facing interior
of unit and is aligned with channel on other Top-
Bottom (2). Press firmly into place.
STEP
8
channels
Slide Backs (3 & 4) into channels on Top-
Bottoms (2). Press Backs (3 & 4) together and
seat firmly against End (1).
STEP
10
channels
Beginning with the holes closest to End (1), insert
dowels on each Long Divider (7) first into holes
on Top-Bottom (2). Then, lower other end to insert
dowels into corresponding holes on bottom of
Shelf (5). To provide enough room, Top-Bottom
(2) can be moved slightly, but no more than
necessary. Make sure all raw edges are facing
same direction (toward back of unit). Press all
parts firmly into place.
STEP
9
raw (back) edges
NOTE:
Movement of
Top-Bottom (2)
is exaggerated
in illustration, in
order to better
depict Long
Divider (7)
installation.
Insert dowels on one end of Divider Assembly
from Step 5 into holes on End (1). Make sure
channel on Top-Bottom (2) is facing toward
bottom of unit. Press firmly into place.
STEP
7
bottom edge
Divider
Assembly
channel
TM2432R
STEP-BY-STEP ASSEMBLY
5
#0964-3142
©2018 Stevens Industries, Inc.
Due to continuing product development, Stevens reserves the right to change specifications without notice.3594.TM2432.9/25/18
Carefully turn unit over, so other End (1) is facing
up.
STEP
13
Repeat Step 12 to secure End (1) to Top-
Bottoms (2) and Shelf (5).
STEP
14
Carefully position assembly with front edges on
floor and back facing up.
STEP
15
Position other End (1) on top of assembly, so
dowels on Top-Bottoms (2) and Shelf (5) align
with holes on End (1). Press firmly into place.
STEP
11
Secure End (1) to Top-Bottoms (2) and Shelf (5)
with six Confirmat Bolts (11).
STEP
12
TM2432R
STEP-BY-STEP ASSEMBLY
6#0964-3142
©2018 Stevens Industries, Inc.
Due to continuing product development, Stevens reserves the right to change specifications without notice. 3594.TM2432.9/25/18
Secure Backs (3 & 4) to Dividers (6 & 7) with
eight Back Screws (12). (Phillips screwdriver
not included.) NOTE: Two Back Screws (12)
will be inserted in joint between Backs (3 & 4).
IMPORTANT! Make sure Back Screws are
centered on raw edge of Dividers and inserted
straight into Dividers. This is necessary to
prevent Back Screws from protruding through
and damaging Divider surfaces.
STEP
16
Secure lower Top-Bottom (2) to two center Long
Dividers (7) with two Confirmat Bolts (11).
STEP
17
Attach each Coat Hook (8) to underside of Shelf
(5) using two Coat Hook Screws (9) and pre-
drilled holes.
STEP
19
Ensure that all joints, bolts and screws are tight.
STEP
21
This completes the assembly.
joint
Carefully turn unit over, so back is flat on floor.
STEP
18
Carefully stand unit upright.
STEP
20

Other Tot Mate Indoor Furnishing manuals

Tot Mate TML401R User manual

Tot Mate

Tot Mate TML401R User manual

Tot Mate TMS401R User manual

Tot Mate

Tot Mate TMS401R User manual

Tot Mate TM2410R User manual

Tot Mate

Tot Mate TM2410R User manual

Tot Mate TM2321R User manual

Tot Mate

Tot Mate TM2321R User manual

Tot Mate TM2313R User manual

Tot Mate

Tot Mate TM2313R User manual

Tot Mate TMS101R User manual

Tot Mate

Tot Mate TMS101R User manual

Tot Mate TMW301R User manual

Tot Mate

Tot Mate TMW301R User manual

Tot Mate TM9300R User manual

Tot Mate

Tot Mate TM9300R User manual

Tot Mate TM2206R User manual

Tot Mate

Tot Mate TM2206R User manual

Tot Mate TMS302R User manual

Tot Mate

Tot Mate TMS302R User manual

Tot Mate My Place TM9428R User manual

Tot Mate

Tot Mate My Place TM9428R User manual

Tot Mate TML402R User manual

Tot Mate

Tot Mate TML402R User manual

Tot Mate Toddler Compartment Storage TM2202R User manual

Tot Mate

Tot Mate Toddler Compartment Storage TM2202R User manual

Tot Mate TM2224R User manual

Tot Mate

Tot Mate TM2224R User manual

Tot Mate TM2181R User manual

Tot Mate

Tot Mate TM2181R User manual

Tot Mate TM2264R User manual

Tot Mate

Tot Mate TM2264R User manual

Popular Indoor Furnishing manuals by other brands

Dorel Home Products Queer Eye Liam Futon 2396479QE manual

Dorel Home Products

Dorel Home Products Queer Eye Liam Futon 2396479QE manual

Flexa 82-70131 Series Assembly instructions

Flexa

Flexa 82-70131 Series Assembly instructions

Verano Arezzo V870 manual

Verano

Verano Arezzo V870 manual

VITRA MedaPro Instructions for use

VITRA

VITRA MedaPro Instructions for use

Famisky Crank standing desk Assembly instructions

Famisky

Famisky Crank standing desk Assembly instructions

John Lewis Liv 413 92421 manual

John Lewis

John Lewis Liv 413 92421 manual

Monarch I 1135 Assebly instructions

Monarch

Monarch I 1135 Assebly instructions

Furinno FNBL-22015 Assembly instruction

Furinno

Furinno FNBL-22015 Assembly instruction

Pitarch 1007 Assembly instructions

Pitarch

Pitarch 1007 Assembly instructions

Homelegance 1526RF-31 Assembly instruction

Homelegance

Homelegance 1526RF-31 Assembly instruction

CAHABA JUNIPER 60 installation manual

CAHABA

CAHABA JUNIPER 60 installation manual

Forte KLKV721 Assembling Instruction

Forte

Forte KLKV721 Assembling Instruction

CORONA 2 DOOR 1 DRAWER WARDROBE Assembly instructions

CORONA

CORONA 2 DOOR 1 DRAWER WARDROBE Assembly instructions

Furniture of America FOA7225-D Assembly instructions

Furniture of America

Furniture of America FOA7225-D Assembly instructions

BLACK RED WHITE STYLIUS NBIU 170 Assembly manual

BLACK RED WHITE

BLACK RED WHITE STYLIUS NBIU 170 Assembly manual

Dormiente CLIA 1 Assembly instruction

Dormiente

Dormiente CLIA 1 Assembly instruction

Spectrum InTouch 20 owner's manual

Spectrum

Spectrum InTouch 20 owner's manual

Kidco BR202 user guide

Kidco

Kidco BR202 user guide

manuals.online logo
manuals.online logoBrands
  • About & Mission
  • Contact us
  • Privacy Policy
  • Terms and Conditions

Copyright 2025 Manuals.Online. All Rights Reserved.