4
2
1
ma I n t e n a n C e :
The mixer requires no maintenance (motor and bearings for the
mechanical parts are greased for life).
Safety device:
Check the function of the safety device regularly:
• Themotormust stop when the rotary knobs is in neutral
position (see g. 3B).
If the safety device does not function, do
not use the mixer. Contact your dealer.
lI S t o f e r r o r S a n d p o S S I b l e S o l U t I o n S :
If the problem cannot be solved, contact
your dealer.
The mixer does not start:
Check that ...
• Theupperpartofthemixerisinitsdownposition.
• Themixerispluggedinandconnectedtopower.
• Theelectricalpowersupplyiscorrect.
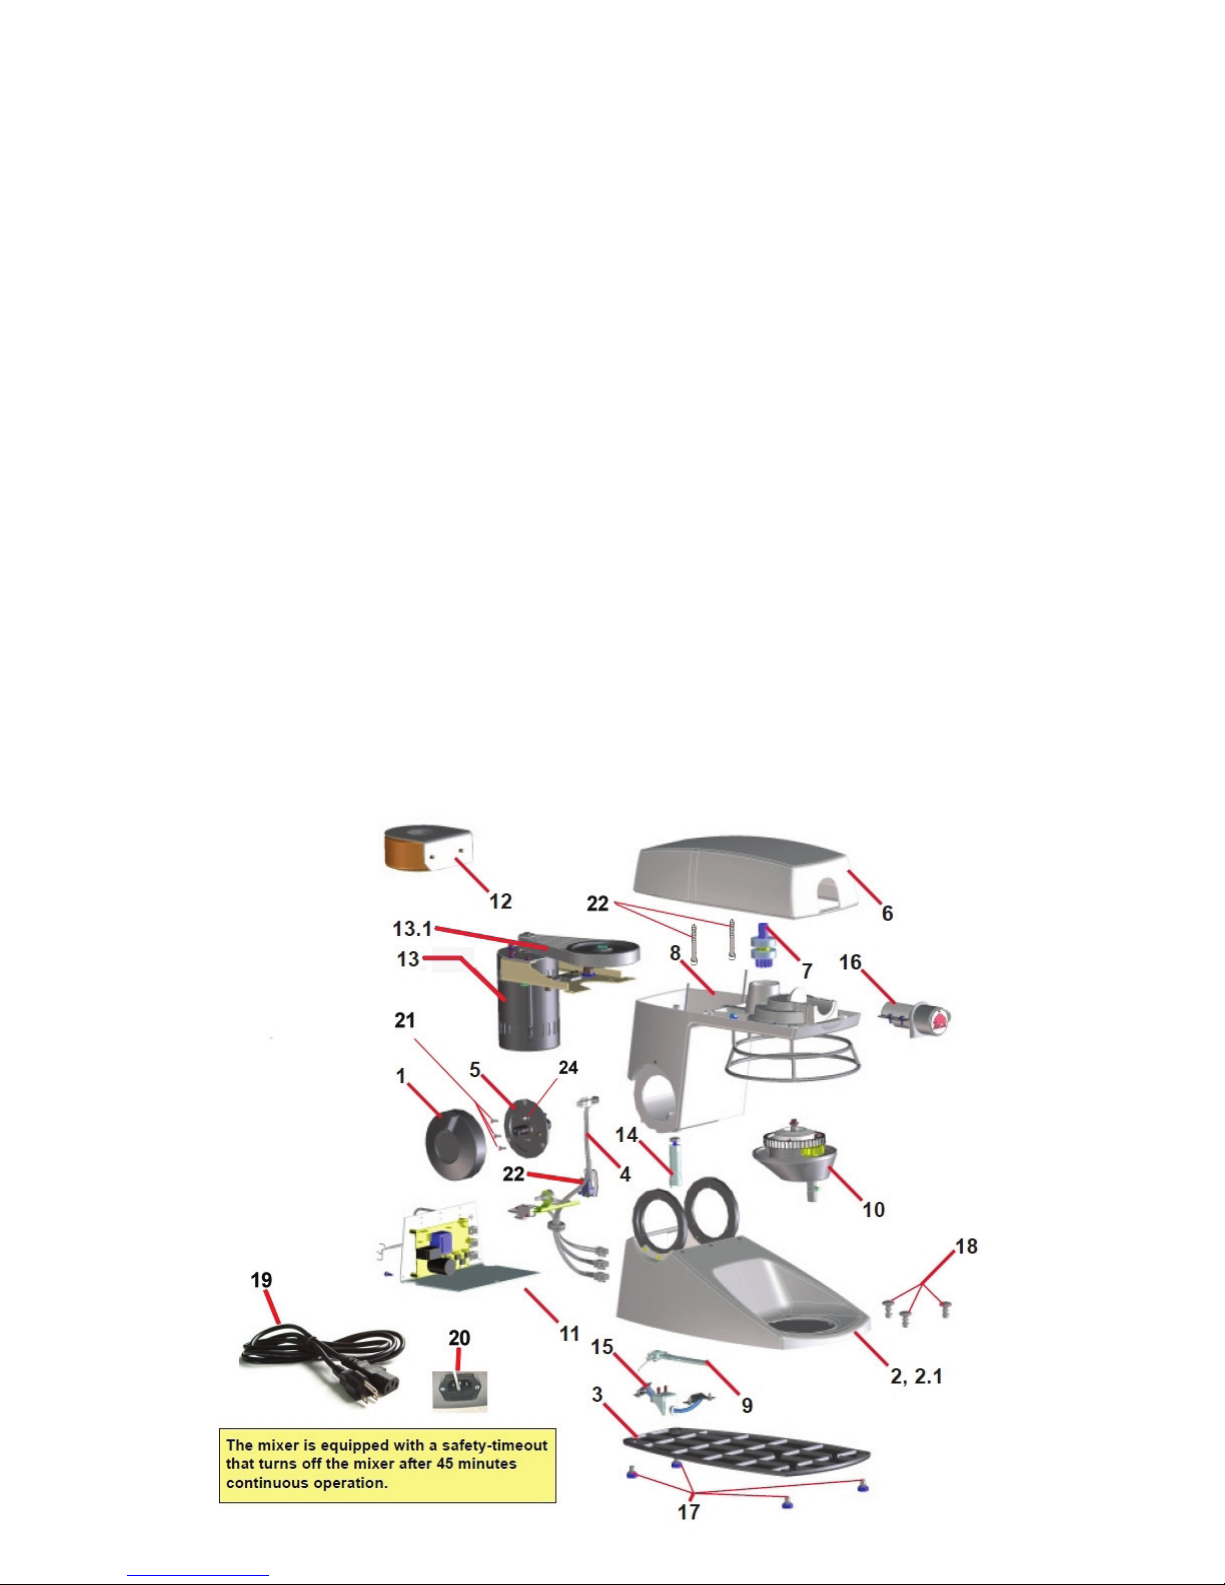
• Thefuseinthecableplug(g.6, 1) has not been burned.
If the fuse is defective, it can be replaced by the extra fuse
(g.6, 2) that is also available in the cable plug.
The mixer stops during work:
• The mixer is overloaded due to too high speed or too
heavy loading. See the paragraph “Overloading”.
In case of power failure set the rotary
button back to neutral position, and the
mixer can be started again.
The tool is stuck in the bayonet shaft:
Thisisnormallyduetoinsufcientcleaningordamagedhole
in the tool:
• Whenthetoolisstuck,donotforceitfree.Applyalittle
oil and let this work a couple of minutes.
• Turnthetoolbackwardsandforwardsuntilitcanbere-
moved.
Unnormal noise:
Metallicnoise...
• Thetoolisdistortedandhitsthebowl.
• Thebowlhasbeendamagedorisnotinitsproperposi-
tion.
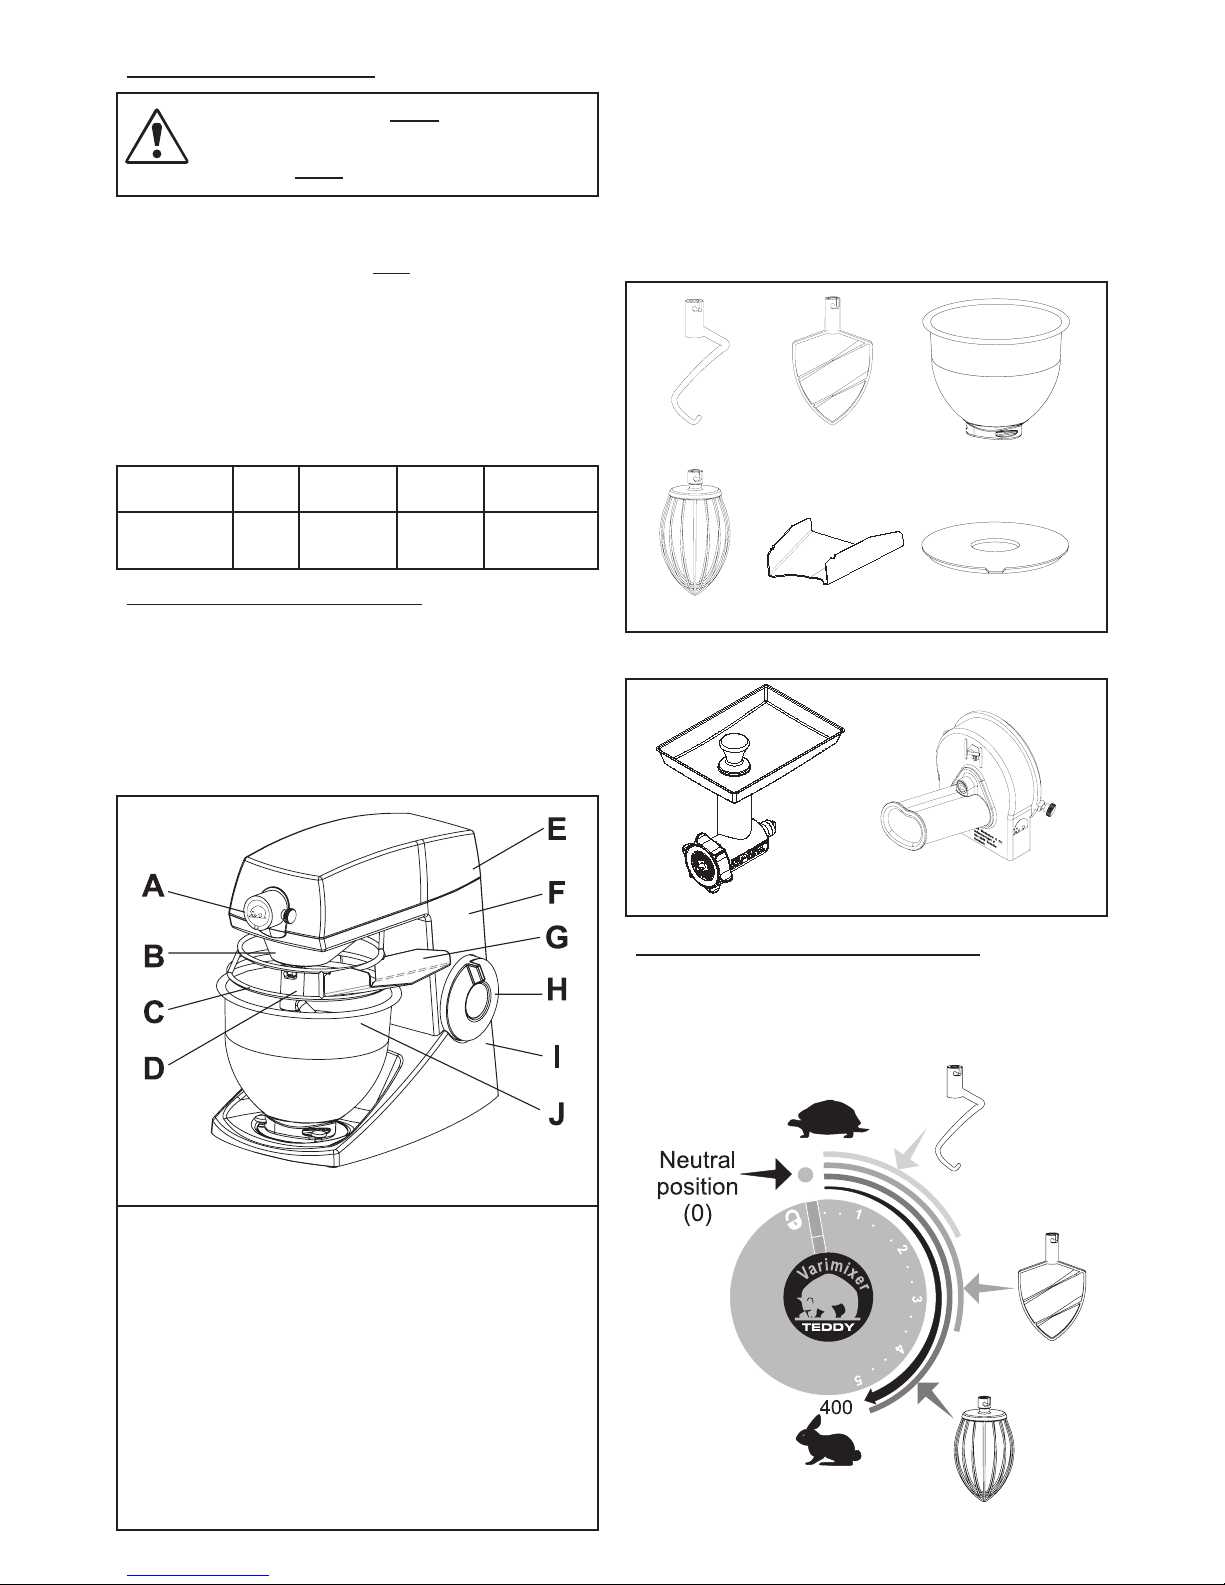
mo U n t I n G o f a C C e S S o r I e S :
The mixer is equipped with an attachment hub with variable speed,
and with the possibility of attaching the following equipment:
• Meatgrinder,suppliedwithmeattray,stomperandsetof
knivesconsistingofbladeandplate5/32”.
• Vegetableslicermountedwithdiscsforshredding,grat-
ing and cube cutting.
For further information regarding ac-
cessories, please see the special sheets
following the accessories.
The mixer must always be disconnected
before mounting or dismantling of the
accessory.
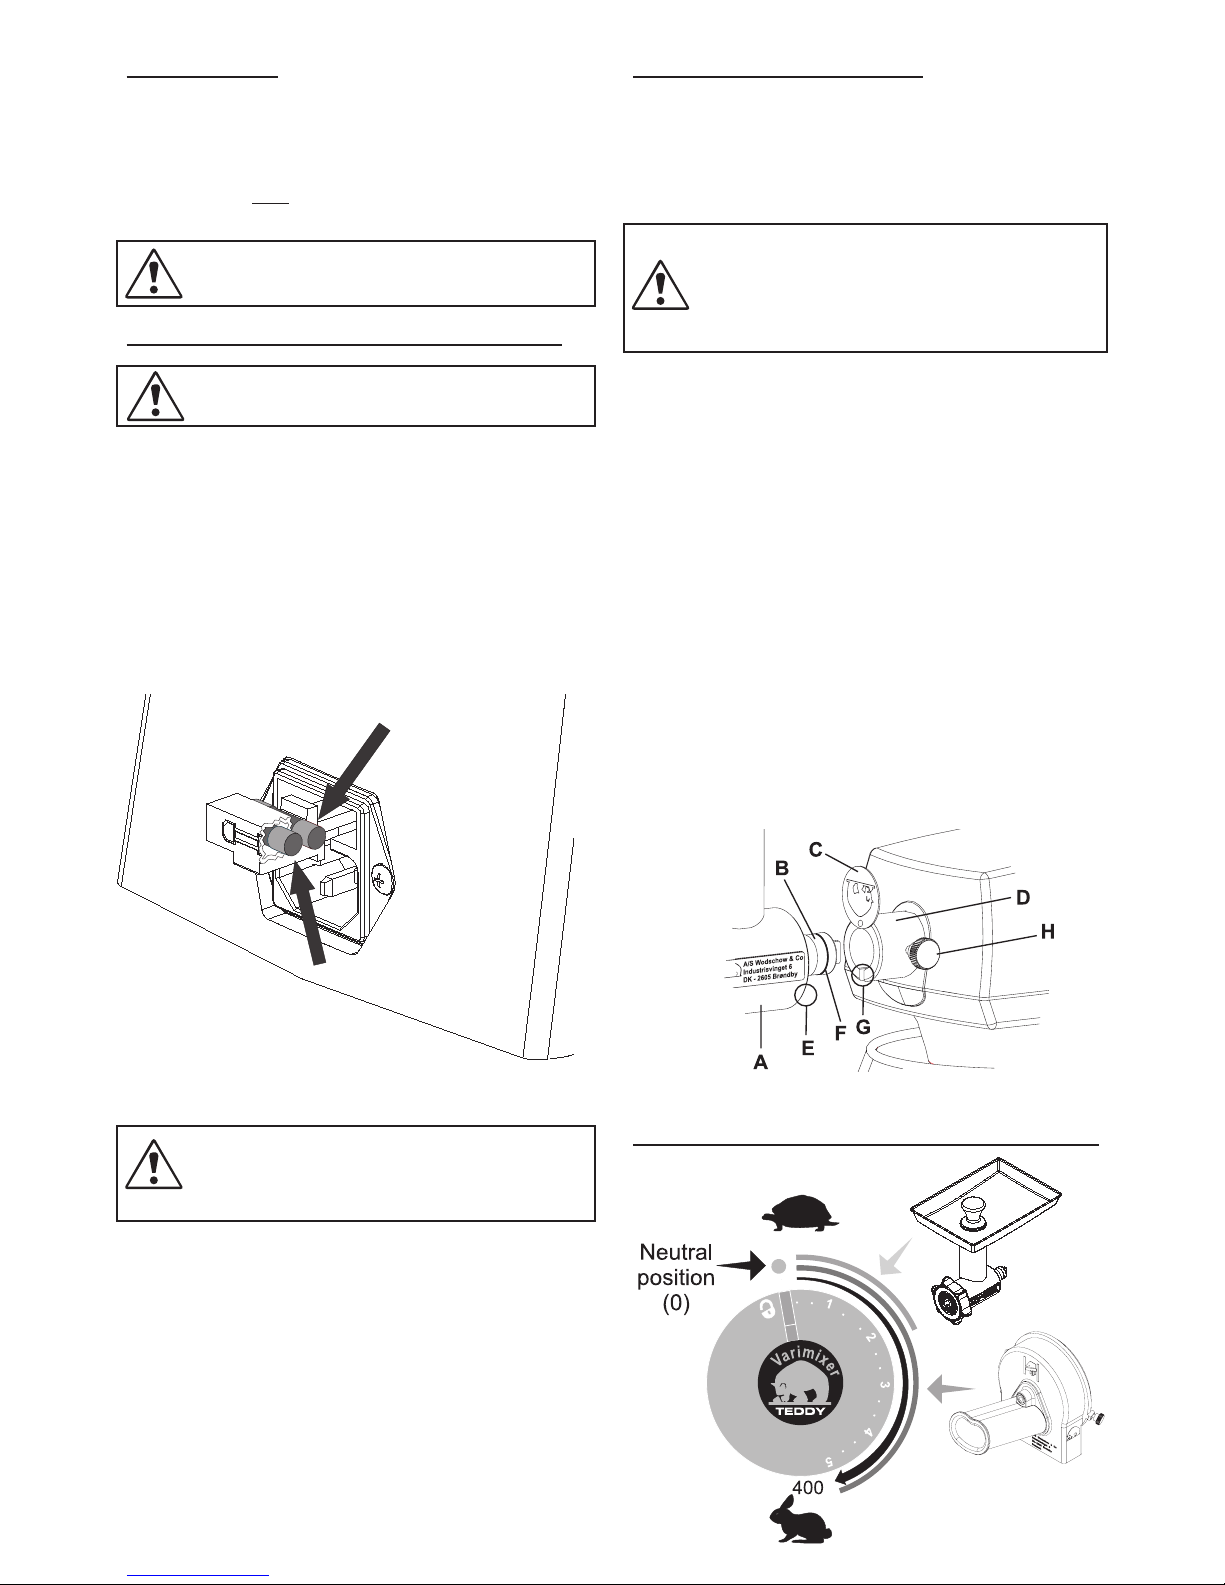
Mounting of accessories (g. 7):
• Assembletheaccessoryinquestion.
• Stopthemixer.
• TurnthecoverplateC away from the hole.
• Whenmountingthepre-mountedaccessoryA, the shaft
B is inserted into the attachment drive Dof the mixer.
• By turning the accessory until the pin Eis pointing to-
wards the slot Ga correct clutch is obtained.
• TheaccessoryispushedasfarintotheattachmenthubD
as possible. (The pin Emust be in the slot G, then the shaft
of the accessory is in a correct clutch with the attachment
drive).
• TheaccessoryisfastenedbyturningtheknobHclock-
wise.
Dismantling of accessories (g. 7):
• Stopthemixer.
• TurntheknobHcounterclockwise until the locking screw
is free of the hole F.
• Takeouttheaccessoryoftheattachmenthub,dismantle
and clean it.
Fig. 7 Mounting of accessories.
re C o m m e n d e d S p e e d S f o r a t t a C h m e n t h U b :
Fig. 6 Fuses in the cable plug.