manuals.online logo
Brands
  1. Home
  2. •
  3. Brands
  4. •
  5. Viavi
  6. •
  7. Test Equipment
  8. •
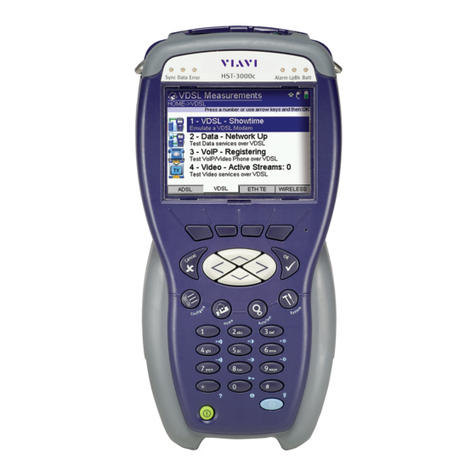
  9. Viavi HST-3000 Parts list manual

Viavi HST-3000 Parts list manual

HST Ethernet Quick Card
The product comes in Ethernet only or Ethernet/T1/T3 variations and works in conjunction with
a fiber cleaning and inspection kit to help turn-up and maintain Ethernet backhaul links from the
cell site.
When connecting to an optical link first make sure the link is clean using the proper inspection
probes. Then connect the HST-3000 to the line under test using the proper SFP connector into
port 1 on the HST Ethernet SIM.
2
1 Testing with the HST-3000
This section describes testing using the HST-3000 located in the field. The first two sections
(Setting up an Electrical Link and Setting up an Optical Link) describe how one will connect the
unit to the link under test. Technicians serving as the loop unit (tests will be run by a far end
HST-3000, TB6000A, TB8000, or QT-600) can stop at this point. However, if the technician is
responsible for validating the link he or she must complete the next two sections of Quick
Testing and RFC 2544 testing. The final section details how to offload the RFC 2544 results
from the HST for storage or further analysis.
1.1 Setup for Testing an Electrical Link with the HST-3000
This section describes setup and testing to a RJ-45 connection located in the field. If testing to
an optical connection, proceed to the next section for instructions.
Step
Directions
1
The first step is turning the unit on and then
hitting the home key. Then select the Eth Elec
tab and select option 1 Terminate.
2
The unit will now boot up. Make sure to insert
the cable into the location (Port 1) on the left side
of the unit. Do not plug into the electrical cable
on the top of the unit.
3
The next step is to select Layer 2 Traffic as your
Test selection.
3
4
Now press the configure button on the tester.
Then select Auto Negotiation and depending on
the network select On or Off. This will most
likely be set to Off. Set the RFC 2544 Mode to
Disable.
5
Next press the right arrow key until you get to
the Link Init screen. Then set the speed to
100Mbps and the Duplex to Full. Next press the
home key.
6
You should see the screen turn green. If not,
select the display key and then select the
summary result pane. Then select the restart
key on the right side. If you cannot get to this
step check the settings and the physical
connection.
7
The tester is now ready to receive loop
commands or proceed to Quick Testing using the
HST-3000 (Section 4.3)
4
1.2 Setup for Testing an Optical Link with the HST-3000
This section describes setup and testing when the location in the field is an optical drop. If there
is instead an electrical RJ-45 handoff then the method detailed previously should be used.
Step
Directions
1
The first step is turning the unit on and then
hitting the home key. Then select the Eth
Optical tab and select option 1 1G Terminate.
2
The unit will now boot up. Make sure to insert
the proper SFP into the R/T 1 slot (top left of the
unit). The proper SFP will be either a 1310nm or
850nm optical SFP depending on the handoff.
3
The next step is to select Layer 2 Traffic as your
Test selection.
4
Now press the configure button on the tester.
Then select RFC 2544 Mode = Disable and
Auto Negotiation and depending on the network
select On or Off (most likely this will be set to
on). Next press the home key.
5
5
Now select the Action tab and then select Laser
On.
6
You should see the screen turn green. If not,
select the display key and then select the
summary result pane. Then select the restart
key on the right side.
7
The tester is now ready to receive loop
commands or proceed to Quick Testing using the
HST-3000 (Section 4.3)
6
1.3 Quick Testing Using the HST-3000
This section describes how to quickly check an active link exists between two test sets. This test
proves that the link exists and will detect if errors occur. After this section is complete one can
safely run the RFC 2544 test to validate the pipe.
Step
Directions
1
This section continues from either section 4.1 or
4.2. If you have not completed the appropriate
section, please do so at this time.
2
Press the configure button. Tap the left and
right arrows until you get to the Summary
Settings Screen.
Then Select:
•Loop Type -> Broadcast
•Tx Payload -> Acterna
•Frame Length -> Random
•Encapsulation -> Most Likely
this will be VLAN tagged though it
depends on the location and network
•VLAN ID and Priority ->
Depends on Network, see work order
•Traffic Load -> again depends
on network, see work order. If
unknown enter 1%.
3
Tap the Right arrow until you get the Ethernet
Tab.
•Frame Type -> 802.3
Please note that if you are running across a
switched service you have to set the Destination
MAC equal to the far end’s Source MAC
address on both testsets.
4
Tab right to select the Error Page.
Make sure that
•Error Type -> FCS
•Insertion Type -> Single
7
5
Tap right to select the Ethernet Filter Tab.
Make sure that
•Destination Type -> Don’t Care
•Source Type -> Don’t Care
•Encapsulation -> Don’t Care
•Payload Analysis -> On
•Rx Payload -> Acterna
6
Next press the home key. Then select Restart.
7
Now to Loop up the far end select the Action
Key, then select #2 Loop and then Select #1
Loop Up.
8
You should see a message at the top stating
“Remote Loop Up Successful…”… If you do
not see this message please double-check your
settings. If the message still does not appear
repeat steps 1-6 for a far end HST and if using a
TB6000A or TB8000 do steps 1-6 in section 3.3.
9
Now select the Action key and then select Start
Traffic. Check that the Frame LED on the top of
the unit becomes illuminated.
10
Press the right arrow to see the Link Stats and
ensure that frames are being received (Total Util
% Cur is >0).
8
11
Now press the left arrow to go back to the
summary page. Check that the summary page
remains green. Select the Action button and
select Insert Single FCS Error.
12
Check that the screen has turned red and a
single error has appeared on the screen.
13
Quick test is now complete. Please proceed to
the next section RFC 2544 testing.
9
1.4 RFC 2544 Testing Using the HST-3000
This section describes how to validate the link between two locations. The output of this test is a
go or no go on the quality of the link and the results can be saved for further analysis. This
section is expected to take approximately 25 minutes for testing.
Step
Directions
1
This section continues from 4.3. If you have not
completed that section, please do so at this time.
If you are ready to proceed, press the action key
and select Stop traffic.
2
Press the configure button. Tap the left and
right arrows until you get to the Summary
Settings Screen. Then select RFC 2544 Mode
and press Symmetric.
3
Tap right to select the RFC 2544 Settings. Make
sure that
•Load Format -> Bit Rate
•Auto Save Report -> Enable
•Auto Restore Cfg* -> Disable
You can also enter the customer, location,
technician and any comments you have that you
wish to be stored on the final report.
4
Tap right to select the Test Selections. Make sure
that
•Throughput -> Enable
•Latency (RTD)* -> Enable
•Packet Jitter * -> Enable
•Frame Loss -> Enable
•Back to Back -> Disable
•Max Bandwidth -> this will change at
each location but should be the CIR for
the circuit.
10
5
Tap right to select the Frame Length Tab. Make
sure that
•The smallest possible Frame Length is
selected (this will be either 64, 68, 70,
or 72 depending on the settings). To do
this go to Frame Length 1 and select the
value.
•Select 512 and 1024 in entries 4 and 5.
•Select User Defined for 1600 in entry 8.
•Make all the rest of the entries disabled
•Please see picture for a correct sample
setup.
6
Tap right to select the Throughput. Make sure
that
•Accuracy -> To within 0.1 (Mbps)
•Test Dur. -> 60 sec
•Frame Loss Tol -> 0Mbps
•Show Pass/Fail -> No
•Zero in Method -> JDSU Enhanced
7
Tap right to select the Latency. Make sure that
•Number of Trials -> 2
•Trial Dur. -> 60 sec
•Show Pass/Fail -> No
8
Tap right to select the Jitter. Make sure that
•Number of Trials -> 2
•Trial Dur. -> 60 sec
•Show Pass/Fail -> No
9
Tap right to select the Frame Loss. Make sure
that
•Test Procedure -> RFC 2544
•Trial Dur. -> 60 sec
•Test Granularity -> 10 Mbps
10
Next press the home key. Then select Restart.
11
11
Now select the Action key and then select Start
Traffic.
12
The RFC 2544 test will automatically run through
all of its tests and save results to the unit. A bar
at the top will diplay the minimum time
remaining for the test to be completed.
13
The link has now been fully tested. In the next
section one can download the results to USB and
view them on a laptop to determine if the link
passed or failed final inspection.
12
1.5 Downloading Results on the HST-3000 (via USB)
This section describes how to download results via USB from the HST-3000
Part 1: Connecting the USB Flash Drive to the HST-3000
Step Action Details
1. Connect Connect the USB Flash Drive to the HST-3000’s USB port on the
top of the mainframe.
Part 2: Transferring files from the HST-3000
Step Action Details
1. Power On Press the green Power Key to turn on the HST-3000.
2. Launch System Tools Press the System Navigation key, and press the TOOLS soft key.
Press the Up Arrow or Down Arrow key to select File Manager,
then press the OK key to manage user files in the file system.
3. Copy File(s) Using the OK key, Up Arrow key, and Down Arrow key,
navigate to the desired file. To go to RFC 2544 results select
results/rfc 2544 folder. Press the Action Soft key and select Copy
to USB. Repeat step 3 for all desired files.
13
Part 3: Ending File Transfer
Step Action Details
1. Shutdown HST-3000 Power cycle the HST-3000 by Pressing the green power button to
turn the unit off.
2. Disconnect Disconnect the USB Flash Drive from the HST-3000’s USB port
on the top of the mainframe.

Other manuals for HST-3000

9

Other Viavi Test Equipment manuals

Viavi IFR 4000 User manual

Viavi

Viavi IFR 4000 User manual

Viavi FIT-82P03-PRO User manual

Viavi

Viavi FIT-82P03-PRO User manual

Viavi 7200 Series Owner's manual

Viavi

Viavi 7200 Series Owner's manual

Viavi MTS 2000 Parts list manual

Viavi

Viavi MTS 2000 Parts list manual

Viavi ONX 580 User manual

Viavi

Viavi ONX 580 User manual

Viavi OneAdvisor-1000 User manual

Viavi

Viavi OneAdvisor-1000 User manual

Viavi AVX-10K User manual

Viavi

Viavi AVX-10K User manual

Viavi OneAdvisor ONA-800 User manual

Viavi

Viavi OneAdvisor ONA-800 User manual

Viavi AVX-10K User manual

Viavi

Viavi AVX-10K User manual

Viavi OneAdvisor 1000 User manual

Viavi

Viavi OneAdvisor 1000 User manual

Viavi T-BERD 5800 Parts list manual

Viavi

Viavi T-BERD 5800 Parts list manual

Viavi Parent Guide User manual

Viavi

Viavi Parent Guide User manual

Viavi T-BERD MTS 5800 Parts list manual

Viavi

Viavi T-BERD MTS 5800 Parts list manual

Viavi ONX-220 User manual

Viavi

Viavi ONX-220 User manual

Viavi HST-3000 User manual

Viavi

Viavi HST-3000 User manual
Viavi NSC-200 User manual

Viavi

Viavi NSC-200 User manual

Viavi NSC-100 User manual

Viavi

Viavi NSC-100 User manual

Viavi CT-X User manual

Viavi

Viavi CT-X User manual
Viavi SmartClass OLP-85 Series User manual

Viavi

Viavi SmartClass OLP-85 Series User manual

Viavi ALT-9000 User manual

Viavi

Viavi ALT-9000 User manual

Viavi HST-3000 Parts list manual

Viavi

Viavi HST-3000 Parts list manual

Viavi E4100 Series Parts list manual

Viavi

Viavi E4100 Series Parts list manual

Viavi T-BERD/MTS 8000 Parts list manual

Viavi

Viavi T-BERD/MTS 8000 Parts list manual

Viavi OneAdvisor 800 Platform User manual

Viavi

Viavi OneAdvisor 800 Platform User manual

Popular Test Equipment manuals by other brands

Agilent Technologies Infiniium DCA Programmer's guide

Agilent Technologies

Agilent Technologies Infiniium DCA Programmer's guide

KYORITSU 6050 instruction manual

KYORITSU

KYORITSU 6050 instruction manual

NI PXI-5122 Getting started guide

NI

NI PXI-5122 Getting started guide

Buckleys Wet Roof Pro' Application guide

Buckleys

Buckleys Wet Roof Pro' Application guide

Murideo MU-M4SOL user manual

Murideo

Murideo MU-M4SOL user manual

FFE Talentum UV/IR Test Unit Procedure

FFE

FFE Talentum UV/IR Test Unit Procedure

Levenhuk Ermenrich NetGeeks NP10 user manual

Levenhuk

Levenhuk Ermenrich NetGeeks NP10 user manual

Oakton ORPTestr 50 operating instructions

Oakton

Oakton ORPTestr 50 operating instructions

LaserLiner BatteryCheck operating instructions

LaserLiner

LaserLiner BatteryCheck operating instructions

Hanna Instruments HI 95701C instruction manual

Hanna Instruments

Hanna Instruments HI 95701C instruction manual

Getac PS236 quick start guide

Getac

Getac PS236 quick start guide

VOLTCRAFT DSO-6202F quick guide

VOLTCRAFT

VOLTCRAFT DSO-6202F quick guide

fafnir ME 5 operating instructions

fafnir

fafnir ME 5 operating instructions

Klein Tools Coax Explorer Plus instruction manual

Klein Tools

Klein Tools Coax Explorer Plus instruction manual

Extech Instruments ET30B user manual

Extech Instruments

Extech Instruments ET30B user manual

Keysight N443xD quick start guide

Keysight

Keysight N443xD quick start guide

Agilent Technologies 81250 System Programming Guide and SCPI Reference

Agilent Technologies

Agilent Technologies 81250 System Programming Guide and SCPI Reference

Leader Electronics Corp. LBO-522 instruction manual

Leader Electronics Corp.

Leader Electronics Corp. LBO-522 instruction manual

manuals.online logo
manuals.online logoBrands
  • About & Mission
  • Contact us
  • Privacy Policy
  • Terms and Conditions

Copyright 2025 Manuals.Online. All Rights Reserved.