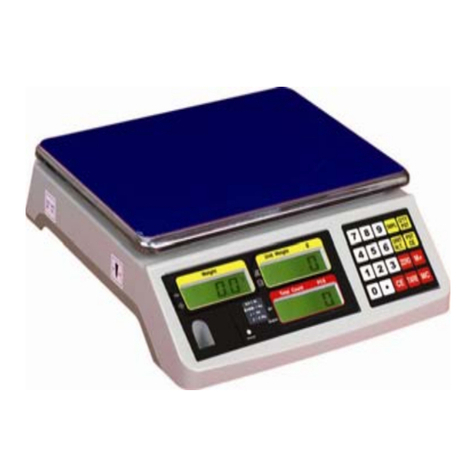
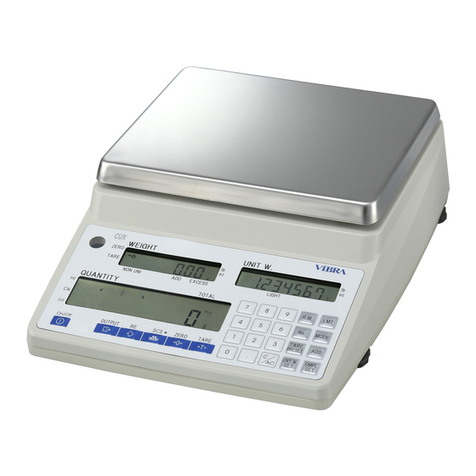
Vibra TPS SERIES User manual

CONTENTS
1. Cautions and Preparation.......................................... 1
2. Display and keypad................................................. 2
3. Operation Instructions..............................................3
4 .User setting............................................................... 5
Attachment1. RS232 communication protocols......... 12
Attachment2. Breakdown and Solution.......................13
Attachment3. Alarming........................ ......................14
Attachment4, Specification and unit conversion ........15
VIBRA TPS SERI C
COUNTING SCALES

一1 .0 Cautions and Preparation
1 .Display and operation panel can be cleaned by the wet towel
but avoid soaking and cleaning.
2. In case that the scale is not in correct zero position, please
press [ZERO] key, auto zero tracking function will work.
3. If a mobile phone or wireless is being used nearby, the display
may flash once but then return to normal status when turning
on. If not, please restart.
4. After long-time use (above one year), if the rechargeable
battery can not last for long time after being recharged for more
than 12-hour, it should be changed. Please contact with the
nearest agency.
5. Please shut off the power suply if the mahcine will not be used
for long time.
6. Please charge the machine in time when the low battery symbol
appears.
Preparation
1 .Avoid placing the machine in direct strong sunlight or draught
that may cause poor performance or malfunctions.
2. Calibration may be required before weighing or when the
machine is initially installed or relocated.
3. Place the machine on a firm and level table and center the
bubble.
4. Please use the individual socket to avoid the interfere of other
wiring·
5. Turn on the machine while there is no load on the pan.
6. Place the weight on the center of the pan for accurate weighing.
Make sure the weight is not over the max capacity as it could
damage the load cell inside.
2 .0 Display and keypad
Select the units: Kg, g, lb and oz.
Used for accumulation in the counting mode and
Used to save and enter the next setting in the
function setting mode.
Check the total accumulation in the weighing or
counting mode.
In the weighing mode, key the number to input the
unit weight and press the key for counting.
And it is used to exit in the function setting mode.
Key the number to input the quantity and press the
key for counting. And it is used to set backlight
function in the weighing mode.

Clear inputted data in the weighing mode.
In the weighing or counting mode, press [ZERO] to
return to 0 and in the function setting, it is used to
set the value.
In the weighing or counting mode, it tares the balance
and shows the net weight value and in the function
setting, it is used to set the value.
Used to set the quantity limit in the weighing or
counting mode.
3 .0 Operation Instructions
3. 1 .Power on
Turn on the machine. After the display shows the battery
voltage for 2seconds, the machine auto-checks and returns
to 0 and enters the weighing mode.
3. 2. Zero
Please check whether there is a zero symbol each time
before weighing. If not, the weight value may be not correct.
Please press [ZERO] key to make it return to zero.
Note: the zero range is the 4% of the maximum capacity of
the scale.
3.3. Unit
Press [UNITS] to select the units: Kg, g, lb and oz in the
weighing mode.
3.4. Tare and pre-tare
If you are using a container for weighing,then you can place the
container on the platform. And for weighing press[TARE] key
and the tare symbol will show on the display, which means it has
deducted the weight of the container and you can weigh your
sample in the container now.
To proceed the pre-tare, key 0-9 to input the tared weight (the
weight can't be over the max capacity of the scale). Press
[TARE] and the display shows the negative value, which means
the pre-tare is done.
To clear the tare, please remove the container and the display will
show the negative value. Press [TARE] key and the display
shows 0.
3.5. Sample setting
3.5.1 Qunatity sampling (unit weight unknown)
a. Place certain numbers of sample on the pan, and press
[CE]. The second line will show 0.
b. Key the number to input the quantity of samples, and
press after the weighing is stable.
c. The display on the third line will flash “CALC” for 1-
3seconds to finish the the sampling. Then it will show the
quantity of samples.
The operating steps are as follows:
A. Input the quantity and press
B. Flash for 1 second
C. Counting finished
3.5.2 Unit weight setting (unit weight known)
a. Press[CE] to zero the second line. Key the numbers
to input the unit weight.
b. Press to finish the sampling and it is ready for
counting
3.6. Accumulation
a. In the counting mode, press[M+] to enter the
accumulation checking mode shown as fig1.
b. Press to save and back to the normal weighing
mode
c. Accumulation can be proceeded many times by
repeating the above steps (no more than 99times in
total).
d. Press [CE]to clear the accumulated times.
3.7. Accumulation check
a. In the counting mode, press [TOTAL] to check the
accumulated weight, shown as the above fig2.
b. Press to shift to the normal counting mode.
c. Press [CE]to clear the accumulated times.
3. 8. Quantity limit alarming
When counting, user can proceed quantity limit alarming by
setting limit. When the quantity is more than the upper limit,
the machine will beep fast. When the quantity is less than
the lower limit, the machine will beep slowly. The setting
method is as follows:
a. Press [QUANTITY CHECK] to enter the quantity limit
setting, shown as the fig3.
b. Press [ZERO] to shift ON or OFF. Press [M+] to save
and enter the next step.
c. “L” flashes on the second line. Input the lower limit.
Press [M+] to save and enter the next step.
d. “H” flashes on the third line. Input the upper limit. Press
[M+] to save and back to the counting mode. The setting
is finished.

一4 .0 User Setting
In the weighing mode, press [CE] and [QUANTITY CHECK] at
the same time to shift to the user setting.
4. 1 Filter setting
This parameter is for setting the stability of the machine. The
bigger is the value, the more stable is the weighing but the
slower is the weighing speed and vice versa. Press [ZERO]
or [TARE] to modify the parameters. Press [M+] to enter
the next setting or to save the setting and exit to the
normal weighing mode.
4.2 Unit weight sampling
This setting is to assure both accurancy and speed of sampling
through unit weight in different enviroment. User can select 1/2/3.
The default value is 3. Press[ZERO] or [TARE] to modiftv
the parameter. Press [M+] to enter the next setting or to
exit to the normal weighing mode.
Note:
Parameter 1: When the stability symbol appears, press
[QUANTITY CHECK] to sample immediately and show the
result. Otherwise, the calculation will be finished and the result
will be shown in 2seconds.
Parameter 2: When the stability symbol appears, press
[QUANTITY CHECK] to sample immediately and show the
result. Otherwise, it exits the sampling mode without calculation
in 2seconds to assure the sampling accurancy.
Parameter 3: When the stability symbol appears, press
[QUANTITY CHECKS] to sample immediately and show the
result. Otherwise, the machine will self-judge internally and
collect the effect data to proceed the counting. The sampling
will be finished and the result will be shown in 2-8seconds.
4.3 Unit weight sampling range
This setting is to assure the sampling accurancy. User can select
1-7. The smaller is the value, the more accurate is the sampling.
The default value is 1.

4.4 Zero tracking range
This setting is for zero tracking range in the weighing mode. User
can select 0-6. The default value is 2. If the value is 0, which
means that zero tracking is not proceeded. Press[ZERO] or
[TARE] to modify the parameter. Press [M+] to enter the
next setting or to exit to the normal weighing mode.
4.5 Default units setting
This is for setting default units. Press [ZERO] or [TARE] to
modify the parameter. Press [M+] to enter the next setting
or to exit to the normal weighing mode.
4.6 Backlight setting
This is for setting backlight of the machine. User can select: Auto, On
and Off. Press [ZERO] or [TARE] to modify the parameter. Press
[M+] to enter the next setting or to exit to the normal
weighing mode.

4.7 Sampling self-average
This function is to turn on/off sampling self-average. It is for
averaging the unit weight automatically when counting,i.e. when
the added quantity on the pan is 10%-100%, the machine will
calculate the new unit weight according to new quantity, which
makes the calculation more accurate.
Press [ZERO] or [TARE] to modify On/Off mode. Press
[M+] to enter the next setting or to exit to the normal
4.8 Communication protocols(Optional)
4.8.1 Communication address
This function is to select the communication address. User can select
1-25. Press [ZERO] or [TARE] to select the address. Press
[M+] to enter the next setting or to save and exit
4. 8.2 Selection of BPS
This function is to select BPS. Press [ZERO] or [TARE] to
select the range(9600/4800/2400/1200). Press [M+] to enter
the next setting or to save and exit.
4 .8.3 Selection of transmission way
This function 15 to connect Printer,pc and other euquiPment. User
Can select 3 transmission:

1 .Continuous transmission
2 .Stability transmission: stable once,transfer once.
3 .Response transmission
a .Select “SENT”
b .The flashing number on the second line shows the present
value. Press [ZERO] or [TARE] to select.
c. Press[M+] to enter the next setting or to cancel
and exit.
4 .8.4 Data format of RS232
This function is to select different data format of RS232.
User can select 7ways:
1 .fixed format (press [M+] to print)
2 .Gross weight output
3 .Net weight output
4 .Tare weight output
5 .Quantity output
6 . Quantity alarming signal output
Attachment 1:RS232 Communication protocols
1. .Order format
Note:1)"X"represents numbers(30H-39H);
2) One frame consists of 12Bits.
3) For example: unit weight : 0.0123, the communication
format is as follows:

4) Abnormal information response
2. Output format
Note: 1) One frame consists of 21 Bits.
2) X" represents numbers (30H-39H);
3) Alarm item is for quantity limit alarming.
a.When the quantity is more than upper limit, the sign
symboloutputis“+”.
b.When the quantity is less than lower limit, the sign
symboloutputis“-”
c.When the quantity is in normal condition, the sign
symboloutputis“blank".
4) Stable mode: ST is stability symbol. US is instability
symbol.
5) Unit: unit contains of 2Bits. If the unit is g, the first bit
Is“blank".
6) The ASCII code of“blank" is "20H”.
7) Line feed/Carriage is the symbol of the stop bit. Its
ASCII code is "OD"/"OA".
3. Fixed format:
Add: A :Machineadd.
N/W: 0. 0001 kg :Net weight
U/W: 0.1g :Unitweight
Pcs: 1 :Quantity
Attachment2:Breakdown and solution

Attachment3: Alarming
1 .Overload alarming
When the overload is 9d,the machine will beep and
Display . Please remove the weight immediately.
2. Unit weight deficiency alarming
When the unit weight or the set unit weight is not enough
(<1d),the unit weight deficiency symbol appears.
3. Quantity deficiency alarming
When the sampling quantity is less than the minimum
sampling weight (<1%max capacity),the quantity deficiency
symbol appears.
4. Charge alarming
When the machine is low battery, the symbol appears.
Please stop using the machine. Please charge the machine
with the provided adaptor. The charging time will be about
12hours per time.
5. Charging light alarming
The charging light is red when it is in charging and it turns
to green when it is full.
Attachment4: Specification and unit conversion VIBRATPS C
Unit conversion:
1 kg = 1000g
1 lb = 453. 59237g
1 oz = 28.349523125g
VIBRATPS 3C – 3kg/0.1g VIBRATPS 2C – 2kg/0.1g
VIBRATPS 6C – 6kg/0.2g VIBRATPS 5C – 5kg/0.2g
VIBRATPS 15C – 15kg/0.5g VIBRATPS 10C – 10kg/0.5g
VIBRATPS 30C – 30kg/1g VIBRATPS 20C – 20kg/1g
Table of contents
Other Vibra Scale manuals

Vibra
Vibra AJ-CESeries User manual

Vibra
Vibra CJ series User manual

Vibra
Vibra AJ Series User manual

Vibra
Vibra DJ series User manual

Vibra
Vibra SJ-6200 CE User manual

Vibra
Vibra VIBRA ALC 3 User manual

Vibra
Vibra FZ623E Series User manual

Vibra
Vibra CUX Series User manual

Vibra
Vibra HJ-KE Series User manual

Vibra
Vibra HJ-KCE series User manual

Vibra
Vibra DJ-150E User manual

Vibra
Vibra GZ II Series User manual

Vibra
Vibra HJ-K Series User manual

Vibra
Vibra SA/CA Series User manual

Vibra
Vibra AJH Series User manual

Vibra
Vibra CG-K User manual

Vibra
Vibra CJ-E series User manual

Vibra
Vibra GZII-CEx Series User manual

Vibra
Vibra VIBRA HAW 3 User manual

Vibra
Vibra SJ-E Series User manual