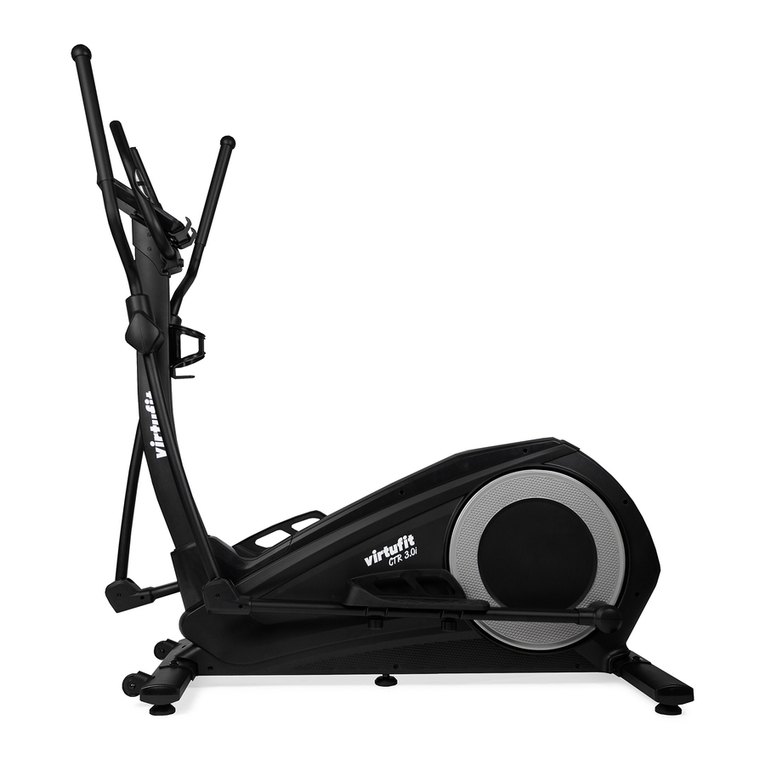
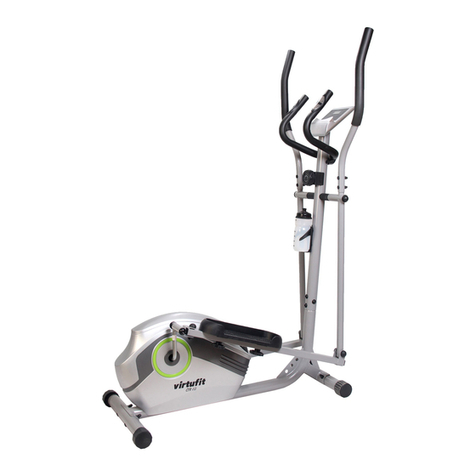
VIRTUFIT iConsole CTR 2.1 User manual

@virtufit_fitness
VirtuFit
www.virtufit.com
ASSEMBLY
VIDEO
USER MANUAL
iConsole CTR 2.1
CTR 2.1
SERIAL NUMBER
SERIENNUMMER
SERIENUMMER
NUMERO DE SERIE

USER MANUAL
02
TOOLKIT
MAIN FRAME CONSOLE HANDLEBAR (L+R)
UPPER HANDLEBAR (L+R) LOWER HANDLEBAR (L+R) FRONT STABILIZER
REAR STABILIZER FOOTPLATE (L+R) PLASTIC COVER FRONT (L+R)
BOTTLE HOLDER ADAPTER ROTATION ROD

USER MANUAL
03
TOOLKIT
(2
x
)
100
(1
x
)
22
(3
x
)
23
(4
x
)
84
(6
x
)
87
(4
x
)
86
(4
x
)
32
(1
x
)
101
(5
x
)
29
(2
x
)
24
(2
x
)
27
(10
x
)
9
(2
x
)
10
(12
x
)
11
(2
x
)
35
(4
x
)
91
(4
x
)
64
(10
x
)
9
(8
x
)
14
(
12
x
)
11
FOOT SUPPORT BAR (L+R) HANDLEBAR POST PLASTIC COVER FOOT (L+R)

USER MANUAL
04
STEP 01
91
9
64
91
9
64

USER MANUAL
05
STEP 02
STEP 06
98
10
11 92
94
9
10
9
10
11
21R
21R
21L
21L
22
30
30
29

USER MANUAL
06
STEP 03
STEP 04
11
11
15
18 96
18
15
14
33L
11
14
35
14
11
35
33R

USER MANUAL
07
STEP 05
STEP 06
30
29
28L
24
28R
27
30
L+R
33
13
14
92
92
14

USER MANUAL
08
STEP 07
STEP 08
8R
8L
10
9
11
10
98
97
13

USER MANUAL
09
STEP 09
20
88
87
86
87
88
86
L+R
31
20

USER MANUAL
10
USER MANUAL
FIG. A

USER MANUAL
11
FIG. B-1
FIG. B-2
USER MANUAL
Ma x
Ma x
Ma x

USER MANUAL
12
FIG. B-3
FIG. B-4
FIG. B-5
USER MANUAL

USER MANUAL
13
FIG. B-6
FIG. B-7
FIG. B-8
USER MANUAL
Ma x Ma x

USER MANUAL
14
USER MANUAL
FIG. C
1
4 5
2 3

ENGLISH
EN
15
INDEX
Safety instructions 15
Guarantee 15
Assembly instructions 15
Training with heart rate 16
Training with fitness applications 16
Maintenance 16
Troubleshooting 17
Console 17
Program 18
Training guidelines 19
SAFETY INSTRUCTIONS
WARNING!
Consult your doctor before you start exercising. This is particularly
important for people with health problems. Please read all
instructions before using the machine. VirtuFit assumes no
responsibility for injury or property damage resulting from the
use of this equipment. Please read this manual carefully before
assembling and/or using the machine.
• Make sure that the machine is properly assembled and that all
nuts and bolts are tight before using it.
• Lubricate all moving parts annually with petroleum jelly (acid-
free) or silicone spray.
• Do not wear loose clothing to avoid getting caught in moving
parts.
• Install and use the unit on a solid, level surface.
• Always wear clean sports shoes when using the appliance.
• Keep children and pets away from the appliance when in use.
• Maintain your balance when using the device.
• Do not place your fingers or other objects in the moving parts.
• Before exercising, consult your physician to determine the
appropriate frequency, duration and intensity of exercise for
your age and physical condition. Stop exercising immediately
if you experience nausea, shortness of breath, fainting, headache,
chest pain, tightness or any other discomfort.
• This machine should only be used by one person at a time.
• This machine is designed for domestic use and the maximum
user weight is 150 kg.
• Leave 1-2 metres of space behind the machine to avoid accidents.
• Place the machine on a clean, flat surface. Do not place it on a
thick carpet, as this may hinder the ventilation of the machine.
Do not place the machine outdoors or near water.
• Keep the storage area dry, clean and level to prevent damage.
Do not use the device for any purpose other than training.
• Use the device only in an environment where the ambient
temperature is between 10°C and 35°C. Store the device only in
an environment where the temperature is between 5°C and
45°C.
GUARANTEE
Warranty claims are excluded if the cause of the defect is the result
of:
• Maintenance and repair work not carried out by an official
dealer.
• Improper use, negligence and/or poor maintenance.
• Failure to maintain the appliance in accordance with the
manufacturer’s instructions.
Missing parts: If any parts are missing from the packaging, carefully
check the polystyrene foam and the appliance itself. Some parts (bolts,
screws, etc.) are already attached to the unit.
Error message: Make sure that all cables are carefully attached. The
aluminium feet of the console are very sensitive and must be kept
straight. If the console gives an error message after the machine
has been mounted, the aluminium feet of the console may be bent.
Straightening the aluminium feet may make the error message
disappear.
Hex head bolts: Make sure that the hex head spanner is pushed into
the bolt before applying force. This will prevent the head of the socket
bolt from turning.

ENGLISH
EN
16
Instruction
• To scan the QR code with an Android or IOS phone or tablet, a
QR code scanner is required. The app for scanning QR codes can
be downloaded from the App Store or Google Play Store.
• Scan one of the QR codes below to go directly to the App Store or
Google Play Store page where the fitness app can be
downloaded.
• Scan the QR code on the right to access the fitness app
manual. The manual describes step by step how to connect the
fitness app to the device, how the fitness app works and what its
capabilities are.
iConsole+
APP STORE GOOGLE PLAY MANUAL
Kinomap
APP STORE GOOGLE PLAY MANUAL
MAINTENANCE
Safe and efficient use can only be achieved if the appliance is
properly installed and maintained. It is your responsibility to ensure
that the appliance is maintained regularly. Parts that have been
used and/or damaged must be replaced before the appliance is
used again. The appliance should only be used and stored indoors.
Long-term exposure to weather and temperature/humidity changes
can have a serious impact on the electrical components and moving
parts of the unit. Always unplug the power cord from the unit before
cleaning or servicing it.
Daily maintenance
• Clean and remove sweat and moisture after each use.
TRAINING WITH HEART RATE
Hand sensors
This VirtuFit fitness machine is equipped with hand sensors for
measuring heart rate. The hand sensors are attached to the handle
and only work if both sensors are held for a longer period of time. For
optimal performance, it is important that the hands are slightly moist
and exert constant pressure on the sensors. Hands that are too dry or
moist may cause abnormal readings.
NOTE!
To avoid interference, never use the hand sensors with a
wireless heart rate monitor.
Wireless Heart Rate Monitor (5 kHz and Bluetooth)
This VirtuFit fitness device is equipped with a wireless heart rate
receiver. To measure your heart rate with a wireless heart rate monitor,
use a heart rate monitor that works on Bluetooth and/or a 5 kHz
frequency. With a wireless heart rate monitor, it is important that the
electrodes are slightly moist and the heart rate monitor fits well to
your body. Refer to your heart rate monitor's user manual for proper
instructions. Incorrect use of the heart rate monitor may result in
abnormal readings.
NOTE!
• A wireless heart rate monitor is not included as standard.
Contact your dealer to purchase a wireless heart rate monitor.
• To avoid interference, never use the wireless heart rate
monitor in combination with the hand sensors.
WARNING!
• If you have a pacemaker, we recommend that you consult
your physician before using a wireless heart rate monitor
• In rooms with multiple heart rate monitors, it is recommended
that you keep enough distance to avoid interference between
different devices.
• Always try to keep the wireless heart rate monitor within a
range of 1 meter from the console for optimal reception.
• Always wear a wireless heart rate monitor directly on the
body, under clothing.
TRAINING WITH FITNESS APPLICATIONS
VirtuFit does not provide service for third party fitness applications
such as Kinomap, iConsole, FitShow etc. If you encounter problems
with a third party fitness application, please contact the developer
of the application in question.

ENGLISH
EN
17
verlaagt.
• Wanneer u de motor hoort draaien, is alle elektronica in orde,
maar is de V-snaar er waarschijnlijk afgelopen. Open de
behuizing en leg de V-snaar er weer op.
• Wanneer u de motor niet hoort draaien, kan het zo zijn dat de
motor of het display defect is. Controleer of de kabel die in de
buis naar boven loopt goed is aangesloten.
Hartslagweergave functioneert niet: Dit kan verschillende oorzaken
hebben.
• De sensorkabeltjes die van de hartslagsensor naar het display
lopen zijn niet goed gemonteerd of losgeraakt tijdens gebruik.
• Het kan zijn dat de sensoren vochtig, vies of vet geworden zijn,
maak deze regelmatig schoon.
The hand sensors are not working properly: Wash your hands, dry
them well and test the hand sensors again. If this does not solve the
problem, check the handlebar cables for damage and ensure that they
are properly connected to the connector. If this still does not correct
the problem, replace the handlebar.
Console does not work: If there is no signal, check that the cable is
correctly connected.
CONSO
• RECOVERY During exercise, press the "RECOVERY" button when
the heart rate value is displayed to start the heart rate recovery
function.
• BODY FAT During exercise, press the "BODY FAT" button
when the value is displayed to start the fat percentage and BMI
measurement.
• RESET Press the button and the settings will be cleared.
• START/STOP Start of stop the exercise.
• MODE Press/twist the "MODE" button to switch between
different functions and values during exercise.
Functions
• TIME The total time of the exercise will be displayed.
• Check that the unit is free of dust and dirt.
• Do not use aggressive cleaning agents and keep the device
away from moisture.
Semi-annual maintenance
• Inspect all bolts and nuts connected to the moving parts of the
unit. Tighten bolts and nuts as necessary and appropriate.
• Check the mobility of moving parts and components of the unit.
Use silicone spray if necessary and appropriate.
We recommend the following:
• Clean the unit after use.
• Use a dry cloth to clean the control panel and the areas around
the on/off switch.
• Use a soft, clean cloth and detergent to remove stubborn marks
and dirt from the unit.
• Store the unit in a safe, dry place away from heat and water.
CAUTION!
• Repairs must be carried out by a professional technician,
unless otherwise specified by the supplier or manufacturer.
Cleaning
General cleaning of the unit will extend its life. Keep the appliance
clean by dusting it regularly. Regular maintenance will prolong the life
of your appliance and prevent injuries! For more information, please
visit https://www.virtufit.nl/service/faq/
TROUBLESHOOTING
The display does not show any values: Check that the sensor and
console cables are properly attached and undamaged. If this does not
solve the problem, carefully bend the sensor.
Device squeaks: Check that all bolts and nuts are tight. If necessary.
Tikkend geluid: Het kans zijn dat het vliegwiel (in de behuizing) tegen
een kabeltje komt bij elke beweging. Dit is wellicht storend, maar zal
geen permanente schade aanbrengen. Om dit op te lossen dient de
behuizing te worden geopend en het kabeltje te worden verlegd of
vastgemaakt met bijvoorbeeld een tie-wrap.
Geen weerstand: Controleer of u de motor kunt horen draaien. De
motor is kort te horen wanneer de weerstand wordt verhoogt of

ENGLISH
EN
18
• Select USER 1-4 by pressing the round button. Press and hold
until the screen appears as shown in the diagram above. The M
of MANUAL will now flash.
• The M stands for Manual.
• You can now select a programme by turning the round knob.
Press start to select a programme. Turn the knob to select a
programme. Press the knob again to set the level of difficulty.
After pressing the knob, the time flashes. Select the desired time
and press "START" to start the programme.
• The user can select 55%, 75%, 90% and target values by turning
the knob.
• TARGET can be set not to exceed a certain value. If a maximum
value is set and the value exceeds this, the unit will beep.
• Please note that the heart rate measurement should not be
used for medical purposes and is only an approximation.
• Start the device. Press the round button to set USER 1-4 and
then turn to the HART symbol on the home screen. Press the
round button. Turn the knob to select. Press the knob to select.
Then time can be set by turning and pressing the knob. Then
press START to start.
LET OP!
De hartslagmeting dient niet voor medische doeleinden
gebruikt te worden en is slechts een benadering. Tijdens deze
oefening moeten de hartslagsensoren worden vastgehouden of een
hartslagband worden gedragen.
WATT Mode (B-5)
• Rotate the knob to set the WATT values. Press the knob again
to set the time.
• Press START to begin exercising. During exercise, the WATT can
be adjusted. If a maximum value is set and the value exceeds
this, the unit will beep.
User Program Mode (B-6)
In this mode you can create your own programme.
• Press and turn the round button to select the U.
• Press and turn the button to change the resistance per bar.
• Press START to begin. Press START again to set the time if
necessary by turning the knob. Press START again to resume.
• SPEED Speed of the workout will be displayed.
• DISTANCE Shows the distance travelled.
• CALORIES Total calories burned during the workout is displayed.
• PULSE When using the heart rate sensors, your heart rate will be
displayed during exercise.
• RPM Shows the number of revolutions per minute (Rounds Per
Minute).
• WATTS Displays the wattage during exercise.
• MANUAL Functions automatically change every 6 seconds.
• PROGRAM Select from 12 programs.
• USER User determines own resistance program.
• Heart Rate Control, heart rate program.
• RECOVERY Heart Rate Recovery status
• BODY FAT Body fat measurement.
• Select a user profile by turning the knob. Press the round button
to confirm.
• Confirm the gender by rotating the knob. Press the round
button to confirm. The same applies to age, height and weight.
The programmes follow.
Quick start
Quick start works by directly pressing the START button. Increase the
resistance by turning the button.
LET OP!
Bij het handmatige programma kunnen verschillende
waardes worden ingesteld, bij voorgeprogrammeerde programma’s
kan alleen de trainingstijd worden aangepast.
• Select USER 1-4 by pressing the round button. Press and hold
until the screen appears as shown in the diagram above. The M
of MANUAL will now flash.
• The M stands for Manual. Press start to select a programme.
Turn the knob to select a programme. Press start to start the
programme.
• Increase/decrease the resistance by turning the knob.
• Press "START" to decrease/increase distance, time, calories and
pulse. Select the time, the time will count down.

ENGLISH
EN
19
exercises should be held for 15-30 seconds. Here are some examples of
stretching exercises:
• Toe touch (Fig.C-1)
• Inner thight stretch (Fig. C-2)
• Hamstring stretch (Fig.C-3)
• Achilles stretch (Fig. C-4)
• Side stretch (Fig. C-5)
Cooling down
The purpose of the cool-down is to return the body to its (near) normal
resting position at the end of the workout. A good cool-down slowly
reduces your heart rate and promotes recovery.
• The resistance will automatically change as you set it.
Body Fat Mode (B-7)
• Press the Body Fat button. Select U1-U4 to select the user
program.
• After selecting, place your hands on the heart rate sensors on
the handlebars.
• After a few seconds an approximation of the BMI (B) and fat
percentage (F) will appear.
Herstelmodus (B-8)
Make sure the device is measuring your heart rate during your workout.
• If you are taking a heart rate measurement during your workout,
press "RECOVERY".
• Time and heart rate will be displayed. The time will count down
from 60 seconds and the current heart rate will be displayed.
• The faster the heart rate decreases, the better the fitness.
NOTE!
This is an estimate. The results should not be used for
medical purposes.
A successful training program includes a warm-up, the actual training
and a cool-down. Perform the complete training program at least
twice, but preferably three times a week and keep a rest day between
training sessions. After a few months, the intensity of the training can
be increased, for example to four or five times a week.
The warm-up
The purpose of a warm-up is to prepare the body for training and to
reduce the risk of injury. Warm up your body for two to five minutes
before starting a cardio or strength training session. Do exercises that
increase the heart rate and warm up the working muscles. Examples of
this type of activity are running, jogging, jumping jacks, skipping and
running in place.
Stretching
Stretching while the muscles are warm is very important after a good
warm-up and cool-down. It reduces the risk of injury. Stretching

NEDERLANDS
NL
20
INHOUD
Trainen met hartslag 21
Trainen met fitness apps 21
Onderhoud 22
Probleemoplossingen 22
Console 23
Programma's 23
Trainingsrichtlijnen 25
VEILIGHEIDSINSTRUCTIES
WAARSCHUWING!
Raadpleeg uw arts voordat u begint met trainen. Dit is in het
bijzonder belangrijk voor personen met gezondheidsproblemen.
Lees alle instructies alvorens het toestel gebruikt wordt.
VirtuFit neemt geen verantwoordelijkheid voor geleden letsel
of materiële schade door het gebruik van dit toestel. Lees deze
handleiding zorgvuldig door, voordat u begint met monteren
van het toestel en/of er gebruik van gaat maken.
• Zorg ervoor dat het toestel voor gebruik correct is
gemonteerd en alle bouten en moeren zorgvuldig zijn
vastgedraaid.
• Smeer alle bewegende delen jaarlijks in met vaseline (zonder
zuren) of siliconenspray.
• Draag geen loszittende kleding om te voorkomen dat deze in
bewegende delen verstrikt raakt.
• Stel het toestel op en gebruik deze op een stevige, effen
ondergrond.
• Draag altijd schone sportschoenen bij gebruik van het
toestel.
• Houd kinderen en huisdieren uit de buurt van het toestel,
terwijl deze in gebruik is.
• Zorg dat u evenwicht behoudt tijdens gebruik van het
toestel.
• Plaats geen vingers of andere voorwerpen in de bewegende
delen.
• Raadpleeg voorafgaand aan een training uw arts om de
trainingsfrequentie, tijd en intensiteit vast te stellen die
geschikt is voor uw leeftijd en conditie. Stop onmiddellijk
met trainen in geval van misselijkheid, kortademigheid,
flauwvallen, hoofdpijn, pijn, benauwdheid in de borst of
enig ander ongemak.
• Dit toestel dient door slechts één persoon tegelijk te worden
gebruikt.
• Dit toestel is gemaakt voor thuisgebruik en het maximaal
gebruikersgewicht bedraagt 150 kg.
• Houd 1 á 2 meter ruimte vrij achter het toestel om eventuele
ongelukken te voorkomen.
• Plaats het toestel op een schone en vlakke ondergrond.
Plaats het toestel niet op dik tapijt waardoor het ventilatie
kan belemmeren. Plaats het toestel niet buiten of in de
buurt van water.
• Het toestel is voor binnengebruik en niet voor buitengebruik.
Houd de opslagplek droog, schoon en vlak om schade te
voorkomen. Het is verboden om het toestel voor andere
doeleinden te gebruiken dan voor de trainingen.
• Gebruik het toestel alleen in een omgeving met een
omgevingstemperatuur tussen 10 °C en 35 °C. Berg het toestel
alleen op bij een omgevingstemperatuur tussen 5 °C en 45 °C.
GARANTIE
Aanspraak op garantie is uitgesloten indien de oorzaak van het
defect het gevolg is van:
• Onderhoudsmontage en reparatiewerkzaamheden die niet
door een officiële dealer zijn uitgevoerd.
• Bij ondeugdelijk gebruik, verwaarlozing en/of gebrekkig
onderhoud.
• Het niet volgens de fabrieksvoorschriften onderhouden van
het toestel.
MONTAGE INSTRUCTIE
Missende onderdelen: Indien bepaalde onderdelen missen in de
verpakking, controleer dan zorgvuldig het piepschuim en het toestel
zelf. Sommige onderdelen (bouten, schroeven, etc.) zitten al bevestigd
aan/in het toestel.
Other manuals for iConsole CTR 2.1
2
Table of contents
Languages:
Other VIRTUFIT Elliptical Trainer manuals

VIRTUFIT
VIRTUFIT FDR 2.0i User manual

VIRTUFIT
VIRTUFIT CTR 1.2i User manual

VIRTUFIT
VIRTUFIT CTR 1.0 User manual

VIRTUFIT
VIRTUFIT CTR 1.1 User manual

VIRTUFIT
VIRTUFIT CTR 3.0i User manual

VIRTUFIT
VIRTUFIT Elite FDR 2.4i User manual

VIRTUFIT
VIRTUFIT iConsole Total Fit User manual
VIRTUFIT
VIRTUFIT Etappe 2.0i Spinbike User manual

VIRTUFIT
VIRTUFIT Elite FDR 2.5i Semi-Pro Crosstrainer User manual
VIRTUFIT
VIRTUFIT CTR 1.2i Crosstrainer User manual