manuals.online logo
Brands
  1. Home
  2. •
  3. Brands
  4. •
  5. Vivo
  6. •
  7. Controllers
  8. •
  9. Vivo DESK-E-100B Controller User manual

Vivo DESK-E-100B Controller User manual

Other Vivo Controllers manuals

Vivo DESK-V103EW User manual

Vivo

Vivo DESK-V103EW User manual

Vivo DESK-100E-RB Controller User manual

Vivo

Vivo DESK-100E-RB Controller User manual

Vivo DESK-V103E User manual

Vivo

Vivo DESK-V103E User manual

Vivo DESK-E-Y48SB User manual

Vivo

Vivo DESK-E-Y48SB User manual

Vivo DESK-E-T55B User manual

Vivo

Vivo DESK-E-T55B User manual

Vivo DESK-V120EB User manual

Vivo

Vivo DESK-V120EB User manual

Vivo DESK-EV00W User manual

Vivo

Vivo DESK-EV00W User manual

Vivo DESK-V120EW User manual

Vivo

Vivo DESK-V120EW User manual

Vivo DESK-E151EB User manual

Vivo

Vivo DESK-E151EB User manual

Vivo DESK-V101EB User manual

Vivo

Vivo DESK-V101EB User manual

Vivo DESK-V100EBY User manual

Vivo

Vivo DESK-V100EBY User manual

Vivo DESK-V130EB User manual

Vivo

Vivo DESK-V130EB User manual

Vivo DESK-E3CTBC User manual

Vivo

Vivo DESK-E3CTBC User manual

Vivo DESK-V133E Controller User manual

Vivo

Vivo DESK-V133E Controller User manual

Vivo DESK-E144D User manual

Vivo

Vivo DESK-E144D User manual

Vivo DESK-V110EW User manual

Vivo

Vivo DESK-V110EW User manual

Vivo DESK-E144BN User manual

Vivo

Vivo DESK-E144BN User manual

Vivo DESK-E144W User manual

Vivo

Vivo DESK-E144W User manual

Vivo DESK-E144C User manual

Vivo

Vivo DESK-E144C User manual

Vivo DESK-E3CTB User manual

Vivo

Vivo DESK-E3CTB User manual

Vivo DESK-E3CVB User manual

Vivo

Vivo DESK-E3CVB User manual

Vivo DESK-V103E User manual

Vivo

Vivo DESK-V103E User manual

Vivo DESK-V133E User manual

Vivo

Vivo DESK-V133E User manual

Vivo DESK-V100EBY User manual

Vivo

Vivo DESK-V100EBY User manual

Popular Controllers manuals by other brands

Sunricher SR-ZV9003T3-RGBW-US Installation

Sunricher

Sunricher SR-ZV9003T3-RGBW-US Installation

Ksenia intro Installation and configuration manual

Ksenia

Ksenia intro Installation and configuration manual

Inovance CAN200 Series manual

Inovance

Inovance CAN200 Series manual

Gauzy LC6 FLEX Controller Installation and operation guide

Gauzy

Gauzy LC6 FLEX Controller Installation and operation guide

Viking SLP-1 Technical practice

Viking

Viking SLP-1 Technical practice

CKD KBX-30E-U Series instruction manual

CKD

CKD KBX-30E-U Series instruction manual

Sharp Energy Sun Flux User manual & installation guide

Sharp Energy

Sharp Energy Sun Flux User manual & installation guide

Yamaha RCX40 user manual

Yamaha

Yamaha RCX40 user manual

AB Quality PowerFlex 400 Frames D-H Service bulletin

AB Quality

AB Quality PowerFlex 400 Frames D-H Service bulletin

Yamaha MJC8 owner's manual

Yamaha

Yamaha MJC8 owner's manual

AL-KO ATC operating instructions

AL-KO

AL-KO ATC operating instructions

Savant SmartControl 2 Deployment guide

Savant

Savant SmartControl 2 Deployment guide

GameSir T3S user manual

GameSir

GameSir T3S user manual

Kostal inveor operating manual

Kostal

Kostal inveor operating manual

Emerson Yarway 20-55 Operating and safety instructions

Emerson

Emerson Yarway 20-55 Operating and safety instructions

CoCo ACM-LV24 Quick installation guide

CoCo

CoCo ACM-LV24 Quick installation guide

Brooks SLA5810/20 Installation and operation manual

Brooks

Brooks SLA5810/20 Installation and operation manual

SIGMA TEK SR 011 Technical manual

SIGMA TEK

SIGMA TEK SR 011 Technical manual

manuals.online logo
manuals.online logoBrands
  • About & Mission
  • Contact us
  • Privacy Policy
  • Terms and Conditions

Copyright 2025 Manuals.Online. All Rights Reserved.

DESK-E-100B Controller
Instruction Manual
Scan the QR code with your mobile device or follow the link
for helpful videos and specifications related to this product.
https://vivo-us.com/products/desk-e-100b
SKU: DESK-E-100B Controller
[email protected]om www.vivo-us.com 309-278-5303
Chat live with an agent!
GET IN TOUCH | Monday-Friday from 7:00am-7:00pm CST
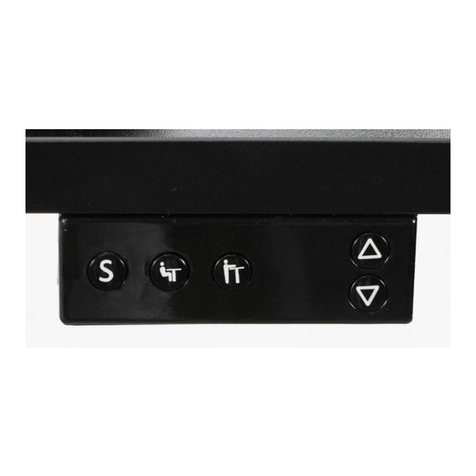
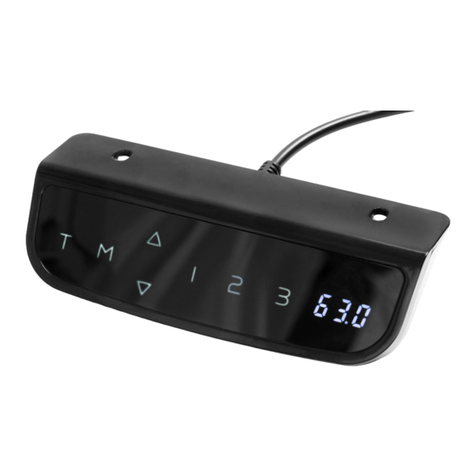
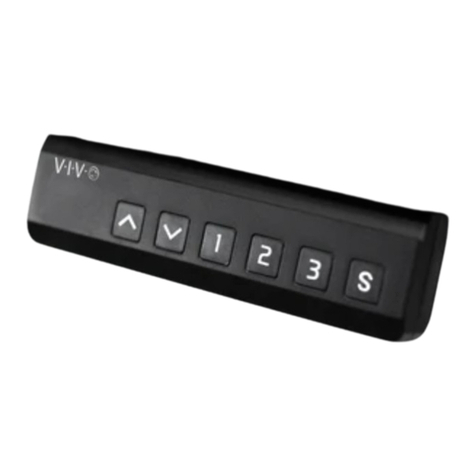
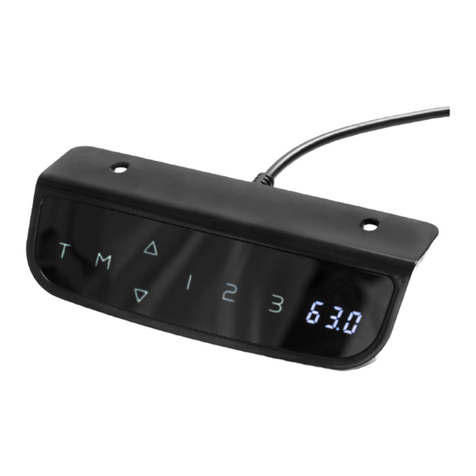
S1 2 3
2
If you do not understand these directions, or if you have any doubts about the safety of the
installation, please call a qualified technician. Check carefully to make sure there are no missing or
defective parts. Improper installation may cause damage or serious injury. Do not use this product
for any purpose that is not explicitly specified in this manual and do not exceed weight capacity.
We cannot be liable for damage or injury caused by improper mounting, incorrect assembly, or
inappropriate use.
WARNING!
ELECTRICAL SAFETY INSTRUCTIONS
THIS PRODUCT IS POWERED BY ELECTRICITY. IN ORDER TO AVOID BURNS, FIRE AND ELECTRIC
SHOCK, PLEASE READ THE FOLLOWING INSTRUCTIONS CAREFULLY.
• DO NOT CLEAN PRODUCT WHILE POWER IS CONNECTED.
• DO NOT DISASSEMBLE OR REPLACE COMPONENTS WHILE POWER IS CONNECTED.
• NEVER OPERATE THE SYSTEM WITH A DAMAGED CORD OR PLUG. PLEASE CONTACT YOUR
SELLER TO REPLACE DAMAGED PARTS.
• NEVER OPERATE SYSTEM IN DAMP ENVIRONMENTS OR IF ANY ELECTRICAL COMPONENTS HAVE
MADE CONTACT WITH LIQUIDS.
• ALTERATIONS OF THE GIVEN POWER UNIT ARE NOT ALLOWED.
• OUTDOOR USE IS PROHIBITED.
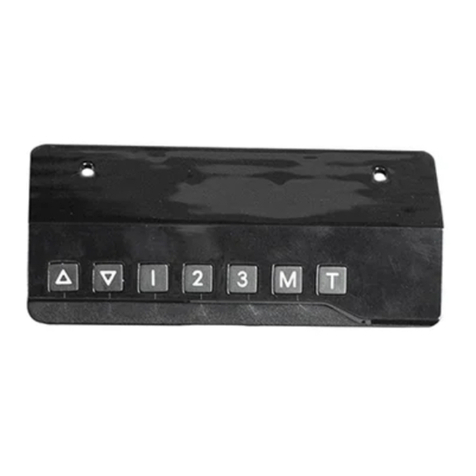
OPERATING INSTRUCTIONS: When the system is powered on, the existing desktop height will appear on
the control panel.
Reset Mode
1. While the unit is powered on, press the down arrow until the desk moves to the fully lowered position.
2. Press and hold the down arrow for 5 seconds or until “rES/E-1” alternates on the display, then release
the button.
3. Then press and hold the down arrow again, the desk will slowly move down and then move back up
once the reset process is finished. The display will now show the current height.
Upward and Downward Movement
Press and hold the up or down arrow until the desk reaches the desired height.
Memory Mode
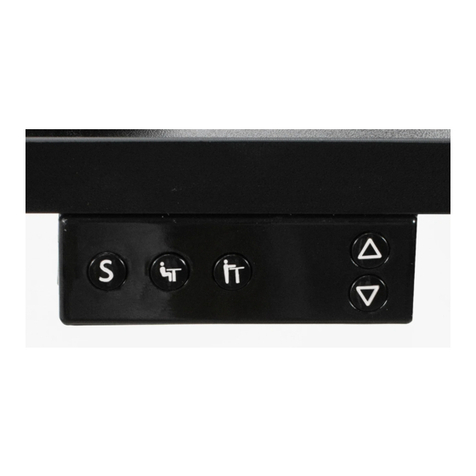
To store a certain height in the controller’s memory, first press and hold “S” for 3 seconds. The display will
begin flashing “S--”. Now press “1”, “2” or “3”. “S-1”, “S-2” or “S-3” will appear, then press “S” to confirm
and store the current height in memory. Each number can store a dierent height. Once in memory, you
can recall any of the three height settings by pressing the corresponding button. Touching any button will
stop the automatic adjustment.
Function Mode
Press and hold the “S” button for 3 seconds, or until “S--” begins flashing on the display. Within function
mode, use the up and down buttons to scroll through settings. To exit function mode, press “S” again.
• Change Displayed Unit: Press the up or down buttons until the display shows “Unt”. Press 1 to select
centimeters, or 2 to select inches. Press “S” again to save the setting.
• Upper Height Limit: Press the up or down buttons until the display shows “HLP”, and press “1” to select.
The display will flash between “H-P” and the current height. Press up or down to adjust the desk height
to the desired limit, then press “S” to save the limit to memory.
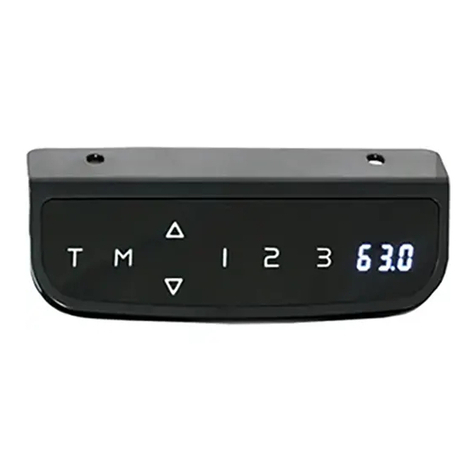
OPERATING CONTROL PANEL
3
• Lower Height Limit: Press the up or down buttons until the display shows “HLP”, and press “2” to select.
The display will flash between “L-P” and the current height. Press up or down to adjust the desk height to
the desired limit, then press “S” to save the limit to memory.
• Factory Reset: Press and hold “S” for 15 seconds or until the display shows “FAC”. Press “S” again to
confirm reset to factory settings.
• Circuit Protection: If motor or controller becomes disconnected, the desk will cease operation. Error will
clear aer all components are reconnected.
NOTES
• • Self-protection function: The unit will enter a protective mode should the system operate
continuously in excess of 2 minutes with “dut” on the controller display. The system will return
to normal operation aer approximately 15 minutes.
• • Do NOT remove or reconnect power to reset the unit when in a protective or “dut” state, as
this may damage the electronics.
• If you install a new control panel, you must perform a reset for the desk to function properly.
TROUBLESHOOTING
Error Code Description/Resolution
dut Duty cycle exceeded; allow desk to rest for 15 minutes.
E-2 Obstacle protection. Desk will automatically move back 2cm aer
Collision.
E-3 Motor connection fault: Disconnect desk power, disconnect the
motor, reconnect the motor, then reconnect power.
ovr Desk overload: Reduce desk load.
Raise desktop
slowly to keep
items stable.
Keep monitor and
laptop base fully on
the desktop.
Leave enough slack
in cable to allow for
full range of vertical
motion (15” / 38 cm).
Follow the cable
routing instructions to
avoid the potential to
pinch cables.
CAUTION!
Failure to follow these instructions may result in property damage and/or personal injury.
LAST UPDATED: 10/09/2020
REV2
Open Monday - Friday 7:00am - 7:00pm CST,
our dedicated support team can oer immediate assistance with rapid response times. If any
parts are received damaged or defective, please contact us. We are happy to replace parts to
ensure you have a fully functioning product.
FOR MORE VIVO PRODUCTS, CHECK OUT OUR WEBSITE AT: www.vivo-us.com
[email protected] AVG. RESPONSE TIME (within oice hrs): 1HR 8M
- 23% within < 15m
- 38% within < 30m
- 61% within < 1hr
- 83% within < 2hr
- 92% within < 3hr
Love your new VIVO setup and want to share?
Tag us in your photo! @vivo_us
AVG. RESOLUTION TIME (within oice hrs): < 15 M
www.vivo-us.com
Chat live with an agent!
AVG. RESOLUTION TIME (within oice hrs): 5M 4S
309-278-5303