manuals.online logo
Brands
  1. Home
  2. •
  3. Brands
  4. •
  5. WB Mfg
  6. •
  7. Indoor Furnishing
  8. •
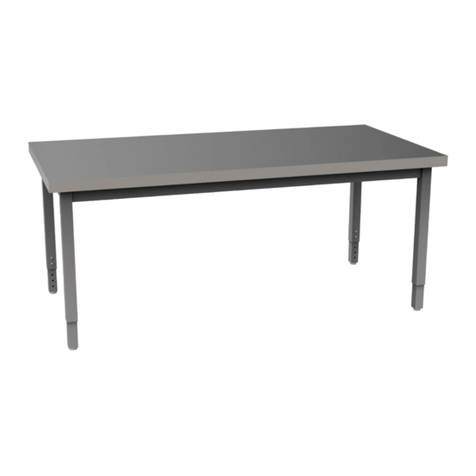
  9. WB Mfg TORO User manual

WB Mfg TORO User manual

1
wibenchmfg.com 507 E. Grant St. Thorp, WI 54771 • P - 800.242.2303
Specications are subject to change. Product
images are for illustrative purposes only and may
dier from the actual product.
Tools Required
• 4mm Hex Wrench
• Screw Gun
• # 2 Phillips
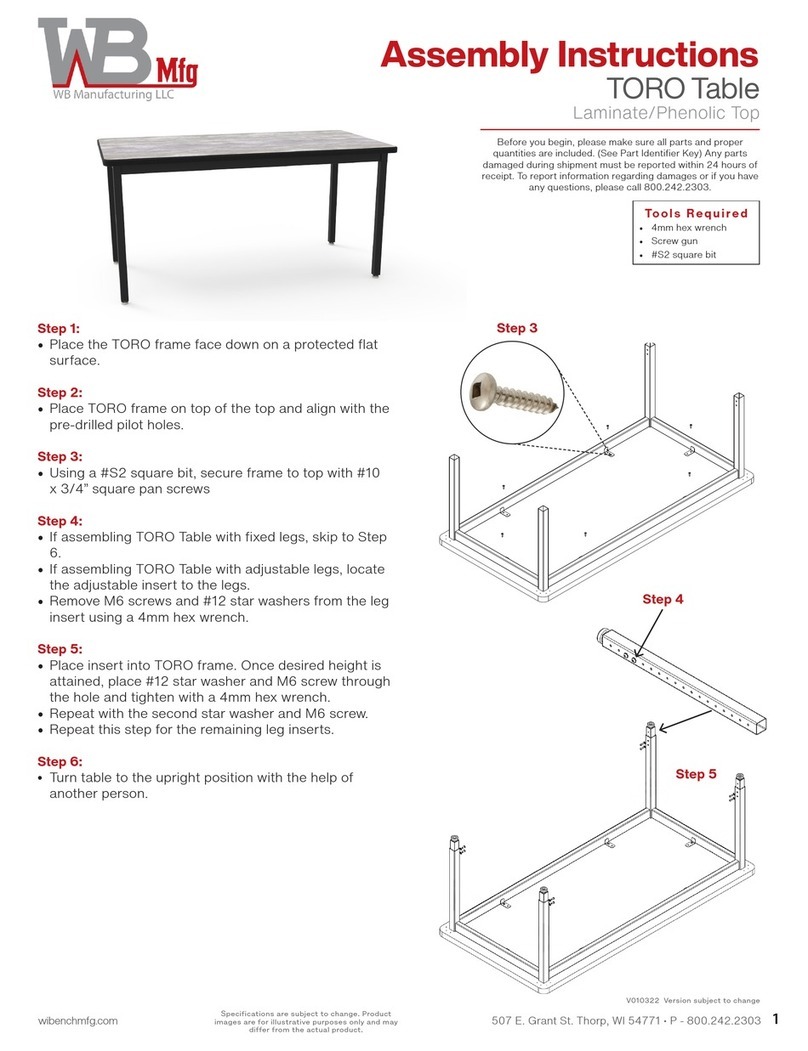
Step 1:
• Place TORO frame down on a clean and at surface with tabs
facing up.
Step 2:
• Place both of the scissor jacks down on the middle cross bar
aligning with the pre-drilled pilot holes.
• Using a # 2 Phillips, secure the scissor jacks to the middle frame
with four, 8-32 x ½” at head machine screws.
Step 3:
• Place both of the TORO tops facing down on a protected at
surface so pre-drilled pilot holes are facing up. See images to
the right and below for the proper placement for each of the
tops.
Step 4:
• Place TORO frame that you just assembled in Steps 1-2, down
on the TORO tops and align with the pre-drilled pilot holes with
the three tabs, scissor jacks and the piano hinge.
• Please use image below for all eleven locations of the
pre-drilled pilot holes which are marked with a red dot.
Step 5:
• Using a # S2 square bit, secure frame, scissor jacks and piano
hinge to the table tops with #10 x ¾”square pan screws. You
will use one screw per tab, two screws per scissor jack and four
screws for the piano hinge.
V122320 subject to change.
Step 3-5
Before you begin, please make sure all parts and proper quantities are included. (See Part Identier Key) Any parts damaged during shipment must be reported
within 24 hours of receipt. To report information regarding damages or if you have any questions, please call 800.242.2303.
Scissor jack
Piano hinge
TORDT6068-ADJ
Step 1-2
TORO Drafting Table
Grey Laminate Tops
Assembly Instructions
Bottom View of the Table
Scissor jacks
Smaller top
Tabs
Piano hinge
Larger top
2
wibenchmfg.com 507 E. Grant St. Thorp, WI 54771 • P - 800.242.2303
Specications are subject to change. Product
images are for illustrative purposes only and may
dier from the actual product.
Step 6:
• Locate TORO inserts. Remove M6 screws and #12 star washers
from the insert using a 4mm hex wrench.
Step 7:
• Place insert into TORO frame and once desired height is
attained, place #12 star washer and M6 screw through the hole
and tighten with a 4mm hex wrench. Repeat with the 2nd star
washer and M6 screw.
• Repeat Step 6 for the remaining inserts.
Step 8:
• With someone’s help, turn table upright.
Step 9:
• Locate pencil ledge and align with the threaded inserts located
on the front edge of the larger top.
• Using a screw gun and a 4mm Hex bit, secure pencil ledge to
the top with ¼”-20 x 20mm joint connector bolts.
Step 6
Step 7
Step 8-9
TORO insert
TORO Drafting Table
Grey Laminate Tops
Assembly Instructions
3
wibenchmfg.com 507 E. Grant St. Thorp, WI 54771 • P - 800.242.2303
Specications are subject to change. Product
images are for illustrative purposes only and may
dier from the actual product.
Part # Description Qty.
0409970 8-32 x ½” at head machine screws
(Used to attach scissor jacks to middle cross bar.) 4
0408231
#10 x ¾” Square pan screws
(Used to attach frame, scissor jacks and piano hinge
to the top.)
11
0404228 ¼”-20 x 20mm joint connector bolts with loctite
(Used to attach pencil ledge to top) 4
Part Identifier Key
3” Heavy Duty Caster Hardware Pack (0402020) Used only with 1.5” adj. legs (-ADJ)
04067460
0401259
¼” Star washers
M6 1x14 screws
(Used in leg insert to prevent bending of the leg insert)
4 per set
4 per set
(Included in Hardware Pack located in leg box as
standard. Discard if casters are not installed.)
TORO Drafting Table
Grey Laminate Tops
Assembly Instructions
4
wibenchmfg.com 507 E. Grant St. Thorp, WI 54771 • P - 800.242.2303
Specications are subject to change. Product
images are for illustrative purposes only and may
dier from the actual product.
Step 1:
• Remove Nylon glide from leg by rotating counterclockwise until glide is free.
Step 2:
• Place stem of optional footing into the hole on the leg. Rotate clockwise
until fully inserted into leg. (See next page if installing a
• Casters are NOT to be used as a leveling device.
Step 3:
• Tighten with a 14mm open-ended wrench. (only with the Dual wheel soft
tread locking caster.)
Step 4:
• Repeat for each caster or glide.
Part # Description Qty.
040164 1⁄ Dia. Grand Hank glide, ⁄-16 x 1” 1 per leg
04067920 1.5” Soft Touch glide 1 per leg
NSL-33056S 1.25” Steel glide 1 per leg
04067540 Dual wheel soft tread locking caster w/brake 1 per leg
Part Identifier Key
Tools Required
• 14mm open-ended wrench
TORO Drafting Table
w/ Casters & Glides
Assembly Instructions
5
wibenchmfg.com 507 E. Grant St. Thorp, WI 54771 • P - 800.242.2303
Specications are subject to change. Product
images are for illustrative purposes only and may
dier from the actual product.
3” Heavy Duty Caster Hardware Pack (0402020) Used only with 1.5” adj. legs (-ADJ)
04067460
0401259
¼” Star washers
M6 1x14 screws
(Used in leg insert to prevent bending of the leg insert)
4 per set
4 per set
(Included in Hardware Pack located in leg box as
standard. Discard if casters are not installed.)
Step 1:
• Before placing caster in the bottom of the leg, lock the caster by pushing
down on the brake lever.
Step 2:
• Twist the stem of the caster into the hole on the bottom of the leg. Applying
thread locking adhesive can help prevent unexpected loosening of the
caster.
Step 3:
• Use ¾” wrench to tighten ¾” nut on stem of caster.
Step 4:
• If using adj. legs, insert star washer and M6 screw in hole closest to the
caster and tighten with 4mm hex wrench. DO NOT OVER TIGHTEN.
• If using a FIXED leg, you will NOT need to use a star washer and M6 screw.
Step 5:
• Repeat for remaining casters. Step 4
Step 2
Step 1
Step 3
Tools Required
• ¾”Wrench
• 4mm Hex Wrench
• Thread Locking Adhesive (optional)
Casters are NOT to be used as a leveling device.
Part # Description Qty.
0400993 3” Heavy duty caster with w/brake 1 per leg
See colored caster chart below 3” Heavy duty colored caster with w/brake 1 per leg
Part Identifier Key
3" Heavy Duty Colored Caster Chart
Model # SKU Colored Caster
-HDCCP 04067882-P Purple
-HDCCR 04067882-R Red
-HDCCL 04067882-L Lime Green
-HDCCB 04067882-B Blue
Model # SKU Colored Caster
-HDCCO 04067882-O Orange
-HDCCG4 04067882-G4 Grey
-HDCC09 04067882-09 Black
TORO Drafting Table
w/ Heavy Duty Casters
Assembly Instructions

This manual suits for next models

1

Other WB Mfg Indoor Furnishing manuals
WB Mfg EJA User manual

WB Mfg

WB Mfg EJA User manual

WB Mfg Quad XL User manual

WB Mfg

WB Mfg Quad XL User manual

WB Mfg ELO Court Team Table User manual

WB Mfg

WB Mfg ELO Court Team Table User manual

WB Mfg iXchange SSW1002-AL User manual

WB Mfg

WB Mfg iXchange SSW1002-AL User manual

WB Mfg Einstein Station User manual

WB Mfg

WB Mfg Einstein Station User manual

WB Mfg DT-45A User manual

WB Mfg

WB Mfg DT-45A User manual

WB Mfg ELO User manual

WB Mfg

WB Mfg ELO User manual

WB Mfg Rhapsody Bass Racks User manual

WB Mfg

WB Mfg Rhapsody Bass Racks User manual

WB Mfg Jackson Desk User manual

WB Mfg

WB Mfg Jackson Desk User manual

WB Mfg Universal Appleton Desk User manual

WB Mfg

WB Mfg Universal Appleton Desk User manual

WB Mfg EPIC EP3082-FXO-RR6 User manual
WB Mfg

WB Mfg EPIC EP3082-FXO-RR6 User manual

WB Mfg Urban Edge User manual

WB Mfg

WB Mfg Urban Edge User manual

WB Mfg EPIC Laminate Top User manual

WB Mfg

WB Mfg EPIC Laminate Top User manual

WB Mfg Tomah User manual

WB Mfg

WB Mfg Tomah User manual

WB Mfg 0600038 User manual

WB Mfg

WB Mfg 0600038 User manual

WB Mfg TORO User manual

WB Mfg

WB Mfg TORO User manual

WB Mfg UNE-T User manual

WB Mfg

WB Mfg UNE-T User manual

WB Mfg LOBO User manual

WB Mfg

WB Mfg LOBO User manual

WB Mfg SSW100X User manual

WB Mfg

WB Mfg SSW100X User manual

WB Mfg 800-242-2303 User manual

WB Mfg

WB Mfg 800-242-2303 User manual

WB Mfg Mini Nucleus User manual

WB Mfg

WB Mfg Mini Nucleus User manual

WB Mfg LOBO Series User manual

WB Mfg

WB Mfg LOBO Series User manual

WB Mfg ELO User manual

WB Mfg

WB Mfg ELO User manual
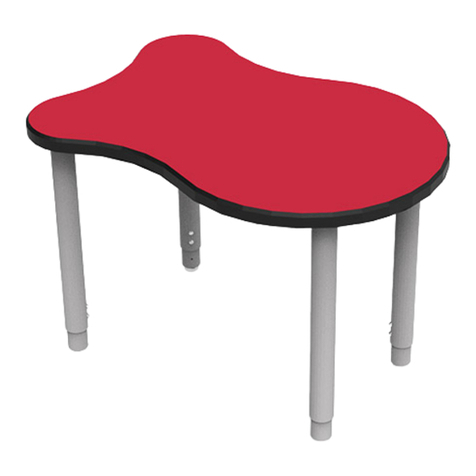
WB Mfg TORO Table Epoxy Top User manual

WB Mfg

WB Mfg TORO Table Epoxy Top User manual

Popular Indoor Furnishing manuals by other brands

Mocka Juno Kids Assembly instructions

Mocka

Mocka Juno Kids Assembly instructions

Amart Furniture CABOS BUFFET 3 DOOR 72789 Assembly instruction

Amart Furniture

Amart Furniture CABOS BUFFET 3 DOOR 72789 Assembly instruction

Mocka Savannah Three Drawer Assembly instructions

Mocka

Mocka Savannah Three Drawer Assembly instructions

Forte MADRANO MEGK231 Assembling Instruction

Forte

Forte MADRANO MEGK231 Assembling Instruction

IKEA SVÄVANDE manual

IKEA

IKEA SVÄVANDE manual

EXPEDO DITA KUFER 214339 Assembly instruction

EXPEDO

EXPEDO DITA KUFER 214339 Assembly instruction

RUSTA 627011550102 manual

RUSTA

RUSTA 627011550102 manual

Bouclair 9400421 Assembly instructions

Bouclair

Bouclair 9400421 Assembly instructions

Gima 45260 manual

Gima

Gima 45260 manual

PL Project PL2000 user manual

PL Project

PL Project PL2000 user manual

Next Kai 389201 Assembly instructions

Next

Next Kai 389201 Assembly instructions

Coaster 736145 Assembly instructions

Coaster

Coaster 736145 Assembly instructions

VITRA Level 34 Instructions for use

VITRA

VITRA Level 34 Instructions for use

Oxford Garden Oxford Assembly instructions

Oxford Garden

Oxford Garden Oxford Assembly instructions

Klaxon G0223IT0300 installation guide

Klaxon

Klaxon G0223IT0300 installation guide

Furinno FNBL-22001 Assembly instruction

Furinno

Furinno FNBL-22001 Assembly instruction

Trasman 8517 ZOOM Assembly manual

Trasman

Trasman 8517 ZOOM Assembly manual

knapp RICON 80/40 instruction manual

knapp

knapp RICON 80/40 instruction manual

manuals.online logo
manuals.online logoBrands
  • About & Mission
  • Contact us
  • Privacy Policy
  • Terms and Conditions

Copyright 2025 Manuals.Online. All Rights Reserved.