widos PSM 20 User manual

Kunststoffschweißtechnik
WIDOS Einsteinstr. 5 Phone +49 (0) 71 52 99 39 - 0
W. Dommer Söhne GmbH D-71254 Ditzingen-Heimerdingen Fax +49 (0) 71 52 99 39 - 40
Website: www.widos.de Email: info@widos.de
Headquarters: D-71254 Ditzingen-Heimerdingen Country Court Stuttgart HRB 200973 Managing director: Jürgen Dommer
Working Instructions
Translation
Sheet welding machine
WIDOS PSM 20
Keep for further use!

Kunststoffschweißtechnik
Product identification
10.12.2013 Working instructions WIDOS PSM 20 Page 2 of 31
Type: WIDOS PSM 20
Serial number: / Year of construction: see type label
Customers‘ entries
Inventory no.:
Location:
Manufacturer’s address WIDOS
W. Dommer Söhne GmbH
Einsteinstraße 5
D-71254 Ditzingen-Heimerdingen
Telephone: ++49 (0) 71 52 / 99 39 – 0
Fax: ++49 (0) 71 52 / 99 39 – 40
Order of spare parts and sales service:
Please directly order at manufacturer or subsidiaries:
WIDOS
WIDOS GmbH W. Dommer Söhne AG
An der Wiesenmühle 15 St. Gallerstr. 93
D-09224 Grüna / Sachsen CH – 9201 Gossau
Telephone: ++49 (0) 3 71 / 8 15 73 - 0 Telephone: ++41 (0) 71 / 388 89 79
Fax: ++49 (0) 3 71 / 8 15 73 - 20 Fax: ++41 (0) 71 / 388 89 73

Kunststoffschweißtechnik
Introduction
10.12.2013 Working instructions WIDOS PSM 20 Page 3 of 31
Purpose of the document
These working instructions give you information about all important questions which refer to
the construction and the safe working of your machine.
Just as we are, you are obliged to engage in these working instructions, as well.
Not only to run your machine economically but also to avoid damages and injuries.
Should questions arise, contact our advisers in the factory or in our subsidiary companies.
We will help you with pleasure.
According to our interest to continuously improve our products and working instructions, we
kindly ask you to inform us about problems and defects which might appear in practical
experience.
Thank you.
Structure of the working instructions
This manual is arranged in chapters which belong to the different using phases of the
machine. Therefore the searched information can be easily found.
10.12.2013 WIDOS
W. Dommer Söhne GmbH
Einsteinstraße 5
D-71254 Ditzingen-Heimerdingen
All rights reserved
Reprinting only allowed with permission of the corporation.
Any changes are subject to technical innovations.

Kunststoffschweißtechnik
Contents
10.12.2013 Working instructions WIDOS PSM 20 Page 4 of 31
1. DESCRIPTION OF PRODUCT........................................................................................ 6
1.1. Usage and non-intended use...............................................................................................6
1.2. Safety measures ...................................................................................................................6
1.3. Conformity.............................................................................................................................6
1.4. Designation of the product..................................................................................................7
1.4.1. Technical data ....................................................................................................................7
1.4.1.1. WIDOS PSM 20 General data................................................................................7
1.4.1.2. Heating element.........................................................................................................7
1.4.1.3. Hydraulic aggregate...................................................................................................8
1.4.2. Accessories (optional)........................................................................................................8
1.4.3. Wear parts..........................................................................................................................8
2. SAFETY RULES.............................................................................................................. 9
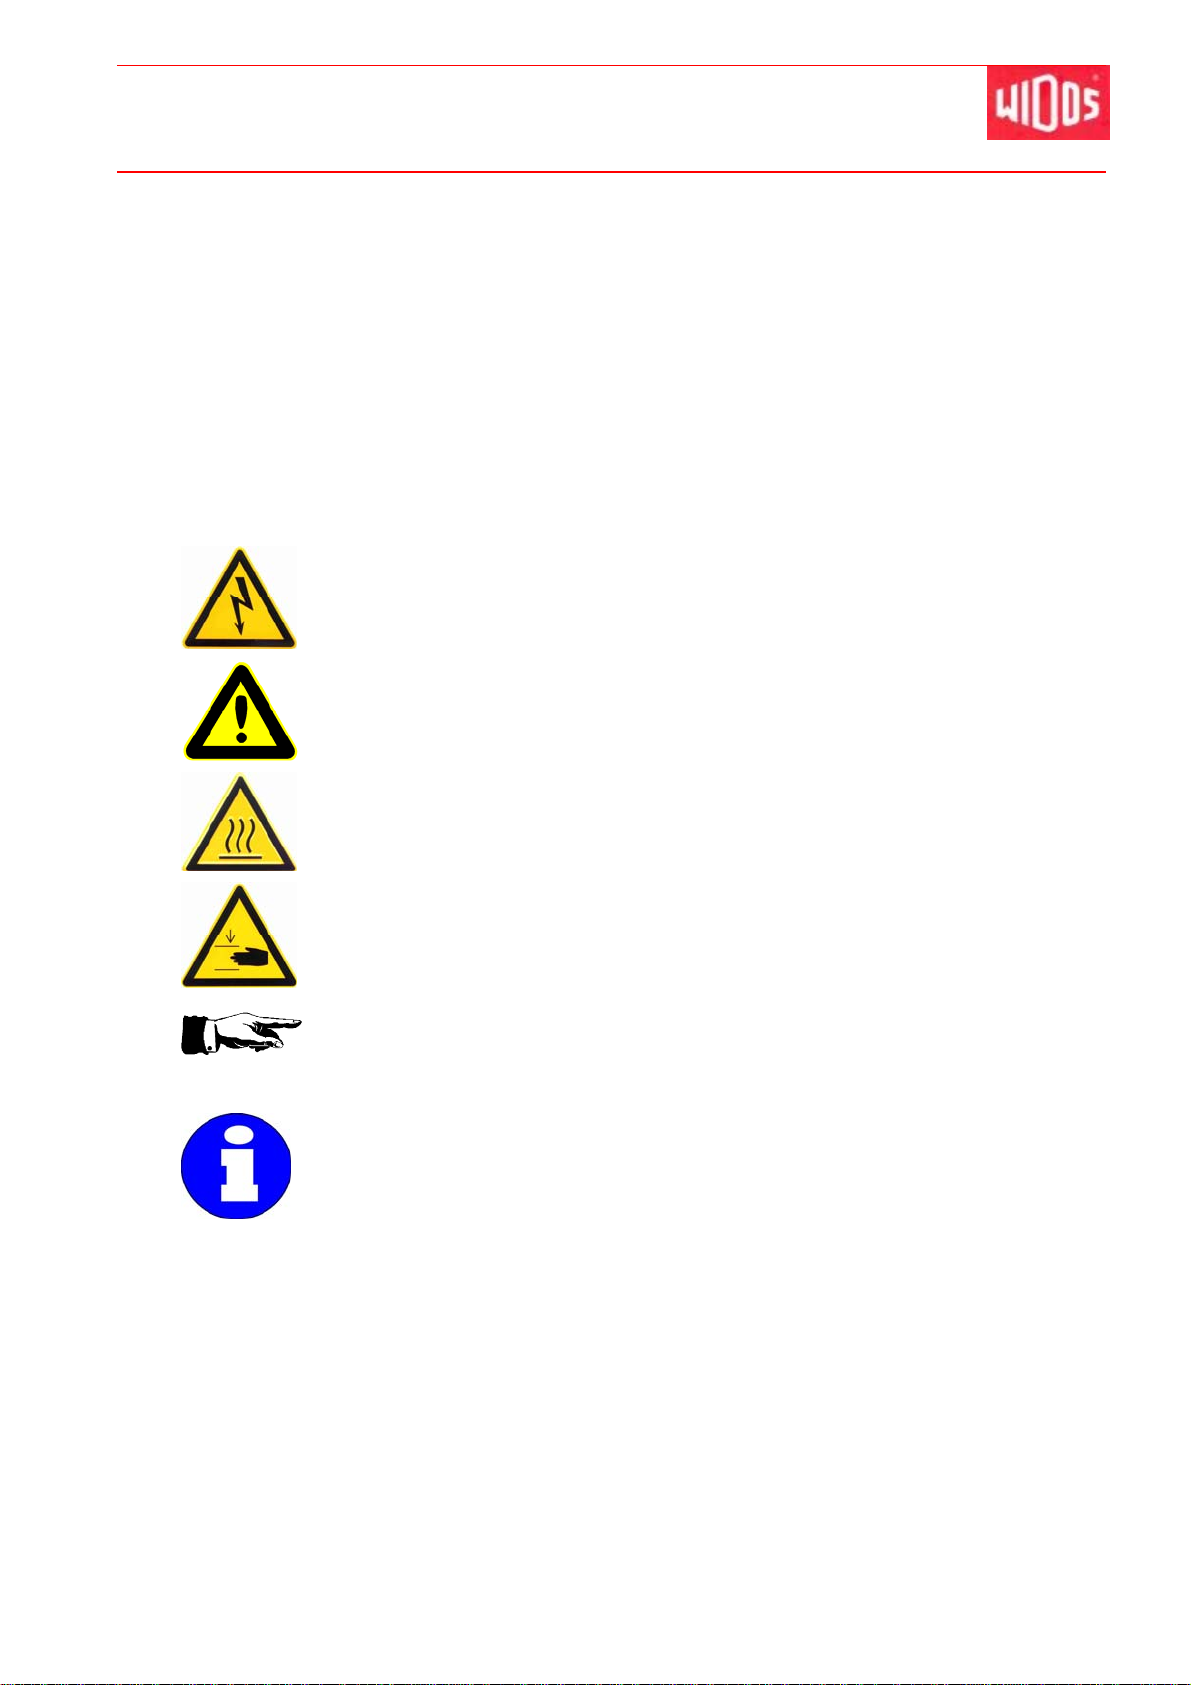
2.1. Explication of the different symbols...................................................................................9
2.2. Obligations of the operator................................................................................................10
2.3. Obligations of the worker ..................................................................................................10
2.4. Measures of organization ..................................................................................................10
2.5. Information about safety precautions ..............................................................................10
2.6. Instructions for the staff ....................................................................................................10
2.7. Dangers while handling the machine ...............................................................................11
2.8. Special dangers ..................................................................................................................11
2.8.1. Danger of stumbling over electric wires ...........................................................................11
2.8.2. Danger of combustion by heating element and welding area..........................................11
2.8.3. Danger of crushing between and near the clamping beams............................................12
2.9. Structural modifications on the machine.........................................................................12
2.10. Cleaning of the machine ....................................................................................................12
2.11. Warranty and liability..........................................................................................................12
3. FUNCTIONAL DESCRIPTION ...................................................................................... 13
4. OPERATING AND INDICATING ELEMENTS .............................................................. 14
4.1. Components at the heating element.................................................................................15
4.2. How to clamp the sheet......................................................................................................16
4.2.1. How to change the clamping beams................................................................................16
4.3. How to clamp sheets for angle welding...........................................................................17
4.4. How to open the clamping beam to remove the pieces .................................................18
4.5. How to weld a pipe out of sheets......................................................................................19
4.6. Service unit..........................................................................................................................19
5. STARTING AND OPERATING...................................................................................... 20
5.1. Starting.................................................................................................................................20
5.2. Welding process .................................................................................................................21

Kunststoffschweißtechnik
Contents
10.12.2013 Working instructions WIDOS PSM 20 Page 5 of 31
6. WELDING TABLES....................................................................................................... 23
6.1. Formulas for the welding of sheets with special measures ..........................................23
7. MAINTENANCE / STORAGE / TRANSPORT .............................................................. 26
7.1. General.................................................................................................................................26
7.2. Clamping elements.............................................................................................................26
7.3. Cleaning of the machine ....................................................................................................26
7.4. Checking of the level of the hydraulic oil.........................................................................26
7.4.1. Used hydraulic oil .............................................................................................................27
7.5. Service unit..........................................................................................................................27
7.6. Transport .............................................................................................................................27
7.7. Disposal...............................................................................................................................27
8. ELECTRIC DIAGRAM................................................................................................... 28
9. DECLARATION OF CONFORMITY.............................................................................. 31

Kunststoffschweißtechnik
WIDOS Einsteinstr. 5 Phone +49 (0) 71 52 99 39 - 0
W. Dommer Söhne GmbH D-71254 Ditzingen-Heimerdingen Fax +49 (0) 71 52 99 39 - 40
Website: www.widos.de Email: info@widos.de
10.12.2013 Working instructions WIDOS PSM 20 Page 6 of 31
1. Description of product
This chapter gives important basic information about the product and its prescribed use.
All technical details of the machine are put together as a general arrangement.
1.1. Usage and non-intended use
The WIDOS PSM 20 is a workshop machine for the heating element butt welding of sheets
made out of PE and PP for the thickness range up to 20 mm and width of plate up to 2000
mm.
Any other use of this machine is non-intended.
The machine is only to be used in a technically perfect condition as well as intended, safety-
and danger-conscious in compliance with the working instructions and the relevant safety
regulations (especially the regulations for the prevention of accidents).
The described plastic welding machine may only be operated, maintained and repaired by
persons who are trained and informed about the dangers.
The manufacturer is not responsible for any damages caused by inappropriate handling or
operation.
For personal injuries, material and property damages resulting herefrom, only the user is
responsible!
Prescribed use also means:
following all indications of these working instructions and
performing the inspection and maintenance work.
1.2. Safety measures
In case of wrong use, wrong operation or wrong maintenance, the machine itself or products
standing nearby can be damaged or destroyed.
Persons in the endangered area may be injured.
Therefore these working instructions have to be thoroughly read and the corresponding safety
regulations must necessarily be observed.
1.3. Conformity
The machine corresponds in its construction to the valid recommendations of the European
Community as well as to the European standard specifications.
The development, manufacturing and mounting of the machine were executed very carefully.

Kunststoffschweißtechnik
Description of the product Chapter 1
10.12.2013 Working instructions WIDOS PSM 20 Page 7 of 31
1.4. Designation of the product
The product is designated by a type label.
It contains the type of the machine, the serial number and the year of construction.
1.4.1. Technical data
1.4.1.1. WIDOS PSM 20 General data
Welding pressure: maximum 59 kN with 250 bar
Sheet size max.: - length up to 2000 mm
- width up to 20 mm
Welding material: PE and PP
Fuse protection: 16 A
Dimensions (W x L x H): appr. 950 x 2500 x 1200 mm
max. working pressure pneumatic; 6 bar
Emissions: -By using the stated plastic materials during
operation within a temperature range of up to
260° C, no poisonous vapors are generated.
Ambient conditions -Keep the workshop clean (no dust at the welding
area)
-If secured by an appropriate measurement that
allowed conditions for welding are indicated, it is
possible to work in any outside temperature
condition as far as the welder is not constrained in
its manual skill
-Avoid humidity
-Avoid strong sunlight
-Avoid strong wind
1.4.1.2. Heating element
Power: 3,6 kW
Current: 15,6 A (± 10 %)
Voltage: 230 V (± 10 %)
Frequency: 50 Hz
Surface: anti-stick coated
Included components: -electronic temperature adjustment
-control lamp
-connection cable with shock-proof plug
,

Kunststoffschweißtechnik
Description of the product Chapter 1
10.12.2013 Working instructions WIDOS PSM 20 Page 8 of 31
1.4.1.3. Hydraulic aggregate
Power: 315 Watt
Voltage: 230 V (10%)
Amperage: 1,5 A
Frequency: 50 Hz
Phase displacement: approx.18°
Hydraulic oil tank: approx. 1 l
Type of protection IP 54
Electric motor and pump:
Engine revolution: 1330 U/min
max. working pump: approx. 250 bar
Working pressure: adjustable up to 250 bar
1.4.2. Accessories (optional)
Unit/
Machine Denomination Article number
1 Spacer for angle welding with sheet thickness 10 mm 8215601-10
1 Spacer for angle welding with sheet thickness 15 mm 8215601-15
1 Spacer for angle welding with sheet thickness 20 mm 8215601-20
2 Screw clamp 100 x 50 mm on request
1.4.3. Wear parts
Unit/
Machine Denomination Article number
1 Heating plate complete 8215800
2 Heating cartridge Ø 10 x 1060; 1,8 kW; 230 V on request
1 Temperature probe PT1000 H09082
For article numbers and single parts, please contact the WIDOS Company.

Kunststoffschweißtechnik
WIDOS Einsteinstr. 5 Phone +49 (0) 71 52 99 39 - 0
W. Dommer Söhne GmbH D-71254 Ditzingen-Heimerdingen Fax +49 (0) 71 52 99 39 - 40
Website: www.widos.de Email: info@widos.de
10.12.2013 Working instructions WIDOS PSM 20 Page 9 of 31
2. Safety rules
A basic premise for working safely and without disturbances is the knowledge of the basic
safety signs and rules.
These working instructions provide you with the most important information to safely run the
machine.
The safety information has to be respected by all persons working with the machine.
2.1. Explication of the different symbols
The working instructions contain the following signs for certain situations:
This symbol means a possible danger to a person’s life and health.
The disrespect of this indication may have heavy consequences for the
health.
This symbol means a possibly dangerous situation.
The disrespect of this indication may cause light injuries or damages of
machine parts.
This symbol means a possibly dangerous situation due to hot surfaces.
The disrespect of these indications may lead to heavy burns, respectively to
ignition or even fire.
This symbol means a possibly dangerous situation by moving parts of the
machine
The disrespect of these indications may cause heavy crushing of parts of the
body resp. damages of machine parts.
This symbol gives important indications for the proper use of the machine.
The disrespect of this indication may lead to malfunctions and damages on
the machine or on parts in the surrounding.
Under this symbol you get user hints and particularly useful information.
It is a help for using all the functions on your machine in an optimal way and
helps you to make the job easier.
The regulations for the prevention of accidents are valid (UVV).

Kunststoffschweißtechnik
Safety rules Chapter 2
10.12.2013 Working instructions WIDOS PSM 20 Page 10 of 31
2.2. Obligations of the operator
The owner is obliged to only let persons work at the machine who
know about basic safety and accident prevention rules and who are instructed in the
handling of the machine
the worker also must have read and understood the safety chapter of this manual and
certify this by his signature.
The safety-conscious working of the staff has to be checked in regular intervals.
2.3. Obligations of the worker
Before working at the machine, all persons in charge of it oblige themselves:
to follow the basic safety and accident protection rules.
to have read and understood the safety chapter and the warnings in this manual and to
confirm by their signature that they have understood well.
to inform themselves about the functions of the machine before using it.
2.4. Measures of organization
The necessary personal protection equipment is to be provided by the operator.
All available safety equipment is to be inspected regularly.
2.5. Information about safety precautions
The working instructions are to be permanently kept at the place of use of the machine.
They are to be at the operator‘s disposal at any time and without effort.
In addition to the manual, the common valid and the local accident protection rules and
regulations for the environmental protection must be available and followed.
All safety and danger indications on the machine have to be in a clear, readable condition.
Every time the machine changes hands or is being hired to a third person, the working
instructions are to be sent along with the machine and their importance is to be
emphasized.
2.6. Instructions for the staff
It must be clearly defined who is responsible for transport, mounting and dismounting,
starting the operation, setting and tooling, operation, maintenance and inspection, repair
and disassembly.
Only skilled and trained persons are allowed to work at the machine.
A person who is being trained may only work at the machine under supervision of an
experienced person.

Kunststoffschweißtechnik
Safety rules Chapter 2
10.12.2013 Working instructions WIDOS PSM 20 Page 11 of 31
2.7. Dangers while handling the machine
The WIDOS PSM 20 is constructed according to the latest technical standard and the
acknowledged technical safety rules.
However, dangers for the operator or other persons standing nearby may occur. Also damages
of the machine itself or of other parts are possible.
The machine has to be only used
according to the prescriptions
in technically safe condition
Disturbances which may affect the safety of the machine must be immediately
eliminated.
Only skilled persons are allowed to work at electric appliances.
The electric equipment of the machine has to be regularly checked.
Loose connections and damaged cables have to be immediately replaced.
The heating element has to be protected against rain and dripping water.
According to VDE 0100, the machine may only be applied on building sites via power
distributors with FI security switch.
2.8. Special dangers
2.8.1. Danger of stumbling over electric wires
Make sure that nobody has to step over the cable to the heating element.
2.8.2. Danger of combustion by heating element and welding area
You can burn parts of your body and inflammable materials can ignite!
The heating element can be heated up to more than 250° C!
Do not leave the machine with the heated heating element unattended.
Do not touch the surface of the heating element.
Take enough safety distance to inflammable materials.
Do wear safety gloves.
Pay attention that nobody is in the area of the heating element.
While cleaning the heating element with cleaning agents (e.g. with PE-cleaning agent) there
is the danger of igniting. Therefore pay attention that the flashpoint is smaller than the
temperature of the heating element, do not put inflammable materials next to it (e.g.
cigarette).

Kunststoffschweißtechnik
Safety rules Chapter 2
10.12.2013 Working instructions WIDOS PSM 20 Page 12 of 31
2.8.3. Danger of crushing between and near the clamping beams
You can crush, grip or squeeze your fingers.
When open the clamping beams swivel in piston rod up to stop and after it
deposit the beam.
While closing the clamping beams do not put parts of your body between
beams and sheet.
While the tables are driving together do not put parts of your body between
beams and sheets.
2.9. Structural modifications on the machine
No modifications, extensions or reconstructions may be made on the machine without
permission of the manufacturer. In case of disrespect the warranty or liability will expire.
Machine parts which are not in a perfect condition are to be immediately replaced.
Only use original WIDOS spare and wear parts.
In case of purchase orders please always indicate the machine number!
2.10. Cleaning of the machine
The materials you use for cleaning the machine have to be properly treated and have to be
appropriately disposed, especially:
when cleaning with solvents
when greasing with oil and grease.
2.11. Warranty and liability
Our „General Sales and Delivery Conditions“ are principally valid.
They are at the owner's disposal at the latest when signing the contract.
Warranty and liability demands referring to damages of persons or objects are suspended if
they are caused by one or several of the following reasons:
not using the machine according to the prescriptions
improper transport, building-up, starting and operating the machine and maintenance
ignoring the information given in this manual
structural changes at the machine without permission
unsatisfactory checking of machine parts which are worn out
repairs performed in an inexpert way
catastrophes by external influence and Acts of God.

Kunststoffschweißtechnik
WIDOS Einsteinstr. 5 Phone +49 (0) 71 52 99 39 - 0
W. Dommer Söhne GmbH D-71254 Ditzingen-Heimerdingen Fax +49 (0) 71 52 99 39 - 40
Website: www.widos.de Email: info@widos.de
10.12.2013 Working instructions WIDOS PSM 20 Page 13 of 31
3. Functional description
All international and national process guidelines are to be basically
followed!
By using the clamping beams the plastic sheets are clamped by pneumatic cylinder and foot
valve.
Afterwards the position of the sheets are checked and if necessary changed.
Now the heating element is slewed in and the sheets are pressed on the heating element at a
defined pressure. This process is called "adjusting".
The applied power can be seen on the pressure gauge you find on the machine.
Having reached the mandatory bead height the pressure is reduced, the heating time begins.
This time is used to reach the welding temperature at the sheet ends.
After the ending of the heating-up, the tables drive apart, the heating element quickly slews
out of the machine and the tables drive together again, we call this change-over time.
The sheets are joined at the needed welding pressure and cool down under pressure
(cooling time).
The welding joint can be clamped out and the welding process is completed.
Image of a heating element butt welding:
heating element heats the
sheets up to welding
temperature
completed weld joint with
bead on top and below

Kunststoffschweißtechnik
WIDOS Einsteinstr. 5 Phone +49 (0) 71 52 99 39 - 0
W. Dommer Söhne GmbH D-71254 Ditzingen-Heimerdingen Fax +49 (0) 71 52 99 39 - 40
Website: www.widos.de Email: info@widos.de
10.12.2013 Working instructions WIDOS PSM 20 Page 14 of 31
4. Operating and indicating elements
No. Denomination Function
1 Clamping beam, left side clamp sheet
2 Rest, left side support sheet
3 Grip, left side clamping beam moving (to the top and below)
4 Piston rod, left side clamp left clamping beam, swiveling
5 Service unit connect the machine with compressed air supply
6 Heating element and lever heating up the sheets and swiveled it (to the top and below)
7 Foot valve pneumatically clamping left side
8 Cable with plug connect the hydraulic with power supply
9 Clamping beam, right side clamp sheet
10 Grip, right side clamping beam moving (to the top and below)
11 Rest, right side support sheet
12 Piston rod, right side clamp right clamping beam, swiveling
13 Lever for hydraulic opening and closing the tables
14 Place for stop watch place fort he stop watch (optional) giving a good view on it.
15 Oil dipstick oil filler neck / checking the oil level. Oil level must be
between the two marks
16 Pressure gauge Indicating of the hydraulic pressure
2
3
4
7
5
11
10
12
6
8
13
16
14
15
17
18
1 9

Kunststoffschweißtechnik
Operating and indicating elements Chapter 4
10.12.2013 Working instructions WIDOS PSM 20 Page 15 of 31
No. Denomination Function
17 Pressure regulator set the pressure for welding
18 Foot valve pneumatically clamping right side
4.1. Components at the heating element
No. Denomination Function
19 on-off switch with lamp,
red - as soon as the heating element is turned on, it is heated up.
- lamp is red if connected to the mains
20 Setting screw with display - For regulating the temperature of the heating element
21 control lamp, green We differ between 3 status:
Off: Signal for the state that the heating element does not
heat up or cool down at the moment.
Blinking: The temperature of the heating element stays
stable. This is realized by the pulse-interval relation.
ON: Signal for the state that the heating element is heated
up at the moment. The desired temperature is not yet
reached.
22 connection cable - cable for the connection with the local power supply 230 V /
50 Hz, covering 16 A
The heating element is brought to
welding position by swiveling the lever.
19
20
21
22
Welding position
Lever
Basic position

Kunststoffschweißtechnik
Operating and indicating elements Chapter 4
10.12.2013 Working instructions WIDOS PSM 20 Page 16 of 31
4.2. How to clamp the sheet
Insert and clamp each sheet between clamping beams and basic plate.
In order to clamp, release the clamping beam by the corresponding foot switch.
Insert the plastic sheet onto the basic plate and align the sheet in a way that the welding
surface overlaps to the inside in rectangular manner and at a short distance.
The clamping beams are flush on one side
and feature a ledge on the opposite side.
The beams may be used on both sides.
While welding sheets, especially thin sheets,
you must use the ledge side on the inside;
then the sheets are clamped close to the
weld.
While welding angles you must insert the
beam flush to the center in order that the
vertical sheet may be supported.
4.2.1. How to change the clamping beams
Detach the threaded bolts at the rear cylinder and disconnect the pneumatic hoses from the
cylinder (left image).
Slightly lift the clamping beams at the front and swing the piston rods forwards out (right
image).
Basic plate
Clamping beam closed
Beam side flush
Beam side with ledge
Clamping beam open
Threaded bolt
Disconnect hoses here

Kunststoffschweißtechnik
Operating and indicating elements Chapter 4
10.12.2013 Working instructions WIDOS PSM 20 Page 17 of 31
Remove the clamping beams, disassemble each handle and mount it on the opposite side.
Insert the beams back again into the machine; left beam to the right and right beam to the
left.
Fix both rear cylinders and clamping beams using the threaded bolts.
Connect the hydraulic hoses to the cylinder; the blue hose at the top and black one at the
bottom.
Lift the clamping beam at the front and swing the piston rods in
again; the beam must rest on the washer afterwards.
4.3. How to clamp sheets for angle welding
You may weld an angle out of two plastic sheets on the WIDOS PSM 20.
The horizontal sheet of 10 - 20 mm is clamped onto the left side (chapter:
4.2).
The vertical sheet, from 5 mm thickness, is clamped onto the right side.
First clamp the right beam (without sheet) tightly onto the right attachment.
Put the vertical sheet onto the interior of the right clamping beam onto the ledge and fix sheet
e.g. with screw clamps.
(The picture shows a machine with manual clamping)
ledge for horizontal sheet
horizontal sheet
vertical sheet
spacer
screw clamp
beam side flushing

Kunststoffschweißtechnik
Operating and indicating elements Chapter 4
10.12.2013 Working instructions WIDOS PSM 20 Page 18 of 31
Lift the heating element and fix it additionally in the height by
a spacer.
The machine features (optional) spacers for a sheet
thickness of 10 / 15 / 20 mm of the horizontal sheet.
Always align spacer and sheet thickness to each other in
order that the vertical sheet is only heated at the welding
area.
Spacer height 65 mm for sheet thickness of 10 mm
Spacer height 70 mm for sheet thickness of 15 mm
Spacer height 75 mm for sheet thickness of 20 mm
Remove the spacer after heating, otherwise the heating
element cannot swing downwards.
4.4. How to open the clamping beam to remove the pieces
Lift the clamping beam at the front and swing the piston rods forwards out.
Now remove the angle or the pipe forwards out of the machine.
Since the clamping beam is very heavy, you may insert a spacer between
clamping beam and support in order to remove a welding piece.
The spacer may have a height of max. 60 mm, otherwise it may damage the
rear part of the piston rod!
Lift the clamping beam at the front, remove the space and swing the
piston rod in again; the beam must rest on the washer afterwards.
Insert the spacer here into the base
frame of the lifted heating element.
Swung out
piston rod
Insert spacer
here,
(max. 60 mm)

Kunststoffschweißtechnik
Operating and indicating elements Chapter 4
10.12.2013 Working instructions WIDOS PSM 20 Page 19 of 31
4.5. How to weld a pipe out of sheets
The PSM 20 allows you to weld a plastic sheet together to get a pipe.
For this purpose clamp the plastic sheet on one side.
Now bend the sheet and fix it on the opposite side.
You may harm yourself! As soon as the tension reduces, the bent sheet will
resile into its original position.
It is recommended to secure the bent and clamped sheet additionally by
clamping belts.
After welding open both clamping beams (chapter: 4.4) and remove the welded pipe
forwards out of the machine.
4.6. Service unit
Activate valve by turning.
The service unit (LFR-1/8-D-MINI-KC) regulates the fed compressed air onto the adjusted
working pressure and compensates pressure fluctuations. It clears the compressed air from
dirt particles and condensation water. It is not intended for the use of other media (liquids or
gases).
In order to adjust the regulator:
slowly ventilate device.
pull the pressure regulator button for the unlocking upwards (away from housing).
Turn the pressure regulator button until the desired pressure is shown on the pressure
gauge. The input pressure must be at least 1 bar larger than the output pressure.
Press the pressure regulator button downwards (towards the housing). Thereby, it is
secured against unintentional twisting.
Activating valve
Connection for compressed air hose
Manual outlet for condensation water
Pressure regulator button with pressure gauge

Kunststoffschweißtechnik
WIDOS Einsteinstr. 5 Phone +49 (0) 71 52 99 39 - 0
W. Dommer Söhne GmbH D-71254 Ditzingen-Heimerdingen Fax +49 (0) 71 52 99 39 - 40
Website: www.widos.de Email: info@widos.de
10.12.2013 Working instructions WIDOS PSM 20 Page 20 of 31
5. Starting and operating
The instructions of this chapter are supposed to guide you in the operation of the machine and
lead you during the appropriate starting of the machine. This includes:
- the safe operation of the machine;
- using all the possible options of the machine;
- economic operation of the machine.
5.1. Starting
Having removed the packaging material the attached guide pulleys have to be mounted on
the left side and the trestle pulleys on the right side of the basic cradle.
Connect the hydraulic with mains (230 V / 50 Hz / 16 A).
Connect the heating element with mains (230 V / 50 Hz / 16 A).
Connect one pneumatic hose to the local compressed air supply (6 – 8 bar) and to the
connector of the service unit (chapter: 4.4)
The machine only has to be introduced and used by skilled persons.
For their qualification they must pass an exam of plastic welding according to
DVS and DVGW.
Before starting the hydraulic check the level of the oil in order to avoid damages
on the pump.
If necessary add hydraulic oil of the quality HLPD 32 (chapter: 7.4).
In dangerous situations for man and machine you have to immediately disconnect the
machine from the mains plug.
Having finished the welding work and during intervals you have to turn off the heating
element. Furthermore you have to control that no unauthorized person can use the
machine.
Protect machine against humidity!
The use on building sites is only permitted when respecting VDE 0100 and using current
distribution with FI-safety-switch.
Carefully install electric cables (danger of stumbling)!
Pay attention to environmental conditions:
The welding process may not take place in case of direct insolation.
If local temperature is under 5° C the following measures have to be taken:
if necessary heat-up sheet ends.
Take measures against rain, wind and dust.
Table of contents
Other widos Welding System manuals

widos
widos PSM 15 User manual

widos
widos 5500 CNC 3.0 User manual

widos
widos 7511 User manual

widos
widos 25000 mobile User manual

widos
widos 26000 User manual

widos
widos HRG 14 User manual

widos
widos ASM 315 WM User manual

widos
widos ASM 160 User manual

widos
widos MAXIPLAST User manual

widos
widos HRG 16, Segment User manual

widos
widos MINIPLAST 2 / T-Piece User manual

widos
widos 10000 mobile User manual

widos
widos 4002 S WI CNC User manual

widos
widos PSM 10 XHS User manual

widos
widos 5100 User manual

widos
widos 4002 S WI CNC User manual

widos
widos 6113 mobile User manual

widos
widos 3511 User manual

widos
widos 6100 CNC 3.0 User manual

widos
widos Miniplast / 2 IR User manual