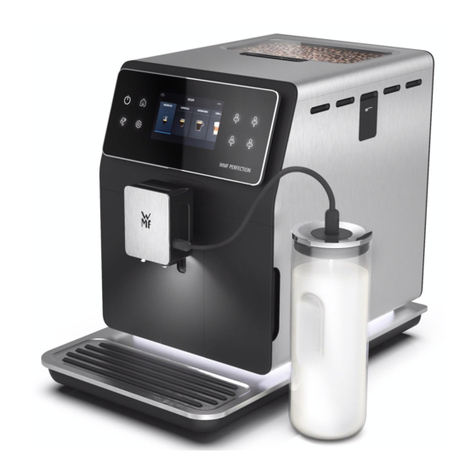
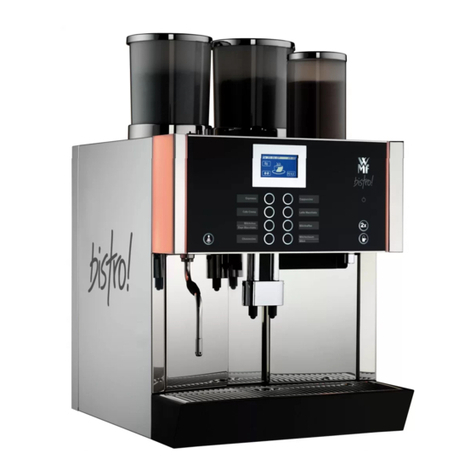
WMF PERFECTION 800L Series User manual

1
EN Operating Instructions 2
PL Instrukcja obsługi 28
HU Használati utasítás 54
CS Návod k obsluze 80
SK Návod na obsluhu 106
RO Instrucţiuni de utilizare 132
BG Указания за употреба 158
WMF PERFECTION
800L-SERIES

EN OPERATING INSTRUCTIONS
1|Technical specifications 4
2|Important safety information 4
2.1|Proper use 5
2.2|For Europe market only 6
2.3|Recommendations for installation 6
2.4|Important product information 8
2.5|Before using the first time 8
3|Components 8
4|Differences between the models 9
5|Overall view 10
5.1|Presentation of the different buttons 10
5.2|Lights settings 11
6|Installing the appliance 11
6.1|Measuring the water hardness 12
6.2|Filter installation 12
7|Important information before preparing drinks 13
7.1|Preparing the appliance 13
7.2|Preparing the grinder 13
7.3|Adjusting the coffee outlet 14
ENOPERATING INSTRUCTIONS
2

8|Preparing drinks 14
8.1|Coffee drinks 14
8.2|Teas / hot water 14
8.3|Milky drinks 14
8.4|Ground coffee recipes 15
8.5|Permanent settings 16
9|Profile menus 18
9.1|Create and delete a profile 18
9.2|Create and delete a fovourite recipe 18
10|Setting menu 18
11|General maintenance 19
11.1|Maintaining coffee grounds collector and drip tray 19
11.2|Maintenance of water tank 20
11.3|Why and how do I maintain the milk system? 20
11.4|Why and how cleaning the coffee beans tank? 20
11.5|Why and how cleaning the coffee hatch? 21
11.6|Overview general maintenance 21
12|Other maintenance 22
13|Troubleshooting 23
LIST OF FIGURES
A First use | B Measuring the water hardness | C Make two cups of a recipe at
once| D Make a milk recipe | E Quick milk rinsing | F Manual deep cleaning
of milk system | G Descaling program | H Complete automatic cleaning of the
machine | IEmpty the coffee ground collector | J Empty the drip tray
3

WMF PERFECTION 800L-SERIES
FULLY AUTOMATIC COFFEE MACHINE
Congratulations! You are now the proud
owner of your WMF Perfection fully auto-
matic coffee machine.
The most frequently consumed drinks are acces-
sible with one simple touch on the main inter-
face. As for the screen, it allows you to follow
the progress of your coffees and provides easy
access to the different menus. Most drinks can
be prepared in batches of two, which saves time
and is more convivial.
We wish you many years of enjoyment with
your WMF Perfection fully automatic coffee
machine.
1| TECHNICAL SPECIFICATIONS
Appliance: WMF Perfection
fully automatic coffee machine
Power supply: 220–240 V~/50 Hz
Pump pressure: 15 bars
Coffee bean container: 250 g
Capacity grounds container: 15 portions
Water tank: 2.0 l
Power consumption: During operation 1,550 W
Use and storage: Indoors, in a dry place (pro-
tected from frost)
Cable length (m): approx. 1.1
Dimensions (mm) H×W×D: 395×285×480
Weight (kg): 12.0
The guarantee period of this appliance is
2years. Please refer to the guarantee document
for details on the other guarantee terms and
conditions in your country.
Manufacturer:
SAS GSM
Rue Saint-Léonard F-53104 Mayenne
France
2| IMPORTANT SAFETY
INFORMATION
Important information is indicated in these
operating instructions using symbols and sig-
nal words:
WARNING indicates a hazardous situation
that can cause serious injuries.
CAUTION indicates a potentially hazard-
ous situation that can cause minor or moder-
ate injuries.
ATTENTION indicates a situation that can lead
to material damage.
NOTE provides additional information regard-
ing the safe handling of the product.
Symbols: observe and follow the
indications.
4

2.1| PROPER USE
•This appliance is not intended for
use by persons (including chil-
dren) with reduced physical, sen-
sory or mental capabilities, or
lack of experience and knowl-
edge, unless they have been
given supervision or instruction
concerning use of the appliance
by a person responsible for their
safety.
•Children should be supervised to
ensure that they do not play with
the appliance.
•Do not use the appliance if the
power cord or plug is damaged.
The power cord must be replaced
by the manufacturer, its after-
sales service or similarly quali-
fied persons in order to avoid a
hazard.
•Your appliance is intended for
domestic use inside the home only
at an altitude below 2.000 m.
•Do not immerse the appliance,
power cord or plug in water or
any other liquid.
•Your appliance is designed for
domestic use only.
•It is not intended to be used
in the following environments,
which are not covered by the
guarantee:
staff kitchen areas in shops,
offices and other working
environments;
farm houses;
by clients in hotels, motels
and other residential type
environments;
bed and breakfast type
environments.
•Always follow the clean-
ing instruction to clean your
appliance:
unplug the appliance,
do not clean the appliance
while hot,
clean with a damp cloth or
sponge,
never immerse the appliance
in water or put it under run-
ning water.
•When using the nozzle to ensure
that it is properly oriented in
order to avoid the risk of burns.
•Do not insert foreign objects into
the grain mill.
•The appliance shall not be placed
in a cabinet when in use.
5
BG RO SK CS HU PL EN

WARNING
Risks of injuries if you don’t
use this appliance correctly.
After using, do not touch hot sur-
faces (steam nozzle), subjected to
residual heat.
2.2| FOR EUROPE MARKET ONLY
•This appliance can be used by
children of at least 8 years of age,
as long as they are supervised
and have been given instructions
about using the appliance safely
and are fully aware of the haz-
ards involved.
•Cleaning and user maintenance
shall not be made by children
unless they are older than 8 and
they are supervised by an adult.
•Keep the appliance and its cord
out of reach of children under 8
years of age.
•This appliance may be used by
persons with reduced physi-
cal, sensory or mental capabil-
ities, or whose experience or
knowledge is not sufficient, pro-
vided they are supervised or have
received instruction to use the
device safely and understand the
dangers.
•Children should not use the
device as a toy.
•European directive 2012/19/UE
on Waste Electrical and Electronic
Equipment (WEEE), requires that
old household electrical appli-
ances are not thrown into the
normal flow of municipal waste.
Old appliances must be col-
lected separately in order to opti-
mize the recovery and recycling
of materials they contain and
reduce the impact on human
health and the environment.
2.3| RECOMMENDATIONS FOR
INSTALLATION
•Only use an earthed socket to
plug the machine in. Check that
the power voltage indicated
on the nameplate of the appli-
ance corresponds to that of your
mains installation.
•Do not use the appliance if it is
not working properly or if it has
been damaged. If this occurs,
contact an authorised service
centre.
•For your safety, this appliance
conforms to applicable stan-
dards and regulations (Directives
on low voltage, electromagnetic
compatibility, materials in con-
tact with foodstuffs, environ-
ment, etc.)
6

•Any error in the electrical con-
nection will negate your
guarantee.
•Do not use if the drip tray and
the grid are not in place.
•Unplug the appliance when you
clean it manually.
•Remove the plug if a problem
occurs during operation or before
you clean the appliance.
•Do not pull on the cord to unplug
the appliance.
•The power cord must never be
close to or in contact with the
hot parts of your appliance, near
a source of heat or over a sharp
edge.
•Ensure that the cord and your
hands do not touch the hot parts
of the appliance (cup warming
plate, steam nozzle).
•Refer to the instructions for des-
caling your appliance.
•All interventions other than
cleaning and everyday mainte-
nance by the customer must be
performed by an authorised ser-
vice centre.
•The accessories and the remov-
able parts of the appliance are
not dishwasher safe.
•For your safety, only use the
manufacturer’s accessories and
spare parts designed for your
appliance.
•This appliance is not suitable for
making drinks for babies under
the age of 2 years.
•All appliances are subject to strict
quality control procedures. These
include actual usage tests on ran-
domly selected appliances, which
would explain any traces of use.
•To reduce the risk of injury, do
not leave the cord hanging over
the table or counter, where it can
be pulled on by a child or trip
someone.
•Never pour cold water in the tank
immediately after a brew cycle.
Let the appliance cool down
between preparations.
•Do not place on or near a hot gas
or electric burner, or in a heated
oven.
•Do not use appliance for other
than intended use.
•Never operate the appliance with
wet hands.
7
BG RO SK CS HU PL EN

2.4| IMPORTANT PRODUCT
INFORMATION
NOTE
Read these instructions carefully and
keep them for future reference. Please
follow the safety guidelines.
The appliance may be used only for the
intended purpose and in accordance with this
manual. It contains instructions for using,
cleaning and looking after the appliance. We
accept no liability for any damage resulting
from non-observance.
Keep this instruction manual in a safe place and
pass it on to any subsequent user together with
the appliance. Please also note the warranty
information, which is enclosed separately. The
safety precautions must be observed during use.
2.5| BEFORE USING THE FIRST TIME
1| Take the appliance and all accessories out
of the box carefully and make sure that all
components and accessories are complete
and undamaged.
2| Ensure that all packaging material is removed
before use.
3| Clean the appliance, components and acces-
sories before the first use and after any long
storage, as described in section 11.
3| COMPONENTS
1Coffee bean container lid
2Grinding fineness adjustment dial
3Pre ground coffee funnel/funnel
for cleaning tablet
4LED light
5Accessory for cleaning the milk system, 2
in 1: disassembly tool + cleaning needle
6Removable One Touch Cappuccino block
7Ground coffee spoon
8Milk pot + lid (according to model)
9Milk lance
10 Milk tube
11 Coffee grounds collector
12 Milk tube connector
13 Grid and removable drip tray
14 Removable spout cover
15 Height-adjustable coffee outlets
16 Water tank
17 Claris – Aqua Filter System
with fitting accessory
18 Display panel
19 Care kit bag
20 1 descaling sachet
21 2 cleaning tablets
22 2 stick for testing water hardness
23 Pipe cleaner
24 Settings button
25 Cleaning button
26 On/Off button
27 Home button
28 Navigation touchscreen
29 Profile 1
30 Profile 3
31 Profile 2
32 Profile 4
8

4| DIFFERENCES BETWEEN THE MODELS
FEATURES WMF
PERFECTION
890L
WMF
PERFECTION
880L
WMF
PERFECTION
860L
WMF
PERFECTION
840L
Design black silver silver silver
Recipes
Ristretto
Espresso
Lungo
Long Coffee/Café Crème
Doppio/ Double Espresso
Americano
Morning Coffee — —
Cappuccino
Latte macchiato
Caffe Latte
Flat white
Milk Coffee/ Cafe au Lait
Espresso macchiato
Hot milk
Frothy milk
Hot Water — — —
Hot water for black tea —
Hot water for white tea —
Hot water for green tea —
Settings
Profile settings 16 16 10 4
Coffee strength setting options 4 4 4 3
Function
Ground Coffee
Accessory
Glass milk container —
9
BG RO SK CS HU PL EN

5| OVERALL VIEW
5.1| PRESENTATION OF THE DIFFERENT BUTTONS
BUTTON DESCRIPTION/GENERAL FUNCTIONS
Switching the machine on and off. It is necessary to press the button to start the machine.
Home button. Allows you to return to the home menu.
The machine has a range of settings – check them out! They let you create a more personalized
experience.
Go to the various cleaning options for the machine. Carrying out proper maintenance will
optimize the life of your machine and preserve the authentic taste of your coffee.
Allows you to return to the previous screen.
Go to the next. For instance, when preparing a Cappuccino, switch from milk preparation to
espresso preparation after a certain time.
Browse upwards in the menu/ increase the parameter selected. Browse downwards in the
menu/ decrease the parameter selected.
You can prepare one or two cups with your appliance by pushing the + button.
OK Confirmation of selection.
START Start the selection.
STOP Stop the selection.
Profile buttons at the right ofthe screen.
Profile button on the top left of the screen.
Contextual button, function depends on screen (advanced setting for recipes, settings for profiles,
etc.).
A recipe with this symbol is prepared from ground coffee inserted via the pre ground coffee
funnel 3.
10

5.2| LIGHTS SETTINGS
Specific information about the buttons’
backlight
•When a button is not illuminated, the corre-
sponding function is inaccessible.
•When it is slightly illuminated, the function is
available and can be selected.
•While the function requested is in progress,
the light becomes very bright.
Specific information about the light effects
on the base of appliance
•When the machine is ON, the base shines
brightly. You can switch the light on or off, as
described in section 10.
•When the machine is OFF the base does not
shine.
•When the light is in floating mode, a drink is
being prepared.
•When the light in the base is blinking, con-
sumer intervention is required to finish the
action in progress.
•All generic information like warning informa-
tion arises on the display panel 18.
NOTE
This Product contains a light source of
energy efficiency class D. Please note
that the light element in the product is not
intended for lighting purposes. The light is
interchangeable by authorized service staff.
Specific information about the spout light of
appliance
•The spout light is automatically activated
when a recipe is in progress.
6| INSTALLING THE APPLIANCE
Refer to first use figure A1– A15 earlier in the
instruction.
WARNING
Connect the appliance to an earthed
230 V mains socket. Failure to do so
means that you run the risk of fatal injury due
to electricity! Respect the safety guidelines as
indicated as described in section 10.
Place your machine on a stable, flat, heat-re-
sistant surface away from water splashes and
sources of heat. Insure that the location chosen
is sufficiently well ventilated, as the appliance
gives off heat. Please do not place the appliance
on surfaces such as marble. Remove the protec-
tive film from the display panel 18.
Specific information about the drip tray
It allows you to collect water or coffee that
might flow out of the appliance during and
after preparation. It is important to always leave
it in place and to empty it regularly.
Switching on the aplliance
Switch on the appliance by pressing the
ON/OFF button 26, WMF-logo appears on the
screen. Follow the instructions provided by your
appliance (figure A1 – A15).
Initial settings
When using the machine for the first time, you
will be prompted to configure various settings.
Follow the indications displayed on the screen.
11
BG RO SK CS HU PL EN

6.1| MEASURING THE WATER
HARDNESS
You must set your machine depending on the
hardness of your water, from 0 to 4. To do this,
follow these instructions:
1| Before using the appliance for the first time,
check the hardness of your water so that you
can set the appliance accordingly. This opera-
tion should also be carried out when you use
your machine in a place where the hardness
of the water is different or if you notice a
difference in the hardness of the water.
2| To check the water hardness, use the test
strip 22 supplied with your machine or con-
tact your local water authority.
The details of the classes are given in the table below:
DEGREE OF HARDNESS CLASSE 0 CLASSE 1 CLASSE 2 CLASSE 3 CLASSE 4
° dH < 3° > 4° > 7° > 14° > 21°
° e < 3.75° > 5° > 8.75° > 17.5° > 26.25°
° f < 5.4° > 7.2° > 12.6° > 25.2° > 37.8°
Appliance setting 0 – very soft 1 – soft 2 – average
hardness
3 – hard 4 – very hard
3| Fill a glass of water and insert a strip (figure
B1 – B2).
4| Put the strip back out of the glass. After 1
minute read the level of water hardness (fig-
ure B3– B4).
5| Indicate the number of red zones when con-
figuring the appliance (figure B6).
6.2| FILTER INSTALLATION
When switching on for the first time, the appli-
ance asks if you want to install the filter. If you
wish to do so, select YES and follow the instruc-
tions on the screen.
1| Install the filter in the appliance.
2| ONLY screw the filter into the bottom of the
water tank using the accessory supplied with
the filter 17 (figure A4 – A5).
3| Set the month when the filter is fitted (posi-
tion 1 on the illustration, left side figure in
the opening) by turning the grey ring located
on the upper end of the filter. The month
when the filter should be replaced is indi-
cated in position 2 on the following illustra-
tion (right side figure in the opening).
4| Please make sure to fill up the water tank
after filter installation.
5| Put a container of 0.6 l under the steam exit (fig-
ure A8). The machine must be primed whether the
filter has been installed or not. This means that
the water circuits have to be filled. To do this, fol-
low the instructions provided on the screen.
6| The machine will begin by filling the water
circuits, preheating the circuits and then will
complete an automatic rinse. The screen will
inform you when installation is complete.
12

7| IMPORTANT INFORMATION
BEFORE PREPARING DRINKS
7.1| PREPARING THE APPLIANCE
1| Remove and fill the water tank 16 (figure
A3 – A6).
2| Replace the water tank 16 (figure A7).
3| Remove the lid of the coffee bean container
1 and add coffee beans (max. 250 g) (figure
A12 – A13).
4| Replace the lid of the coffee bean container
1(figure A14).
CAUTION
Do not fill the water tank 16 with hot
water, milk or any other liquid.
CAUTION
Never put ground coffee in the cof-
fee container. It is recommended that
you do not use oily, caramelized or flavored cof-
fee beans for this appliance. These kinds of
beans may damage the appliance. Check that
the coffee beans do not contain any foreign
particles such as grit, as any damage caused by
the presence of foreign particles will invalidate
the guarantee. Do not put water into the coffee
bean container.
7.2| PREPARING THE GRINDER
Depending on the drinks chosen and the
strength of coffee selected, your machine will
automatically adjust the quantity of ground
coffee.
You can also set the strength of your cof-
fee by adjusting how finely the coffee beans
are ground. In general, the finer the coffee is
ground, the stronger and creamier the coffee
will be.
It may also vary according to the type of coffee
used. We recommend a fine setting for espres-
sos and a coarser setting for coffees.
Adjust the fineness of grinding by moving the
slider of the coffee grounds fineness adjuster 2
which is located on the topside of the appliance
(figure A14).
CAUTION
On new product the grinder position is
a factory setting and should not be
changed during 30 recipes to let the grinder set
in its optimal configuration. However if the cof-
fee dispenses too slowly you can move the slider
1 notch towards the right direction for more
coarseness.
NOTE
This setting should be applied during
grinding notch by notch. It is advised to
move 1 notch at a time, you will notice a pro-
nounced difference in taste after 3 recipes. If
you set the grinder towards “fine” more than 1
notch at a time an alert screen might ask you to
reset it coarser.
Setting the fineness of grinding is useful when
you change the type of coffee or if you want
to make coffee that is more or less strong.
However, it is not advised to use this setting
systematically.
13
BG RO SK CS HU PL EN

7.3| ADJUSTING THE COFFEE OUTLET
For all the drinks available, you can lower or
raise the coffee outlets 15 according to the size
of your cup or glass (figure A15).
NOTE
Splashing or scalding may occur if the
coffee outlets 15 are set to high in rela-
tion to the size of the cups.
8| PREPARING DRINKS
Preparation: Place the cup(s) under the coffee
nozzles. Press the button for the desired drink.
8.1| COFFEE DRINKS
Possible settings: It is possible to increase the
strength of the coffee by selecting different
number of coffee beans.
You can prepare one or two cups with your
appliance by pushing the + button (figure C3).
It is possible to adjust the volume of the cof-
fee prepared by operating the quantities scale
on the right side of the screen (possible to do
it before launching recipe and during recipe
flow). The machine starts by grinding the beans,
tamping the ground coffee and finally brewing
the coffee.
You can stop the preparation at any time by
pressing STOP.
8.2| TEAS / HOT WATER
Possible settings: Your appliance allows you to
prepare hot water for teas or herbal tea.
Model 840: One hot water recipe, you can
adjust temperature and volume of the drink
(before and during preparation).
Models 860, 880, 890: Three types of tea (black
tea, white tea, green tea), the hot water tem-
perature is adapted to the drink selection; you
can adjust volume of the drink (before and
during preparation).
8.3| MILKY DRINKS
Refer to figure D1 – D6 earlier in the instruction.
Before recipe launching
1| Connect the slimmer and longer side of the
milk tube connector 12 to the One Touch
Cappuccino block 6(figure D1).
NOTE
Take care to well insert the slimmer and
longer side of the milk tube connector
12, to insure recipe quality.
2| Immerse the other end in a receptacle filled
with milk or directly in your bottle of milk
(figure D3).
3| Place the cup(s) under the coffee/milk noz-
zles (figure D6).
Possible settings: It is possible to increase the
strength of the coffee by selecting different
number of coffee beans, and choose drink size.
The steam is used to froth the milk. As a higher
temperature is required when producing steam,
the appliance will run an additional pre-heating
phase. The appliance allows to choose the quan-
tity of milk foam, on several milky recipes.
14

You can push STOP to stop the recipe, you can
can push >> to go to next recipe step (only for
recipes with 2 or more steps).
NOTE
No possibility to modify the volume
during processing milk recipes (coffee
and milk).
Cleaning after preparing milky drinks
Automatic milk cleaning: The screen indi-
cates Clean milk? at the end of each milky
preparation.
It is advised to rinse after using the milk func-
tion in order to ensure the cleanliness of the
frothing accessories and the frothiness of the
milk.
NOTE
For the best results, it is advised to clean
the One Touch Cappuccino removable
block
6
regularly (see section 11).
If you note a change in the quality of your
milk froth, do not hesitate to repeat the rins-
ing and cleaning process: indeed a milk system
that is not well maintained may cause this type
of problem.
NOTE
Automatic rinsing outlets: according to
the type of preparation (coffee or milky
recipe), the machine may complete an auto-
matic rinse program when it switches off. The
cycle lasts only a few seconds and stops auto-
matically (figure E3 – E5).
8.4| GROUND COFFEE RECIPES
Your appliance allows to prepare coffee and
milky recipes with ground coffee.
Use the ground coffee beverage choice in the
home screen or via a profile to prepare a bever-
age with ground coffee. After setting your rec-
ipe and pressing START, the appliance invites
you to open pre ground coffee funnel 3. With
the specific spoon provided 7, insert one
ground coffee spoon in the hatch. Close it. Then
repeat this operation a second time. Press OK to
realize the recipe. We recommend to insert two
ground coffee spoons (one after the other) to
insure coffee taste.
CAUTION
Do not put more than 1 spoon of
ground coffee in the pre ground coffee
funnel 3 at once. For one recipe, do not put
more than 2 spoons of ground coffee in the
appliance: Any damage caused by introducing
an excessive quantity of ground coffee will not
be covered by the guarantee.
Do not put anything else than ground coffee
in funnel: Any damage caused by introducing
another substance will not be covered by the
guarantee.
NOTE
Never open pre ground coffee funnel 3
during recipe progressing; if doing, rec-
ipe will be stopped and machine will launch
automatic maintenance after hatch closing.
Possibility to realize ground coffee recipe even
if there are no coffee beans.
When a cycle is interrupted, the appliance
requests immediately to close the hatch, before
running automatic maintenance.
15
BG RO SK CS HU PL EN

8.5| PERMANENT SETTINGS
The following permanent settings can be made:
PRODUCT NUMBER OF
GRINDING
DOUBLE RECIPE
AVAILABLE
APPROXIMATE
SIZE
DEFAULT STRENGTH
(MIN/MED/MAX)
POSSIBLE SETTINGS ADVANCED SETTINGS BY
PUSHING PARAMETERS
GROUND COFFEE
OPTION
Ristretto 1 Yes (2 grindings) 25ml Med Volume (20–35ml, in 5ml steps), strength Coffee temperature
T2/ T3
Yes
Espresso 1 Yes (2 grindings) 40ml Med Volume (30–70ml, in 10ml steps), strength Coffee temperature
T1/ T2/ T3
Yes
Lungo 1 Yes (2 grindings) 80ml Med Volume (50–90ml, in 10ml steps), strength Coffee temperature
T1/ T2/ T3
Yes
Long Coffee/ Café Crème 1 Yes (2 grindings) 120ml Min Volume (80–180ml, in 10ml steps), strength Coffee temperature
T1/ T2/ T3
Yes
Doppio/ Double Espresso 2 No 80ml Med Volume (60–140ml, in 10ml steps), strength Coffee temperature
T1/ T2/ T3
No
Americano 1 No 160ml Med Volume (120–280ml, in 10ml steps), strength Coffee temperature
T1/ T2/ T3
Yes
Morning Coffee 1 Yes (2 grindings) 150ml Max (fixed) Volume (120–170ml, in 10ml steps), strength No
Cappuccino 1 Yes (2 grindings) 180ml Med Volume (M L XL), strength Foam volume,
Coffee temperature T1/ T2/ T3
Yes
Latte macchiato 1 Yes (2 grindings) 250ml Med Volume ( M L XL), strength Foam volume,
Coffee temperature T1/ T2/ T3
Yes
Caffe Latte 1 No 250ml Med Volume ( M L XL), strength Foam volume,
Coffee temperature T1/ T2/ T3
Yes
Flat white 2 No 160ml Med Volume ( M L XL), strength Foam volume,
Coffee temperature T1/ T2/ T3
No
Milk Coffee/ Cafe au Lait 1 No 280ml Min Volume ( M L XL ), strength Foam volume,
Coffee temperature T1/ T2/ T3
Yes
Espresso macchiato 1 Yes (2 grindings) 60ml Med Volume (M L XL), strength Foam volume,
Coffee temperature T1/ T2/ T3
Yes
Hot milk No 200ml Volume (M L XL)
Frothy milk No 200ml Volume (M L XL) Foam volume
Hot Water Volume (50–300ml, in 10ml steps) Water temperature (T1/ T2/ T3)
Hot water for black tea No 200ml Volume (50–300ml, in 10ml steps)
Hot water for white tea No 200ml Volume (50–300ml, in 10ml steps)
Hot water for green tea No 200ml Volume(50–300ml, in 10ml steps)
16

8.5| PERMANENT SETTINGS
The following permanent settings can be made:
PRODUCT NUMBER OF
GRINDING
DOUBLE RECIPE
AVAILABLE
APPROXIMATE
SIZE
DEFAULT STRENGTH
(MIN/MED/MAX)
POSSIBLE SETTINGS ADVANCED SETTINGS BY
PUSHING PARAMETERS
GROUND COFFEE
OPTION
Ristretto 1 Yes (2 grindings) 25ml Med Volume (20–35ml, in 5ml steps), strength Coffee temperature
T2/ T3
Yes
Espresso 1 Yes (2 grindings) 40ml Med Volume (30–70ml, in 10ml steps), strength Coffee temperature
T1/ T2/ T3
Yes
Lungo 1 Yes (2 grindings) 80ml Med Volume (50–90ml, in 10ml steps), strength Coffee temperature
T1/ T2/ T3
Yes
Long Coffee/ Café Crème 1 Yes (2 grindings) 120ml Min Volume (80–180ml, in 10ml steps), strength Coffee temperature
T1/ T2/ T3
Yes
Doppio/ Double Espresso 2 No 80ml Med Volume (60–140ml, in 10ml steps), strength Coffee temperature
T1/ T2/ T3
No
Americano 1 No 160ml Med Volume (120–280ml, in 10ml steps), strength Coffee temperature
T1/ T2/ T3
Yes
Morning Coffee 1 Yes (2 grindings) 150ml Max (fixed) Volume (120–170ml, in 10ml steps), strength No
Cappuccino 1 Yes (2 grindings) 180ml Med Volume (M L XL), strength Foam volume,
Coffee temperature T1/ T2/ T3
Yes
Latte macchiato 1 Yes (2 grindings) 250ml Med Volume ( M L XL), strength Foam volume,
Coffee temperature T1/ T2/ T3
Yes
Caffe Latte 1 No 250ml Med Volume ( M L XL), strength Foam volume,
Coffee temperature T1/ T2/ T3
Yes
Flat white 2 No 160ml Med Volume ( M L XL), strength Foam volume,
Coffee temperature T1/ T2/ T3
No
Milk Coffee/ Cafe au Lait 1 No 280ml Min Volume ( M L XL ), strength Foam volume,
Coffee temperature T1/ T2/ T3
Yes
Espresso macchiato 1 Yes (2 grindings) 60ml Med Volume (M L XL), strength Foam volume,
Coffee temperature T1/ T2/ T3
Yes
Hot milk No 200ml Volume (M L XL)
Frothy milk No 200ml Volume (M L XL) Foam volume
Hot Water Volume (50–300ml, in 10ml steps) Water temperature (T1/ T2/ T3)
Hot water for black tea No 200ml Volume (50–300ml, in 10ml steps)
Hot water for white tea No 200ml Volume (50–300ml, in 10ml steps)
Hot water for green tea No 200ml Volume(50–300ml, in 10ml steps)
T = Temperature
17
BG RO SK CS HU PL EN

9| PROFILE MENUS
Profiles and favourite recipes allow you to
record your preferred recipes, to personalize
recipes and other settings like lights and display.
9.1| CREATE AND DELETE A PROFILE
Method 1: Press one profile button at the right
of the screen 29 – 32. If there is not a profile
already recorded for this button, then follow
instruction on the screen.
Method 2: Press profile icon ( ) on the top
left of the screen, then press + (available if
maximum of profile number is not reached).
Possibility to create up to 16 several profiles
(depending on model). If you want to modify
or delete a profile then press setting button in
concerned profile.
9.2| CREATE AND DELETE A
FOVOURITE RECIPE
Method 1: From profile interface, press + but-
ton to add a recipe and follow instructions on
the screen.
Method 2: At the end of a recipe press follow-
ing button: ( )
Possibility to record up to 8 recipes per profile.
If you want to delete a favourite recipe then
stay pressed on the concerned tile, then press
the cross displayed on the top of the tile.
NOTE
No possibility to modify a recipe in pro-
file menu or during recipe processing.
NOTE
If you stop your favourite drink in
progress, this setting will be saved.
For each profile, you can set specific settings:
•Base light, on or off
•Auto on on a specific favourite recipe
•Recipes display
•Add a name
•Choose a color
•Choose a short cut
10| SETTING MENU
Push gear wheel ( ) at the left of the display
panel 18.
The following settings can be made:
•Parameters: language, clock, date, water
hardness, coffee temperature, tea tempera-
ture, measuring unit, base light brightness,
screen brightness, Auto-off, automatic rins-
ing, recipe display (mosaic or slider), reset
product.
•Information: drinks prepared, number of rec-
ipes done
•Help and tutorials: videos to explain how to
use appliance
18

Below are the main settings available:
Date You must set the date, particularly when you are using an anti-limescale cartridge.
Clock You can select to display a 12 or 24-hour clock.
Language You can select the language of your choice from those offered.
Measuring Unit You can set the unit of measurement to be ml or oz.
Screen brightness You can adjust the screen brightness according to your preferences.
Drinks temperature You can adjust the temperature of your coffees and/or your teas to three different
levels. This adjustment is a generic setting, applied as default on all recipes. But you
can modify it occasionally when you launch a recipe, by using advance setting of
the recipe.
Water hardness You can set your water hardness from 0 to 4 (see section 6.1).
Auto-off You can choose the duration after which your appliance will switch off
automatically (duration of non-use). This function lets you reduce your energy
consumption. Set the automatic switch-off time to save energy (switch-off after
15/ 30/ 60/ 90 minutes after the last action on the machine). Set the automatic
switch off time to the shortest duration (15 minutes) to save utmost energy.
You can also reset it to the factory setting.
Automatic rinsing You can choose to activate automatic rinsing of the coffee outlet or not when
starting the machine (not concern tea recipes).
Base light You can adjust the base light according to your preferences, on or off. This setting is
independent of specific settings done in each profile.
To exit the settings menu, press . The settings will be stored in the memory if you unplug your
machine.
11| GENERAL MAINTENANCE
Carrying out proper maintenance will opti-
mise the life of your machine and preserve the
authentic taste of your coffee. For hygiene rea-
son, it is important to carry on daily mainte-
nance as proposed in the operating instructions,
and run a rinsing program every day before first
use or when not used for a long period (over 2
days).
11.1| MAINTAINING COFFEE GROUNDS
COLLECTOR AND DRIP TRAY
The drip tray 13 collects the used water and the
coffee grounds collector 11 collects the used
ground coffee.
When and how should I empty the drip tray?
When the machine notifies you. You can empty
it more regularly, before the machine notifies
you (figure J1 – J9).
It is recommended that you let it air dry before
you put it back in the appliance. It is import-
ant to always leave it in place and to empty it
regularly.
19
BG RO SK CS HU PL EN

CAUTION
For hygienic reasons, as this container
is in contact with milk and coffee, we
recommend that you fully dismantle and clean
daily each element under hot water.
CAUTION
Not emptying the drip tray 13 regularly
as may damage your machine. To clean
it, you can disassemble cover by pulling on indi-
cated area (figure J5).
When and how should I empty the coffee
grounds collector?
When the machine notifies you. You can empty
it more regularly, before the machine notifies
you, but ensure that the machine is switched on
so that it can record that the collector 11 has
been emptied (figure I1 – I6).
CAUTION
Not emptying the coffee grounds col-
lector 11 regularly may damage your
machine. Do not put it in the dishwasher. For
hygienic reasons, we recommend that you clean
the coffee ground container daily under hot
water with soap and sponge.
It is recommended that you let it air dry before
you put it back in the appliance.
11.2| MAINTENANCE OF WATER TANK
For the preservation of best coffee fla-
vor impacted by the quality of the water and
hygienic reasons, we advise you to use only
fresh water and to daily clean the water tank 16
with hot water and a bottle brush.
11.3| WHY AND HOW DO I MAINTAIN
THE MILK SYSTEM?
Maintain the milk system after making milky
drinks.
NOTE
In order to obtain a consistent foam
quality, we recommend that you:
•Start the machine’s cleaning cycle. You can
start a milk system cleaning at any time. To
learn how to do this, see the tutorial stored in
your machine: Performing a cleaning.
•Thoroughly clean the tube and nozzle with
hot water immediately after each use. You
can use the pipe cleaner inside the metal part
of the milk tube.
•We recommend to clean the milk pot 8 after
each use or when it is empty. The glass jar can
be washed in the dishwasher.
11.4| WHY AND HOW CLEANING THE
COFFEE BEANS TANK?
The coffee beans can leave oily stains in the
tank that may affect coffee taste.
To preserve the best coffee flavour and for bet-
ter hygiene, we recommend to wipe coffee
beans tank with a soft and dry cloth, every time
you fill it.
CAUTION
Do not clean it with water, because
water in coffee beans tank may dam-
age your product.
20
Other manuals for PERFECTION 800L Series
3
This manual suits for next models
4
Table of contents
Languages:
Other WMF Coffee Maker manuals

WMF
WMF WMF 1000 S User manual

WMF
WMF PERFECTION 600 Series User manual

WMF
WMF Bueno User manual

WMF
WMF 1500S User manual

WMF
WMF PERFECTION 800L Series User manual

WMF
WMF Coffee Station 58 User manual

WMF
WMF 2000 S User manual

WMF
WMF Presto 1400 Series User manual

WMF
WMF 1300 S Instructions for use

WMF
WMF CASHMIRA User manual