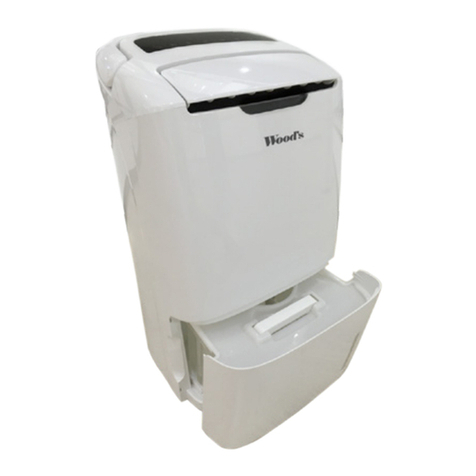
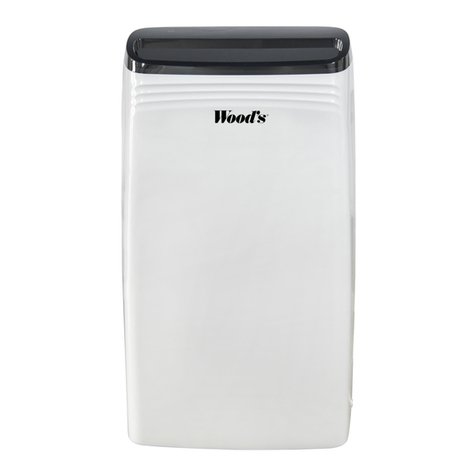
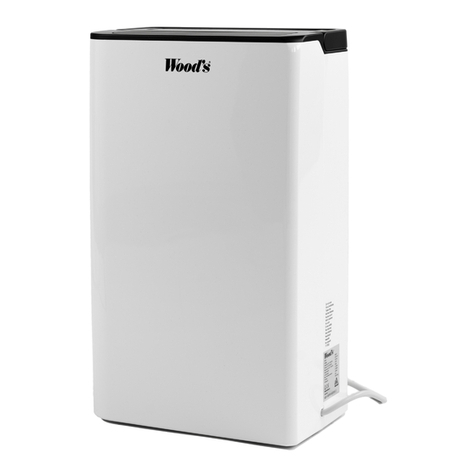
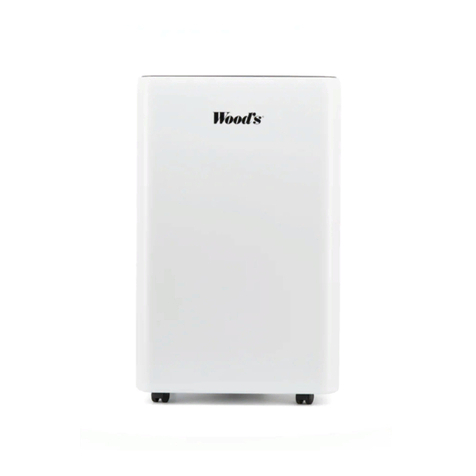
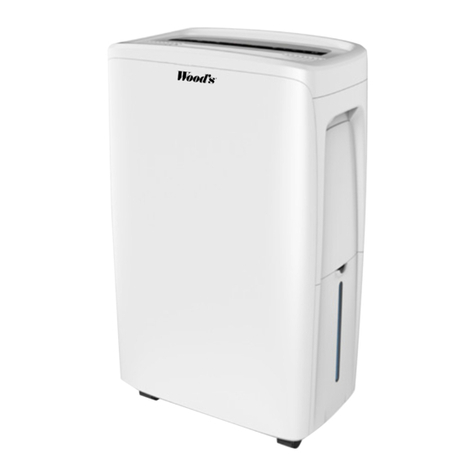
Wood’s M10G User manual

Wood’s dehumidier M10G
Users manual

CUSTOMER CARE AND SERVICE
Always use original spare parts.
When contacting our Authorised Service Centre, ensure that you have the
following data available: Model number,receipt and serial number.
Warning / Caution-Safety information.
General information and tips.
Environmental information.
Subject to change without notice.
Please read this manual carefully before installing and using yourWood’s product.
Store the manual in a safe place for future reference and product warranty.
Visit our website www.woods.se for:
Usage advice, updated brochures, trouble shooter and service information.
Register your product for additional warranty: www.warranty-woods.com

Users manualWood’s dehumidier M10G
Table of contents
4 ................................................................................ English
13 ................................................................................ Swedish
25 ................................................................................ Danish
30 ................................................................................ Norwegian
37 ................................................................................ German
42 ................................................................................ French
48 ................................................................................ Spanish
57 ................................................................................ Dutch
66 ................................................................................ Lithuania
71 ............................................................................... Latvian
80 ............................................................................... Estonian
89 ............................................................................... Finnish
94 ............................................................................... Icelandic
103 ............................................................................... Romanian
111 ............................................................................... Greek
120 ............................................................................... Polish

4 5
English
Flammable material. This
appliance contains R290/
Propane
a ammable refrigerant.
Refer to this manual
for safety information.
R290 refrigerant gas
complies with European
environmental directives.
Do not pierce or burn.
Maintenance and repairs
requiring the assistance of
other qualied personnel
must be carried out under
the supervision of specialists
in the use of inammable
refrigerants.
Refer to this manual for
safety information
Read technical manual
Read operators
manual.
SAFETY INFORMATION
Before the installation
and use of the appliance,
carefully read the
supplied instructions.
The manufacturer is not
responsible if an incorrect
installation and use that
causes injuries and damages.
Always keep the instructions
with the appliance for future
reference.
Children and vulnerable
people safety
WARNING
Risk of injury or permanent
disability.
This appliance can be used
by children aged 8 years
and above and persons with
reduced physical, sensory or
mental capabilities or lack of
experience and knowledge
if they have been given
supervision or instruction
concerning use of the
appliance in a safe way and
understand the hazards
involved.
Do not let children play with
the appliance.
Children of less than 3 years
should be kept away unless
continuously supervised.
Keep all packaging away
from children.
Cleaning and user
maintenance shall not be
made by children without
supervision.
General Safety
This appliance is intended
to be used in household
and similar applications
such as: – bathrooms,
sta kitchen areas in
shops, oces and other
working environments.
The rating plate is located
at the back or the side of
the dehumidier. Keep
ventilation openings clear of
obstruction.
Do not use mechanical
devices or other means to
accelerate the defrosting
process, other than those
recommended by the
manufacturer.
The appliance shall not
be stored in a room with
continuously operating
ignition sources (for
example; open ames, an
operating gas appliance or
an operation electric heater.
Do not pierce or burn.
Be aware that refrigerants
may not contain an odour.
Do not use water spray
and steam to clean the
appliance. Clean the
appliance with a moist
soft cloth. Only use neutral
detergents. Do not use
abrasive products, abrasive
cleaning pads, solvents or
metal objects.
If the supply cord is
damaged, it must
be replaced by the
manufacturer, its Authorised
Service Centre or similarly
qualied persons in order to
avoid a hazard.
SAFETY INSTRUCTIONS
Installation
WARNING
Only a qualied person must
install this appliance.
Remove all the packaging.
Do not install or use a
damaged appliance. The
appliance shall be installed,
R290

5
English
operated and stored in
a room with a oor area
larger than 4m². Obey the
installation instruction
supplied with the appliance.
Always be careful when
you move the appliance
because it is heavy. Always
wear safety gloves.
Make sure the air can
circulate around the
appliance.
Wait at least 4 hours before
connecting the appliance to
the power supply. This is to
allow the oil to ow back in
the compressor.
Do not install the appliance
close to radiators or other
heat sources.
Do not install the appliance
where there is direct
sunlight. This device is only
for indoor use. Ensure that
the unit is placed on a
stable and at surface. If
the surface is not stable
there is a risk that the unit
may be unstable and cause
excessive vibration and that
water will be released.
Electrical connection
WARNING
Risk of re and electrical
shock.
The appliance must be
connected to a grounded
outlet.
Make sure that the electrical
information on the rating
plate matches the power
supply. If not, contact an
electrician.
Always use a correctly
installed shockproof socket.
Do not use multi-plug
adapters and extension
cables.
Make sure not to cause
damage to the electrical
components (e.g. mains
plug, mains cable).
Contact the Authorised
Service Centre or an
electrician to change the
electrical components.
The mains cable must stay
below the level of the mains
plug.
Connect the mains plug to
the mains socket only at the
end of the installation.
Make sure that there is
access to the mains plug
after the installation.
Do not pull the mains cable
to disconnect the appliance.
Always pull at the mains
plug.
Use
WARNING
Risk of injury, burns,
electrical shock or re.
Do not change the
specication of this
appliance.
Be careful not to cause
damage to the refrigerant
circuit. It contains propane
(R290), a natural gas with a
high level of environmental
compatibility. This gas is
ammable.
If damage occurs to the
refrigerant circuit, make sure
that there are no ames and
sources of ignition in the
room. Ventilate the room.
Do not put ammable
products or items that
are wet with ammable
products near or on the
appliance.
Disposal
WARNING
Risk of injury.
Disconnect the appliance
from the mains supply.
Cut o the mains cable and
discard it.
The refrigerant circuit of this
appliance is ozone-friendly.
Contact your municipal
authority for information
on how to discard the
appliance correctly.
Do not cause damage to the
part of the cooling unit that
is near the heat exchanger.
Always see to that the
appliance is kept clean. Do
not cover the unit.

6 7
English
Thank you
Thank you for choosing a Wood’s
dehumidier. You are one of more
than 600.000 people who have cho-
sen a Wood’s dehumidier to prevent
damages from excessive moisture
and mould. Originating in Canada in
1950, Wood’s has more than 60 years
experience of developing and manu-
facturing dehumidiers. When choo-
sing a Wood’s dehumidier you’ll get
a unit with great quality, high capacity
and that will extract the most litres per
consumed kWh.
Workings of your
dehumidier
The Wood’s M10G is a compressor
dehumidier. As the air is drawn
through the dehumidier by the fan,
the air passes over the compressor
cooled copper coils. The coils cool the
water vapour, separating the water
from the air.
The water drips down from the coils
and is drained away with the water
hose. Left is the dry air that is exhau-
sted in the room. As the dehumidier
condensates the water vapour, heat
energy is released. That is why a
compressor dehumidier will exhaust
dry air that is extra benecial for dry-
ing clothes, laundry, wood etc.
A compressor dehumidier is the
most energy efcient way to remove
excess moist and bad odour. Keep
the relative humidity level between
50% and 60% to maintain a safe and
healthy indoor environment.
1. Installation and
placement
Wood’s dehumidiers are easy to
move around, but bare in mind the
following.
• The dehumidier should not be
placed near radiators or other
heat sources or exposed to direct
sunlight, as it will reduce its perfor-
mance.
• Keep at least 25cm distance from
walls and other obstructions to max-
imize the air ow.
• For optimum performance, place
the dehumidier in the middle of the
room.
• Make sure that the air ow from the
inlet and outlet isn’t blocked
Installation:
1. Place the dehumidier on a at and
solid ground, preferably in the middle
of the room.
2. Close all windows and ventilators
in the room. Otherwise, moist air from
the outside will continue to ow into
the room.
3. Connect the dehumidier to a
grounded power outlet.
If the dehumidier is transported
horizontally, oil may have run out of
the compressor and into the closed
piping system. In such a case, let
the dehumidier stand for a few
hours before being used. It is very
important that the oil runs back into
the compressor, otherwise the dehu-
midier may be seriously damaged.
2. Using the M10G
Hygrostat controlled
The unit will run only when the
ambient humidity exceeds your set
value.
Automatic restart
In the event of a power failure, the
unit will continue to work according to
your latest settings once the power
returns.
Automatic defrost
The unit will defrost automatically
when needed and resume to work
when the defrost is completed.
When defrosting, the compressor
shuts off and the defrost indication
light is lit.
Start and stop the dehumidier by
pressing the ON/OFF button.
When the compressor is working, the
compressor light is illuminated.
Set desired humidity
Press the UP and DOWN arrows
to choose desired humidity level
between 30% and 90%. The dehu-
midier will shut off when desired
humidity level is reached. Set value
is shown in the display for a couple of
seconds. After, the display returns to
showing the ambient humidity level.
Press the DOWN arrow until the dis-
play shows CO to have the dehumi-
dier running continuously. Continue
function, no matter room humidity,
machine continue running.
When ambient humidity level is below
35%, the display shows LO. When
ambient humidity level is above 95%,
the display shows HI.
NOTE: when desired humidity level is
reached, the fan will continue to work
for a couple of minutes before shut-
ting off .
Set timer for automatic shut off
Press the timer button repeatedly to
active the timer for automatic shut
off between 1 and 24 hours. When
activated, the timer light illuminates.
Set value is shown in the display for a
couple of seconds. After, the display
returns to showing the ambient humi-
dity level. Press the timer button until
the display shows 0 and the timer
light shuts off to deactivate. When
shut off due to the timer, you need to
press the power button to restart the
unit.
4.Water drainage
When the water reservoir is full, the
dehumidier is shut off automatically.
Once the water reservoir is emptied
the unit will automaticallt restart.
1. Disconnect the dehumidier from
the power source.
2. Empty the water reservoir.
3. Put the empty water reservoir back
and check that the oat moves
freely.
4. Connect the dehumidier to the
power source.

7
Direct water drainage
Connect a water hose (10 mm) to the
pipe on the back of the dehumidier.
Lead the other end to a drain. Make
sure that the water can be drained
downwards.
5.The air lter
The air lter prevents dust and dirt
from entering the machine, prolong-
ing its life expectancy. It is important
the lter is cleaned regularly.
Filter cleaning:
1. Remove the lter.
2. Wash it with warm water and a
mild cleansing agent. Alternatively
the lter may be vacuum cleaned.
3. Let the lter dry and put it back
It is very important that the
lter is cleaned regularly;
otherwise the dehumidier
might lose capacity and even
be seriously damaged.
6. Maintenance
- Clean the unit with a soft moist
cloth. Do not use solvents or strong
cleaners as this might damage the
surface of the unit.
- The cooling coils are best cleaned
with a rag and warm water.
7. Service
If the dehumidier requires servicing,
you must rst contact your local retai-
ler. Proof of purchase is required for
all warranty claims.
8.Warranties
2 years consumer warranty against
production faults. Please note that
the warranty is only valid upon the
production of the receipt. The war-
ranty is only valid if the product is
used in accordance with the instruc-
tions and security warnings expres-
sed in this manual. The warranty
does not cover any damages caused
by improper handling of the product.
NOTE: The 2 years warranty only applies
for consumers and not for commercial
use of the unit.
This machine complies with EMC -
Directives 2014/30/EU
and its amendments
The unit is set to work between
+5ºC and + 35ºC.
If the temperature goes outside
this range the unit might not
work properly.
9. Hints
Sometimes it may be useful to use
a frost guard or heater fan to make
sure that the temperature does not
fall below +10˚C. Even if the M10G
works down to temperatures as low
as +5°C, its capacity will increase
at higher temperatures as warm air
carries more water.
For maximum dehumidifying power
in a room, it is recommended that
the air supply from outside and from
adjoining rooms is minimized – close
doors and ventilators.
Expect higher dehumidication
capacity during Autumn / Summer
because the outside air is warmer
and more humid.
To achieve a safe and reliable pro-
tection against mould and moisture
damage, keep the relative humidity
between 50% and 60%.
PARTS
Parti componente
1. Front shell
2. Outlet
3. Handle
4. Control Panel
5. Filter box
6. Back shell
7. Tank
8.Rubber feet
9.Supply cord
OPERATING INSTRUCTIONS
LED INDICATORS
1. WATER FULL-LED Red
2. COMP-LED Blue
3. DEFROST Blue
4. TIMER-LED Blue
English
D
TIMER POWER
DOWNUP
C B A
TIMER DEFROST COMP WATER FULL
4 3 2 1

8 9
Humidity Level & Timer 2 digit display
The indicator features 3 functions:
1. when you set the humidity, it will indicate the humidity that you have selected
2. when you program the time for the unit to turn on and off, it will show the hours.
3. When the environment humidity is lower than 35%, it will show “LO”
4. When the environment humidity is higher than 95%, it will show “HI”
Functions
A. On/Off button
B. Press arrow down to set lower the humidity
C.Press arrow up to set higher humidity
D. Timer button
OPERATING INSTRUCTIONS
1. Plug in the unit.
2. Press button to start operation, the power indicator will be on. Press it again to stop operation.
3. Press or button to set the desired humidity level in the room, which can be set from 30% to 90% at
5% intervals or “CO”.
After a period of working,when environment humidity is lower than the selected humidity by 2%, compressor will stop ;
When environment humidity is equal to or higher than the selected humidity by 3%, compressor will restart once
3-minute compressor protection time over.
When setting the humidity to “ CO ”, the compressor will run continuously .
4.press button can be timer setting:
Press the button to program the time when the unit turns on and turns off. If you want to cancel the timer program-
ming, press the button to adjust the time at 00, and press the button ,it will be circulate from 00-01-02……23-24.It
is the programmed time to switch the machine. The programmed time will be cancelled when to switch compressor
manually each time. The programmed time remains unchanged if the machine stops to wok due to water full or during
defrosting
Noted: when ambient humidity reaches what you set before, both compressor and fan motor stop for 60mins rstly,
and then, fan motor works for 3mins to detect ambient humidity, if it is higher than set, both compressor and motor
works again; If it is lower than set, both compressor and motor stop for 60mins, and then motor works for 3mins again;
English

9
DRAINING THE COLLECTED WATER
When the drainage tank is full, the tank full indicator light will turn on, the operation will stop automatically and the
buzzer will beep 15 times to alert the user, that the water need to be emptied from the drainage tank.
Emptying the Drainage Tank
1.Lightly press on the sides of the tank with both hands and pull the tank out gently.
2.Discard the collected water
NOTE!
1. Do not remove the oat from the water tank. The water full sensor will no longer be able to detect the water level
correctly without the oat and water may leak from the water tank.
2. If the drainage tank is dirty, wash it with cold or lukewarm water. Do not use detergent, scouring pads, chemically
treated dust cloths, gasoline, benzene, thinner, or other solvents, as these can scratch and damage the tank and cau-
se water leakage
3. When replacing the drainage tank, press the tank rmly into place with both hands. If the tank is not positioned pro-
perly, the “TANK FULL” sensor will be activated, and the dehumidier will not operate.
English

10 11
ContinuousWater Drainage
The unit features a continuous drainage port .Using a plastic pipe (with an inner diameter of 10mm) inserts into drain
hole (on intermediate p late), reach out from side of water tank, install it in place, and arrange the drain pipe.
The water in the drainage tank can be continuously drained out from the continuous port on the unit.
MAINTENANCE
Cleaning the Dehumidier
To clean the Body: Wipe it with a soft damp cloth.
To Clean the Air Filter
1. Open the inlet grill rstly and remove the air lter
2. Clean the air lter
Run a vacuum cleaner lightly over the surface of the air lter to remove dirt. If the air lter is exceptionally dirty, wash it
with warm water and a mild cleanser and dry thoroughly.
English

11
3.Attach the air lter
Insert the lter into the grill smoothly, and place the inlet grill into right place.
Storing the Dehumidier
When the unit is not being used for a long period of time and you want to store it note the following steps:
1. Empty any water left in the drainage tank.
2. Fold up the power supply cord and put it in the water tank.
3. Clean the air lter
4. Discard in a cool and dry place .
Clearance
Maintain the minimum clearance around the dehumidier when the unit is operating as shown in the left drawing.
English

12 13
Problem Possible Cause Solution
The unit doesn't operate Has the power cord been
disconnected?
Plug the power cord into the outlet.
Is the tank full indication
lamp blinking? (The tank is
full or in a wrong position.)
Empty the water in the drainage tank
and then reposition the tank.
Is the temperature of the
room above 35° or below
5°?
The protection device is
activated and the unit
cannot be started.
The dehumidifying
function doesn’t work
Is the air lter clogged? Clean the air lter as
instructed under
”Cleaning the dehumidier”.
Is the intake duct or
discharge duct obstructed?
Remove the obstruction from the di-
scharge duct or intake duct.
No air is discharged Is the air lter clogged? Clean the air lter as
instructed under
”Cleaning the dehumidier”.
Operation is noisy Is the unit tilted or
unsteady?
Move the unit to a stable, sturdy loca-
tion.
Is the air lter clogged? Clean the air lter as
instructed under
”Cleaning the dehumidier”.
“E1” error code Defrosted sensor failed. Replace defrosted sensor.
This marking indicates that this product should not be disposed with other household wastes throughout the EU. To prevent pos-
sible harm to the environment or human health from uncontrolled waste disposal, recycle it responsibly to promote the sustaina-
ble reuse of material resources. To return your device, please use the return and collection systems or contact the retailer where
the product was purchased. They can take this product for environmental safe recycling.
English
TROUBLESHOOTING
If a condition listed below occurs, please check the following items before calling customer service.
Max. Working area 40 m2
Recommended Room Size 2-30 m2
Airow 120 m3/h
Capacity (at 30ºC & 80% RH) 10 Litres
Power 280 W
Tank Volume 2 Litres
Noice-Level 42 dB
Working Temperature +5°C to +35°C
Fan Speeds 1
Dimensions, L x W x H 276x185x480 mm
Weight 9,5 kg
Refrigerant R290
IP Code IP21
Technical dataWood’s M10G

13
Brännbart ämne. Denna
maskin innehåller R290/
Propan – ett brännbart
köldmedium.
Se bruksanvisning.
Läs
serviceinstruktion
Läs
bruksanvisning.
SÄKERHETSINFORMATION
Läs den medföljande
bruksanvisningen noggrant
innan installation och
användning av produkten.
Tillverkaren är ej ansvarig för
person- och egendomsskador
som uppstår på grund
av felaktig installation
eller användning. Spara
bruksanvisningen för
framtida behov.
SÄKERHET FÖR BARN OCH
HANDIKAPPADE
VARNING!
Risk för skador och
permanent invaliditet.
Denna produkt kan användas
av barn från 8 års ålder och
uppåt och av personer med
nedsatt fysisk, sensorisk
eller mental förmåga samt
personer med bristande
erfarenhet och kunskap, om
de övervakas eller instrueras
beträande hur produkten
används på ett säkert
sätt och förstår de risker
som är förknippade med
användningen. Låt inte barn
leka med produkten.
Barn under 3 år ska inte vistas
i närheten av produkten utan
ständig uppsikt.
Håll förpackningsmaterial
utom räckhåll för barn.
Rengöring och
användarunderhåll ska inte
utföras av barn utan tillsyn.
ALLMÄN SÄKERHET.
Denna produkt är avsedd att
användas i hushållsliknande
tillämpningar såsom: - källare,
badrum, pentryn i butiker,
på kontor och liknande
arbetsmiljöer. Produktens
märkskylt är placerad bakom
kondensvattenbehållaren.
Håll produktens
ventilationsöppningar fria
från hinder.
Använd ej andra metoder för
avfrostning eller rengöring
än de som rekommenderas
av tillverkaren. Produkten
ska inte förvaras i ett rum
där kontinuerligt använda
tändkällor nns (till exempel;
öppen eld, gasvärmare
eller elektriska värmare).
Kylkretsen får ej punkteras
eller utsättas för öppen
låga. Köldmediet kan vara
luktlöst. Spraya inte vatten
eller ånga på produkten för
att rengöra den. Använd
en fuktad mjuk trasa vid
rengöring tillsammans med
rengöringsmedel. Undvik
att använda slipande medel
eller metallföremål. Om
nätsladden är skadad måste
den bytas av tillverkaren eller,
en av tillverkaren auktoriserad
verkstad eller liknande
kvalicerad person för att
unndvika framkallande av
fara.
SÄKERHETSINSTRUKTIONER
INSTALLATION
VARNING!
Endast kvalicerade
personer får installera
denna produkt. Avlägsna
allt förpackningsmaterial.
Installera eller använd
inte en skadad produkt.
Produkten ska installeras,
användas och förvaras i ett
rum med en golvyta större
än 4m2. Följ den bifogade
installationsanvisningen
noga. Iakktag alltid försikghet
om produkten ska ytttas
eftersom den är tung. Använd
alltid skyddshanskar. Tillse
att luft kan cirkuera runt
produkten. Vänta minst 4
timmar innan produkten
ansluts till nätspänning i
syft att låta kopressorns
smörjmedel rinnan tillbaka
till kompressorn. Installera
inte produkten i närheten
av raditorer eller andra
värmekällor. Installera inte
produkten i dirket solljus.
Svenska
R290

14 15
ELEKTRISK ANSLUTNING
VARNING!
Risk för brand och elektriska
stötar. Produkten måste
anslutas till ett jordat eluttag.
Kontrollera att märkskyltens
elektriska information
överensstämmer med
nätspänningskällan. Om
så inte är fallet, kontakta
en elektriker. Använd
alltid ett korrekt installerat
stötsäkert och jordat eluttag.
Använd inte grenuttag eller
förlängningssladdar. Vid
skadad anslutningssladd (t.ex.
stickpropp eller nätsladd)
kontakta en av tillverkaren
auktoriserad verkstad eller
en elektriker om en elektrisk
komponent behöver bytas.
Nätsladden ska benna sig
nedanför stickproppen efter
installation. Anslut nätsladden
sist i installationen. Tillse att
nätsladdens stickpropp är
åtkomlig efter installationen.
Dra inte i nätsladden för
att koppla loss produkten
från eluttaget. Drag alltid i
stickproppen.
ANVÄNDNING
VARNING!
Risk för personskador,
elektriska stötar eller brand.
Produktens specikation
får inte ändras. Iakttag
försiktighet för att inte skada
produkten kylkrets. Produkten
innehåller propan (R290),
ett naturligt köldmedel
med låg miljöpåverkan.
Köldmediegasen är
brandfarlig.
Om kylkretsen skadas tillse
att öppen låga eller andra
tändkällor inte nns i rummet.
Vädra utrymmet. Placera
inte brännbara ämnen eller
föremål dränkta i brännbara
ämnen i närheten av, eller på
produkten. Produkten får inte
täckas
AVYTTRING
VARNING!
Risk för skador.
Koppla loss produkten från
eluttaget. Klipp av nätsladden
nära produkten och kassera
den.
Köldmediet i kylkretsen
på denna produkt är
miljövänligt. Kontakta de
lokala myndigheterna för
information angående korrekt
avyttring av produkten. Skada
inte kylenheten närmast
förångaren då kylmedia kan
läcka ut.
Svenska

15
Tack
Tack för att du valt en Wood’s av-
fuktare. Du är en av mer än 600.000
människor som har valt Wood’s
avfuktare för att förebygga skador
orsakade av fukt och mögel. Wood’s
startade i Kanada år 1950 och har
mer än 60 års erfarenhet av att
utveckla och tillverka avfuktare. När
du väljer en Wood’s avfuktare kan du
vara säker på att du får en avfuktare
av bästa kvalitet, hög kapacitet och
som kommer att avfukta est liter
vatten per förbrukad kWh.
Wood’s M10G
Wood’s M10G är en väldigt smidig
och kompakt avfuktare. Wood’s
M10G kan användas i många olika
utrymmen, till exempel i badrum, sov-
rum, sommarstugor eller båtar.
Så fungerar din avfuktare
Wood’s M10G är en kompressorav-
fuktare. När luften dras genom
avfuktaren med äkten, passerar den
fuktiga luften över det kompressorkyl-
da kondenspaketet. Peketet kyler ner
vattenångan och separerar vattnet
från luften.
Vattnet rinner från slingorna och ner
i vattentanken alternativt leds bort till
ett avlopp med vattenslangen. Kvar
är torr luft som blåses ut i rummet.
När avfuktaren kondenserar vat-
tenångan frigörs värmeenergi. Därför
blåser en kompressoravfuktare ut torr
luft som är perfekt för att torka tvätt,
kläder, ved m.m.
En kompressoravfuktare är det mest
energieffektiva sättet att ta bort
överödig fukt och dålig lukt. Håll den
relativa fuktigheten mellan 50% och
60% för att säkerställa ett tryggt och
hälsosamt inomhusklimat.
1. Säkerhetsföreskrifter
Läs dessa varningar noggrant innan
du använder avfuktaren. Om säker-
hetsföreskrifterna inte följs kan det
leda till att garantin blir ogiltig och
även innebära en säkerhetsrisk.
• Dra alltid ut strömsladden innan
underhåll, förvaring och lterrengö-
ring.
• Håll alltid ett behörigt avstånd från
vattenkällor.
• Denna apparat är inte avsedd att
användas av personer (inklusive
barn) med försämrad fysisk, men-
tal, eller psykisk förmåga eller brist
på erfarenhet eller kunskap, om de
inte övervakas eller getts instruktio-
ner om användning av apparaten
av en person som är ansvarig för
dess säkerhet.
• Barn bör övervakas för att säker-
ställa att de inte leker med appa-
raten.
• Apparaten måste installeras i
enlighet med nationella kopplings-
föreskrifter.
• Apparaten är en värmekälla. Den
får därför inte övertäckas eller kom-
ma i kontakt med andra värmekäl-
lor eller brandfarliga ämnen.
• Om strömsladden är skadad,
måste den bytas ut av tillverkaren,
dess serviceagent eller liknande
kvalicerad personal för att undvika
skador.
• Stick inte in ngrar eller andra ob-
jekt i luftintaget eller luftutblåset.
• Ändra inte eller bygg om avfuktaren
eller dess strömsladd på något sätt.
• Det är mycket viktigt att ltret hålls
rent. Kontrollera ltret regelbun-
det och byt ut eller rengör det vid
behov.
• Dra aldrig i strömsladden för att
koppla ur den från eluttaget.
• Kompressorn är fylld med ett fre-
onfritt kylmedia. Om det blir ett läc-
kage på kylsystemet ska du sluta
använda avfuktaren och kontakta
din återförsäljare.
• Använd inte maskinen utan dess
lter.
• Stå inte på avfuktaren.
• Dränera alltid vattnet enligt instruk-
tionerna.
• Avfuktaren avger vatten. Håll alltid
ett säkert avstånd från material
som är känsliga för vattenskador,
t.ex. trägolv.
2. Installation & placering
Wood’s avfuktare är enkla att ytta
runt, men tänk på följande.
• Avfuktaren ska inte placeras nära
element eller andra värmekällor då
det kan sänka avfuktaren kapacitet.
• Håll minst 25cm avstånd från vägg-
ar och andra hinder för att maxime-
ra luftödet.
• För bästa kapacitet, placera avfuk-
taren i mitten av rummet.
• Se till luftintaget och luftutblåset
inte blockeras.
Installation:
1. Placera avfuktaren på ett plant
och stabilt underlag, helst i mitten av
rummet.
2. Stäng alla fönster och ventiler i
rummet. Annars fortsätter fuktig luft
utifrån att strömma in i rummet.
3. Anslut avfuktaren till ett jordat
eluttag.
Om avfuktaren transporterats liggan-
de kan det hända att olja runnit ut
från kompressorn och in i det slutna
rörsystemet. Låt då avfuktaren stå i
några timmar innan den tas i bruk.
Det är mycket viktigt att oljan hin-
ner rinna tillbaka in i kompressorn,
annars kan avfuktaren ta allvarlig
skada.
Swedish

16 17
Starta och stanna avfuktare med
ON/OFF knappen.
Kompressorlampan lyser när avfukta-
ren arbetar.
Ställ in önskad luftfuktighet.
Tryck på PIL UPP och PIL NER för
att ställa in önskad luftfuktighet mel-
lan 30% och 90%. Avfuktaren stänger
automatiskt av sig när önskad luft-
fuktighet är uppnådd. Inställt värde
visas i displayen i några sekunder.
Efter det återgår displayen till att visa
rummets luftfuktighet. Tryck på PIL
NER tills displayen visar CO för att
aktivera kontinuerlig avfukting. I kon-
tinuerligt läge arbetar avfuktaren tills
du stänger av den eller ändrar läge.
När rummets luftfuktighet är under
35% visar displayen LO. När rum-
mets luftfuktighet är över 95% visar
displayen HI.
OBS: när önskad luftfuktighet är
uppnådd fortsätter äkten att arbeta
några minuter efter att kompressorn
stannat innan den också stannar.
Ställ in timern för automatisk
avstängning
Tryck på TIMER knappen upprepade
gånger för att ställa in tid för auto-
matisk avstängning. När TIMERN är
aktiverad lyser en lampa på kontroll-
panelen. Inställd tid visas i displayen
i några sekunder innan den återgår
till att visa rummets luftfuktighet. När
inställd tid har passerat stängs av-
fuktaren av. För att starta avfuktaren
igen behöver du manuellt sätta på
den med ON/OFF knappen.
Tryck på TIMER knappen tills värdet
0 visas för att avaktivera timern.
4.Vattenavledning
När vattenbehållaren är full stängs
avfuktaren av automatiskt och kan
inte användas innan vattenbehållaren
töms.
1. Koppla bort avfuktaren från
eluttaget.
2. Töm vattenbehållaren.
3. Sätt tillbaka den tömda
vattenbehållaren.
4. Sätt avfuktarens kontakt i eluttaget.
Direkt vattenavledning
Anslut en vattenslang (10 mm) till
röret på baksidan av avfuktaren. Led
den andra änden av slangen till ett
avlopp. Se till att vattnet kan ledas
nedåt.
5. Luftltret
Luftltret förhindrar damm och smuts
från att ta sig in i avfuktaren och för-
länger dess livslängd. Filterrengöring:
1. Ta bort ltret från maskinen.
2. Lyft ut ltret och tvätta det med
varmt vatten och ett milt rengörings-
medel. Alternativt kan ltret damm-
sugas.
3. Låt ltret torka och sätt sedan
tillbaka det.
Det är mycket viktigt att ltret
rengörs regelbundet,annars
kan avfuktaren tappa kapacitet
och till och med bli allvarligt
skadad.
6. Underhåll
- Rengör avfuktaren med en fuktig
trasa. Undvik lösningsmedel och
starka rengöringsmedel då det kan
skada avfuktarens yta.
- Kylslingorna kan rengöras med en
trasa och varmt vatten.
7. Service
Om avfuktaren behöver service ska
du först kontakta din återförsäljare.
Inköpskvitto krävs vid alla garantian-
språk.
8. Garantier
2 års produktgaranti. Notera att ga-
rantin bara är giltig mot uppvisande
av kvitto.
Denna maskin överensstämmer med
EEC direktiven 76/889 + 82/499
9.Tips
Det kan ibland vara bra att använda
en värmeäkt för att hålla tempera-
turen över +10˚C. Även om M10G
fungerar ner till +5°C kommer dess
kapacitet öka vid högre temperaturer
då varm luft kan bära mer vatten.
För bästa kapacitet, se till att minime-
ra luftinödet utifrån - stäng fönster
och ventiler.
Förvänta dig högre kapacitet under
sommaren och hösten då utomhus-
luften är varmare och fuktigare.
För att uppnå ett säkert och pålitligt
skydd mot fukt och mögel, håll den
relativa fuktigheten mellan 50% och
60%.
Enheten är inställd att fung-
era mellan +5°C och + 35°C.
Om temperaturen går utanför
detta intervall kan det hända
att avfuktaren inte fungerar
ordentligt.
Swedish

17
SPARA BRUKSANVISNINGEN
PÅ EN SÄKER PLATS.
Tack för att du valt en avfuktare som
ger din familj och hem den välförtjän-
ta komforten. Denna handbok ger dig
nödvändig information för använd-
ning och underhåll av din nya avfuk-
tare. Vänligen använd några minuter
att läsa bruksanvisningen innan du
använder avfuktaren för att bekanta
dig med alla funktioner.
Denna utrustning tar bort luftfuktig-
het, vilket ger en bekväm miljö i ditt
hem eller kontor. Det kan bekvämt
yttas från rum till rum.
Hög avfuktningskapacitet
Genom att använda kylteknik tar
avfuktaren bort luftfuktigheten, vilket
håller luften inifrån till en bekväm
nivå.
Avfuktaren är kompakt och lätt. Den
kan yttas från rum till rum efter
behov.
Justerbar Hygrostat: Ställ in önskad
luftfuktighet med inbyggd hygrostat.
Timer På / Av: Planera funktionen av
avfuktaren.
Tyst drift: Avfuktaren fungerar tyst.
Energieffektivitet: Effektförbrukningen
av avfuktare är låg.
SÄKERHET
När du använder avfuktaren, följ
säkerhetsanvisningarna nedan:
1. Koppla ur apparaten från ström-
försörjningen före rengöring eller
underhåll och före lagring.
2. Doppa inte apparaten i vatten,
spraya inte apparaten med vatten,
lägg inte apparaten nära en vatten-
källa.
3. Placera inte apparaten nära vär-
mekällor eller nära brandfarliga eller
farliga material.
4. Sätt inte in ngrar eller andra före-
mål i luftutloppet eller luftintaget.
5. Sätt inte på apparaten.
6. Töm vattnet från behållaren vid
behov.
7. Starta inte avfuktaren i mycket
små utrymmen. 8. Montera avlopps-
slangen vid kontinuerlig dränering så
att det nns ett fritt fall i avloppet och
vattnet kan dräneras från apparaten
till avloppet.
9. Om nätsladden är skadad måste
den bytas ut av leverantören eller
serviceföretaget.
1. Front
2. Luftutblås
3. Handtag
4. Kontrollpanel
5. Filter
6. Bakstycke
7. Vattentank
8.Gummifot
9. Strömkabel
ANVISNINGAR FÖR LED
LAMPOR
1. Vid fast sken full vattentank-
2. Vid fast sken- går kompressorn
3. Avfrostning
4. Timer
Svenska
D
TIMER POWER
DOWNUP
C B A
TIMER DEFROST COMP WATER FULL
4 3 2 1

18 19
Fuktnivå och Timer
1. När fuktigheten ställs in visar displayen den fuktighet du ställt in.
2. När du programmerar timern för att slå på och stänga av maskinen, visar displayen timmarna.
3. När luftfuktigheten i rummet är under 35% visar displayen LO.
4. När rumsfuktigheten är över 95%, kommer displayen att indikera ”HI”.
KNAPPFUNKTIONER
A. ON/OFF
B. Sänk luftfuktigheten
C. Höj luftfuktigheten
D. Timer
1. Anslut enheten.
2. Tryck på knappen för att slå på maskinen. Tryck igen för att stoppa operationen.
3. Tryck på eller för att ställa in önskad luftfuktighet, den intervall du kan välja är mellan 30% och
90% i ett område på 5%.
Om det inställda värde är lägre än 2%, kommer kompressorn att stanna och äkten fortsätter att gå i ytterligare
3 minuter och sedan stanna. När luftfuktighetsnivån är högre än inställt värde startar kompressorn.för att ställa in
önskad luftfuktighetsnivå i rummet, som kan ställas in från 30% till 90% med 5% intervall eller “CO”.
När omgivningens fuktighet är lika med eller högre än den valda fuktigheten med 3%, startar kompressorn en
gång igen. När luftfuktigheten ställs in på “CO” kommer kompressorn att gå kontinuerligt.
4. Tryck på timerinställningsknappen enligt följande:
Tryck på knappen för att programmera tiden du vill att avfuktaren stannar. När du vill avbryta Timer-läge, tryck
på knappen igen för att välja tiden vid 00. Inställningsområdet är 00-01-02 ...... 23-24. Den programmerade tiden
ändras inte om apparaten stannar på grund av full vattenbehållare.
Noteras: när den omgivande fuktigheten når vad du ställde in tidigare stoppar både kompressor och äktmotor
under 60 minuter, och sedan fungerar äktmotorn i 3 minuter för att upptäcka omgivningens fuktighet, om den är
högre än inställd, fungerar både kompressor och motor igen; Om den är lägre än inställd, stannar både kompres-
sor och motor i 60 minuter, och sedan fungerar motorn i 3 minuter igen;

19
Svenska
Vattenbehållare
När vattentanken är full, tänds indikatorlampan, avfuktningsfunktionen stängs av automatiskt. Du hör en pip (15 pip)
för att varna om att tömma behållaren.
Tömning av behållaren
1. Tryck försiktigt på behållarens sidor med båda händerna och dra långsamt ut behållaren.
2. Töm det uppsamlade vattnet.
VARNING!
1.Ta inte bort ottören från behållaren.
2. Om vattenbehållaren är smutsig, rengör den med en mjuk trasa och varmt vatten. Använd inte tvättmedel, slipme-
del eller produkter eller aggressiva ämnen, använd inte bensin, tunnare eller andra lösningsmedel som kan försämra
behållaren och orsaka läckage i vatten.
3. När du lägger behållaren på plats, tryck på behållaren och placera den med båda händerna.Om behållaren inte är
korrekt placerad, tänds behållaren för fullständig behållare och avfuktaren fungerar inte.

20 21
Svenska
Direktavrinning till avloppsbrunn
Apparaten är utrustad med det kontinuerliga evakueringsalternativet för det uppsamlade vattnet. Använd en plast-
slang (10 mm i innerdiameter) genom att ansluta den till apparatens utlopp och den fria änden till avloppet.Se till att
du har ledigt vatten från apparaten till avloppet
UNDERHÅLL
Rengör avfuktaren
Rengöring av höljet: Torka höljet med en mjuk, fuktig trasa.
Rengöring av luftltret
1. Öppna skyddsgaller och ta bort luftltret.
2. Rengör luftltret
Kör en dammsugare lätt över luftlterets yta för att ta bort smuts. Om luftltret är extra smutsigt, tvätta det med varmt
vatten och ett milt rengöringsmedel och torka noggrant.
Table of contents
Languages:
Other Wood’s Dehumidifier manuals

Wood’s
Wood’s MRD20 Silent User manual

Wood’s
Wood’s MDK21 User manual

Wood’s
Wood’s WCD2 Pro User manual

Wood’s
Wood’s LD48PRO+ User manual

Wood’s
Wood’s WCD6HGM User manual

Wood’s
Wood’s DS12F User manual

Wood’s
Wood’s WLD1 User manual

Wood’s
Wood’s MRD12 User manual

Wood’s
Wood’s MDK21 User manual

Wood’s
Wood’s DSC-90ES User manual

Wood’s
Wood’s MRD20GW User manual

Wood’s
Wood’s DS-40FS User manual

Wood’s
Wood’s MDX14 User manual

Wood’s
Wood’s MRD25G User manual

Wood’s
Wood’s MRD10 User manual

Wood’s
Wood’s DSC-70ES User manual

Wood’s
Wood’s MRD17 User manual

Wood’s
Wood’s DSC95 User manual

Wood’s
Wood’s LD40PRO User manual

Wood’s
Wood’s DSC95 User manual