manuals.online logo
Brands
  1. Home
  2. •
  3. Brands
  4. •
  5. Yale
  6. •
  7. Lock
  8. •
  9. Yale Narrow Profile Series User manual

Yale Narrow Profile Series User manual

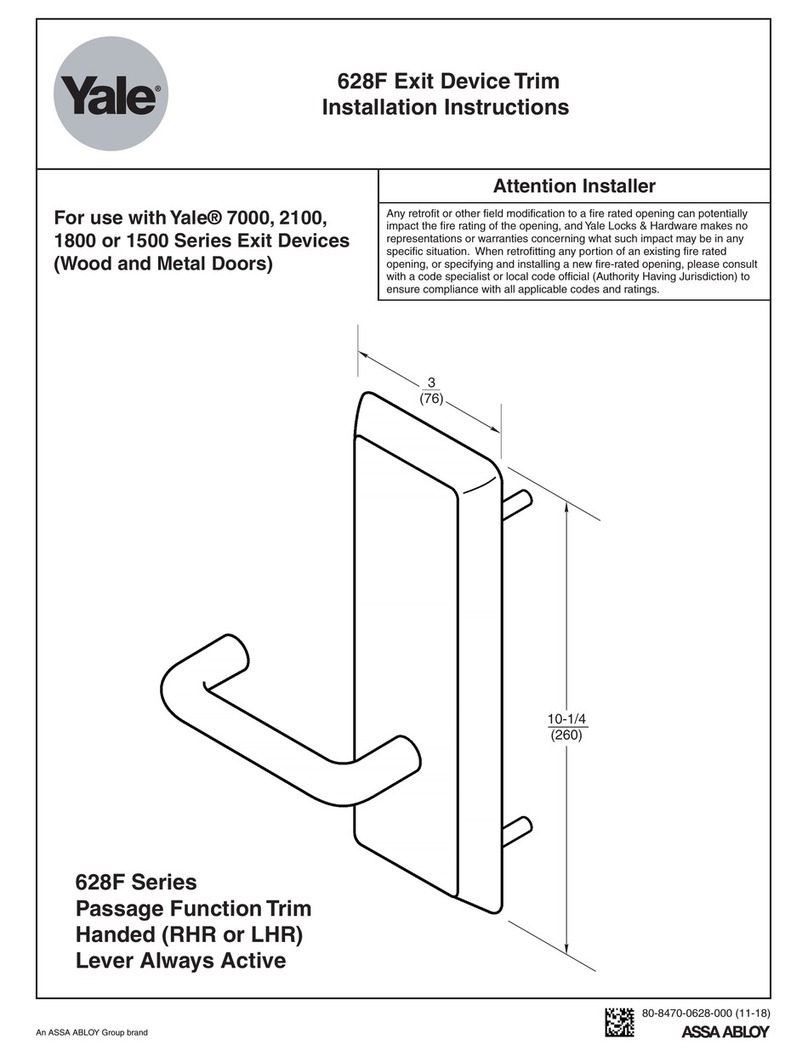
Installation Instructions
80-9350-2527-010 (06-09) Sized
(Sizes 4,5,& 6)
254(BC)
255(BC)
256(BC)
Non Hold Open Models
An incorrectly installed or improperly
adjusted door closer can cause
property damage or personal injury.
These instructions should be followed
to avoid the possibility of
misapplication or misadjustment.
CAUTION
CAUTION
Page 1
Components:
Narrow Profile Series
250 Series
251(BF) Series
Sized Closers
Multi-Sized Closers
Multi-Sized
(Sizes 3 thru 6)
(Sizes 1 thru 4)
251
251BF
“BC” suffix (Backcheck) is an optional feature for sized closers but is standard with Multi-Sized closers.
See Page 3 for an explanation of the Backcheck feature.
“DL” suffix (Delayed Action) is an optional feature.
A separate instruction will be packed with these instructions.showing valve locations and adjustment procedures
Spring Power Adjustment Screw
(1/8 Hex Drive)
"BC" Valve
Pinion Cap
Closer
Size
Stamp "L"Valve "S"Valve
4
Closer Body
289 Soffit Plate
Used with Parallel
Arm Closers Only
Hinge Edge of Door
For special applications a separate door and frame preparation template is packed with these instructions
Use this instruction sheet for installation sequence and closer adjustments only
• It is recommended that the door on which the door closer will be installed be hung on ball bearing hinges. Door must swing freely
• A separate door stop, supplied by others, is recommended to prevent damage to the door closer, closer arm, or to the door, frame or
adjacent walls.
• Door and Frame must be properly reinforced, or use of special fasteners employed, to prevent the mounting screw from pulling out.
• All dimensions are given in inches with corresponding metric dimensions (mm) in parenthesis.
NOTE:
Left Hand Door - LH
Right Hand Reverse - RHR Right Hand Door - RH
Left Hand Reverse - LHR
Regular Arm
Installation
Closer on door
on hinge (pull)
side of door
See Page 2
Top Jamb
Installation
Closer on frame
on opposite to hinge
(push) side of door
See Page 3 Right Hand Door - RH
Left Hand Reverse - LHR
Left Hand Door - LH
Right Hand Reverse - RHR
Hinge Edge of Door
Right Hand Door - RH
Left Hand Reverse - LHR
Left Hand Door - LH
Right Hand Reverse - RHR
Parallel Arm
Installation
Closer on door
on opposite to hinge
(push) side of door
See Page 4
Hinge Edge of Door
Hinge Edge of Door
Main Arm Screw
Main Arm
Connecting Rod Arm Slide
Forearm
Screw
Regular
Arm/Top
Jamb Shoe
Arm Assembly
NON HOLD OPEN
Regular Arm Installation
Page 2 80-9350-2527-010 (06-09)
6
(152)
1-3/4
(44.5)
1-1/4
(32)
3/4
(19.1) 9-1/16
(230.2)
1/2
(12.7)
A
Template
Hinge or Pivot
C
L• Do not scale drawing.
• Right hand door shown.
• Dimensions are in inches (mm).
Installation Sequence
!
!
!
!
!
Select door opening angle using template above. Mark 4 holes on
door for closer and 2 holes on frame for arm shoe.
Prepare door and frame for fasteners See “Preparation for
Fasteners” below.
Install closer with “S” and “L” adjustment valves toward hinge edge
of door.
Mount arm shoe to frame face.
Install main arm onto closer pinion shaft, indexing main arm mark
“S” with pinion flat as shown at right. Fasten with arm screw.
!251 or 251BF Models Only. Set closing power using “Power
Adjustment Chart” below right.
Side Elevation
Opening
To 100°
101° to 120°
121° to 180°
Dimension A
inches
7
6
3-1/2
mm
178
152
89
* Door/Wall/Hardware/Jamb
conditions permitting
Typical Installation
Right Hand Door Left Hand Door
Optional
“BC”
Valve
“S” & “L”
Valves Power
Adjustment
Screw
Preload Preload
Pinion Flat
!
!
Open door to allow connecting rod to be inserted into arm slide. Insert rod
and close door. Preload main arm by rotating away from hinge until
forearm is perpendicular (at 90° angle) to door. Secure with forearm screw.
Screw pinion cap onto pinion shaft by hand or with a Phillips screw driver -
DO NOT OVER TIGHTEN.
Adjust closer.!
Door Closer Adjustment
Power Adjustment Chart
DOOR
INTERIOR
INTERIOR EXTERIOR
EXTERIOR
251BF
251
TYPE
OF INSTALLATION
REGULAR ARM
TOP JAMB
PARALLEL ARM
REGULAR ARM
TOP JAMB
PARALLEL ARM
REGULAR ARM
REGULAR ARM
TOP JAMB
PARALLEL ARM
TOP JAMB
PARALLEL ARM
MAXIMUM DOOR SIZE
34”
(0.85 m)
36”
(0.9 m)
40”
(1 m)
44”
(1.1 m)
48”
(1.2 m)
1
2
5
8
2
3
3
5
1
2
6
9
4
5
5
7
2
3
8
12
6
7
7
10
3
4
9
10
10
14
3
5
11
13
13
16
*18 -360° TURNS MAXIMUM AVAILABLE
*
FULL 360 TURNS
OF POWER ADJUSTMENT
SHAFT
o
NOT
RECOMMENDED
USE 251
Increase
Decrease
1/8”
Hex
Key
Increase
Decrease
FULL 360 TURNS
OF POWER ADJUSTMENT
SHAFT
o
“S” & “L”
Valves
1
2
3
4
Z
Y
S
Pinion Flat
1
2
3
4
Z
Y
S
9/32” (7 mm);
3/8” (9.5 mm) dia. x
3/8” (9.5 mm) deep on
door opposite to closer
Standard
Optional
Through-bolts and
grommet-nuts
All
Preparation for Fasteners
Door or Frame
Fasteners Drill-Sizes
Self-Drilling Screw
Wood 3/16” (4.30 mm)
1/4” - 20 machine
screw Metal Drill: #7 (0.201” dia.)
Tap: 1/4” - 20
Sleeve nuts and bolts
Hollow
Metal
9/32” (7 mm) through;
3/8” (9.5 mm) door face
opposite to closer
Aluminum
or Wood 3/8” (9.5 mm) through
Aluminum
or Metal No drill required
Top Jamb Installation Using 587 Dropplate
Page 3
7
(178)
1/2
(13)
7/8
(22)
5
(127)
1-3/4
(44.5)
1-3/4
(44.5)
C
L
A
Installation Sequence
!
!
!
!
!
!
!
!
!
Select door opening angle using template above. Mark 4 holes on
frame face for Dropplate and 2 holes on door for arm shoe.
Prepare door and frame for fasteners. See “Preparation for
Fasteners” at bottom of Page 2.
Mount drop plate to frame.
Install closer to drop plate with “S” and “L” adjustment valves
toward hinge edge of door.
Mount arm shoe to door.
Install main arm onto closer pinion shaft, indexing main arm mark
“S” with pinion flat as shown at right. Fasten with arm screw.
Screw pinion cap onto pinion shaft by hand or with a Phillips
screw driver - DO NOT OVER TIGHTEN.
Adjust closer.
!251 or 251BF Models Only. Set closing power using “Power
Adjustment Chart” at bottom of Page 2.
Open door to allow connecting rod to be inserted into arm slide.
Insert rod and close door. Preload main arm by rotating away
from hinge until forearm is perpendicular (at 90° angle) to door.
Secure with forearm screw.
Door Closer Adjustment (Continued)
“DA” suffix (Delayed Action) is an optional feature.
A separate instruction will be packed with these instructions showing valve locations and adjustment procedures.
Closing Speed Control
CAUTION:
DO NOT BACK VALVES OUT OF
CLOSER OR A LEAK WILL
RESULT
Attention: Adjust Closing Speed
Time to between 4 to 7 seconds
from 90°. Use of the door by
handicapped, elderly or small
children may require greater
closing time.
Standard Closing Cycle
CLOSED
S
W
E
E
P
L
A
TC
H
10°
Unit Adjustment
Closing Speed Controls (Figure 1)
!
!
Valve “S” controls sweep range.
Valve “L” controls latch range.
Opening Door Control
Opening Cycle
O
P
E
N
I
N
G
Opening Door Control
!Backcheck (”BC”) valve controls the hydraulic resistance to door
opening in backcheck range. NEVER close this valve completely
– it is not to provide a positive stop.
B
A
C
K
C
H
E
C
K
Template
Hinge or Pivot
Side Elevation
Typical Installation
Right Hand Door
Left Hand Door
Figure 2
Figure 1
CAUTION:
DO NOT BACK VALVES OUT OF
CLOSER OR A LEAK WILL
RESULT
• Do not scale drawing.
• Left hand door shown.
• Dimensions are in inches (mm).
Opening
To 100°
101° to 120°
121° to 180°
Dimension A
inches
8-1/2
7
4-1/2
mm
216
177.8
114
* Door/Wall/Hardware/Jamb
conditions permitting
Optional
“BC”
Valve
“S” & “L”
Valves Power
Adjustment
Screw
Preload Preload
Pinion Flat
“S” & “L”
Valves
1
2
3
4
Z
Y
S
Pinion Flat
1
2
3
4
Z
Y
S
4
(101.6)
1-1/2
(38.1)
Parallel Arm Installation
Page 4
2-3/4
(69.9)
3/8
(9.5)
5/16
(8)
7/16
(11.1)
2
(50.8)
1-1/2
(38.1)
7
(177.8)
4
(101.6)
1-1/8
(29)
2-1/4
(57)
1/2
(12.7)
3/4
(19.1) 9-1/16
(230.2)
C
L
A
C
B
1-1/2
(38mm)
Template
Holes for 214 Plate only
Installation Sequence
!
!
!
!
!
!
!
!
Select door opening angle using template above. Mark 4 holes
on door for closer or 214 dropplate and 4 holes on frame for
soffit plate.
Install closer with “S” and “L” adjustment valves toward lock
edge of door.
Mount soffit plate to frame.
Install main arm onto closer pinion shaft. Rotate pinion 45°
toward hinge edge of door to align main arm letter “3” (right
hand) or “2” (left hand) with pinion flat. Fasten with arm screw.
Fasten forearm to soffit plate. Adjust forearm length to set arm
elbow about 1-1/2” (38mm) from door when connected to main
arm. Tighten forearm screw.
Prepare door and frame for fasteners. See “Preparation for
Fasteners” bottom of Page 2.
Screw pinion cap onto pinion shaft by hand or with a Phillips
screw driver - DO NOT OVER TIGHTEN.
251 or 251BF Models Only. Set closing power using “Power
Adjustment Chart” at bottom of Page 2.
Mount 214 dropplate ... only if required.
!
!Adjust closer. See Closer Adjustments on Pages 2 and 3.
Side Elevation
To 100°
101° to 130°
Over 131°
9-1/4
7-3/4
5-3/4
235
197
146
7-5/8
6-1/8
4-1/8
194
156
105
8-5/8
7-1/8
5-1/8
219
181
130
Door
Opening
Dimension A Dimension B Dimension C
Inches Inches Inches
mm mm mm
Hinge or
Pivot
• Do not scale drawing
• Left Hand shown
• Dimensions are in inches (mm)
Typical Installation
Left Hand Door
Optional
“BC”
Valve
S & L
Valves
Power
Adjustment
Screw
Pinion Flat
Optional
“BC”
Valve
Power
Adjustment
Screw
Right Hand Door
1
2
3
4
Z
Y
S
Pinion Flat
1
2
3
4
Z
Y
S
An ASSA ABLOY Group brand
3000 Highway 74 East • Monroe, NC 28112
Tel: (800)-438-1951 • Fax: (800)-338-0965
www.yalecommercial.com
Yale ® is a registered trademark of Yale Security Inc., an ASSA ABLOY Group company.
Copyright © 2001, 2009, Yale Security Inc., an ASSA ABLOY Group company. All rights reserved.
Reproduction in whole or in part without the express written permission of Yale Security Inc. is prohibited.

This manual suits for next models

5

Other Yale Lock manuals

Yale Real Living YRD220-ZW-619 User manual

Yale

Yale Real Living YRD220-ZW-619 User manual

Yale nexTouch Technical specifications

Yale

Yale nexTouch Technical specifications

Yale YRC216 Technical specifications

Yale

Yale YRC216 Technical specifications

Yale Luna Pro+ User manual

Yale

Yale Luna Pro+ User manual

Yale RL Series User manual

Yale

Yale RL Series User manual

Yale 5400LN SERIES Manual

Yale

Yale 5400LN SERIES Manual

Yale inTouch User manual

Yale

Yale inTouch User manual

Yale D112 User manual

Yale

Yale D112 User manual

Yale MORTISE 8800 SERIES User manual

Yale

Yale MORTISE 8800 SERIES User manual

Yale Real Living Technical specifications

Yale

Yale Real Living Technical specifications

Yale Real Living YRD220 Technical specifications

Yale

Yale Real Living YRD220 Technical specifications

Yale Real Living Technical specifications

Yale

Yale Real Living Technical specifications

Yale Brighton User manual

Yale

Yale Brighton User manual

Yale Quattro Sliding 3 User manual

Yale

Yale Quattro Sliding 3 User manual

Yale Assure Lock YRC226 Technical specifications

Yale

Yale Assure Lock YRC226 Technical specifications

Yale 420F Series User manual

Yale

Yale 420F Series User manual

Yale nexTouch Technical specifications

Yale

Yale nexTouch Technical specifications

Yale Assure Lock YRD410 User manual

Yale

Yale Assure Lock YRD410 User manual

Yale Real Living Assure Lock YRD226 Technical specifications

Yale

Yale Real Living Assure Lock YRD226 Technical specifications

Yale YDM 3168 User manual

Yale

Yale YDM 3168 User manual

Yale Keyfree Connected Smart Lock User manual

Yale

Yale Keyfree Connected Smart Lock User manual

Yale 5400LN SERIES User manual

Yale

Yale 5400LN SERIES User manual

Yale 501F User manual

Yale

Yale 501F User manual

Yale YRD246 Technical specifications

Yale

Yale YRD246 Technical specifications

Popular Lock manuals by other brands

Rottner EM2020 User instructions

Rottner

Rottner EM2020 User instructions

CDVI SD300 installation manual

CDVI

CDVI SD300 installation manual

Assa Abloy IKON eCLIQ N110 operating instructions

Assa Abloy

Assa Abloy IKON eCLIQ N110 operating instructions

Hesibond HB-WLK-01 user manual

Hesibond

Hesibond HB-WLK-01 user manual

Wittkopp Insys 7202 manual

Wittkopp

Wittkopp Insys 7202 manual

Ebelco 300-LED Installation instruction guide

Ebelco

Ebelco 300-LED Installation instruction guide

Assa Abloy EMTEK CF Mechanism installation guide

Assa Abloy

Assa Abloy EMTEK CF Mechanism installation guide

Lippert 1520 Series owner's manual

Lippert

Lippert 1520 Series owner's manual

Stock Loks C8834 instruction sheet

Stock Loks

Stock Loks C8834 instruction sheet

COMPX MFW23010 Assembly

COMPX

COMPX MFW23010 Assembly

KEYA TRONIC TOUCH PANEL Assembly

KEYA

KEYA TRONIC TOUCH PANEL Assembly

Vemus miniK 10mc operating manual

Vemus

Vemus miniK 10mc operating manual

Siegenia KFV Assembly instructions

Siegenia

Siegenia KFV Assembly instructions

Schlage Dexter JD60 installation instructions

Schlage

Schlage Dexter JD60 installation instructions

Assa Abloy OneSystem 819N Quick manual

Assa Abloy

Assa Abloy OneSystem 819N Quick manual

Schlage L9000 Series installation instructions

Schlage

Schlage L9000 Series installation instructions

Weiser Aura quick start guide

Weiser

Weiser Aura quick start guide

Stock Loks C8714 instruction sheet

Stock Loks

Stock Loks C8714 instruction sheet

manuals.online logo
manuals.online logoBrands
  • About & Mission
  • Contact us
  • Privacy Policy
  • Terms and Conditions

Copyright 2025 Manuals.Online. All Rights Reserved.