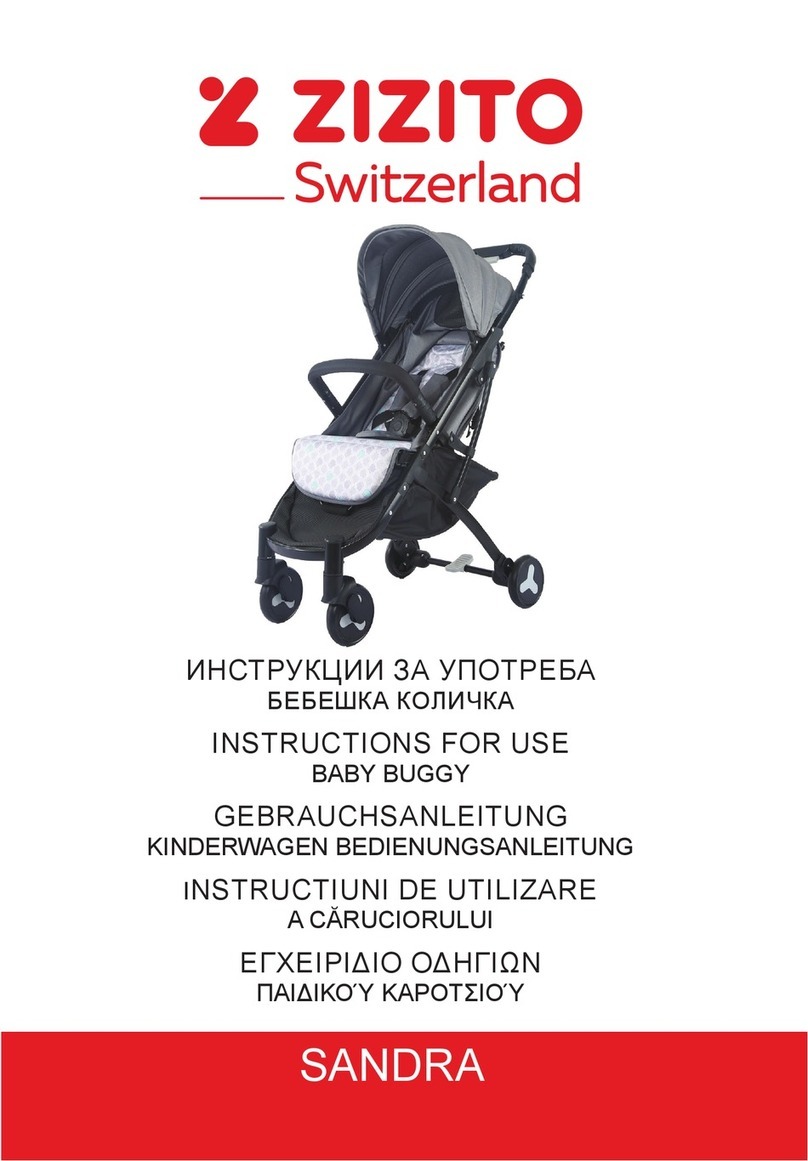
Zizito NOAM BT001H User manual

1
NOAM
BT001H
DE Kinderdreirad .......................................... 2
EN Children three-wheeled cart ................... 5
FR Chariot à trois roues pour enfants........... 8
ES
Coche de tres ruedas para niños.......... 11
IT Veicolo a tre ruote per bambini ............. 14
NL Kinderen driewielige kar........................ 17
RO Cărucioruluicutreiroțipentrucopii ...... 20
GR Παιδικώντρίτροχωνκαροτσιών ............ 23
BG Детскатриколка ................................. 26

2
SICHERHEITSHINWEISE
WARNHINWEISE
1. Bitte prüfen Sie vor dem Gebrauch sorgfältig, ob alle Teile ordnungsgemäß mon-
tiert und fest verbunden sind.
2. Von Feuer fernhalten.
3. Dieses Fahrzeug ist kein Verkehrsmittel. Es ist verboten, in gefährlichen Bere-
ichen wie Straßen und Fahrbahnen zu fahren.
4. BittenutzenSiediesesFahrzeugnichtaufunebenenStraßenoberächenoder
Gelände mit potenziellem Sicherheitsrisiko.
5. Um Gefahren zu vermeiden, sollten Sie das Gerät nicht im Dunkeln, bei Nacht
oder bei schlechter Sicht benutzen.
6. Bitte entsorgen Sie den PE-Plastikbeutel rechtzeitig, um ein Ersticken durch
spielende Kinder zu vermeiden.
7. Dieses Produkt enthält Kleinteile. Wenn die Teile lose sind oder abfallen, halten
Sie Kinder davon ab, sie in den Mund zu nehmen, um ein versehentliches Ver-
schlucken zu vermeiden.
1. Es kann vorkommen, dass sich Schrauben nach längerem Gebrauch gelockert
haben. Vor jedem Einsatz ist daher für das gesamte Fahrzeug eine Sicherhe-
itsüberprüfung durchzuführen!
2. Die Verpackung mit Kleinteilen und Plastikfolie stellt eine Gefahr für Kinder dar.
Bitte entfernen Sie die Verpackung rechtzeitig, um ein Ersticken und Verschluck-
en durch spielende Kinder zu vermeiden!
3. Lassen Sie die Kinder bei Benutzung nie unbeaufsichtigt!
4. Aus Sicherheitsgründen sollten Sie das Produkt nicht selbst zerlegen oder um-
bauen und es nicht verwenden, wenn es beschädigt ist!
5. Die maximale Belastung dieses Geräts beträgt 25 kg und das maximale Befesti-
gungsdrehmoment beträgt nicht weniger als 15 Nm!
6. Wenn Sie mit Kindern unterwegs sind, halten Sie sich bitte von Haustieren und
anderen Personen fern und beugen Sie Fremd- und Selbstverletzungen durch
Zusammenstöße vor!
7. Um die Sicherheit von Kindern zu gewährleisten, darf dieses Fahrzeug nur von
Erwachsenen aufgebaut werden!
8. Benutzer und Aufsichtspersonen sollten diese Anleitung vor dem Gebrauch sorg-
fältig lesen und für spätere Nachschlagzwecke aufbewahren. Wenn die Anweis-
ungen in diesem Handbuch nicht befolgt werden, kann die Sicherheit der Kinder
beeinträchtigt werden.
Bitte lesen Sie die Anleitung sorgfältig durch und bewahren Sie
sie ordnungsgemäß auf, bevor Sie das Produkt verwenden
DE

3
Montieren Sie das Vorderrad
von unten nach oben.
Montieren Sie den vorderen
GriamRahmen.
Montieren Sie das Rad am
Rahmen.
Montieren Sie die
Vorderräder am Rahmen.
DervordereGriist
installiert.
FührenSiedieSchiebegrie
zusammen.
Installieren Sie den Korb am
Rahmen.
Montieren Sie die Bremse an
der Rückseite des Rahmens.
BringenSiedenSchiebegri
am Lenkhebel an.
1
4
7
2
5
8
3
6
9
10 11 12
Installieren Sie den Snap. Drücken Sie den Lenkdraht
an der Vordergabel.
Die andere Seite ist am
Lenkhebel montiert.

4
DE 13
16
19
22
14
17
20
23
15
18
21
24
Ziehen Sie die untere
Schraube fest an.
Montieren Sie den Sitz am
Rahmen.
Installieren Sie das Kissen
auf dem Sitz.
Bringen Sie die
Aufbewahrungstasche am
Schiebegrian.
Bringen Sie den hinteren
Korb am Rahmen an und
ziehen Sie die Schrauben
fest.
Ziehen Sie die untere
Schraube fest an.
Fixieren Sie die Schutzleisten
an beiden Enden.
Der Aufbau ist
abgeschlossen.
Installieren Sie die Sitzbasis
am Rahmen.
Montieren Sie die
Schutzleiste im Sitzloch.
Bringen Sie den
Sonnenschutz auf beiden
Seiten des Sitzes an.
Die Installation ist
abgeschlossen.

5
SAFETY PRECAUTIONS
WARNING
1. Before use, please carefully check whether all parts are installed in place and
connectedrmly.
2. Keepawayfromthere.
3. This vehicle is not a vehicle. It is forbidden to drive in dangerous areas such as
streets and roads.
4. Please do not use it on the uneven road surface and the site with potential safety
hazard.
5. Avoid using in dark, night or low visibility to avoid danger.
6. PleaseputawaythePEplasticbagintimetoavoidsuocationcausedbychil-
dren playing.
7. This product contains small parts. If it is loose or dropped, do not let children in
the mouth to avoid accidental swallowing.
1. The screw may be loose after long-term use. Safety inspection shall be conducted
for the whole vehicle before each use!
2. Packagewithsmallpartsandplasticlmisdangeroustochildren.Pleaseputthe
packageawayintimetoavoidsuocationandswallowingcausedbychildren
playing!
3. Guardians should not leave when children are riding!
4. For the sake of safety, do not disassemble or modify the product by yourself, and
do not use the damaged product!
5. The maximum load of this product is 25kg, and the maximum fastener torque is
not less than 15N. M!
6. When driving with children, please keep away from the pets and people around,
and avoid the third party and self injury caused by collision!
7. In order to ensure the safety of children, this car is only assembled by adults!
8. Users and guardians should read this manual carefully before use and keep it
properly for future reference. If the manual is not followed, the safety of children
maybeaected.
Please read the instruction carefully and keep it properly before
using the product
EN

6
Install the front wheel from
the bottom to the top.
Install the front handle on the
frame.
After the axle passes through
the wheel rod.
Install the front wheels on the
frame.
The front handle is installed.
Install the wheel on the
frame.
Install the basket on the
frame.
Install the brake on the rear
of the frame.
Install the push handles
together.
1
4
7
2
5
8
3
6
9
10 11 12
Install the push handle to the
steering lever.
InstalI the snap. Press the steering wire on
the front fork.
EN

7
13
16
19
22
14
17
20
23
15
18
21
24
The other side is mounted
on the steering lever.
Install the seat base
on the frame.
InstalI the guardrail
in the seat hole.
Install the sunshade on
both sides of the seat.
Tighten the bottom screw to
makeitrm.
Install the seat on the frame.
Install the cushion
on the seat.
Install the storage bag
on the push handle.
Install the rear basket on
the frame and tighten the
screws.
Tighten the bottom screw
tomakeitrm.
Jam the guardrails
at both ends.
Installation is complete.

8
PRÉCAUTIONS DE SÉCURITÉ
AVERTISSEMENT
1. Avantutilisation,veuillezvériersoigneusementsitouteslespiècessontin-
stallées en place et fermement connectées.
2. Tenir à l’écart du feu.
3. Ce véhicule n’est pas un véhicule. Il est interdit de conduire dans les zones dan-
gereuses telles que les rues et les routes.
4. Veuillez ne pas l’utiliser sur la surface de la route inégale et sur le site présentant
un risque potentiel pour la sécurité.
5. Évitez d’utiliser dans l’obscurité, la nuit ou une faible visibilité pour éviter tout
danger.
6. VeuillezrangerlesacenplastiquePEàtempspouréviterl’étouementcausépar
les enfants qui jouent.
7. Ceproduitcontientdepetitespièces.S’ilestlâcheoutombe,nelaissezpasles
enfants dans la bouche pour éviter de l’avaler accidentellement.
1. Lavispeutêtredesserréeaprèsuneutilisationàlongterme.Uneinspectionde
sécuritédoitêtreeectuéepourl’ensembleduvéhiculeavantchaqueutilisation!
2. L’emballageavecdepetitespiècesetunlmplastiqueestdangereuxpourlesen-
fants.Veuillezrangerl’emballageàtempspouréviterl’étouementetladégluti-
tion causés par les enfants qui jouent !
3. Les tuteurs ne doivent pas partir lorsque les enfants roulent !
4. Pourdesraisonsdesécurité,nedémontezninemodiezleproduitvous-même
et n’utilisez pas le produit endommagé !
5. La charge maximale de ce produit est de 25 kg et le couple de serrage maximal
n’est pas inférieur à 15 N. M !
6. Lorsque vous conduisez avec des enfants, veuillez vous tenir à l’écart des ani-
maux domestiques et des personnes autour, et évitez les tiers et les blessures
causées par une collision !
7. And’assurerlasécuritédesenfants,cettevoituren’estassembléequepardes
adultes !
8. Les utilisateurs et les tuteurs doivent lire attentivement ce manuel avant utilisation
et le conserver correctement pour référence future. Si le manuel n’est pas suivi, la
sécuritédesenfantspeutêtreaectée.
Veuillez lire attentivement les instructions et les
conserver correctement avant d’utiliser le produit
FR

9
Installez la roue avant
de bas en haut.
Installez la poignée avant
sur le cadre.
Aprèsquel’essieuatraversé
la tige de roue.
Installez les roues
avant sur le cadre.
La poignée avant est
installée.
Installez la roue sur
le cadre.
Installez le panier sur
le cadre.
Installezlefreinàl’arrière
du cadre.
Installez les poignées de
poussée ensemble.
1
4
7
2
5
8
3
6
9
10 11 12
Installez la poignée de
poussée sur le levier de
direction.
Installez le snap. Appuyezsurlecâblede
direction sur la fourche
avant.

10
FR 13
16
19
22
14
17
20
23
15
18
21
24
L’autre côté est monté sur
le levier de direction.
Installezlabasedusiège
sur le cadre.
Installez le garde-corps
dansletroudusiège.
Installez le pare-soleil
desdeuxcôtésdusiège.
Serrez la vis inférieure
pour la rendre ferme.
Installezlesiègesur
le cadre.
Installez le coussin
surlesiège.
Installez le sac de rangement
sur la poignée de poussée.
Installezlepanierarrièresur
le cadre et serrez les vis.
Serrez la vis inférieure pour
la rendre ferme.
Bloquez les garde-corps
aux deux extrémités.
L’installation
est terminée.

11
PRECAUCIONES DE SEGURIDAD
ADVERTENCIA
1. Antesdeusar,veriquecuidadosamentesitodaslaspiezasestáninstaladasen
sulugaryconectadasrmemente.
2. ¡Mantened el producto alejado del fuego!
3. Estevehículonoesunvehículo.Estáprohibidoconducirenáreaspeligrosas
como calles y carreteras.
4. Porfavor,nolouseensuperciesirregularesdelacarreterayensitiosconun
riesgo potencial para la seguridad.
5. Evite usarse en la oscuridad, por la noche o con en condiciones de poca visibili-
dad para evitar el peligro.
6. Porfavor,guardelabolsadeplásticoPEatiempoparaevitarquelosniñosse
asxienjugando.
7. Este producto contiene piezas pequeñas. Si se suelta o se cae, no deje que los
niños se lo lleven a la boca para evitar que se lo traguen accidentalmente.
1. El tornillo puede estar suelto después de un uso prolongado. Antes de utilizarlo,
se debe realizar una inspección de seguridad en todo el vehículo.
2. Elpaqueteconpiezaspequeñasyenvolturadeplásticoespeligrosoparalos
niños.¡Porfavor,guardeelpaqueteatiempoparaevitarquelosniñosseasx-
ien o traguen el producto!
3. ¡Losguardianesnodebendejarelvehículocuandolosniñosestánmontando!
4. ¡Porseguridad,nodesmontenimodiqueelproductoporsímismo,ynoutiliceel
productosiestádañado!
5. Lacargamáximadeesteproductoesde25kg,yelpardeaprietemáximonoes
inferior a ¡15 N. M!
6. ¡Cuando conduzcan con niños, por favor manténgase alejado de los animales
domésticos y de las personas de alrededor, y evite las lesiones a terceros y las
propias causadas por colisiones!
7. Paragarantizarlaseguridaddelosniños,¡estecochesoloseráensambladopor
adultos!
8. Los usuarios y tutores deben leer atentamente este manual antes de utilizarlo y
guardarlo adecuadamente para futuras consultas. Si no se sigue el manual, la
seguridad de los niños puede verse afectada.
Por favor, léase atentamente las instrucciones y consérvelas
correctamente antes de usar el producto.
ES

12
Instale la rueda delantera
desde abajo hacia arriba.
Instale el manillar delantero
en el cuadro.
Después de que el eje pase
por la barra de la rueda.
Instale las ruedas
delanteras en el cuadro.
El manillar delantero
estáinstalado.
Instale la rueda en
el cuadro.
Instale la cesta en
el cuadro.
Instale el freno en la parte
trasera del cuadro.
Instale los mangos de
empuje juntos.
1
4
7
2
5
8
3
6
9
10 11 12
Instale el mango de empuje
en la palanca de dirección.
Instale el cierre. Presione el cable de
dirección en la horquilla
delantera.
ES

13
13
16
19
22
14
17
20
23
15
18
21
24
El otro lado se monta en
la palanca de dirección.
Instale la base del asiento
en el cuadro.
Instale la defensa en el
agujero del asiento.
Instale el parasol en ambos
lados del asiento.
Apriete el tornillo inferior
paraquequederme.
Instale el asiento en
el cuadro.
Instale el cojín en
el asiento.
Instale la bolsa de
almacenamiento en el mango
de empuje.
Instale la cesta trasera
en el cuadro y apriete los
tornillos.
Apriete el tornillo inferior
paraquequederme.
Encaje las defensas en
ambos extremos.
Se ha completado la
instalación.

14
MISURE DI SICUREZZA
ATTENZIONE
1. Prima dell’uso, controllare attentamente che tutte le parti siano installate al loro
posto e collegate saldamente.
2. Tenere lontano dal fuoco.
3. Questoveicolononèunmezzoditrasporto.Èvietatoguidarloinareepericolose
come strade e vie.
4. Sipregadinonusareilprodottosusupercistradaliirregolarieinluoghiche
presentano un potenziale pericolo per la sicurezza.
5. Evitare di usare il prodotto al buio, di notte o in condizioni di scarsa visibilità per
non correre rischi.
6. SipregadimettereviailsacchettodiplasticaPEperevitareilpericolodisooca-
mento nei bambini che giocano.
7. Questo prodotto contiene piccole parti. Se si allenta o perde pezzi, non lasciare
che i bambini li mettano in bocca per evitare l’ingestione accidentale.
1. La vite potrebbe allentarsi dopo un uso prolungato. Prima di ogni utilizzo deve
essereeettuatouncontrollodisicurezzaperl’interoveicolo!
2. Ilpaccocontenentepiccolepartierivestitodaunapellicoladiplasticaèperico-
losoperibambini.Sipregadimettereviailpaccointempoperevitareilsooca-
mento e l’ingestione da parte dei bambini!
3. I genitori non dovrebbero lasciare i bambini da soli mentre usano il veicolo!
4. Perragionidisicurezza,nonsmontareomodicareilprodotto,enonutilizzareil
prodotto danneggiato!
5. Ilcaricomassimodiquestoprodottoèdi25kg,elacoppiamassimadiserraggio
nonèinferiorea15N.M!
6. Durante la guida con i bambini, si prega di tenersi lontani dagli animali domestici
e dalle persone, ed evitare lesioni a se stessi e a terzi causate da un’eventuale
collisione!
7. Alnedigarantirelasicurezzadeibambini,questamacchinadeveessereas-
semblata solo da adulti!
8. Gli utenti e i genitori dovrebbero leggere attentamente questo manuale prima
dell’uso e conservarlo adeguatamente per riferimenti futuri. Se il manuale non
viene seguito correttamente, la sicurezza dei bambini potrebbe risultarne compro-
messa.
Si prega di leggere attentamente le istruzioni e conservarle
correttamente prima di utilizzare il prodotto
IT

15
Installare la ruota anteriore
dal basso verso l’alto.
Installare la maniglia
anteriore sul telaio.
Dopochel’assaleèpassato
attraverso il tirante della
ruota.
Installare le ruote anteriori
sul telaio.
Lamanigliaanterioreè
installata.
Installare la ruota sul telaio.
Installare il cestino
sul telaio.
Installare il freno sulla parte
posteriore del telaio.
Installare le maniglie di
spinta insieme.
1
4
7
2
5
8
3
6
9
10 11 12
Installare la maniglia di
spinta sulla leva dello sterzo.
Installare lo scatto. Premere il cavo dello sterzo
sulla forcella anteriore.

16
IT 13
16
19
22
14
17
20
23
15
18
21
24
L’altrolatoèmontatosulla
leva dello sterzo.
Installare la base del sedile
sul telaio.
Installare il paraurti nel
vano sedile.
Installare il parasole su
entrambi i lati del sedile.
Stringere la vite inferiore
per renderla stabile.
Installare il sedile sul telaio.
Installare il cuscino sul sedile.
Installare la borsa
portaoggetti sulla maniglia
di spinta.
Installare il cestino
posteriore sul telaio e
stringere le viti.
Stringere la vite inferiore per
renderla stabile.
Fissare i paraurti alle due
estremità.
L’installazioneècompleta.

17
VEILIGHEIDSMAATREGELEN
WAARSCHUWING
1. Controleer voor gebruik zorgvuldig of alle onderdelen op hun plaats zijn geïnstal-
leerd en stevig zijn gemonteerd.
2. Blijf uit de buurt van het vuur.
3. Dit voertuig is geen voertuig. Het is verboden te rijden in gevaarlijke gebieden
zoals straten en wegen.
4. Gebruikheta.u.b.nietopeenoneenwegdekenopeenterreinmeteenpoten-
tieel veiligheidsrisico.
5. Vermijd gebruik in het donker, ‘s nachts of bij slecht zicht om gevaar te voor-
komen.
6. Berg de PE-plastic zak goed op om verstikking bij spelende kinderen te voor-
komen.
7. Dit product bevat kleine onderdelen. Als het los zit of is gevallen, zorg er dan
voor dat kinderen het niet in de mond kunnen steken om onbedoeld inslikken te
voorkomen.
1. De schroeven kunnen los zitten na langdurig gebruik. Voor elk gebruik moet de
veiligheidsinspectie voor het hele voertuig worden uitgevoerd!
2. Pakket met kleine onderdelen en plastic folie is gevaarlijk voor kinderen. Berg
de verpakking goed op om verstikking en inslikken door spelende kinderen te
voorkomen!
3. Voogden mogen niet weggaan als kinderen rijden!
4. Om veiligheidsredenen mag u het product niet zelf demonteren of wijzigen en het
beschadigde product niet gebruiken!
5. De maximale belasting van dit product is 25 kg en het maximale bevestigingsmo-
ment is niet minder dan 15N. M!
6. Als kinderen rijden blijf dan uit de buurt van huisdieren en mensen in de omgeving
en vermijd iedere derde partij om zelfverwonding veroorzaakt door een botsing te
voorkomen!
7. Om de veiligheid van kinderen te garanderen, wordt deze auto alleen door vol-
wassenen in elkaar gezet!
8. Gebruikers en voogden dienen deze handleiding voor gebruik zorgvuldig te lezen
en op de juiste manier te bewaren voor toekomstig gebruik. Als de handleiding
niet wordt gevolgd, kan de veiligheid van kinderen in gevaar komen.
Lees de instructie zorgvuldig door en bewaar deze goed
voordat u het product gebruikt!
NL

18
Monteer het voorwiel van
onder naar boven.
Monteer de voorste
handgreep op het frame.
Nadat de as door de
wielstang is gegaan.
Monteer de voorwielen op
het frame.
De voorste handgreep is
geïnstalleerd.
Monteer het wiel op het
frame.
Installeer de mand op het
frame.
Monteer de rem aan de
achterkant van het frame.
Monteer de duwhandvatten
samen.
1
4
7
2
5
8
3
6
9
10 11 12
Monteer de duwbeugel op de
stuurhendel.
Installeer de sluiting. Druk op de stuurdraad
op de voorvork.
NL

19
13
16
19
22
14
17
20
23
15
18
21
24
De andere kant is
gemonteerd op de
stuurhendel.
Monteer de basis van het
zitje op het frame.
Monteer de leuning in het
stoelgat.
Monteer het zonnescherm
aan beide zijden van
de stoel.
Draai de onderste schroef
vast om hem stevig te
maken.
Monteer het zitje op het
frame.
Installeer het kussen op
het zitje.
Installeer de opbergtas
op de duwbeugel.
Installeer de achterste
mand op het frame en draai
de schroeven vast.
Draai de onderste schroef
vast om hem stevig te
maken.
Blokkeer de veiligheidsrails
aan beide kanten.
De installatie is voltooid.

20
MĂSURI DE SIGURANȚĂ
AVERTIZARE
1. Înaintedeutilizare,vărugămsăvericațicuatențiedacătoatepieselesuntinsta-
lateșiconectatebine.
2. Ținețidepartedefoc.
3. Acestvehiculestedoarpentruinterior.Esteinterzisăcirculațiaînzonepericulo-
ase,cumarstrăzileșidrumurile.
4. Vărugămsănuîlutilizațipesuprafațaneuniformăadrumuluisaupeuntraseucu
potențialpericolpentrusiguranță.
5. Evitațiutilizareaînîntuneric,petimpdenoaptesauvizibilitateredusăpentrua
evita eventualele pericole.
6. VărugămsăscoatețisaculdeplasticPElatimppentruaevitasufocareacopiilor
caresejoacă.
7. Acestprodusconținepiesemici.Dacăacestepiesecadsausedesprind,nu
lăsațicopiiisăleintroducăîngurăpentruaevitaînghițireaaccidentală.
1. Șuruburilesepotslăbidupăutilizareapetermenlung.Inspecțiadesiguranță
trebuieefectuatăpentruîntregulvehiculînaintedeecareutilizare!
2. Pachetulcupiesemicișifoliedeplasticestepericulospentrucopii.Vărugămsă
îndepărtațiambalajullatimppentruaevitasufocareașiînghițirealacopiiimici
caresejoacă!
3. Acestprodustrebuiefolositdoarînprezențaadulților!
4. Dinmotivedesiguranță,nudezasamblațisaumodicațisingurprodusulșinu
utilizațiprodusuldeteriorat!
5. Sarcinamaximăaacestuiprodusestede25kg,iarcuplulmaximdexarenu
este mai mic de 15N. M!
6. Cândvăplimbațicucopii,vărugămsăținețideparteanimaleledecompaniesau
altepersoanedinjurpentruaevitaauto-vătămareacauzatădecoliziune!
7. Pentruaasigurasiguranțacopiilor,acestarticoltrebuieasamblatdoardeadulți!
8. Utilizatoriișitutoriiartrebuisăciteascăcuatențieacestmanualînaintedeutiliza-
reșisăîlpăstrezeînmodcorespunzătorpentrureferințeviitoare.Dacăinstrucțiu-
nilenusuntrespectate,siguranțacopiilorpoateafectată.
Vă rugăm să citiți cu atenție instrucțiunile și să le păstrați
corect înainte de a utiliza produsul
RO
Table of contents
Languages:
Other Zizito Stroller manuals

Zizito
Zizito LANA GS-106S User manual

Zizito
Zizito TROY BT010 User manual

Zizito
Zizito SUSSANE User manual

Zizito
Zizito SANDRA User manual

Zizito
Zizito OLIVIA User manual

Zizito
Zizito CASPAR User manual

Zizito
Zizito HARMONY LUX BP001 User manual

Zizito
Zizito S900 User manual

Zizito
Zizito REGINA YH-N007 User manual

Zizito
Zizito BARRON User manual