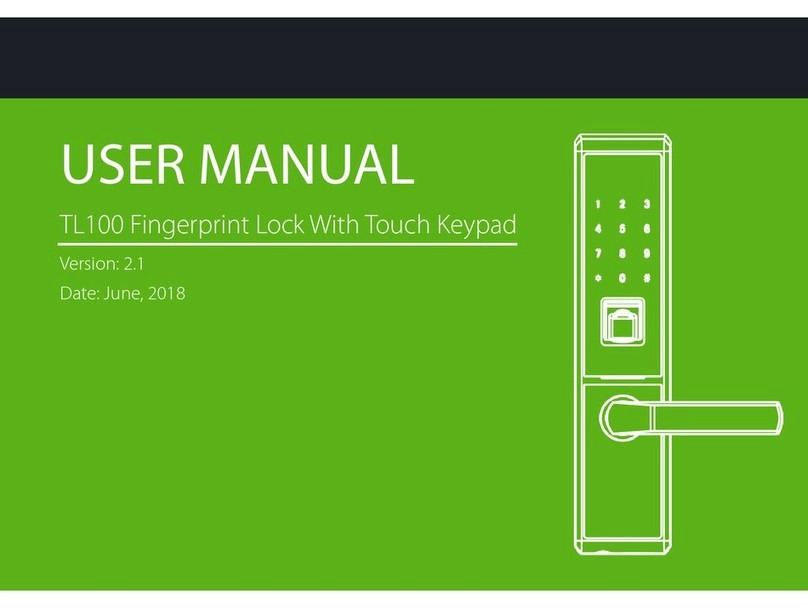
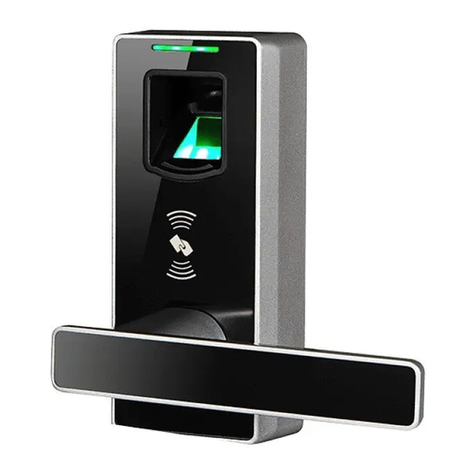
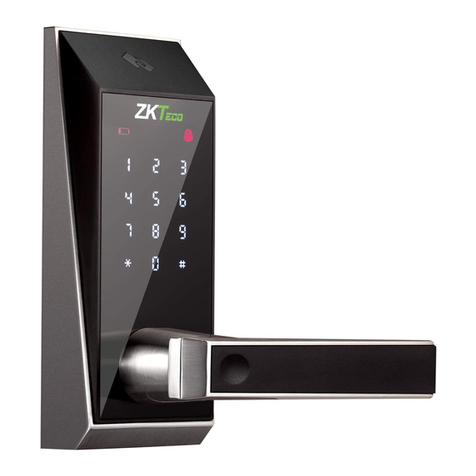
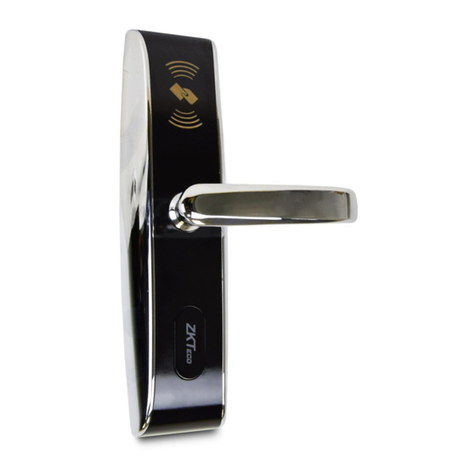
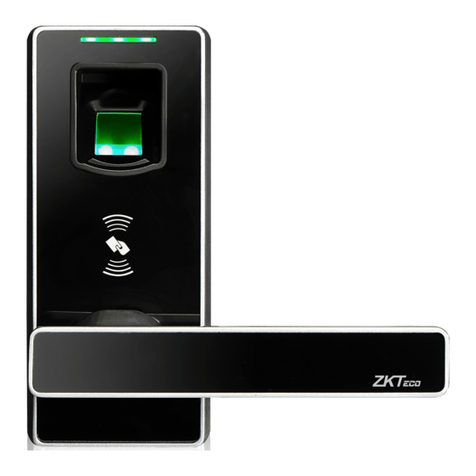
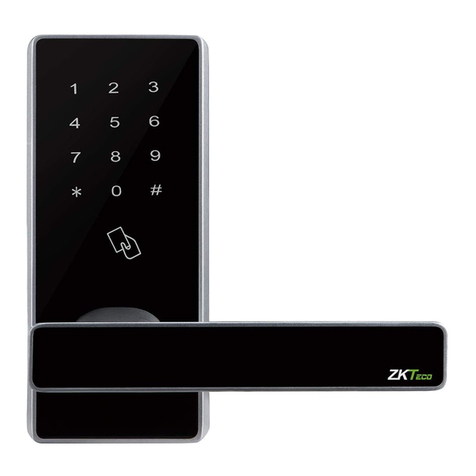
ZKTeco ML300 Series User manual

Model: ML300
Version: 1.0
English
User Manual

Table of Contents
Product Overview...........................................................................................................1
Product Features............................................................................................................1
Lock Setup.......................................................................................................................2
1. Resetting the Lock.....................................................................................................................................2
2. Pairing the Lock with App.......................................................................................................................2
3. Programming the Lock in Standlone Mode.....................................................................................3
4. *Adding the Smart Gateway..................................................................................................................5
5. *Connecting to Amazon Alexa or Google Assistant.......................................................................6
How to Use......................................................................................................................6
Unlocking Door with Fingerprint..............................................................................................................6
Unlocking Door with Password..................................................................................................................6
Unlocking Door with App.............................................................................................................................7
*Unlocking Door with Voice Assistant.....................................................................................................7

Important Notes
Before registration, the new locks can be unlocked by any authentication method by
default.
An administrator must be registered first, before any other operation in the
Standalone Mode.
Four alkaline AA batteries (not included) are needed to power the device. Non-
alkaline and rechargeable batteries ARE NOT RECOMMENDED.
Do not remove batteries from the lock when it is operating.
Batteries must be replaced when the lock flashes the red light along with 2-second
beeps after being turned on.
The locks are also equipped with mechanical keys for manual unlocking. Please keep
the mechanical keys at a safe place.
Fingerprint positioning tips:
1.
2.
3.
4.
5.
6.
7.
Note: Please use the correct method when pressing your fingers onto the fingerprint
reader for registration and identification. Our company will assume no liability for
recognition issues that may result from incorrect usage of the product. We reserve the
right of final interpretation and modification concerning this point.
Recommended fingers: Index, middle, or ring fingers; avoid using the thumb or pinky,
as it is difficult to accurately press onto the fingerprint reader using those.
Too low Too close to the edge
Vertical

1
Product Overview
Random Password: To protect the password, users may enter their password with
random digits before or after the actual password. The maximum number of entered digits
must be less than or equal to 32. For example: If the correct password is 123456, then the
random password can be 89123456807, 1234562363, 389123456, etc.
Mechanical Key Hole (hidden)
Micro-USB Interface
User Introduction:
The maximum capacity of all users is 100. The maximum capacity of each
verification method (fingerprint/password) is 100.
Owner is the person who owns the lock and registers it in ZSmart App, and has all
the privileges.
Admin can always unlock via fingerprint, password, or App. Admin can add or delete
normal users, and control all lock settings.
Normal User can always unlock via fingerprint, password, or App, and check the
opening records.
1)
2)
Low Battery Warning: When the battery power is low, the lock will flash the red light
along with 2-second beeps after being turned on. Then the batteries need to be replaced.
Product Features
Keypad
Fingerprint Sensor
Handle (reversible)
ZKTeco Button Battery
Compartments
Reset Button
Battery Cover
3)
4)
Initialization: All registered user data will be deleted and restored to the factory default
setting.
Illegal Attempts Alert: After 5 failed verification attempts, the lock will flash the red light
along with 10-second beeps and the lock will not be operable hereafter.
Outdoor Unit Indoor Unit

2
Emergency Charging: The bottom of the outdoor unit is provided with a Micro-USB
interface. Use a power bank to charge the lock when it is out of power.
Emergency Mechanical Key: The mechanical key is used to open the door when the lock
has any electronic malfunction. Slide the key cover and insert the key to unlock in
emergency situations.
*Remote Access: This function is only available for the additional Smart Gateway. With
the Smart Gateway installed, the lock can be controlled remotely via ZSmart App.
*Voice Assistant Control: This function is only available for the additional Smart
Gateway. The lock can be unlocked using your voice commands through Amazon Alexa
and the Google Assistant.
Bluetooth Connectivity: The lock is designed with BLE5.0 communication, you can
unlock it via your smart phone when the Bluetooth is connected.
Lock Setup
Please note all registered user data will be deleted and restored to the factory
default setting.
If Never Paired: Press and hold the reset button until you hear one long beep and two
short beeps.
If Paired with App: Tap the EDIT button on the upper right corner of Device Interface,
and click “Disconnect and wipe data” to remove the lock from your ZSmart Account. Then
press and hold the reset button until you hear one long beep and two short beeps.
Step 1
Search for the “ZSmart” App in iOS App Store or
Google Play Store, or scan the QR code to download
the App.
1Resetting the Lock
2Pairing the Lock with App

2 short beeps with no light indication
Completed
3
Step 2
Open the ZSmart App, register and sign in to the account.
Step 3
Make sure the lock is in Factory Default Mode. Turn on Bluetooth permission on your
smartphone, and stay near the lock (within 10 meters without obstacles).
Step 4
Tap the “+” button on the upper right corner, follow the on-screen instructions to pair the
lock automatically, and start to use it.
Note: If you don’t want to use the App, please check the next section i.e. "Programming
the Lock in Standalone Mode"
It is recommended to use ZSmart App to program your lock. If you don’t have a
smartphone or don’t want to use the App, you can use the programming instructions
below.
Note:
Standalone Mode is not available after the lock is registered in App! Please
reset the lock to Factory Default Mode first to program your lock in
Standalone Mode.
3Programming the Lock in Standalone Mode
3.1 Add the Admin Password in Standalone Mode
Operation Indicator’s Status
Press and hold the ZKTeco Button for
3 seconds
2 short beeps with flashing green
light
Enter the same six-digit password
and press ZKTeco Button again
Enter a six-digit password and press
ZKTeco Button
1 short beep with green light, then
flashing green light
1 short beep with green light

4
2 short beeps with no light indication
Completed
3.2 Add the Admin Fingerprint in Standalone Mode
Operation Indicator’s Status
Press and hold the ZKTeco Button for
3 seconds
2 short beeps with flashing green
light
Press t he sa me fin ger onto t he
fingerprint sensor again
Press the finger onto the fingerprint
sensor
1 short beep with green light, then
flashing green light
Press t he sa me fin ger onto t he
fingerprint sensor again
1 short beep with green light, then
flashing green light
1 short beeps with green light
2 short beeps with no light indication
Completed
3.3 Add the User Password in Standalone Mode
Operation Indicator’s Status
Press and hold the ZKTeco Button for
3 seconds
Enter a six-digit password and press
the ZKTeco Button
Verify the administrator ’s identity
w ith his/ h e r fi n g e r print , o r b y
entering the password then pressing
the ZKTeco Button to confirm
Enter the same six-digit password
and press the ZKTeco Button again
1 short beep with green light, then
flashing green light
1 short beep with green light
2 short beeps with flashing blue light
1 short beep with green light, then
flashing green light

5
2 short beeps with no light indication
Completed
3.4 Add the User Fingerprint in Standalone Mode
Operation Indicator’s Status
Press and hold the ZKTeco Button for
3 seconds
Press the finger onto the fingerprint
sensor
Verify the administrator ’s identity
w ith his/ h e r fi n g e r print , o r b y
entering the password then pressing
the ZKTeco Button to confirm
Press t he sa me fin ger onto t he
fingerprint sensor again
1 short beep with green light, then
flashing green light
2 short beeps with flashing blue light
1 short beep with green light, then
flashing green light
1 short beep with green light, then
flashing green light
Press t he sa me fin ger onto t he
fingerprint sensor again 1 short beep with green light
Note:
Admin must be created before any other programming. Only one Admin is
available in the Standalone Mode.
The verification mode of an admin can be a fingerprint or a passcode.
The registered password must be six digits.
If you try to register the same fingerprint/password again, the lock will prompt one
long beep with a red light.
1)
2)
3)
4)
Step 1
Plug the Gateway into the outlet using the provided Power Adapter.
Step 2
Open the ZSmart App. Tap the “+” button on the upper right corner, and then select the
“Smart Lock/Wireless Gateway” category.
4*Adding the Smart Gateway

6
Step 3
Follow the on-screen instructions to connect the Gateway to the 2.4GHz Wi-Fi network
and complete the setup.
Step 4
Enter the device interface of Gateway, and then follow the on-screen instructions to select
the corresponding lock to add.
Tap the EDIT button on the upper right corner of the device interface. Select the Alexa or
Google Assistant icon, then follow the on-screen instructions to link your ZSmart
Account to Amazon Alexa or Google Assistant.
After completing the setup, you can use the supported voice commands that include:
Alexa, unlock the front door.
OK Google, unlock the front door.
5*Connecting to Amazon Alexa or Google Assistant
How to Use
Unlocking Door with Fingerprint
Unlocking Door with Password
Note:
You can press the ZKTeco Button to turn on the keypad backlight.
Users may enter a random password to prevent any person from observing the
password. The maximum length of a random password is 32 digits.
1)
2)
Press the registered
finger onto the
fingerprint sensor
Rotate the handle down
to open the door
Enter the registered
password and press the
ZKTeco Button to
confirm
Rotate the handle down
to open the door

7
Note: Once the Lock and Smart Gateway has been installed and configured correctly,
make sure you enable the “ZSmart” Amazon Alexa Skill and Google Home Action first
before you can configure your voice to perform voice commands.
Unlocking Door with App
Turn on Bluetooth
permission on your
smartphone
Open the App and press
the UNLOCK button
Rotate the handle down
to open the door
Note:
If you have already paired the lock with the gateway, you don’t need to turn on
Bluetooth.
When unlocking the lock via Bluetooth, please stay near the lock (within 10 meters
without obstacles).
1)
2)
*Unlocking Door with Voice Assistant
Perform the voice
commands
Answer the additional
voice security codes
Rotate the handle down
to open the door

Modelo: ML300
Versión: 1.0
Español
Manual de Usuario

Descripción del Producto...............................................................................................1
Características del Producto..........................................................................................1
Configuración de la Cerradura.......................................................................................2
1. ....................................................................................2Restablecimiento de la Cerradura....................
2. .......................................................................2 Emparejamiento de la Cerradura con la App.............
3. ........................................................3Programación de la Cerradura en Modo Autónomo..............
4. * ...............................................................................5Agregar el Gateway Inteligente...........................
5. ..................................................6*Conexión con Amazon Alexa o Google Assistant.......................
Cómo Utilizar..................................................................................................................6
Desbloqueo con Huella Digital..................................................................................................................6
Desbloqueo con Contraseña......................................................................................................................6
Desbloqueo con la Aplicación....................................................................................................................7
*Desbloqueo con Asistente Virtual...........................................................................................................7
Contenido

Antes del registro, las nuevas cerraduras se pueden desbloquear mediante cualquier
método de autenticación de forma predeterminada.
Primero se debe registrar un administrador, antes que cualquier otra operación en el
modo autónomo.
Se necesitan cuatro pilas AA alcalinas (no incluidas) para alimentar el dispositivo. NO
SE RECOMIENDAN pilas recargables y no alcalinas.
No quite las baterías de la cerradura cuando esté funcionando.
Las baterías deben reemplazarse cuando la cerradura parpadee con la luz roja junto
con pitidos de 2 segundos después de encenderse.
Las cerraduras también están equipadas con llaves mecánicas para desbloqueo
manual. Guarde las llaves mecánicas en un lugar seguro.
Consejos de posicionamiento de huellas dactilares:
1.
2.
3.
4.
5.
6.
7.
Nota: utilice el método correcto al presionar con los dedos el lector de huellas digitales
para registrarse e identificarse. Nuestra empresa no asumirá ninguna responsabilidad por
problemas de reconocimiento que puedan resultar del uso incorrecto del producto. Nos
reservamos el derecho de interpretación final y modificación de este punto.
Dedos recomendados: Índice, medio o anular; evite usar el pulgar o el meñique, ya
que es difícil presionar con precisión sobre el lector de huellas digitales con estos.
Demasiado baja Demasiado cerca
del borde
Verticalmente
Notas Importantes

Unidad Exterior
1
Contraseña aleatoria: para proteger la contraseña, los usuarios pueden ingresar su
contraseña con dígitos aleatorios antes o después de la contraseña real. El número
máximo de dígitos ingresados debe ser menor o igual a 32. Por ejemplo: si la contraseña
correcta es 123456, la contraseña aleatoria puede ser 89123456807, 1234562363,
389123456, etc.
Ojillo Oculto para Llave Mecánica
Interfaz Micro-USB
Introducción al usuario:
La capacidad máxima de todos los usuarios es 100. La capacidad máxima de cada
método de verificación (huella digital/contraseña) en total es de 100.
El propietario es la persona que posee la cerradura, la registra en la aplicación ZSmart
y tiene todos los privilegios.
El administrador siempre puede desbloquear mediante huella digital, contraseña o
aplicación. El administrador puede agregar o eliminar usuarios normales y controlar
todas las configuraciones de la cerradura.
Los usuarios normales siempre pueden desbloquear mediante huella digital,
contraseña o aplicación, y verificar los registros de apertura.
1)
2)
Advertencia de batería baja: cuando la energía de las baterías es baja, la cerradura
parpadeará con la luz roja junto con pitidos de 2 segundos después de encenderse.
Entonces es necesario reemplazar las baterías.
Teclado
Sensor de Huella
Manija Reversible
Botón ZKTeco Compartimiento
de Baterías
Botón Reset
Cubierta de Batería
3)
4)
Inicialización: Todos los datos de usuario registrados se eliminarán y se restaurarán a la
configuración predeterminada de fábrica.
Descripción del Producto
Unidad Interior
Características del Producto

2
Carga de emergencia: la parte inferior de la unidad exterior está provista de una interfaz
Micro-USB. Use una batería de respaldo para cargar la cerradura cuando se quede sin
energía.
Llave mecánica de emergencia: la llave mecánica se utiliza para abrir la puerta cuando la
cerradura tiene algún mal funcionamiento electrónico. Deslice la tapa de la llave e inserte
la llave para desbloquear en situaciones de emergencia.
*Acceso remoto: esta función solo está disponible en conjunto con un Gateway
Inteligente adicional. Con este ya instalado, la cerradura se puede controlar de forma
remota a través de la aplicación Zsmart.
*Control de asistente de voz: esta función solo está disponible en conjunto con un
Gateway Inteligente adicional. La cerradura se puede desbloquear usando sus comandos
de voz a través de Amazon Alexa y el Asistente de Google.
Conectividad Bluetooth: la cerradura cuenta con comunicación BLE5.0, puede
desbloquearla a través de su teléfono inteligente cuando el Bluetooth está conectado.
Tenga en cuenta que todos los datos de usuario registrados se eliminarán y se
restaurarán a la configuración predeterminada de fábrica.
Si nunca se emparejó: Mantenga presionado el botón de reinicio hasta que escuche un
pitido largo y dos pitidos cortos.
Si está emparejado con la aplicación: toque el botón EDITAR en la esquina superior
derecha de la Interfaz del dispositivo y haga clic en "Desconectar y borrar datos" para
eliminar la cerradura de su cuenta ZSmart. Luego presione y mantenga presionado el
botón de reinicio hasta que escuche un pitido largo y dos pitidos cortos.
1Restablecimiento de la Cerradura
Alerta de intentos ilegales: después de 5 intentos fallidos de verificación, la cerradura
parpadeará con la luz roja junto con pitidos de 10 segundos y la cerradura no estará
operativa en lo sucesivo.
Conguración de la Cerradura
Paso 1
Busque la aplicación "ZSmart" en iOS App Store o
Google Play Store, o escanee el código QR para
descargar la aplicación.
2Emparejamiento de la Cerradura con la App

2 beeps cortos sin luz
Completado
3
Paso 2
Abra la aplicación ZSmart, regístrese e inicie sesión en la cuenta.
Paso 3
Asegúrese de que la cerradura esté en el modo predeterminado de fábrica. Active el
permiso de Bluetooth en su teléfono inteligente y permanezca cerca de la cerradura (a
menos de 5 metros sin obstáculos).
Paso 4
Toque el botón "+" en la esquina superior derecha, siga las instrucciones en pantalla para
emparejar la cerradura automáticamente y comience a usarla.
Notas: Si no desea utilizar la aplicación, consulte la siguiente sección, es decir,
"Programación de la cerradura en modo independiente".
Se recomienda utilizar la aplicación ZSmart para programar su cerradura. Si no tiene un
teléfono inteligente o no desea utilizar la aplicación, puede utilizar las instrucciones de
programación a continuación.
Nota:
El modo autónomo no está disponible después de que la cerradura se registra
en la aplicación. Primero restablezca la cerradura al modo predeterminado de
fábrica para programar su cerradura en modo autónomo.
3Programación de la Cerradura en Modo Autónomo
3.1 Agregar Contraseña de Administrador en Modo Autónomo
Operación Indicador de Estado
Presione por 3 segundos el botón
ZKTeco
2 b e e p s c o r t o s c o n l u z v e r d e
parpadeando
Ingrese la misma contraseña de 6
digitos y presione el botón ZKTeco de
nueva cuenta
Ingrese una contrasea de 6 digitos y
presione el botón ZKTeco
1 beep corto con luz verde, después
luz verde parpadeando.
1 beep corto con luz verde

Indicador de Estado
Operación
4
2 beeps cortos sin luz
Completado
3.2 Agregar Huella de Administrador en Modo Autónomo
Presione por 3 segundos el botón
ZKTeco
2 b e e p s c o r t o s c o n l u z v e r d e
parpadeando
Coloque la misma huella en el sensor
de nueva cuenta
1 beep corto con luz verde, después
luz verde parpadeando.
Coloque la misma huella en el sensor
de nueva cuenta
1 beep corto con luz verde, después
luz verde parpadeando.
1 beep corto con luz verde
2 beeps cortos sin luz
Completado
3.3 Agregar Contraseña de Usuario en Modo Autónomo
Presione por 3 segundos el botón
ZKTeco
Ingrese una contrasea de 6 digitos y
presione el botón ZKTeco
Verifique como administrador ya sea
con huella o contraseña, después
pres i o ne e l b o tón Z K Te c o p a ra
confirmar
Ingrese la misma contraseña de 6
digitos y presione el botón ZKTeco de
nueva cuenta
1 beep corto con luz verde, después
luz verde parpadeando.
1 beep corto con luz verde
1 beep corto con luz verde, después
luz verde parpadeando.
Coloque su huella en el sensor
Indicador de Estado
Operación
2 b e e p s c o r t o s c o n l u z a z u l
parpadeando

5
2 beeps cortos sin luz
Completado
3.4 Agregar Huella de Usuario en Modo Autónomo
Presione por 3 segundos el botón
ZKTeco
Coloque su huella en el sensor
Verifique como administrador ya sea
con huella o contraseña, después
pres i o ne e l b o tón Z K Te c o p a ra
confirmar
Coloque la misma huella en el sensor
de nueva cuenta
1 beep corto con luz verde, después
luz verde parpadeando.
1 beep corto con luz verde, después
luz verde parpadeando.
1 beep corto con luz verde, después
luz verde parpadeando.
Coloque la misma huella en el sensor
de nueva cuenta 1 beep corto con luz verde
Nota:
El administrador debe crearse antes que cualquier otra programación. Solo hay un
administrador disponible en el modo independiente.
El modo de verificación de un administrador puede ser una huella digital o
contraseña.
La contraseña registrada debe tener seis dígitos.
Si intenta registrar la misma huella digital/contraseña nuevamente, la cerradura
emitirá un pitido largo con una luz roja.
1)
2)
3)
4)
Paso 1
Conecte el Gateway en la toma de corriente con el adaptador proporcionado.
4*Agregar el Gateway Inteligente
Indicador de Estado
Operación
2 b e e p s c o r t o s c o n l u z a z u l
parpadeando

Paso 2
Abra la aplicación ZSmart. Toque el botón "+" en la esquina superior derecha y luego
seleccione la categoría "Smart Lock/Wireless Gateway".
Paso 4
Ingrese a la interfaz del dispositivo y siga las instrucciones en pantalla para seleccionar la
cerradura correspondiente para agregar.
Toque el botón EDITAR en la esquina superior derecha de la interfaz del dispositivo.
Seleccione el ícono de Alexa o Google Assistant, luego siga las instrucciones en pantalla
para vincular su cuenta ZSmart a Amazon Alexa o Google Assistant.
Después de completar la configuración, puede usar los comandos de voz admitidos que
incluyen:
Alexa, abre la puerta principal.
OK Google, abre la puerta principal.
5*Conexión con Amazon Alexa o Google Assistant
Desbloqueo con Huella Digital
Desbloqueo con Contraseña
Presione el dedo
registrado en el sensor
de huellas
Luego, gire la manija
hacia abajo para abrir la
puerta
Ingrese la contraseña
registrada y presione el
botón ZKTeco
Luego, gire la manija
hacia abajo para abrir la
puerta
Paso 3
Siga las instrucciones en pantalla para conectar el Gateway a la red Wi-Fi de 2.4GHz y
complete la configuración.
Cómo Utilizar
6

7
Nota: Una vez que la cerradura y el Gataway inteligente se hayan instalado y configurado
correctamente, asegúrese de habilitar la skill "ZSmart" de Amazon Alexa y el comando de
Google Home antes de poder configurar su voz para ejecutar comandos de voz.
Desbloqueo con la Aplicación
Active el permiso de
Bluetooth en su
teléfono inteligente
Abra la aplicación y
presione el botón
DESBLOQUEAR
Gire la manija hacia
abajo para abrir la
puerta
Nota:
Si ya ha vinculado la cerradura con el Gataway, no es necesario que active Bluetooth.
Cuando desbloquee la cerradura a través de Bluetooth, permanezca cerca de la
cerradura (a menos de 10 metros sin obstáculos).
1)
2)
*Desbloqueo con Asistente Virtual
Ejecute los comandos
de voz
Responda los códigos
de seguridad de voz
adicionales
Luego, gire la manija
hacia abajo para abrir la
puerta
Nota:
Puede presionar el botón ZKTeco para encender la luz de fondo del teclado.
Los usuarios pueden ingresar una contraseña aleatoria para evitar que cualquier
persona la observe. La longitud máxima de una contraseña aleatoria es de 32 dígitos.
1)
2)
Table of contents
Languages:
Other ZKTeco Door Lock manuals

ZKTeco
ZKTeco TL700 User manual

ZKTeco
ZKTeco ML100 User manual

ZKTeco
ZKTeco LH7000 User manual

ZKTeco
ZKTeco AL10B User manual

ZKTeco
ZKTeco AL-130 Series User manual

ZKTeco
ZKTeco TL300Z User manual

ZKTeco
ZKTeco ZL600 User manual

ZKTeco
ZKTeco LH3600 User manual

ZKTeco
ZKTeco ZL700 User manual

ZKTeco
ZKTeco DL30B User manual

ZKTeco
ZKTeco L4000 User manual

ZKTeco
ZKTeco AL10DB User manual

ZKTeco
ZKTeco GL300 User manual

ZKTeco
ZKTeco ZL500 User manual

ZKTeco
ZKTeco LH6000 User manual

ZKTeco
ZKTeco AL30Z User manual

ZKTeco
ZKTeco HBL100 User manual

ZKTeco
ZKTeco TL400B User manual

ZKTeco
ZKTeco ML200 Series User manual

ZKTeco
ZKTeco LH4000 User manual