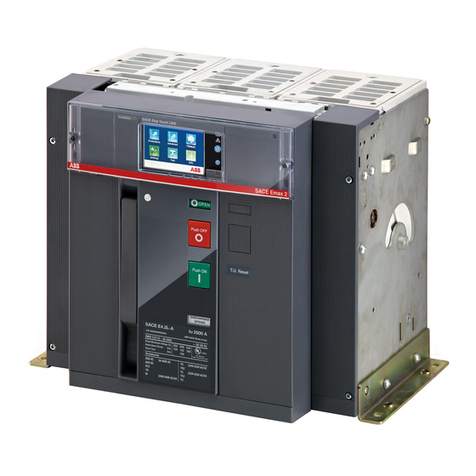
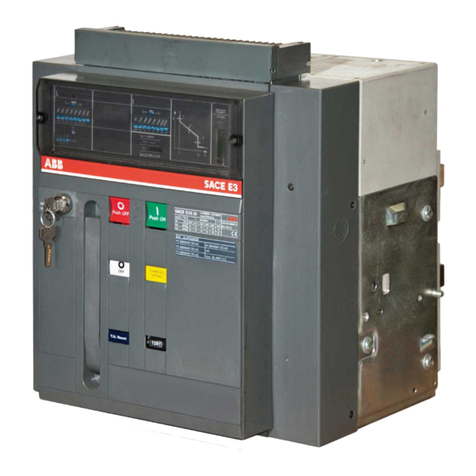
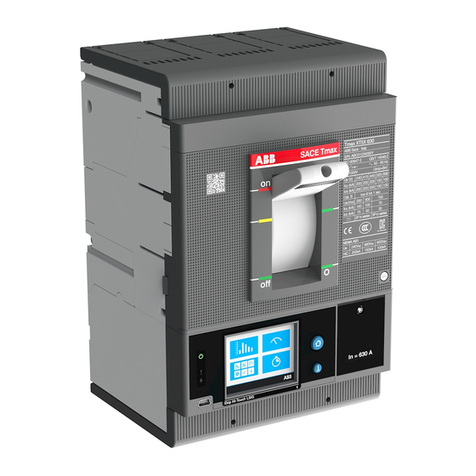
ABB SACE Emax 2 User manual

Il presente kit di terminali, consente la sostituzione totale di interruttori
aperti Entelliguard G Envelope 1, Envelope 2 e Envelope 3 con interruttori
aperti in esecuzione estraibile di più moderna fattura tipo Emax 2
di medesima taglia, senza dover eseguire alcuna modifica alle parti attive
del quadro.
E' garantita la totale corrispondenza delle caratteristiche elettriche (corrente
nominale e potere di interruzione) a condizione che
1.La scelta sia effettuata in conformità a quanto riportato nei cataloghi tecnici
relativi ai prodotti.
2.L'interruttore Entelliguard G Envelope 1, Envelope 2, Envelope 3
da sostituire sia installato in conformità al proprio manuale di installazione,
rispettando le distanze di isolamento verso massa, il dimensionamento delle
sbarre di connessione, il posizionamento del primo setto di ancoraggio.
IMPORTANTE
Questi terminali consentono la sostituzione di un dispositivo di comando
e protezione divenuto obsoleto ma non di alterare in maniera alcuna i dati di
progetto originali del quadro esistente. Qualora il nuovo interruttore
presentasse dati di targa superiori, i terminali sono dimensionati per le
prestazioni del vecchio dispositivo.
Per ulteriori chiarimenti contattare ABB.
Attenzione Istruzioni riguardanti il solo assemblaggio del kit terminali,
non sono da intendersi come sostitutive del manuale di installazione, uso e
manutenzione del nuovo interruttore Emax 2.
MESSA IN SICUREZZA DELL’IMPIANTO
A) A garanzia dell’incolumità del personale addetti all’installazione del kit,
prima di operare la sostituzione dell’interruttore, si raccomanda di seguire,
scrupolosamente, le seguenti azioni:
- Mettere fuori servizio il quadro ospitante
- Portare l’interruttore da sostituire in posizione di aperto e molle scariche
- Disconnettere le applicazioni ausiliarie
- Prima di estrarre l’apparecchio, controllare nuovamente il fuori servizio
dell’utenza
B) Smantellare completamente il vecchio interruttore conservando le viti di
connessione dei poli del vecchio interruttore Entelliguard G Envelope 1,
Envelope 2, Envelope 3 alla barratura del quadro.
This terminals kit allows Env1 Env2 Env3 (Entelliguard G) circuit-breakers
to be fully replaced with the more modern Emax 2
plug-in air circuit-breakers of the same size without having to modify the live
parts of the switchgear in any way.
Full correspondence of the electrical characteristics is guaranteed (rated
current and breaking capacity) so long as:
1.The kit is chosen in accordance with the indications in the technical
catalogues dedicated to products.
2.The Env1 Env2 Env3 (Entelliguard G) circuit-breaker to be replaced has
been installed in compliance with the instructions in the relative installation
manual, and with the specified insulation clearance towards earth, connection
busbar size and position of the first anchor plate.
IMPORTANT
Terminals allow an obsolete control and protection device to be replaced,
but does not allow the data of the original project of the existing switchboard
to be altered in any way.
If the rating plate data of the new circuit-breaker are higher, the terminals
kits are sized for the performance of the old device.
Consult ABB for further details.
Warning The instructions concern the sole assembly of the terminals kit.
They do not substitute the instructions in the installation, operation and
maintenance manual of the new Emax 2 circuit-breaker.
SETTING THE INSTALLATION IN SAFE CONDITIONS
A) To ensure that the persons who install the kit work in safe conditions,
strictly comply with the following instructions before replacing the
- Close down the switchboard in which the circuit-breaker is to be installed.
- Set the old circuit-breaker to the open position with the springs unloaded.
- Disconnect the auxiliary circuit applications.
- Check to make sure that the user is disconnected before removing the
device.
B) Completely disassemble the old circuit-breaker, but keep the screws that
connect the poles of the old Env 1 Env 2 Env 3 (Entelliguard G)
circuit-breaker to the switchboard bars.
Kit terminali per adattamento interruttori Estraibili Entelliguard G Env 1, Env 2, Env 3 ad Emax 2 E2.2-A, E4.2-A, E6.2-A
Terminals kit to match Entelliguard G Env 1, Env 2, Env 3 to Emax 2 E2.2-A, E4.2-A, E6.2-A Withdrawable circuit breakers
Kit Anschlüsse für Anpassung Steckbarer Leistungsschaltern Entelliguard G Env 1, Env 2, Env 3 an Emax 2 E2.2-A, E4.2-A, E6.2-A
Kit prises pour l’adaptation disjoncteurs Débrochables Entelliguard G Env 1, Env 2, Env 3 à Emax 2 E2.2-A, E4.2-A, E6.2-A
Kit terminales para la adaptación interruptores Extraíble Entelliguard G Env 1, Env 2, Env 3 a Emax 2 E2.2-A, E4.2-A, E6.2-A
Doc. N.° 1SDH002033A1001 - ECN000117970 - Rev. D
Emax 2
the circuit breaker.
L’uso di questi terminali Emax 2 per sostituzione di Entelliguard G non è
stata valutata da UL. Use of these Emax 2 terminals for replacement of Entelliguard G has not
been evaluated by UL.

(2)
Die offenen Leistungsschalter Entelliguard G
ganz durch die offenen Leistungsschalter in der
ausfahrbaren Ausführung mit modernerer Bauart
vom Typ Emax 2 der gleichen Baugröße
auszutauschen, ohne irgendeine Änderung an
den aktiven Teilen der Schaltanlage vornehmen
zu müssen.
Die vollständige Übereinstimmung der
elektrischen Eigenschaften (Bemessungs-Strom
und Ausschaltvermögen) ist unter der
Voraussetzung gewährleistet,
1.Dass die Wahl in Konformität mit dem erfolgt,
was in den technischen Katalogen zu den
Produkten angegeben ist.
2.Dass der zu ersetzende Leistungsschalter
Envelope 3 in Übereinstimmung mit dem eigenen
Installationshandbuch installiert wird, d.h. dass
die Isolationsabstände gegen Masse, die
Dimensionierung der Anschlusssammelschienen,
die Positionierung der ersten Verankerungswand
wie vorgeschrieben installiert sind
WICHTIG
Die gestattet das Austauschen einer Anschlüsse
nunmehr obsoleten Schalt- und
Schutzeinrichtung, ohne die ursprünglichen
Projektdaten der vorhandenen Schaltanlage auf
irgendeine Weise ändern zu müssen.
Sollte der neue Leistungsschalter höhere
Typenschildwerte aufweisen, sind die
Anschlüsse auf die Leistungen der alten
Einrichtung auszulegen.
Überprüfen Sie die tatsächliche Größe der Zelle
vor dem Kauf.
Für die Abmessungen siehe dieses Handbuch.
Für weitere Erläuterungen wenden Sie sich bitte
an ABB.
Achtung Anweisungen, die sich lediglich auf den
Einbau die beziehen und nicht Anschlüsse
so zu verstehen sind, dass sie die Installations-,
Betriebs- und Wartungsanleitungen des neuen
Leistungsschalters Emax 2 ersetzen.
SICHERHEITSTECHNISCHE MASSNAHME
FÜR DIE ANLAGE
A) Um die Sicherheit des Personals zu
gewährleisten, das mit der Installation des
Nachrüstsatzes beauftragt ist, sind vor dem
Austausch des Leistungsschalters gewissenhaft
die folgenden Vorgänge durchzuführen:
-Die Schaltanlage, in der sich der
Leistungsschalter befindet, außer Betrieb
setzen.
- Den auszutauschenden Leistungsschalter in die
AUS-Stellung mit entspannten Federn bringen.
- Die Hilfsanwendungen abklemmen.
- Bevor man das Schaltgerät herauszieht, erneut
sicherstellen, dass der Stromverbraucher außer
Betrieb genommen ist.
B) Den alten Leistungsschalter ganz ausbauen
und die Schrauben zum Anschluss der Pole des
alten Leistungsschalters Entelliguard G
Sammelschienen der Schaltanlage aufbewahren.
Le présent kit prises est conçu pour la
reconfiguration totale de disjoncteurs ouverts
Entelliguard G Envelope 1, Envelope 2,
dans la version débrochable sur chariot de
conception plus moderne type Emax 2 de
même taille, sans devoir effectuer aucune
modification aux parties actives du tableau.
La correspondance totale des caractéristiques
électriques est garantie (courant nominal et
pouvoir de coupure) à condition que :
1.Le choix soit effectué conformément aux
catalogues techniques relatifs aux produits.
2.Le disjoncteur Entelliguard G Envelope 1,
installé conformément à son manuel d'installation,
en respectant les distances d'isolation vers la
masse, le dimensionnement des barres de
connexion, le positionnement du premier
diaphragme d'ancrage.
IMPORTANT
Ces prises permet le remplacement
d’un dispositif de commande et de
protection devenu obsolète mais de ne pas
altérer en aucune manière les données d’origine
de projet du tableau existant.
Si le nouveau disjoncteur devait avoir des
données de plaque supérieures, les kits
prises sont dimensionnés pour les
performances de l’ancien dispositif.
Vérifiez la taille réelle du compartiment avant
l'achat. Pour les dimensions voir ce manuel.
Pour plus d’informations veuillez contacter ABB.
Attention Ces instructions concernent
uniquement l’assemblage du kit prises,
elles ne remplacent en aucun cas celles du
manuel d’installation, utilisation et entretien du
nouveau disjoncteur Emax 2.
MISE EN SÉCURITÉ DE L’INSTALLATION
A) En garantie de la sécurité du personnel
préposé à la mise en place du kit, avant de
remplacer le disjoncteur il est recommandé
d’effectuer scrupuleusement les opérations
suivantes :
- Mettre hors service le tableau d’accueil ;
- Placer le disjoncteur à remplacer en position
ouvert et ressorts débandés ;
- Débrancher les applications auxiliaires;
- Avant d’extraire l’appareil contrôler de nouveau
que l’utilisation est hors service.
B) Démanteler entièrement l’ancien disjoncteur
en conservant les vis de connexion des pôles de
l’ancien disjoncteur Entelliguard G Envelope 1,
tableau.
El presente kit terminales, ha sido realizado
para la sustitución totajl de interruptores
Entelliguard G Envelope 1, Envelope 2,
ejecución extraíble de realización más moderna,
tipo Emax 2, del mismo tamaño, sin tener que
modificar ninguna parte activa del cuadro.
Está garantizada la total correspondencia entre
las características eléctricas (corriente asignada
y poder de corte):
1.Siempre que la selección se efectúe de
conformidad con lo expuesto en los catálogos
técnicos relativos a los productos
2.El interruptor Entelliguard G Envelope 1,
instalado de conformidad con el respectivo
manual de instalación, respetando las distancias
de aislamiento hacia la masa, el
dimensionamiento de las barras de conexión, la
colocación del primer tabique de fijación.
IMPORTANTE
Estos terminales permiten la
sustitución de un dispositivo de mando y
protección ya obsoleto sin alterar en ningún
modo los datos de proyecto originales del cuadro
existente.
Si el nuevo interruptor presentara características
nominales superiores, los kits terminales están
dimensionados para las prestaciones del viejo
dispositivo.
Verificar el tamaño real de la celda antes de la
compra. Para conocer las dimensiones véase
este manual.
Para ulteriores aclaraciones contactar ABB.
Atención Instrucciones relativas exclusivamente
al ensamblado del kit terminales. Estas
instruciones no sustituyen aquellas presentes en
el manual de instalación, uso y mantenimiento
del nuevo interruptor Emax 2.
PUESTA EN SEGURIDAD DE LA
INSTALACIÓN
A) Para garantizar la incolumnidad del personal
encargado de la instalación del kit, antes de
efectuar la sustitución del interruptor, se aconseja
respetar escrupulosamente los siguientes pasos:
- Poner fuera de servicio el cuadro que alojará el
interruptor
- Poner el interruptor a sustituir en posición de a
bierto y con los resortes sin carga
- Desconectar las aplicaciones auxiliares
- Antes de extraer el aparato, controlar
nuevamente la condición de fuera de servicio
del respectivo circuito
B) Desmantelar completamente el viejo
interruptor conservando los tornillos de conexión
de los polos del viejo interruptor Entelliguard G
Envelope 1, Envelope 2, Envelope 3 en las barras
Envelope 1, Envelope 2 und Envelope 3
Envelope 1, Envelope 2, Envelope 3
Envelope 3 par des disjoncteurs ouverts
Envelope 2, Envelope 3 au jeu de barres du
del quadro.
Entelliguard G Envelope 1, Envelope 2 und
Envelope 2, Envelope 3 à remplacer soit
Envelope 3 con interruptores abiertos en
Envelope 2, Envelope 3 a sustituir esté
L’utilisation de ces prises Emax 2 pour le
remplacement d’Entelliguard G n’a pas été
évaluée par UL
El uso de estos terminales Emax 2 para la
sustitución de Entelliguard G no fue evaluada
por UL
Dieses ermöglicht Anschlüsse
Die Verwendung dieser Emax 2 für Anschlüsse
den Austausch von Entelliguard G wurde von UL
nicht evaluiert.

(3)
III
M8X16 M6X20
14
1 24 2 2 2
III
M8X16 M6X20
14
148 2 2 2 6
RF Env1(N,H,P)-W 1600 VR 3p->E2.2(S,H,V)-A 1600
RF Env1(S)-W 1200 VR 3p->E2.2(S)-A 1200
1A 1B 2A 2B 104 106 105 109
1A 1B 2A 2B 101 102 103
III
M8x16 M6X20
14
140 2 4 2 2
1A 1B 2A 2B 112 113 110 111
RF Env1(N,H,P)-W 2000 VR 3p->E2.2(S,H,V)-A 2000
III
M8X16 M8X22
14
1 24 2 2 2
1A 1B 2A 2C 206 207 208
RF Env2(E,M)-W 1600 VR 3p->E4.2(H,V)-A 1600

(4)
III
M8X16 M8X22
14
1 24 2 2 2
1A 1B 2A 2C 201 202 203
RF Env2(E,M)-W 2000 VR 3p->E4.2(H,V)-A 2000
III
M8X16 M8X22
14
1 24 2 2 2
1A 1B 2A 2C 242 243 244
RF Env2(N,H,M)-W 2500 VR 3p->E4.2(S,H,V)-A 2500
III
M8X16
M8X22
16
196 2 2 2
1C 1D 2A 2C 303 304 305
RF Env2(N,E,M)-W 3200 VR 3p->E4.2(H,V)-A 3200
1 1
306 3071E
1 1 1
308 346 347
1
348
III
1
III
M8X22
14
1 24 1 1 1
1A 1B 2A 2C 210 211 212
1 1 1
214 215 216
3 3
301 302
RF Env3-W 5000 VR 3p->E6.2-A 5000
M8X16

(5)
RF Env1(S)-W 1200 VR 3p->E2.2-A 1200
TERMINALE INFERIORE
LOWER TERMINAL
UNTERE ANSCHLUSS
BORNE INFÉRIEUR
TERMINALES INFERIOR
TERMINALE SUPERIORE
UPPER TERMINAL
OBERE ANSCHLUSS
BORNE SUPÉRIEURE
TERMINALES SUPERIOR
8.5Nm(75 lb-in)
2B
8.5Nm(75 lb-in)
2B
- Installare i terminali sulla parte fissa
- Install the terminals on the fixed part
1
2B
101 102
103
2B
101 102
103
101 102
103
103 102
101
- Installieren Sie die Klemmen am Festes Teil
- Installer les prises sur la partie xe
- Instale los terminales a la parte ja

(6)
RF Env1(S)-W 1200 VR 3p->E2.2-A 1200
- Install the supports in the switchboard. Tighten the screws.
Riusare viteria esistente
Use the existing screws and bolts again
Die vorhandenen Schraubteile wiederbenutzen
Réutiliser la boulonnerie existante
Reutilzar la tornilleria existente
20.5 Nm (181 lb-in)
2A
RF Env1(S)-W 1200 VR 3p->E2.2-A 1200
2
3
4
- Fori di ssaggio interruttore Entelliguard G al quadro.
1A
1B
2A
Riusare viteria esistente
Use the existing screws and bolts again
Die vorhandenen Schraubteile wiederbenutzen
Réutiliser la boulonnerie existante
Reutilzar la tornilleria existente
- Installare i supporti nel quadro. Stringere le viti.
- Installieren Sie die Stützen in die Schaltanlage.
Ziehen Sie die Schrauben an.
- Installez les supports dans le tableau. Serrez les vis.
- Instale los soportes en el cuadro. Apretar los tornillos.
- Install the xed part in the switchboard. Tighten the screws.
- Installare la parte ssa nel quadro. Stringere le viti.
- Installieren Sie die Festes Teil in die Schaltanlage.
Ziehen Sie die Schrauben an.
- Installez la partie xe dans le tableau. Serrez les vis.
- Instale la parte ja en el cuadro. Apretar los tornillos.
- Fixing holes of Entelliguard G breaker to the switchboard.
- Trous de xation disjoncteur Intelliguard G dans le tableau.
- Agujeros de jación interruptor Entelliguard G en el cuadro.

RF Env1(N,H,P)-W 1600 VR 3p->E2.2-A 1600
- Installare le piastre di adattamento sull’interruttore.
8.5Nm(75 lb-in)
2B
(7)
TERMINALE INFERIORE
LOWER TERMINAL
UNTERE ANSCHLUSS
BORNE INFÉRIEUR
TERMINALES INFERIOR
TERMINALE SUPERIORE
UPPER TERMINAL
OBERE ANSCHLUSS
BORNE SUPÉRIEURE
TERMINALES SUPERIOR
8.5Nm(75 lb-in)
2B
8.5Nm(75 lb-in)
2B
6
RF Env1(N,H,P)-W 1600 VR 3p->E2.2-A 1600
5
2B
2B
105 106
104
105
106
104
2B
109
109
109
109
109
109
- Install the Adapter plates to the breaker.
- Installieren Sie die Adapterplatten am Leistungsschalter.
- Installer les plaques d’adaptateur sur le disjoncteur
- Instale las placas adaptadoras en el interruptor.
- Installare i terminali sulla parte fissa
- Install the terminals on the fixed part
- Installieren Sie die Klemmen am Festes Teil
- Installer les prises sur la partie xe
- Instale los terminales a la parte ja

(8)
Riusare viteria esistente
Use the existing screws and bolts again
Die vorhandenen Schraubteile wiederbenutzen
Réutiliser la boulonnerie existante
Reutilzar la tornilleria existente
20.5 Nm (181 lb-in)
2A
7
8
9
RF Env1(N,H,P)-W 1600 VR 3p->E2.2-A 1600
1A
1B
2A
- Install the supports in the switchboard. Tighten the screws.
- Installare i supporti nel quadro. Stringere le viti.
- Installieren Sie die Stützen in die Schaltanlage.
Ziehen Sie die Schrauben an.
- Installez les supports dans le tableau. Serrez les vis.
- Instale los soportes en el cuadro. Apretar los tornillos.
Riusare viteria esistente
Use the existing screws and bolts again
Die vorhandenen Schraubteile wiederbenutzen
Réutiliser la boulonnerie existante
Reutilzar la tornilleria existente
- Fori di ssaggio interruttore Entelliguard G al quadro.
- Fixing holes of Entelliguard G breaker to the switchboard.
- Trous de xation disjoncteur Intelliguard G dans le tableau.
- Agujeros de jación interruptor Entelliguard G en el cuadro.
- Install the xed part in the switchboard. Tighten the screws.
- Installare la parte ssa nel quadro. Stringere le viti.
- Installieren Sie die Festes Teil in die Schaltanlage.
Ziehen Sie die Schrauben an.
- Installez la partie xe dans le tableau. Serrez les vis.
- Instale la parte ja en el cuadro. Apretar los tornillos.

(9)
8.5Nm (75 lb-in)
2B
TERMINALE INFERIORE
LOWER TERMINAL
UNTERE ANSCHLUSS
BORNE INFÉRIEUR
TERMINALES INFERIOR
TERMINALE SUPERIORE
UPPER TERMINAL
OBERE ANSCHLUSS
BORNE SUPÉRIEURE
TERMINALES SUPERIOR
8.5Nm (75 lb-In)
2B
11
10
8.5Nm (75 lb-in)
2B
2B
2B
113
112
113
2B
111
111
110
110
RF Env1(N,H,P)-W 2000 VR 3p->E2.2-A 2000
113
112
113
- Installare le piastre di adattamento sull’interruttore.
- Install the Adapter plates to the breaker.
- Installieren Sie die Adapterplatten am Leistungsschalter.
- Installer les plaques d’adaptateur sur le disjoncteur
- Instale las placas adaptadoras en el interruptor.
- Installare i terminali sulla parte fissa
- Install the terminals on the fixed part
- Installieren Sie die Klemmen am Festes Teil
- Installer les prises sur la partie xe
- Instale los terminales a la parte ja

(10)
Riusare viteria esistente
Use the existing screws and bolts again
Die vorhandenen Schraubteile wiederbenutzen
Réutiliser la boulonnerie existante
Reutilzar la tornilleria existente
12
13
14
RF Env1(N,H,P)-W 2000 VR 3p->E2.2-A 2000
1A
1B
20.5 Nm (181 lb-in)
2A
2A
RF Env1(N,H,P)-W 2000 VR 3p->E2.2-A 2000
- Install the supports in the switchboard. Tighten the screws.
- Installare i supporti nel quadro. Stringere le viti.
- Installieren Sie die Stützen in die Schaltanlage.
Ziehen Sie die Schrauben an.
- Installez les supports dans le tableau. Serrez les vis.
- Instale los soportes en el cuadro. Apretar los tornillos.
- Fori di ssaggio interruttore Entelliguard G al quadro.
- Fixing holes of Entelliguard G breaker to the switchboard.
- Trous de xation disjoncteur Intelliguard G dans le tableau.
- Agujeros de jación interruptor Entelliguard G en el cuadro.
Riusare viteria esistente
Use the existing screws and bolts again
Die vorhandenen Schraubteile wiederbenutzen
Réutiliser la boulonnerie existante
Reutilzar la tornilleria existente
- Install the xed part in the switchboard. Tighten the screws.
- Installare la parte ssa nel quadro. Stringere le viti.
- Installieren Sie die Festes Teil in die Schaltanlage.
Ziehen Sie die Schrauben an.
- Installez la partie xe dans le tableau. Serrez les vis.
- Instale la parte ja en el cuadro. Apretar los tornillos.

(11)
RF Env2(E,M)-W 1600 VR 3p->E4.2-A 1600
TERMINALE INFERIORE
LOWER TERMINAL
UNTERE ANSCHLUSS
BORNE INFÉRIEUR
TERMINALES INFERIOR
TERMINALE SUPERIORE
UPPER TERMINAL
OBERE ANSCHLUSS
BORNE SUPÉRIEURE
TERMINALES SUPERIOR
15
20.5Nm(181 lb-in)
2B
2C
206
207
208
206
207
208
20.5Nm(181 lb-in)
2B
2C
- Installare i terminali sulla parte fissa
- Install the terminals on the fixed part
- Installieren Sie die Klemmen am Festes Teil
- Installer les prises sur la partie xe
- Instale los terminales a la parte ja

(12)
Riusare viteria esistente
Use the existing screws and bolts again
Die vorhandenen Schraubteile wiederbenutzen
Réutiliser la boulonnerie existante
Reutilzar la tornilleria existente
16
17
18
RF Env2(E,M)-W 1600 VR 3p->E4.2-A 1600
1A
1B
RF Env2(E,M)-W 1600 VR 3p->E4.2-A 1600
20.5 Nm (181 lb-in)
2A
2A
- Install the xed part in the switchboard. Tighten the screws.
- Installare la parte ssa nel quadro. Stringere le viti.
- Installieren Sie die Festes Teil in die Schaltanlage.
Ziehen Sie die Schrauben an.
- Installez la partie xe dans le tableau. Serrez les vis.
- Instale la parte ja en el cuadro. Apretar los tornillos.
- Install the supports in the switchboard. Tighten the screws.
- Installare i supporti nel quadro. Stringere le viti.
- Installieren Sie die Stützen in die Schaltanlage.
Ziehen Sie die Schrauben an.
- Installez les supports dans le tableau. Serrez les vis.
- Instale los soportes en el cuadro. Apretar los tornillos.
Riusare viteria esistente
Use the existing screws and bolts again
Die vorhandenen Schraubteile wiederbenutzen
Réutiliser la boulonnerie existante
Reutilzar la tornilleria existente
- Fori di ssaggio interruttore Entelliguard G al quadro.
- Fixing holes of Entelliguard G breaker to the switchboard.
- Trous de xation disjoncteur Intelliguard G dans le tableau.
- Agujeros de jación interruptor Entelliguard G en el cuadro.

(13)
RF Env2(E,M)-W 2000 VR 3p->E4.2-A 2000
TERMINALE INFERIORE
LOWER TERMINAL
UNTERE ANSCHLUSS
BORNE INFÉRIEUR
TERMINALES INFERIOR
TERMINALE SUPERIORE
UPPER TERMINAL
OBERE ANSCHLUSS
BORNE SUPÉRIEURE
TERMINALES SUPERIOR
1
201 202
203
201 202 203
9
20.5Nm(181 lb-in)
2B
2C
20.5Nm(181 lb-in)
2B
2C
- Installare i terminali sulla parte fissa
- Install the terminals on the fixed part
- Installieren Sie die Klemmen am Festes Teil
- Installer les prises sur la partie xe
- Instale los terminales a la parte ja

(14)
Riusare viteria esistente
Use the existing screws and bolts again
Die vorhandenen Schraubteile wiederbenutzen
Réutiliser la boulonnerie existante
Reutilzar la tornilleria existente
20
21
22
1A
1B
RF Env2(E,M)-W 2000 VR 3p->E4.2-A 2000
20.5 Nm (181 lb-in)
2A
2A
- Install the xed part in the switchboard. Tighten the screws.
- Installare la parte ssa nel quadro. Stringere le viti.
- Installieren Sie die Festes Teil in die Schaltanlage.
Ziehen Sie die Schrauben an.
- Installez la partie xe dans le tableau. Serrez les vis.
- Instale la parte ja en el cuadro. Apretar los tornillos.
- Install the supports in the switchboard. Tighten the screws.
- Installare i supporti nel quadro. Stringere le viti.
- Installieren Sie die Stützen in die Schaltanlage.
Ziehen Sie die Schrauben an.
- Installez les supports dans le tableau. Serrez les vis.
- Instale los soportes en el cuadro. Apretar los tornillos.
Riusare viteria esistente
Use the existing screws and bolts again
Die vorhandenen Schraubteile wiederbenutzen
Réutiliser la boulonnerie existante
Reutilzar la tornilleria existente
- Fori di ssaggio interruttore Entelliguard G al quadro.
- Fixing holes of Entelliguard G breaker to the switchboard.
- Trous de xation disjoncteur Intelliguard G dans le tableau.
- Agujeros de jación interruptor Entelliguard G en el cuadro.

(15)
RF Env2(N,H,M)-W 2500 VR 3p->E4.2-A 2500
TERMINALE INFERIORE
LOWER TERMINAL
UNTERE ANSCHLUSS
BORNE INFÉRIEUR
TERMINALES INFERIOR
TERMINALE SUPERIORE
UPPER TERMINAL
OBERE ANSCHLUSS
BORNE SUPÉRIEURE
TERMINALES SUPERIOR
23
242
243
244
242 243
244
20.5Nm(181 lb-in)
2B
2C
24
20.5Nm(181 lb-in)
2B
2C
- Rimuovere le fascette autobloccanti e i distanziatori.
- Remove self locking strip and Spacers.
- Entfernen Sie den Sicherungsstreifen und die Distanzstücke.
- Enlevez la bande autobloquante et les entretoises.
- Retire la tira autoblocante y los espaciadores.
- Installare i terminali sulla parte fissa
- Install the terminals on the fixed part
- Installieren Sie die Klemmen am Festes Teil
- Installer les prises sur la partie xe
- Instale los terminales a la parte ja

(16)
Riusare viteria esistente
Use the existing screws and bolts again
Die vorhandenen Schraubteile wiederbenutzen
Réutiliser la boulonnerie existante
Reutilzar la tornilleria existente
25
26
27
1A
1B
20.5 Nm (181 lb-in)
2A
2A
RF Env2(N,H,M)-W 2500 VR 3p->E4.2-A 2500
- Install the xed part in the switchboard. Tighten the screws.
- Installare la parte ssa nel quadro. Stringere le viti.
- Installieren Sie die Festes Teil in die Schaltanlage.
Ziehen Sie die Schrauben an.
- Installez la partie xe dans le tableau. Serrez les vis.
- Instale la parte ja en el cuadro. Apretar los tornillos.
- Install the supports in the switchboard. Tighten the screws.
- Installare i supporti nel quadro. Stringere le viti.
- Installieren Sie die Stützen in die Schaltanlage.
Ziehen Sie die Schrauben an.
- Installez les supports dans le tableau. Serrez les vis.
- Instale los soportes en el cuadro. Apretar los tornillos.
- Fori di ssaggio interruttore Entelliguard G al quadro.
- Fixing holes of Entelliguard G breaker to the switchboard.
- Trous de xation disjoncteur Intelliguard G dans le tableau.
- Agujeros de jación interruptor Entelliguard G en el cuadro.
Riusare viteria esistente
Use the existing screws and bolts again
Die vorhandenen Schraubteile wiederbenutzen
Réutiliser la boulonnerie existante
Reutilzar la tornilleria existente

(17)
RF Env2(N,E,M)-W 3200 VR 3p->E4.2-A 3200
TERMINALE INFERIORE
LOWER TERMINAL
UNTERE ANSCHLUSS
BORNE INFÉRIEUR
TERMINALES INFERIOR
TERMINALE SUPERIORE
UPPER TERMINAL
OBERE ANSCHLUSS
BORNE SUPÉRIEURE
TERMINALES SUPERIOR
28
210 211
212
214 215
216
20.5Nm(181 lb-in)
2B
2C
29 RF Env2(N,E,M)-W 3200 VR 3p->E4.2-A 3200
20.5Nm(181 lb-in)
2B
2C
- Rimuovere le fascette autobloccanti e i distanziatori.
- Remove self locking strip and Spacers.
- Entfernen Sie den Sicherungsstreifen und die Distanzstücke.
- Enlevez la bande autobloquante et les entretoises.
- Retire la tira autoblocante y los espaciadores.
- Installare i terminali sulla parte fissa
- Install the terminals on the fixed part
- Installieren Sie die Klemmen am Festes Teil
- Installer les prises sur la partie xe
- Instale los terminales a la parte ja

(18)
Riusare viteria esistente
Use the existing screws and bolts again
Die vorhandenen Schraubteile wiederbenutzen
Réutiliser la boulonnerie existante
Reutilzar la tornilleria existente
30
31
32
1A
1B
20.5 Nm (181 lb-in)
2A
2A
RF Env2(N,E,M)-W 3200 VR 3p->E4.2-A 3200
- Install the xed part in the switchboard. Tighten the screws.
- Installare la parte ssa nel quadro. Stringere le viti.
- Installieren Sie die Festes Teil in die Schaltanlage.
Ziehen Sie die Schrauben an.
- Installez la partie xe dans le tableau. Serrez les vis.
- Instale la parte ja en el cuadro. Apretar los tornillos.
- Install the supports in the switchboard. Tighten the screws.
- Installare i supporti nel quadro. Stringere le viti.
- Installieren Sie die Stützen in die Schaltanlage.
Ziehen Sie die Schrauben an.
- Installez les supports dans le tableau. Serrez les vis.
- Instale los soportes en el cuadro. Apretar los tornillos. Riusare viteria esistente
Use the existing screws and bolts again
Die vorhandenen Schraubteile wiederbenutzen
Réutiliser la boulonnerie existante
Reutilzar la tornilleria existente
- Fori di ssaggio interruttore Entelliguard G al quadro.
- Fixing holes of Entelliguard G breaker to the switchboard.
- Trous de xation disjoncteur Intelliguard G dans le tableau.
- Agujeros de jación interruptor Entelliguard G en el cuadro.

(19)
TERMINALE INFERIORE
LOWER TERMINAL
UNTERE ANSCHLUSS
BORNE INFÉRIEUR
TERMINALES INFERIOR
TERMINALE SUPERIORE
UPPER TERMINAL
OBERE ANSCHLUSS
BORNE SUPÉRIEURE
TERMINALES SUPERIOR
34
20.5Nm(181 lb-in)
2B
2C
210
304
304
RF Env3-W 5000 VR 3p->E6.2-A 5000
33
20.5Nm(181 lb-in)
2B
2C
303
305
305
301
301
301
302
302
302
303
307 308
306
347
348
346
20.5Nm(181 lb-in)
2B
2C
- Installare le piastre di adattamento sull’interruttore.
- Install the Adapter plates to the breaker.
- Installieren Sie die Adapterplatten am Leistungsschalter.
- Installer les plaques d’adaptateur sur le disjoncteur
- Instale las placas adaptadoras en el interruptor.
- Installare i terminali sulla parte fissa
- Install the terminals on the fixed part
- Installieren Sie die Klemmen am Festes Teil
- Installer les prises sur la partie xe
- Instale los terminales a la parte ja

(20)
Riusare viteria esistente
Use the existing screws and bolts again
Die vorhandenen Schraubteile wiederbenutzen
Réutiliser la boulonnerie existante
Reutilzar la tornilleria existente
35
36
37
1C
1E
20.5 Nm (181 lb-in)
2A
2A
RF Env3-W 5000 VR 3p->E6.2-A 5000
1D
- Install the xed part in the switchboard. Tighten the screws.
- Installare la parte ssa nel quadro. Stringere le viti.
- Installieren Sie die Festes Teil in die Schaltanlage.
Ziehen Sie die Schrauben an.
- Installez la partie xe dans le tableau. Serrez les vis.
- Instale la parte ja en el cuadro. Apretar los tornillos.
- Install the supports in the switchboard. Tighten the screws.
- Installare i supporti nel quadro. Stringere le viti.
- Installieren Sie die Stützen in die Schaltanlage.
Ziehen Sie die Schrauben an.
- Installez les supports dans le tableau. Serrez les vis.
- Instale los soportes en el cuadro. Apretar los tornillos.
- Fori di ssaggio interruttore Entelliguard G al quadro.
- Fixing holes of Entelliguard G breaker to the switchboard.
- Trous de xation disjoncteur Intelliguard G dans le tableau.
- Agujeros de jación interruptor Entelliguard G en el cuadro.
Other manuals for SACE Emax 2
46
Other ABB Circuit Breaker manuals

ABB
ABB HD4/R User manual

ABB
ABB SACE Emax 2 User manual

ABB
ABB SACE Emax 2 User manual

ABB
ABB SACE Emax 2 User manual

ABB
ABB SACE Emax 2 E2.2 Installation instructions

ABB
ABB XT7 User manual

ABB
ABB SACE Emax 2 - Tmax XT User manual

ABB
ABB AKD6-800A User manual

ABB
ABB Emax Series User manual

ABB
ABB RELION 650 SERIES Instructions for use
Popular Circuit Breaker manuals by other brands

Doepke
Doepke DFS F Audio Series Installation and operating instructions

Vertical Power
Vertical Power VP-X Pro Installation and operating manual

Noark
Noark PNF-MM 24W Mounting instruction

Eaton
Eaton RMQ-Titan M22-XLED Series Instruction leaflet

Eaton
Eaton JDB installation instructions

Siemens
Siemens 3VL9400-8LC00 operating instructions