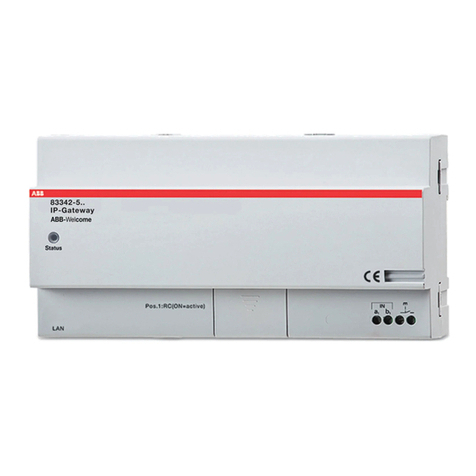
ABB Welcome IP H8301 User manual

Pos: 2 /CNDEX/00 Title/00_Title -- H83 01 @ 63\mod_150060910538 7_0.docx @ 800997 @ @ 1
2TMD041700D0046 │01.08.2017
Operating Instructions
ABB-Welcome IP
IP gateway
H8301
===Ende der Liste für Textmarke Titel ===

Table of contents
Operating Instructions VER:1.0 │2
Pos: 4 /DinA-4 -- Online -- standard c ontent/TOC/TOC -- international -4 heading levels @ 57\m od_1488436026244_15.doc x@ 7542 87 @ @1
Table of c ontents
1Notes on the instruction manual.................................................................................................................. 4
2Safety ..........................................................................................................................................................4
3Intended use................................................................................................................................................ 4
4Environment ................................................................................................................................................ 5
4.1 ABB devices..................................................................................................................................... 5
5Product description...................................................................................................................................... 6
5.1 Control elements..............................................................................................................................6
5.2 Feature............................................................................................................................................. 7
6Technical data.............................................................................................................................................8
7Mounting/Installation....................................................................................................................................9
7.1 Requirement for the electrician........................................................................................................9
7.2 Mounting ........................................................................................................................................ 10
7.2.1 Product dimension..........................................................................................................................10
7.2.2 Mounting.........................................................................................................................................10
7.2.3 Dismantling.....................................................................................................................................10
8Commissioning..........................................................................................................................................11
8.1 Overview........................................................................................................................................11
8.2 Commissioning with the Windows UPnP service........................................................................... 12
8.3 Commissioning with IP address.....................................................................................................13
8.3.1 Getting the IP address from the router...........................................................................................13
8.3.2 Getting the IP address from the indoor station ..............................................................................16
8.3.3 Logging into IP gateway with the IP address.................................................................................17
8.4 Resetting the IP gateway to the factory default setting..................................................................18
9Operation................................................................................................................................................... 19
9.1 Language.......................................................................................................................................19
9.2 Network configuration ....................................................................................................................20
9.3 Basic setting................................................................................................................................... 21
9.4 Modify password............................................................................................................................ 22
9.5 Network information ....................................................................................................................... 23
9.6 Device settings............................................................................................................................... 24
9.7 User management.......................................................................................................................... 25
9.7.1 Add standard user..........................................................................................................................25
9.7.2 Access for standard user................................................................................................................26
9.7.3 Quick configuration for standard user with APP ............................................................................27
9.8 KNX setting.................................................................................................................................... 29
9.9 Import/Export configuration............................................................................................................30
9.9.1 Firmware update.............................................................................................................................31
9.10 Generate certification file ............................................................................................................... 32
9.11 Version information........................................................................................................................ 33
Table of contents
Operating Instructions VER:1.0 │3
Notice.................................................................................................................................................................34
=== Ende der List e für Textmarke Inhalt sverzeichnis ===

Notes on the instruction manual
Operating Instructions VER:1.0 │4
Pos: 7 /CNDEX/01 Heading/1. Head ing/Heading_Notes on the instru ction manual @ 56\mod_148756 7267846_15.docx @ 747508 @ 1 @ 1
1Notes on the instruction manual
Pos: 8 /CNDEX/00 Warning/Txt _Notes on the instruction manual @ 62\m od_1496802824525_15.d ocx @ 786157 @ @ 1
Please read through this manual carefully and observe the information it contains. This will
assist you in preventing injuries and damage to property, and ensure both reliable operation and
a long service life for the device.
Please keep this manual in a safe place.
If you pass the device on, also pass on this manual along with it.
ABB accepts no liability for any failure to observe the instructions in this manual.
Pos: 10 /CNDEX/01 Heading/1. H eading/Heading_Safety @ 56\m od_1487743565314_15.doc x @ 749894 @ 1 @ 1
2Safety
Pos: 11 /CNDEX/00 Warning/W arning_Electric voltage_Dan gerous currents @ 56\mod_148774 1007782_15.docx @ 749637 @ @ 1
Warning
Electric voltage!
Dangerous currents flow through the body when coming into direct or indirect
contact with live components.
This can result in electric shock, burns or even death.
– Disconnect the mains power supply prior to installation and/or disassembly!
– Permit work on the 110-240 V supply system to be performed only by
specialist staff!
Pos: 12 /CNDEX/01 Heading/1. Heading/H eading_Intended use @ 56\mod_1487 743332845_15.docx @ 7498 31 @ 1@ 1
3Intended use
Pos: 13 /CNDEX/02 Intended use/I ntended use_H8301_IP gat eway @ 62\mod_1497055014421_15. docx @ 788589 @ @1
This device is used for door communication and video transmission. It makes communication
possible between the ABB-Welcome IP door communication and the local IP network.
Pos: 14 /CNDEX/99 Auxiliary tools/+++ +++++++++++ p agebr eak +++++++++++++++ @ 57\mod_148 7814735946_0.docx @ 750979 @ @ 1

Environment
Operating Instructions VER:1.0 │5
Pos: 16 /CNDEX/01 Heading/1. H eading/Heading_Environm ent @ 62\mod_1496803173718 _15.docx @ 786200 @ 1 @ 1
4Environment
Pos: 17 /CNDEX/00 Warning/Not e_Environment @ 62\mod_149 6803082333_15.docx @ 786178 @ @ 1 Consider the protection of the environment!
Used electric and electronic devices must not be disposed of with household
waste.
– The device contains valuable raw materials that can be recycled. Therefore,
dispose of the device at the appropriate collecting facility.
Pos: 18 /CNDEX/01 Heading/1. 1 Heading/Heading_ABB devic es @ 62\mod_1496803248336_15. docx @ 786222 @ 2 @ 1
4.1 ABB devices
Pos: 19 /CNDEX/00 Warning/T xt_ABB devices_Environment @ 56\mod_148 7743585555_15.docx @ 74991 5 @12 @ 1
All packaging materials and devices from ABB bear the markings and test seals for proper
disposal. Always dispose of the packing materials and electric devices and their components via
an authorized collection facility or disposal company.
ABB products meet the legal requirements, in particular the laws governing electronic and
electrical devices and the REACH ordinance.
(EU-Directive 2002/96/EG WEEE and 2002/95/EG RoHS)
(EU-REACH ordinance and law for the implementation of the ordinance (EG) No.1907/2006)
Pos: 20 /CNDEX/99 Auxiliary tools/+++ +++++++++++ p agebr eak +++++++++++++++ @ 57\mod_148 7814735946_0.docx @ 750979 @ @ 1

Product description
Operating Instructions VER:1.0 │6
Pos: 22 /CNDEX/01 Heading/1. Heading/H eading_Product description @ 56\m od_1487644182664_15.d ocx @ 747986 @ 1 @ 1
5Product description
Pos: 23 /CNDEX/01 Heading/ 1.1 Heading/Heading_Cont rol elements @ 56\mod_14 87747434664_15.docx @ 75003 0 @ 2 @ 1
5.1 Control elements
Pos: 24 /CNDEX/03 Control elements/ Control elements_H8301_IP g ateway @ 62\mod_149705521849 9_15.docx @ 788609 @ @1
Fig. 1: Control elements
No. Function
1LAN port
Link to a router or switch
2Uplink port
Link to outdoor ABB-welcome IP system
3DC+, GND
Power supply interface
4Reset button
When the device is powered on, hold this button for more than 3 s to enter the factory
reset mode within 30 s.
5
Status indicator
When the device is powered on and the connection of the indoor station is detected,
the LED indicator blinks.
After entering the factory reset mode, the indicator lights up for 3 s and then goes out.
Tab.1: Description
Pos: 25 /CNDEX/99 Auxiliary tools/+++ +++++++++++ p agebr eak +++++++++++++++ @ 57\mod_148 7814735946_0.docx @ 750979 @ @ 1
1
2
3
4
5

Product description
Operating Instructions VER:1.0 │7
Pos: 26 /CNDEX/01 Heading/1. 1H eading/Heading_Feature @ 56\mod _1487747498194_15.doc x@ 75 0051 @ 2 @ 1
5.2 Feature
Pos: 27 /CNDEX/04 Feature/Feature_H8301_IP g ateway @ 62\mod_149705608043 1_15.docx @ 788629 @ @1
■Standard MDRC device
■1 LED indicator
■Dual LAN port to isolate private devices from public device
■Support Welcome APP connected (Android and iOS)
■Support multiple indoor station(s) in one apartment
Pos: 28 /CNDEX/99 Auxiliary tools/+++ +++++++++++ p agebr eak +++++++++++++++ @ 57\mod_148 7814735946_0.docx @ 750979 @ @ 1

Technical data
Operating Instructions VER:1.0 │8
Pos: 30 /CNDEX/01 Headin g/1. Heading/Heading_T echnical data @ 56\mod_1 487744734167_15.docx @ 749958 @ 1 @ 1
6Technical data
Pos: 31 /CNDEX/06 Technical dat a/Technical data_H8301_IP gat eway @ 62\mod_1497057743426 _15.docx @ 788650 @ @1
Designation Value
Operating voltage 27 VDC
Standby current ≤100 mA
Operating current ≤100 mA
Dimension 107 mm x 89.6 mm x 64.5 mm
Temperature -25
℃
- +70
℃
Humidity ≤93% RH,non-condensing
Protection IP 31
Tab.2: Technical data
Pos: 32 /CNDEX/99 Auxiliary tools/+++ +++++++++++ p age break +++++++++++++++ @ 57\mod_1 487814735946_0.docx @ 750979 @ @ 1

Mounting/Installation
Operating Instructions VER:1.0 │9
Pos: 34 /CNDEX/01 Heading/1. H eading/Heading_Mounting/ Installation @ 56\mod_14877433 69641_15.docx @ 749852 @ 1 @ 1
7Mounting/Installation
Pos: 35 /CNDEX/00 Warning/W arning_Electric voltage_Dan gerous currents @ 56\mod_148774 1007782_15.docx @ 749637 @ @ 1
Warning
Electric voltage!
Dangerous currents flow through the body when coming into direct or indirect
contact with live components.
This can result in electric shock, burns or even death.
– Disconnect the mains power supply prior to installation and/or disassembly!
– Permit work on the 110-240 V supply system to be performed only by
specialist staff!
Pos: 36 /CNDEX/01 Heading/1. 1H eading/Heading_Requirem ent for electrician @ 56\mod_148774 3099110_15.docx @ 749789 @ 2 @ 1
7.1 Requirement for the electrician
Pos: 37 /CNDEX/00 Warning/W arning_Electric voltage_Inst all the device @ 56\mod_14877432055 78_15.docx @ 749810 @ @ 1
Warning
Electric voltage!
Install the device only if you have the necessary electrical engineering
knowledge and experience.
– Incorrect installation endangers your life and that of the user of the electrical
system.
– Incorrect installation can cause serious damage to property, e.g. due to fire.
The minimum necessary expert knowledge and requirements for the installation
are as follows:
– Apply the "five safety rules" (DIN VDE 0105, EN 50110):
1. Disconnect
2. Secure against being re-connected
3. Ensure there is no voltage
4. Connect to earth and short-circuit
5. Cover or barricade adjacent live parts.
– Use suitable personal protective clothing.
– Use only suitable tools and measuring devices.
– Check the type of supply network (TN system, IT system, TT system) to
secure the following power supply conditions (classic connection to ground,
protective grounding, necessary additional measures, etc.).
Pos: 38 /CNDEX/99 Auxiliary tools/+++ +++++++++++ p agebr eak +++++++++++++++ @ 57\mod_148 7814735946_0.docx @ 750979 @ @ 1

Mounting/Installation
Operating Instructions VER:1.0 │10
Pos: 39 /CNDEX/01 Heading/1. 1 Heading/Heading_Mounti ng @ 56\mod_1487742836665_15. docx @ 749745 @ 2 @ 1
7.2 Mounting
Pos: 40 /CNDEX/01 Heading/ 1.1.1 Heading/Heading_Pr oduct dimension @ 57\m od_1488956657809_15.d ocx @ 759837 @ 3 @ 1
7.2.1 Product dimension
Pos: 41 /CNDEX/07 Mounting/Installation/Pr oduct dimension_H8301_IP gat eway@ 63\ mod_1499755002049_15. docx @ 798107 @ @ 1
Fig. 2: Product dimension
Pos: 42 /CNDEX/01 Heading/ 1.1.1 Heading/Heading_ Mounting @ 62\mod_1497058 778845_15.docx @ 788710 @ 3 @ 1
7.2.2 Mounting
Pos: 43 /CNDEX/07 Mounting/Installation/Mou nting_H8301_IP gateway @ 63\m od_1499755194530_15.doc x @ 798127 @ @ 1
Fig. 3: Mounting
Pos: 44 /CNDEX/01 Heading/ 1.1.1 Heading/Heading_ Dismantling @ 57\mod_14878 16885447_15.docx @ 75104 8 @ 3 @ 1
7.2.3 Dismantling
Pos: 45 /CNDEX/07 Mounting/Installation/D ismantling_H8301_IP gateway @ 6 3\mod_1499755277754_15. docx @ 798147 @ @ 1
Fig. 4: Dismantling
Pos: 46 /CNDEX/99 Auxiliary t ools/++++++++++++++ page break ++++++++++++++ + @ 57\mod_1487814735946_0. docx @ 750979 @ @1
64.5 mm
89.6 mm
107 mm

Commissioning
Operating Instructions VER:1.0 │11
Pos: 48 /CNDEX/01 Heading/1. Heading/H eading_Commissioning @ 57\m od_1487828936105_15.doc x@ 751 257 @ 1 @ 1
8Commissioning
Pos: 49 /CNDEX/01 Heading/1. 1 Heading/Heading_Overview @ 62\m od_1497060309863_15.docx @ 78 8751 @ 2 @ 1
8.1 Overview
Pos: 50 /CNDEX/08 Commissionin g/Overview of commissioning_ H8301_IP gateway @ 62\mod_149706 0380247_15.docx @ 788772 @ @ 1
The IP gateway has a user interface that can be reached via an Internet browser. The user
interface can be opened from every computer that is part of the same network as the gateway
that is to be configured.
For the initial startup of the IP gateway a few basic settings need to be made in this user
interface.
2 options are available to you for commissioning:
Commissioning Description
Version 1 - UPnP Commissioning with the Windows UPnP service
Version 2 - IP address Enter IP address directly
Tab.3: Overview of commissioning
Information regarding documentation
The Windows 7 interface is used to describe the configuration options.
Pos: 51 /CNDEX/99 Auxiliary tools/+++ +++++++++++ p agebr eak +++++++++++++++ @ 57\mod_148 7814735946_0.docx @ 750979 @ @ 1

Commissioning
Operating Instructions VER:1.0 │12
Pos: 52 /CNDEX/01 Heading/1. 1H eading/Heading_Commission ing with the Windows UPnP service @ 62\m od_1497060717381_15.docx @ 78 8792 @ 2@ 1
8.2 Commissioning with the Windows UPnP service
Pos: 53 /CNDEX/08 Commissi oning/Commissioning with t heW indows UPnP service_H8301_I P gateway @ 62\mod_149742005 7223_15.docx @ 791237 @ @ 1
Preconditions:
■There is a DHCP server on the network, e.g. integrated in the router.
■The IP gateway is connected to the router by a LAN cable.
■The PC is connected to the network.
■The IP gateway is connected and ready for operation.
Operations:
■Open Windows Explorer.
■Click the "Network" entry below the displayed drives. The window on the right now displays
all devices currently on the network.
■Double-click the IP gateway icon. A browser window with the configuration interface
automatically opens.
Fig. 5: Commissioning with Windows UPnP service
Note
If the browser does not open automatically, the device properties appear
instead. Copy the displayed IP address, e.g. 192.168.1.101, and enter it
manually into the browser's address bar.
If the IP gateway icon can’t be found, you can check the Windows firewall. For
example, turn off the Windows firewall. If you still can’t find the IP gateway icon,
you can go to version 2.
Pos: 54 /CNDEX/99 Auxiliary tools/+++ +++++++++++ p agebr eak +++++++++++++++ @ 57\mod_148 7814735946_0.docx @ 750979 @ @ 1

Commissioning
Operating Instructions VER:1.0 │13
Pos: 55 /CNDEX/01 Heading/1. 1 Heading/Heading_Comm issioning with IP address @ 62\mod_1497 420163254_15.docx @ 79125 7 @2 @ 1
8.3 Commissioning with IP address
Pos: 56 /CNDEX/01 Heading/1. 1.1 Heading/Heading_Getting I P address from the router @ 62\mod_149 7488712220_15.docx @ 791 337 @ 3 @ 1
8.3.1 Getting the IP address from the router
Pos: 57 /CNDEX/08 Commissionin g/Get IP address from the router_H83 01_IP gateway @ 62\mod_14974887 80431_15.docx @ 791358 @ @ 1
Preconditions:
■There is a DHCP server on the network, e.g. integrated in the router.
■The IP gateway is connected to the router by a LAN cable.
■The PC is connected to the router by a LAN cable
■The IP gateway is ready for operation.
Operations:
■Open "Control Panel", select "Network and sharing center".
■Click on "Change adapter settings"
Fig. 6: Change adapter settings

Commissioning
Operating Instructions VER:1.0 │14
■Double click the network connection icon to enter the "Network Connection Status" window.
■On "Network Connection Status" window, click "Properties".
■On "Network Connection Properties" window, select "TCP/IPv4", click "Properties".
■On "TCP/IPv4 Properties" window, select "Obtain an IP address automatically", click "OK".
■Back to "Network Connection Status" window, click on "Details".
■On "Network Connection Details" window, you can find the IP address of the router.
Fig. 7: Getting IP address of DHCP server
1
3
5
6
7
2
4

Commissioning
Operating Instructions VER:1.0 │15
Getting the IP address of the IP gateway
■Enter the IP address of the router on the browser to access the router.
■Click "Attached Devices", you will find a list of all connected devices including the name,
MAC address and IP address.
Fig. 8: Getting the IP address of IP gateway
Pos: 58 /CNDEX/99 Auxiliary tools/+++ +++++++++++ p agebr eak +++++++++++++++ @ 57\mod_148 7814735946_0.docx @ 750979 @ @ 1

Commissioning
Operating Instructions VER:1.0 │16
Pos: 59 /CNDEX/01 Heading/1. 1.1 Heading/Heading_Getting I P address from indoor station @ 62\mod_14 97489017651_15.docx @ 791378 @ 3 @ 1
8.3.2 Getting the IP address from the indoor station
Pos: 60 /CNDEX/08 Commissionin g/Get IP address from indoor station _H8301_IP gateway @ 62\m od_1497489179283_15.docx @ 79 1399 @ @ 1
If the connection type of the indoor station is set on "IP gateway", you can also find the IP
address from the information page of the indoor station.
The indoor station needs to be connected to the LAN port of the IP gateway.
Fig. 9: Getting IP address from indoor station
Pos: 61 /CNDEX/99 Auxiliary tools/+++ +++++++++++ p agebr eak +++++++++++++++ @ 57\mod_148 7814735946_0.docx @ 750979 @ @ 1

Commissioning
Operating Instructions VER:1.0 │17
Pos: 62 /CNDEX/01 Heading/1.1. 1 Heading/Heading_Logging int o I P gateway with the IP address @ 62\mod_1 497489288031_15.docx @ 7914 19 @ 3 @1
8.3.3 Logging into IP gateway with the IP address
Pos: 63 /CNDEX/08 Commissionin g/Logging into IP gateway with the I Paddr ess_H8301_IP gateway @ 62\mod_14 97489368933_15.docx @ 79 1440 @ @ 1
■Enter the IP address of the IP gateway directly on the browser.
■Enter the user name and password. (default is "admin", "admin")
■Click "Login" to enter the configuration menu.
Fig. 10: Logging into IP gateway with the IP address
Pos: 64 /CNDEX/99 Auxiliary tools/+++++ +++++++++ page br eak+ ++++++++++++++ @ 57\mod_148781473 5946_0.docx @ 750979 @ @ 1

Commissioning
Operating Instructions VER:1.0 │18
Pos: 65 /CNDEX/01 Heading/1. 1 Heading/Heading_Resetting the IP gateway t of actory default setting @ 62\mod_149 7489718628_15.docx @ 79148 0 @ 2 @1
8.4 Resetting the IP gateway to the factory default setting
Pos: 66 /CNDEX/08 Commissi oning/Resetting the IP gat eway to factory default setting _H8301_IP gateway @ 62\m od_1497489461893_15.d ocx @ 791460 @ @1
Press and hold the "Reset" button for 3 s to reset the IP gateway to the factory default setting.
Fig. 11: Resetting the IP gateway to factory default setting
Pos: 67 /CNDEX/99 Auxiliary tools/+++ +++++++++++ p agebr eak +++++++++++++++ @ 57\mod_148 7814735946_0.docx @ 750979 @ @ 1

Operation
Operating Instructions VER:1.0 │19
Pos: 69 /CNDEX/01 Heading/1. Headin g/Heading_Operation @ 56\ mod_1487743450854_15.doc x @ 749873 @ 1 @ 1
9Operation
Pos: 70 /CNDEX/01 Heading/1.1 H eading/Heading_Language @ 62\ mod_1497489904803_15.d ocx @ 791501 @ 2 @ 1
9.1 Language
Pos: 71 /CNDEX/09 Operation/Lan guage_H8301_IP gateway @ 62\ mod_1497489985660_15. docx @ 791522 @ @ 1
Fig. 12: Language
Select a language on the upper right corner of the page.
Pos: 72 /CNDEX/99 Auxiliary tools/+++++ +++++++++ page br eak+ ++++++++++++++ @ 57\mod_148781473 5946_0.docx @ 750979 @ @ 1

Operation
Operating Instructions VER:1.0 │20
Pos: 73 /CNDEX/01 Heading/1. 1 Heading/Heading_Networ kc onfiguration @ 62\mod_1497490 065330_15.docx @ 791542 @ 2 @ 1
9.2 Network configuration
Pos: 74 /CNDEX/09 Operation/ Network configuration_H830 1_IP gateway @ 62\mod_1497490 459763_15.docx @ 791645 @ @ 1
Fig. 13: Network configuration
On the "Network configuration" page you can set the IP address as DHCP or Static IP. (Default
is DHCP)
Pos: 75 /CNDEX/99 Auxiliary tools/+++ +++++++++++ p agebr eak +++++++++++++++ @ 57\mod_148 7814735946_0.docx @ 750979 @ @ 1
Table of contents
Other ABB Gateway manuals

ABB
ABB Cassia X1000 User manual

ABB
ABB SPA-ZC 302 Guide

ABB
ABB ARG600 ANSI User manual

ABB
ABB AWIN GW120 User manual

ABB
ABB LVS Digital User manual

ABB
ABB i-bus KNX User manual

ABB
ABB RER601 User manual

ABB
ABB COM600 series Owner's manual

ABB
ABB ARM600 User manual

ABB
ABB i-bus KNX EnOcean EG/A 32.2.1 User manual

ABB
ABB M2302 User manual

ABB
ABB 83350-500 User manual

ABB
ABB Ability Smart Sensor Technical manual

ABB
ABB M2302 User manual

ABB
ABB ARG600 ANSI User manual

ABB
ABB ARG600 ANSI User manual

ABB
ABB VSN900 Quick start guide

ABB
ABB COM600 series Instruction sheet

ABB
ABB MicroSCADA Pro SYS 600C User manual

ABB
ABB ARG600 Single SIM Variant User manual