Absaar HF-1212 User manual

12 BATTERY CHARGER MANUAL
Bedienungsanleitung
Directions of Use
Instructions d’utilisation
Istruzioni d’uso
Bruksanvisning
Gebruiksaanwijzing
Käyttöohjeet
Retningslinjer for bruk
Brugsanvisning
Batterieladegerät mit Kunststoffgehäuse, vollautomatisch
Battery charger in plastic casing, fully automatic
Chargeur de batterie en boîtier plastique, tout automatique
Caricabatterie in plastica, interamente automatico
Batteriladdare i plast, helautomatisk
Kunststof acculader, volautomatisch
Täysautomaattinen, muovipäällysteinen akkulaturi
Batterilader i plastinnfatning, helautomatisk
Batterioplader i plastikhus, fuldautom
Wichtig: Vor jeder Benutzung unbedingt durchlesen. Anleitung und Ratschläge befolgen.
Important: Read these instructions before using the charger.
Important : Veuillez lire attentivement ce manuel avant toute utilisation. Respectez les instructions et
les conseils qui s’y trouvent.
Importante: Leggere attentamente le presenti istruzioni e av vertenze prima di ogni utilizzo del vostro
apparecchio.
Viktigt: Läs noga igenom bruksanvisningen innan laddaren tas i bruk.
Belangrijk: Wij verzoeken u nadrukkelijk deze gebruiksvoorschriften en aanwijzingen te lezen
voordat u het apparaat gebruikt.
Tärkeää: Tutustu näihin ohjeisiin ennen laturin käyttöä.
Viktig: Les disse instruksjonene før du bruker laderen.
Vigtigt: Læs disse anvisninger, før opladeren bruges.

2
Erklärung der Warnhinweise: / Explanation of warnings:
Explication des Avertissements : / Spiegazioni delle indicazioni di avvertimento:
Aclaración sobre las indicaciones de seguridad: / Förklaring till varningar:
Uitleg van de waarschuwingssymbolen: / Varoitusten selityksiä: / Forklaring av advarsler: /
Forklaring på advarsler:
Gebrauchsanweisung vor Inbetriebnahme lesen.
Before charging, read the instructions.
Lisez les instructions avant toute utilisation.
Leggere il manuale d‘uso prima della messa in funzione.
Läs igenom bruksanvisningen innan laddaren tas i bruk.
Lees voor gebruik de handleiding
Tutustu ohjeisiin ennen lataamista.
Les instruksjonene før lading.
Læs anvisningerne før opladning.
Nur zur Verwendung in geschlossenen, belüfteten Räumen! Vor Regen schützen!
For indoor use; do not expose to rain!
N’utilisez l’appareil qu’à l’intérieur ! Ne l’exposez pas à la pluie !
Utilizzare solo ambienti coperti! Proteggere dalla pioggia!
För inomhusbruk! Skydda laddaren mot fukt och regn!
Uitsluitend voor binnengebruik! Beschermen tegen de regen!
Tarkoitettu sisäkäyttöön; ei saa jättää sateeseen.
For innendørs bruk. Må ikke utsettes for regn!
Kun til indendørs brug: må ikke udsættes for regn!
WARNUNG: Explosive Gase! Vermeiden Sie offenes Feuer und Funken!
WARNING: Explosive gases. Prevent ames and sparks!
AVERTISSEMENT : Gaz explosifs. Evitez les ammes et les étincelles !
AVVISO: Gas esplosivi. Evitare amme libere e scintille!
VARNING: Explosiva gaser - undvik öppen eld och gnistor!
WAARSCHUWING: Ontvlambare gassen: vermijd open vuur en vonken!
VAROITUS: Räjähtäviä kaasuja. Estä avotuli ja kipinöinti.
ADVARSEL: Eksplosive gasser. Unngå ammer og gnister!
ADVARSEL: Eksplosive gasser. Undgå ammer og gnister!
Cilit lor sim zzril dunt in henis amcore min henit alis aciduis alit,
Intertek
Model Number: HF-1212
Input: 230 - 240V AC, 50 Hz, 690W
Output: 12 V DC, Automatic: 12A Max
Continuous, Manual: 2A/8A/12A
Battery Type 12 V: lead-acid, VRLA
maintenance free (gel and AGM)
Battery Capacity max: Cr = 140 Ah
Please read and follow safe ty instructions carefully.
Warning: Explosive gases.
Prevent exposure to flames and sparks.
For indoor use only.
HF-1212
Made in China
Industriegelaende,
66802 Altforweiler, Germany
Anklemmen, Connect, Brancher,
Conecte, Sluit, Raccordo, Ansluta:
1 - 2 - 3
Abklemmen, Disconnect, Debrancher,
Desconecte, Koppel, Staccare, Lossa:
3 - 2 - 1

3
Betreiben Sie das Ladegerät nur an gut belüfteten Plätzen!
Provide adequate ventilation during charging!
Veillez à assurer une ventilation appropriée pendant la charge.
Azionare il caricabatteria solo in luoghi ben ventilati!
Laddningsaggregatet får endast användas i väl ventilerade rum!
Gebruik de lader alleen in goed geventileerde ruimtes!
Huolehti latauksen aikana riittävästä ilmanvaihdosta.
Sørg for tilstrekkelig ventilasjon under lading.
Sørg for tilstrækkelig ventilation under opladning!
Trennen Sie das Ladegerät vom Stromnetz bevor Sie die Klemmen
mit der Batterie verbinden oder lösen.
Disconnect the supply before making or breaking the connections to the battery.
Débranchez l‘équipement avant de brancher ou débrancher les connexions à la batterie.
Disconnettere il caricabatteria dall’alimentazione di rete prima di collegare o scollegare le
pinze con la batteria.
Koppla laddningsaggregatet från nätet innan du ansluter klämmorna på batteriet eller tar
loss dem.
Koppel de lader los van het elektriciteitsnet voordat u de klemmen aan de accu
bevestigt of de klemmen verwijdert.
Irrota virtajohto ennen kuin kytket akun tai irrotat sen kytkennät.
Koble fra strømtilførselen før du kobler til eller fra batteriet.
Frakobl strømforsyningen, før forbindelsen til batterierne oprettes eller afbrydes.
Schutzklasse II - Doppelte Isolierung
Class II Double Insulation
Double isolation Classe II
Classe II Doppio isolamento
Dubbele isolatie van klasse II
Klass II dubbelisolering
Luokan II kaksoiseristys
Dobbeltisolert klasse II
Klasse II dobbeltisoleret

4BEDIENUNGSANLEITUNG (DEUTSCH)
SICHERHEITSHINWEISE UND VORBEREITUNG
GEFAHR: Batterien enthalten ätzende Säuren und explosive Gase. NICHT RAUCHEN! In der Nähe von Bat-
terien dürfen sich KEIN OFFENES FEUER oder Funkenquellen benden. Bei Kontakt mit Batteriesäure muss
die Haut oder das Körperteil sofort mit reichlich ießendem, kaltem Wasser gespült werden. Falls Batteriesäu-
re in die Augen gelangt ist, sofort mit reichlich ießendem, kaltem Wasser ausspülen und einen Arzt aufsu-
chen. Kinder und Haustiere dürfen beim Auaden von Batterien nicht in der Nähe sein.
FALLS DIE BATTERIE ODER DAS LADEGERÄT BEIM AUFLADEN WARM WERDEN SOLLTEN, BRECHEN
SIE DEN LADEVORGANG AB, UND LASSEN SIE DIE BATTERIE VON EINEM FACHMANN ÜBERPRÜFEN.
ACHTUNG: BATTERIEN, DIE SEHR LANGE NICHT BENUTZT WORDEN SIND, SIND MÖGLICHERWEISE
AUFGRUND VON TIEFENTLADUNG ODER SULFATIERUNG BESCHÄDIGT. DIESE BATTERIEN KÖNNEN
NICHT KORREKT GELADEN WERDEN. SIE DÜRFEN DAS LADEGERÄT NICHT AN DIESE BATTERIEN
ANSCHLIESSEN.
DAS LADEGERÄT DARF NICHT ANSTELLE EINES NETZTEILS ZUR STROMVERSORGUNG VERWEN-
DET WERDEN. FERNER DARF ES NICHT IN EIN FAHRZEUG FEST EINGEBAUT WERDEN. DER FAHR-
ZEUGMOTOR DARF NACH ANSCHLIESSEN DES LADEGERÄTES NICHT GESTARTET WERDEN. DAS
LADEGERÄT DARF NICHT ANGESCHLOSSEN WERDEN, WENN NOCH ANDERE FAHRZEUGSYSTEME
(WIE DIE ALARMANLAGE) VON DER FAHRZEUGBATTERIE GESPEIST WERDEN.
STARTEN SIE DEN FAHRZEUGMOTOR NICHT, WÄHREND SIE DIE BATTERIE AUFLADEN.
VORSICHT: · VERSUCHEN SIE NICHT, HERKÖMMLICHE (NICHT WIEDERAUFLADBARE) BATTERI-
EN AUFZULADEN!
· WÄHREND DES LADEVORGANGS DARF NICHT GERAUCHT UND KEIN OFFENES
FEUER GEMACHT WERDEN.
· DIE BATTERIEFLÜSSIGKEIT IST ÄTZEND! VERMEIDEN SIE JEDEN KONTAKT MIT
IHR.
Damit die während des Ladevorgang entstehenden Gase gut abziehen können, schrauben Sie die Verschlus-
skappen der Batteriezellen ab, und vermeiden Sie offenes Feuer und Funkenbildung. Die beim Ladevorgang
freigesetzten Gase sind explosiv. Einige Ladegeräte enthalten Bauteile wie Schalter und Relais, die Funken
oder Funkenstrecken bilden können. Daher müssen Sie das Ladegerät bei Verwendung in einer Garage an
einem geeigneten Ort aufstellen.
Altbatterien müssen über Werkstätten oder Altbatterie-Sammelstellen entsorgt werden.
· Metall- oder PVC-Teile gehören nicht in den Hausmüll.
· Schützen Sie unsere Umwelt!
Falls das Netzkabel beschädigt ist, muss es vom Hersteller oder einem autorisierten Kundendienst oder Tech-
niker ausgetauscht werden. Führen Sie keine eigenhändigen Änderungen oder Reparaturen am Netzkabel
durch. Anderenfalls besteht Stromschlag- und Brandgefahr!
Dieses Gerät ist nicht für Kinder oder Personen mit körperlichen, sensorischen oder geistigen Einschränkun-
gen geeignet. Ebenso darf es nicht durch unerfahrene Anwender gebraucht werden. Diese Personen müssen
stets durch eine erfahrene Person beaufsichtigt bzw. instruiert werden, die für ihre Sicherheit verantwortlich
ist. Ferner müssen Kinder immer durch Erwachsene beaufsichtigt werden, damit Sie nicht mit dem Produkt
spielen. Einige Ladegeräte enthalten Bauteile wie Schalter und Relais, die Funken oder Funkenstrecken
bilden können. Daher müssen Sie das Ladegerät bei Verwendung in einer Garage an einem geeigneten Ort
aufstellen.

5
GEWÄHRLEISTUNGSBEDINGUNGEN
1) Die Gewährleistung erstreckt sich auf sämtliche Fabrikations- oder Materialfehler seitens des Herstellers.
Daher gewährt der Hersteller zwei Jahre lang ab Kaufdatum einen kostenlosen Austausch (von Bauteilen oder
des Ladegerätes). Lediglich die Frachtkosten gehen zu Lasten des Kunden.
2) Die Gewährleistung ist nur gegen Vorlage eines Kaufbelegs (Rechnung oder Kassenbon) gültig.
3) Die Gewährleistung erstreckt sich nicht auf Reparaturen, die Folgen eines Unfalls, unsachgemäßer Demon-
tage, Beschädigung durch Herunterfallen oder Stöße, unsachgemäßen Gebrauchs oder Anschluss an eine
andere, als die angegebene Netzspannung sind.
4) Auf keinen Fall beinhaltet die Gewährleistung Ansprüche auf Schadensersatz oder Rückzahlung.
IM FALLE VON GERÄTESCHÄDEN
Wenden Sie sich an Ihren Fachhändler. Er veranlasst das Einschicken des Produkts mit einer vom Hersteller
angegebenen Retourennummer (RMA).
EINFÜHRUNG
Vielen Dank, dass Sie sich für dieses Batterieladegerät Absaar HF-1212 entschieden haben! Es wurde dazu
entwickelt, wartungsfreie, wiederauadbare 12-V-Bleisäurebatterien - üblicherweise mit 6 Zellen je 2 V, für
weitere Informationen, siehe die Angaben des Batterieherstellers - (Gel und AGM) mit Kapazitäten von bis zu
140 Ah aufzuladen. Dieses vollautomatische Ladegerät bestimmt den erforderlichen Ladestrom selbständig.
Es verfügt über diverse automatische Schutzvorrichtungen:
· Kurzschlussschutz
· Verpolungsschutz
· Überhitzungsschutz
· Überspannungsschutz
· Automatische Lüftersteuerung
· Am LCD-Display werden der Betriebszustand des Gerätes (wie z.B. laufender Ladevor-
gang, Batterie voll, Batterie-Refresh und Verpolung) angezeigt.
DREISTUFIGER LADEVORGANG
Der mehrstuge Ladevorgang gewährleistet, dass die Batterie stets optimal aufgeladen wird:
1) Ladestrom
2) Konstantladung
3) Ladeerhaltung
WICHTIGER SICHERHEITSHINWEIS
Durch unsachgemäßen Gebrauch oder falschen Anschluss kann das Ladegerät HF-1212 beschädigt werden
oder Gefahren für den Anwender hervorrufen. Lesen Sie sich die Sicherheitshinweise aufmerksam und voll-
ständig durch, und beachten Sie alle Warnhinweise („Vorsicht“, „Achtung“ und „Gefahr“), in der Bedienungsan-
leitung. Verwahren Sie dieses Handbuch für zukünftige Nachschlagezwecke.
INHALT
Einführung 5
Wichtiger Sicherheitshinweis 5
Eigenschaften 6
Bedienungsanleitung 7
Problemlösung 8
Technische Daten 8

6
EIGENSCHAFTEN
1. Anzeigefeld – zeigt die aktuelle Batteriespannung, den Ladestrom oder einen Fehlercode an.
Die Bedeutung der Codes und entsprechende Vorschläge zur Abhilfe nden Sie in der folgenden Tabelle.
Zustand Ursache Lösung
01 Die Batteriespannung liegt
nach 10-minütigem Auaden
immer noch unter 10 V.
Mindestens eine der Batterie-
zellen ist kurzgeschlossen. Tauschen Sie die Batterie aus.
Entsorgen Sie die defekte Batterie
umweltgerecht.
Es ist noch ein Verbraucher an
die Batterie angeschlossen. Trennen Sie den Verbraucher von
der Batterie.
Die Batteriespannung liegt
nach dem Umschalten auf
Ladeerhaltung immer noch
unter 13V.
Versuchen Sie, die Batterie komplett zu entladen und erneut
aufzuladen.
02 Die Spannung an den Klem-
men beträgt über 19 V. Die Spannung zwischen den
beiden Klemmen ist zu hoch. Überprüfen Sie die Batterie. Die
Leerlauf-Batteriespannung muss
zwischen 12 V und 14 V liegen.
03 Der Ladestrom ist zu hoch. Dies geschieht, wenn während
des Ladevorgangs eine exter-
ne Spannungsquelle an die
Batterie angeschlossen ist.
Trennen Sie alle externen Geräte
von der Batterie.
04 Die Temperatur des Ladege-
rätes ist zu hoch. Die Umgebungstemperatur ist
zu hoch. Reinigen Sie die Lüftungsschlitze,
und entfernen Sie alle Gegenstän-
de, die sich auf oder neben dem
Ladegerät benden. Stellen Sie das
Gerät an einem kühleren Ort auf.
05 Das Ladegerät schaltet nicht
auf Erhaltungsladung um. Der Ladestrom ist zu niedrig. Stellen Sie einen höheren Lade-
strom für die Batterie ein.
Die Batterie ist defekt. Entsorgen Sie die defekte Batterie
umweltgerecht.
2. Verpolungsanzeige – diese LED-Anzeige leuchtet, wenn die Batterieklemmen vertauscht wurden.
3. Refresh-Anzeige – diese Anzeige leuchtet gelb, wenn ein Refresh der Batterie durchgeführt wird. Das
Ladegerät führt nur ein Refresh der Batterie durch, wenn diese tiefentladen wurde. Dabei wird alle 4 (±0,5)
Std. ein Ladezyklus durchgeführt, bis keine Tiefentladung mehr vorliegt. Wenn sich der Batteriezustand nach 5
kompletten Ladezyklen nicht geändert hat, erscheint der Fehlercode F01 am Display. Tauschen Sie in diesem
Fall die Batterie aus.

7
4. Ladeanzeige – diese LED-Anzeige blinkt grün, während die Batterie mit konstantem Ladestrom oder kon-
stanter Ladespannung aufgeladen wird. Nachdem die Batterie voll aufgeladen ist oder das Gerät auf Erhal-
tungsladung umschaltet, leuchtet die Anzeige dauerhaft grün.
5. Stromanzeige – diese Anzeige leuchtet, wenn am Display der Ladestrom angezeigt wird.
6. Spannungsanzeige – diese Anzeige leuchtet, wenn am Display die Batteriespannung angezeigt wird.
7. Ladepegelanzeige – diese Anzeige leuchtet, wenn am Display der Ladepegel angezeigt wird.
Code Zustand
LO Der Ladepegel liegt unter 50%.
80 Der Ladepegel liegt bei ca. 80%.
FUL Die Batterie ist voll geladen.
8. Display-Umschalter – drücken Sie diese Taste, um die am Display angezeigten Werten umzuschalten.
9. Automatik – das Ladegerät stellt den Ladestrom automatisch in Abhängigkeit des angeschlossenen Batte-
rietyps ein.
10. Ladestrom 2 A - Sie haben einen Ladestrom von 2 A gewählt.
11. Ladestrom 8A - Sie haben einen Ladestrom von 8A gewählt.
12. Ladestrom 12A - Sie haben einen Ladestrom von 12A gewählt.
13. Ladestrom-Auswahltaste – wählen Sie den geeigneten Ladestrom für Ihre Batterie. Siehe die folgende
Tabelle:
Gewählter Ladestrom Batteriekapazität
Automatik Der Ladestrom wird abhängig von der Batteriekapa-
zität automatisch eingestellt.
2 A Bis 30 Ah
8 A Bis 120 Ah
12 A Bis 140 Ah
BEDIENUNGSANLEITUNG
· Trennen Sie das Batterieladegerät vom Stromnetz.
· Verbinden Sie die rote Klemme mit dem Pluspol (+) der Batterie.
· Verbinden Sie die schwarze Klemme mit dem Minuspol (-) der Batterie.
· Wählen Sie mit der Ladestrom-Auswahltaste den geeigneten Ladestrom für Ihre Batterie.
· Verbinden Sie den Netzstecker des Ladegerätes mit dem Stromnetz. Daraufhin blinkt die
grüne LED-Anzeige und signalisiert damit, dass die Batterie geladen wird.
ACHTUNG: Falls die rote Verpolungsanzeige aueuchtet, trennen Sie das Gerät sofort vom
Stromnetz. Überprüfen Sie die Polarität der Batterieklemmen.
· Sobald die Batterie vollständig aufgeladen ist, leuchtet die grüne LED-Anzeige. Die
Ladedauer ist von der Kapazität und dem verbleibenden Ladepegel der angeschlossenen
Batterie abhängig.
· Trennen Sie das Netzkabel vom Stromnetz.
· Trennen Sie die schwarze Klemme vom Minuspol (-) der Batterie.
· Trennen Sie die rote Klemme vom Pluspol (+) der Batterie.
· Verstauen Sie das Ladegerät an einem trockenen Ort.

8
PROBLEMLÖSUNG
Problem Ursache Lösung
Nach dem Anschließen
des Ladekabels an die
Batterie blinkt oder leuch-
tet die grüne LED-Anzeige
nicht.
Die Batteriespannung liegt
unterhalb der Mindest-
spannung zum Starten des
Ladevorgangs.
Versuchen Sie, die Batterie komplett zu ent-
laden und erneut aufzuladen. Falls dies nicht
funktioniert, tauschen Sie die Batterie aus.
Entsorgen Sie die defekte Batterie umweltge-
recht.
Schließen Sie die Klemmen
erneut an die Batterie an. Überprüfen Sie die Kabelverbindung.
Die rote LED-Anzeige
leuchtet auf. Sie haben die Batterieklem-
men verpolt. Schließen Sie die Batterieklemmen richtig an.
Ladefehler Die Batterie
ist defekt. Die Batterie ist defekt und
kann nicht mehr aufgeladen
werden.
Tauschen Sie die Batterie aus. Entsorgen Sie
die defekte Batterie umweltgerecht.
Überhitzung Das Ladegerät ist zu heiß
geworden. Reinigen Sie die Lüftungsschlitze, und entfer-
nen Sie alle Gegenstände, die sich auf oder
neben dem Ladegerät benden. Stellen Sie
das Gerät an einem kühleren Ort auf.
Die maxima-
le Ladezeit
wurde
erreicht.
Der gewählte Ladestrom ist
für diese Batteriekapazität zu
niedrig.
Wählen Sie einen höheren Ladestrom.
Mindestens ein Zelle der
Batterie ist defekt. Tauschen Sie die Batterie aus. Entsorgen Sie
die defekte Batterie umweltgerecht.
Überspan-
nungsschutz Die Batteriespannung beträgt
15 V oder mehr. Überprüfen Sie die Batteriespannung. Die
Batteriespannung muss 12 V= betragen.
TECHNISCHE DATEN
Änderungen der technischen Daten ohne vorherige Ankündigung vorbehalten.
Nennspannung und Leistung 230 – 240 V~ / 50 Hz, 690 W
Stromaufnahme 3 A
Maximaler Ausgangsstrom Automatik: 12 A max. Manuell: 2 A / 8A / 12A
Konstante Ausgangsspannung 14,8 ± 0,3 V=
Batterietyp Wartungsfreie 12-V-Bleisäure-/VRLA-Batterien (Gel
und AGM)
Umgebungstemperatur -20°C – 40°C
Gewicht 1.419 g
Abmessungen (L x B x H) 285 × 19 × 91,5 mm
Ordnungsgemäße Entsorgung dieses Produktes – das Symbol einer durchgestrichenen
Mülltonne auf dem Produkt bedeutet, dass es der Europäischen Richtlinie 2002/96/EC
unterliegt. Elektro- und Elektronik-Altgeräte gehören nicht in den Hausmüll und müssen
über entsprechend ausgewiesene Sammelstellen gesondert entsorgt werden. Die richtige
Entsorgung von Altgeräten verhindert Umweltverschmutzung und Gesundheitsschäden.
Weitere Informationen zur Rückgabe von Altgeräten erhalten Sie bei der Umweltbehörde,
den Recyclingstellen oder bei dem Händler, bei dem Sie das Produkt erworben haben.

9
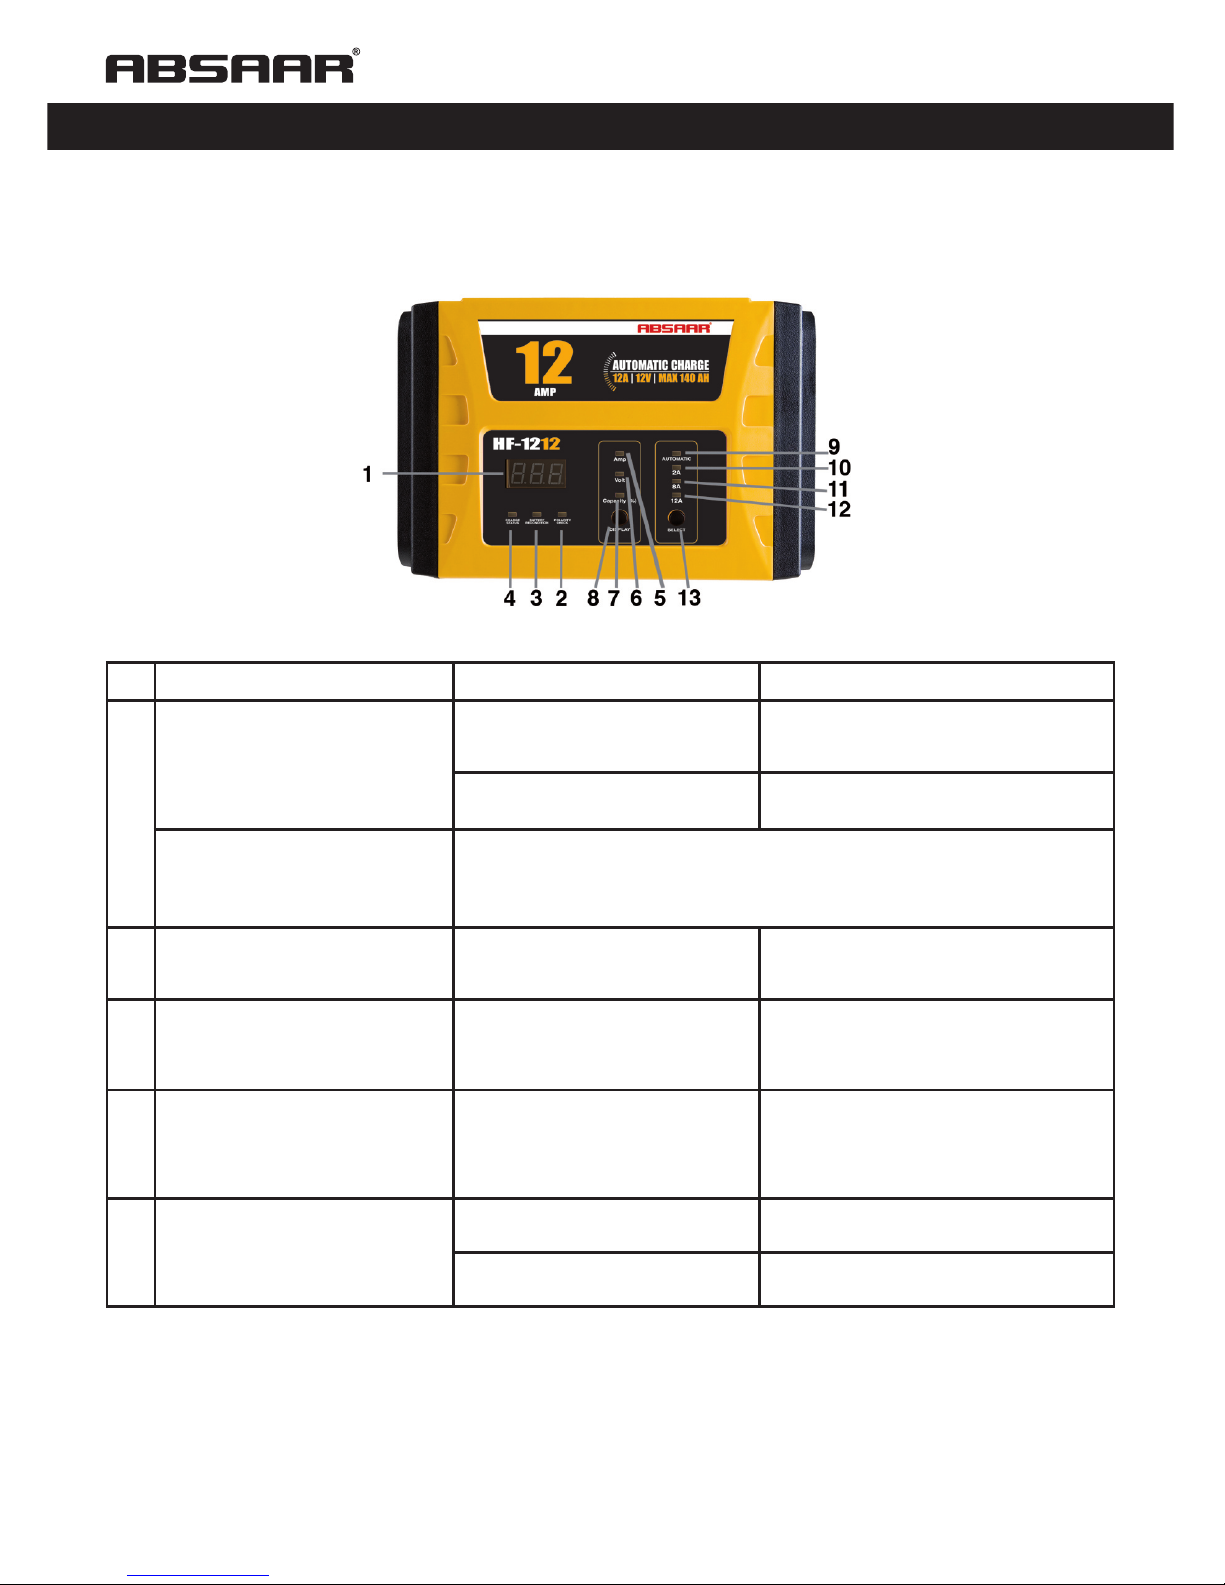
DIRECTIONS OF USE (ENGLISH)
PRECAUTIONS AND PREPARATIONS
DANGER: batteries contain corrosive burning acid and explosive gasses, DO NOT SMOKE near them, NO
NAKED FLAMES or other sources of ignition should be used or nearby. Any contact with the battery acid
should be washed off immediately with copious amounts of cold water, any acid in the eyes should be urgently
washed out with large amounts of cold water and urgent medical advice sought. Keep children and pets away
from the battery charging process.
SHOULD THE BATTERY OR CHARGER BECOME HOT DURING THE CHARGING PROCESS, STOP THE
PROCESS AND GET THE BATTERY PROFESSIONALLY CHECKED.
ATTENTION: BATTERIES THAT HAVE NOT BEEN USED IN A LONG TIME CAN BE FAULTY DUE TO EX-
TREME DISCHARGE OR SULPHATION. THESE BATTERIES CAN NOT BE CHARGED CORRECTLY. THIS
CHARGER SHOULD NOT BE USED ON THESE TYPES OF BATTERIES.
THE CHARGER SHOULD NOT HOWEVER BE USED AS A SUBSTITUTE POWER SUPPLY. IT SHOULD
NOT BE BUILT INTO A VEHICLE OR BE SWITCHED ON OR CONNECTED WHILST OTHER VEHICLE
SYSTEMS ARE BEING POWERED OFF THE BATTERY (OTHER THAN THE VEHICLES ALARM SYSTEM).
DO NOT ATTEMPT TO START THE VEHICLE WHILE THE BATTERY IS CHARGING!
WARNING: · DO NOT CHARGE NON RECHARGEABLE BATTERIES!!!
· WHEN CHARGING A BATTERY DO NOT SMOKE AND AVOID OPEN FIRE!!!
· ELECTROLYTE LIQUID IS CORROSIVE. AVOID CONTACT!!!
To assure a fast diversion of the gases, which develop during the charging process, unscrew without fail the
rell tops of the battery and avoid any open re or spark forming. The gases are explosive. Some chargers
contain parts like switches or relays with which sparks or spark bridges can occur, so, when the charger is
used in a garage put it in a suitable place or space.
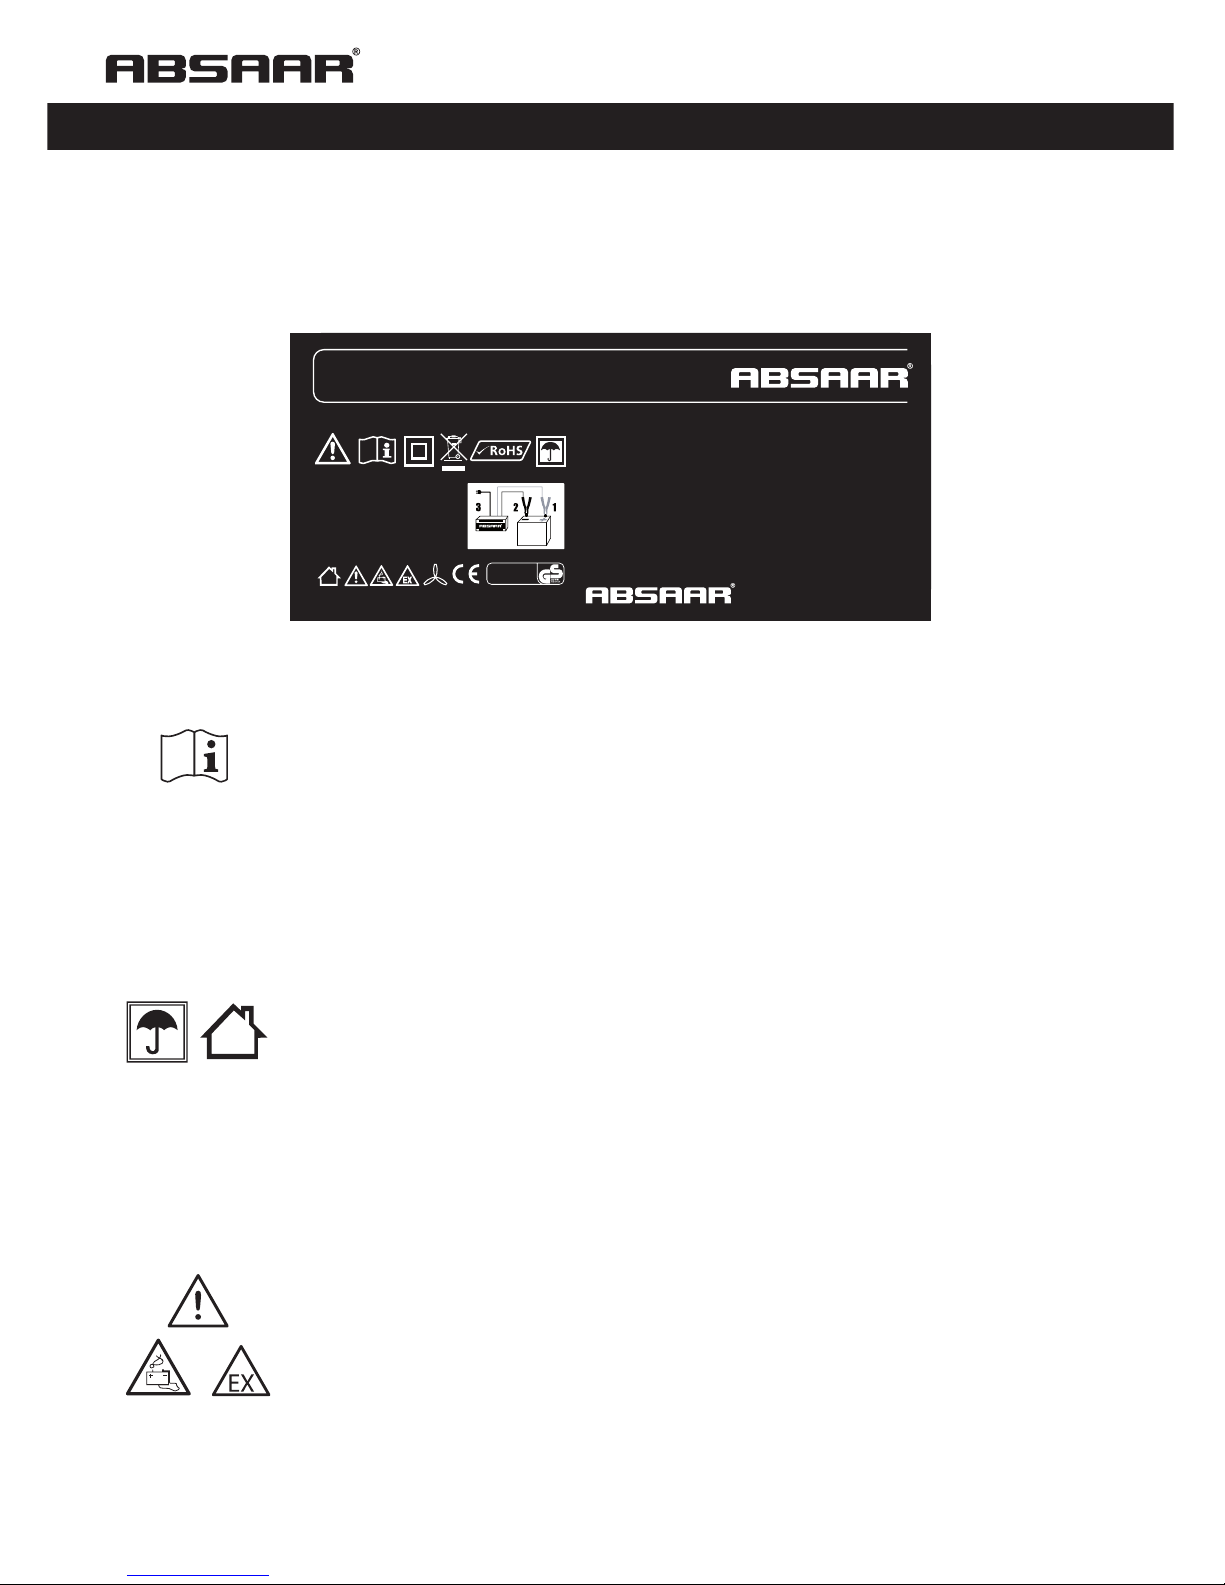
Dispose of defect batteries via a garage or battery station
· No metal or PVC parts in the normal dustbin
· Watch the environment
In case of damaged supply cord, it must be replaced by the manufacturer of this appliance or by any author-
ized service department or a similar qualied person. To avoid electrical hazards no manipulation may be
made to the supply cord by the user himself.
This appliance is not intended for use by persons (including children) with reduced physical, sensory or mental
capabilities, or lack of experience and knowledge, unless they have been given supervision or instruction con-
cerning use of the appliance by a person responsible for their safety. Children should be supervised to ensure
that they do not play with the appliance. Some chargers contains parts like switches or relays which sparks or
spark bridges can occur, so, when the charger is used in a garage, put it in a suitable place or space.
GUARANTEE CONDITIONS
1) The guarantee conditions cover all manufacturer’s material faults. The manufacturer gives therefore two
years free of charge replacement (parts or charger) starting from purchase date. Only freight charges are
responsibility of the customer.
2) The warranty is only valid on the presentation of the purchase receipt.
3) The guarantee extends not to necessary repairs as result of an accident, an unprofessional disassembly,
damage through fall or hit, unprofessional use or a higher mains voltage as indicated.
4) Under no condition does the guarantee contain the right of compensation or repayment.
IN CASE OF DAMAGE
Contact your dealer. He will send back the charger together with a RMA-number given by us

10
INTRODUCTION
Thank you for purchasing an Absaar HF-1212 charger. It is designed to charge 12V (typically six 2 volt cells,
for detailed information refer to the battery manufacturer) rechargeable lead-acid, maintenance free, gel and
AGM batteries with a battery capacity up to 140Ah. The fully automatic battery charger can choose the charge
current automatically. It includes automatic protection features to ensure safety:
· Short circuit protection
· Reverse polarity protection
· Over-heating protection
· Over-voltage protection
· Automatic fan control
· The LCD display shows the current status of the unit, including charging, fully charged,
battery recondition, and reverse polarity.
THREE-STAGE BATTERY CHARGING
Multi-stage charging ensures batteries receive optimum charging:
1) Current charge
2) Constant charge
3) Floating charging
IMPORTANT SAFETY INFORMATION
Misusing or incorrectly connecting the HF-1212 battery charger may damage the equipment, on-board elec-
tronics, or create hazardous condition for users. Read the safety instructions and pay special attention to all
cautions and warning statements in the guide. Please keep this manual for future reference.
FEATURES
1. Display Panel - indicates present voltage, present current or fault condition code.
The meaning of the codes and the solutions are shown in the table.
CONTENTS
I
ntroduction 10
Important Safety Information 10
Features 10
Operation Instructions 12
Troubleshooting 12
Specications 13

11
Condition Cause Solution
01 The voltage of the
battery is lower than
10V after 10 minutes
charged.
There is short circuit in the battery. Replace the battery. Dispose of the
defective battery in a suitable manner.
There is load connected to the
battery. Disconnect the load from the battery.
The voltage of the bat-
tery is lower than 13V
when the battery goes
into oat charge.
Recondition the battery.
02 The voltage between
the two clamps is higher
than 19V.
The voltage between the two
clamps is too high. Check the battery. The voltage of
battery should be in the range of 12V
to 14V.
03 The charge current is
too high. This happens when an external
voltage source is connected to the
battery during charging process.
Please disconnect battery from any
external components.
04 The temperature of the
charger is too high. This charger ambient temperature
is too high. Clean dirty ventilation openings or re-
move objects covering the unit. Place
the unit in a cooler location.
05 The battery charger
does not go into oat
charge.
The charging current is too low. Choose the higher current to charge
the battery.
Bad battery. Replace the battery. Dispose of the
defective battery in a suitable manner.
2. Reverse Polarity LED Indicator - when the battery clamps are connected incorrectly the red LED illumi-
nates.
3. Battery Recondition Indicator - when the battery is reconditioned, the yellow LED illuminates. The charger
will recondition the battery only when the battery is in a state of “deep discharge”. It cycles every 4±0.5h until
the battery is no longer “deep discharged”. If it cycles 5 times and the condition has not changed, there will be
the code F01 present on the display panel, indicating an error. Please replace the battery.
4. Charging State LED Indicator - when battery is charged at a constant current or a constant voltage, the
green LED ashes. When the battery is fully charged or goes into oat charge, the green LED illuminates.
5. Current Indicator - When the display panel indicates the present current, the current LED indicator illumi-
nates.
6. Voltage Indicator - When the display panel indicates the present voltage, the voltage LED indicator illumi-
nates.
7. Battery Capacity - When the display panel indicates the battery capacity, the LED indicator illuminates.
Code Condition
LO The capacity is lower than 50%
80 The capacity is around 80%.
FUL Battery is full charged
8. Display Button Switch - You can choose the display mode on the panel by pressing the button.
9. Automatic – The charger automatically selects the correct charging current for your battery
10. 2A Charge current Indicator – The charging current is set to 2A.
11. 8A Charge current Indicator – The charging current is set to 8A.
12. 12A Charge current Indicator – The charging current is set to 12A.
13. Charging Current Select Button – select the charging current for your battery type, for your reference see
the table below:

12
The charging rate you choose The capacity of the battery
automatic Automatically select the current to charge the battery
according to the battery capacity
2 A Up to 30Ah
8 A Up to 120 Ah
12 A Up to 140 Ah
OPERATION INSTRUCTIONS
· Ensure the battery charger is disconnected from the power supply.
· Connect the red charger clamp to the positive terminal of the battery (+) symbol.
· Connect the black charger clamp to the negative terminal of the battery (-) symbol.
· Choose the correct current to match the battery you wish to charge with the current
selection button.
· Plug the charger into the AC mains power. The green LED will blink showing that the
battery is charging
CAUTION: If the red “Reverse Polarity” LED turns on, immediately disconnect from the AC
mains power, check the polarity of the battery clips to the battery terminals.
· When fully charged, the green LED light turns on. The charge time will vary based on the
capacity and discharge state of the battery.
· Disconnect the power supply cable from the AC mains power outlet.
· Disconnect the black charge clamp from the negative terminal of the battery (-) symbol.
· Disconnect the red charge clamp from the positive terminal of the battery (+) symbol.
· Store the battery charger in a dry place.
TROUBLESHOOTING
Problem Cause Solution
The green LED indicator
does not ash or illuminate
when the charging clamps
are connected to the bat-
tery.
The voltage of the battery being
charged is less than the lowest
start-up voltage.
Attempt to recondition the battery. If this
does not work, replace the battery. Dis-
pose of the defective battery in a suitable
manner.
Reconnect to the battery
terminals. Check the connection.
The red LED indicator
lights. Reverse Polarity Check the clamps are connected correctly.
Charging
error Faulty
battery The battery is dead and cannot
be charged. Replace the battery. Dispose of the defec-
tive battery in a suitable manner.
Overhea-
ting The charger is too hot. Clean dirty ventilation openings or remove
objects covering the unit. Place the unit in
a cooler location.
Chaging
time
elapsed
The charging current selected
for the battery is too low. Select a higher charging current.
A battery cell is damaged. Replace the battery. Dispose of the defec-
tive battery in a suitable manner.
Overvolta-
ge shutoff The voltage for the battery be-
ing charged is or above 15V. Check the battery voltage to ensure battery
voltage is 12V DC .

13
SPECIFICATIONS
Specications are subject to change without notice.
Rated voltage & power 230 – 240V AC/50 Hz, 690 W
Input current 3 A
Maximum output current Automatic: 12A Max Manual: 2A/8A/12A
Continuous output voltage 14,8 ± 0,3 V DC
Battery type 12V lead-acid, VRLA maintenance free (gel and
AGM) batteries
Ambient temperature -20°C – 40°C
Weight 1419 g
Dimension (L×W ×H) 285 × 19 × 91,5 mm
Correct disposal of this product - If the symbol of a crossed out trash can appears on
a product, it means that this product is subject to the European Directive 2002/96/EC.
All old electrical and electronic devices must be disposed of separately from household
rubbish at designated places. The proper disposal of old devices avoids damage to
the environment and your personal health. You can obtain more information on the
disposal of old devices by contacting your municipal administration, the disposal ofce
or the place where you purchased the product.

14 INSTRUCTIONS D’UTILISATION (FRANÇAIS)
PRÉCAUTIONS ET PRÉPARATIONS
DANGER : les batteries contiennent de l’acide corrosif pouvant provoquer des brûlures ainsi que des gaz
explosifs. NE FUMEZ PAS à proximité. N’utilisez et ne laissez PAS DE FLAMMES NUES ou d’autres sources
inammables à proximité. En cas de contact avec l’acide issu de la batterie, rincez immédiatement la zone
affectée avec une quantité abondante d’eau froide. En cas de contact avec les yeux, rincez-les de toute
urgence avec une grande quantité d’eau froide et consultez immédiatement un médecin. Tenez les enfants et
les animaux domestiques à l’écart pendant le processus de charge.
AU CAS OÙ LA BATTERIE OU LE CHARGEUR DEVIENDRAIENT CHAUDS PENDANT LA RECHARGE,
ARRÊTEZ L’OPÉRATION ET FAITES VÉRIFIER LA BATTERIE PAR UN PROFESSIONNEL.
ATTENTION : LES BATTERIES QUI N’ONT PAS ÉTÉ UTILISÉES DEPUIS LONGTEMPS PEUVENT NE
PLUS FONCTIONNER CORRECTEMENT À CAUSE D’UNE DÉCHARGE EXCESSIVE OU D’UN PHÉNO-
MÈNE DE SULFATATION. CES BATTERIES NE PEUVENT PAS ÊTRE CHARGÉES CORRECTEMENT. CE
CHARGEUR NE DOIT PAS ÊTRE UTILISÉ SUR CE TYPE DE BATTERIE.
LE CHARGEUR NE DOIT PAS ÊTRE UTILISÉ EN GUISE D’ALIMENTATION DE SECOURS. IL NE DOIT
PAS ÊTRE MONTÉ DANS UN VÉHICULE OU ÊTRE ALLUMÉ OU CONNECTÉ ALORS QUE D’AUTRES
SYSTÈMES DU VÉHICULE SONT ALIMENTÉS (À L’EXCEPTION DU SYSTÈME D’ALARME DU VÉHI-
CULE).
N’ESSAYEZ PAS DE DÉMARRER LE VÉHICULE ALORS QUE LA BATTERIE EST EN COURS DE CHAR-
GE !
AVERTISSEMENT :
· NE CHARGEZ PAS DE BATTERIES NON RECHARGEABLES !!!
· LORS DE LA RECHARGE D’UNE BATTERIE, NE FUMEZ PAS ET ÉLOIGNEZ-VOUS
DE TOUT FEU OUVERT !!!
· L’ÉLECTROLYTE LIQUIDE EST UNE SUBSTANCE CORROSIVE. ÉVITEZ TOUT
CONTACT !!!
Pour assurer une dispersion rapide des gaz qui se développent pendant le processus de recharge, n’oubliez
pas de dévisser le bouchon de remplissage de la batterie et évitez toute formation de amme ou d’étincelles.
Les gaz sont explosifs. Certains chargeurs de batterie contiennent des interrupteurs ou des relais sur lesquels
peuvent se former des étincelles ou des ponts. Veillez donc à positionner le chargeur à endroit approprié lors
de son utilisation dans un garage.
Pour éliminer les batteries défectueuses, déposez-les dans un garage ou un centre spécialisé assurant la
collecte des batteries.
· Ne jetez jamais de pièces en métal ou en plastique avec les déchets ménagers.
· Protégez l’environnement.
Si le câble d’alimentation de cet appareil est endommagé, il doit être remplacé par le fabricant ou par son
service après-vente ou une personne de même qualication. Aucune manipulation ne doit être effectuée par
l’utilisateur sur le câble d’alimentation an d’éviter tout danger électrique.
Cet appareil ne doit pas être utilisé par des personnes (notamment des enfants) limitées dans leurs capacités
physiques, sensorielles ou mentales, ou par des personnes qui ne possèdent pas d’expérience et de connais-
sances dans le domaine, à moins qu’elles soient surveillées ou instruites quant à l’utilisation de cet appareil
par un individu responsable de leur sécurité. Les enfants doivent être surveillés an de s‘assurer qu’ils ne se
servent pas de l’appareil comme d’un jouet. Certains chargeurs de batterie contiennent des interrupteurs ou
des relais sur lesquels peuvent se former des étincelles ou des ponts. Veillez donc à positionner le chargeur à
endroit approprié lors de son utilisation dans un garage.

15
CONDITIONS DE GARANTIE
1) La garantie couvre tous les défauts de fabrication ou de matériau. En cas de situation de ce type, le
fabricant garantit le remplacement gratuit (des pièces ou du chargeur) pendant deux ans à compter de la date
d’achat. Seuls les frais d’expédition sont à la charge du client.
2) La garantie n’est valide que sur présentation de la preuve d’achat.
3) La garantie ne couvre pas les réparations s’avérant nécessaires à la suite d’un accident, d’un démontage
qui n’a pas été réalisé par un professionnel, de dommages occasionnés par une chute ou des coups, d’une
utilisation non professionnelle ou bien d’un raccordement à une tension d’alimentation supérieure à celle
indiquée.
4) La garantie n’englobe en aucun cas de droit à dommages et intérêts ni de droit à remboursement.
EN CAS DE DOMMAGE
Contactez votre revendeur. Celui-ci nous renverra l’appareil avec le numéro RMA que nous lui avons attribué.
INTRODUCTION
Nous vous remercions d’avoir acheté un chargeur Absaar HF-1212. Celui-ci est conçu pour charger des bat-
teries acide-plomb rechargeables de 12 V (généralement six cellules de 2 volts. Pour obtenir des informations
détaillées, consultez le fabricant de la batterie), sans entretien, gel et AGM, avec une capacité de batterie al-
lant jusqu’à 140 Ah. Le chargeur de batterie complètement automatique permet de choisir automatiquement le
courant de charge. Il comprend des fonctions de protection automatiques destinées à assurer votre sécurité :
· protection contre les courts-circuits
· protection de polarité inversée
· protection contre la surchauffe
· protection contre la surtension
· Contrôle automatique du ventilateur
· L’afchage LCD·afche l’état actuel de l’unité : charge, charge complète, reconditionne-
ment de la batterie et polarité inversée.
LA RECHARGE DE BATTERIE EN TROIS ÉTAPES
La charge en plusieurs étapes garantit la charge optimale des batteries :
1) Charge de courant
2) Charge constante
3) Charge ottante
CONSIGNES DE SÉCURITÉ IMPORTANTES
La mauvaise utilisation ou le branchement incorrect du chargeur de batterie HF-1212 peuvent endommager
l’équipement et l’électronique embarquée, ou créer une situation susceptible d’être dangereuse pour les
utilisateurs. Lisez les consignes de sécurité et faites particulièrement attention à l’ensemble des précautions
et avertissements présentés dans ce guide. Veuillez conserver ce manuel pour pouvoir le consulter ultérieure-
ment.
TABLE DES MATIÈRES
Introduction 15
Consignes de sécurité importantes 15
Caractéristiques 16
Instructions d’utilisation 17
Dépannage 18
Spécications 18

16
CARACTÉRISTIQUES
1. Panneau d’afchage - indique la tension actuelle, le courant actuel ou le code d’anomalie.
Le tableau ci-dessous indique la signication des codes ainsi que les solutions adaptées.
Condition Cause Solution
01 La tension de la batterie est
inférieure à 10 V après une
charge de 10 minutes.
Il y a un court-circuit dans la
batterie. Remplacez la batterie. Éliminez
la batterie défectueuse conformé-
ment à la législation en vigueur.
Il y a une charge
connectée à la batterie. Déconnectez la charge de la
batterie.
La tension de la batterie est
inférieure à 13 V quand la bat-
terie passe en charge ottante.
Reconditionnez la batterie.
02 La tension entre les deux pin-
ces est supérieure à 18 V. La tension entre les deux pin-
ces est trop élevée. Vériez la batterie. La tension de
la batterie doit être comprise entre
12 V et 14 V.
03 Le courant de charge est trop
élevé. Cela se produit lorsqu’une
source de tension extérieure
est raccordée à la batterie pen-
dant le processus de charge.
Veuillez déconnecter la batterie de
tout composant externe.
04 La température du chargeur
est trop élevée. La température ambiante du
chargeur est trop élevée. Nettoyez les orices de ventilation
sales ou ôtez les objets couvrant
l’unité. Placez l’unité dans un
endroit plus frais.
05 Le chargeur de batterie ne
passe pas en charge ottante. Le courant de charge est trop
faible. Sélectionnez le courant le plus
élevé pour charger la batterie.
Batterie défectueuse. Remplacez la batterie. Éliminez
la batterie défectueuse conformé-
ment à la législation en vigueur.
2. Indicateur DEL de polarité inversée - le voyant DEL rouge s’allume lorsque les bornes de la batterie ne sont
pas connectées convenablement.
3. Indicateur de reconditionnement de batterie - le voyant DEL jaune s’allume lorsque la batterie est recondi-
tionnée. Le chargeur reconditionnera la batterie uniquement en cas de « décharge profonde » de la batterie.
Le cycle se répète toutes les 4±0,5 heures jusqu’à ce que la batterie ne soit plus en état de « décharge
profonde » Si le cycle se répète 5 fois et que rien n’a changé, le code d’erreur F01 apparaîtra sur le panneau
d’afchage. Veuillez remplacer la batterie.

17
4. Indicateur DEL d’état de charge - le voyant DEL vert clignote lorsque la batterie est chargée à un courant
constant ou à une tension constante. Lorsque la batterie est complètement chargée ou qu’elle passe en
charge ottante, le voyant DEL vert s’allume.
5. Indicateur de courant - le voyant DEL de courant s’allume lorsque le panneau d’afchage indique le courant
actuel.
6. Indicateur de tension - le voyant DEL de tension s’allume lorsque le panneau d’afchage indique la tension
actuelle.
7. Capacité de la batterie - le voyant DEL s’allume lorsque le panneau d’afchage indique la capacité de la batterie.
Code Condition
LO La capacité est inférieure à 50%
80 La capacité est située aux alentours de 80%.
FUL La batterie est complètement chargée.
8. Bouton d’afchage - appuyez sur le bouton pour sélectionner le mode d’afchage sur le panneau.
9. Automatique – le chargeur sélectionne automatiquement le courant de charge adapté à votre batterie.
10. Indicateur de courant de charge 2 A – le courant de charge est réglé sur 2 A.
11. Indicateur de courant de charge 8 A – le courant de charge est réglé sur 8 A.
12. Indicateur de courant de charge 12 A – le courant de charge est réglé sur 12 A.
13. Bouton de sélection du courant de charge – permet de sélectionner le courant de charge adapté au type
de batterie. Consultez le tableau ci-dessous pour référence :
Taux de charge sélectionné Capacité de la batterie
Automatique Sélectionne automatiquement le courant de charge
en fonction de la capacité de la batterie.
2 A Jusqu’à 30Ah
8 A Jusqu’à 120 Ah
12 A Jusqu’à 140 Ah
INSTRUCTIONS D’UTILISATION
· Assurez-vous que le chargeur de batterie est déconnecté de l’alimentation électrique.
· Connectez la pince rouge du chargeur à la borne positive (+) de la batterie.
· Connectez la pince noire du chargeur à la borne négative (-) de la batterie.
· À l’aide du bouton de sélection de courant, sélectionnez le courant adéquat correspon-
dant à la batterie que vous souhaitez charger.
· Branchez le chargeur à une prise d’alimentation CA. Le voyant vert clignote pour indiquer
que la batterie est en cours de charge.
ATTENTION : Si le voyant rouge « Polarité inversée » s’allume, déconnectez immédiate-
ment le chargeur de la prise d’alimentation CA et vériez la polarité des pinces connectées
aux bornes de la batterie.
· Lorsque la batterie est complètement chargée, le voyant DEL vert s’allume. Le temps de
recharge peut varier en fonction de la capacité et de l’état de décharge de la batterie.
· Débranchez le câble d’alimentation de la prise de courant CA.
· Déconnectez la pince noire du chargeur de la borne négative (-) de la batterie.
· Déconnectez la pince rouge du chargeur de la borne positive (+) de la batterie.
· Rangez le chargeur de batterie dans un endroit sec.

18
DÉPANNAGE
Problème Cause Solution
L’indicateur DEL vert
ne clignote pas ou ne
s’allume pas quand les
pinces de charge sont
connectées à la batterie.
La tension de la batterie en cours
de charge est inférieure à la ten-
sion de démarrage minimale.
Essayez de reconditionner la batterie.
Si cela ne fonctionne pas, remplacez la
batterie. Éliminez la batterie défectueuse
conformément à la législation en vigueur.
Reconnectez le chargeur aux
bornes de la batterie. Vériez le branchement.
Le voyant DEL rouge
s’allume. polarité inversée Vériez que les pinces sont connectées
correctement.
Erreur de
charge Batterie dé-
fectueuse La batterie est morte et ne peut
pas être chargée. Remplacez la batterie. Éliminez la batterie
défectueuse conformément à la législation
en vigueur.
Surchauffe Le chargeur est trop chaud. Nettoyez les orices de ventilation sales ou
ôtez les objets couvrant l’unité. Placez l’unité
dans un endroit plus frais.
Temps de
charge
écoulé
Le courant de charge sélectionné
pour la batterie est trop faible. Sélectionnez un courant de charge plus
élevé.
Une cellule de la batterie est
endommagée. Remplacez la batterie. Éliminez la batterie
défectueuse conformément à la législation
en vigueur.
Arrêt pour
cause de
surtension
La tension de la batterie en cours
de charge est égale ou supé-
rieure à 15 V.
Vériez la tension de la batterie pour vous
assurer qu’elle est de 12 V CC.
SPÉCIFICATIONS
Les spécications peuvent faire l’objet de modications sans préavis.
Tension et puissance nominales 230 – 240V CA/50 Hz, 690 W
Courant à l’entrée 3 A
Courant de sortie maximum Automatic: 12A Max. Manuel: 2A/8A/12A
Tension de sortie continue 14,8 ± 0.3 V CC
Type de batterie Batterie de 12 V acide-plomb, VRLA sans entretien
(Gel et AGM)
Température ambiante De -20°C à 40°C
Poids 1419 g
Dimension (L×L×h) 285 × 19 × 91,5 mm
Consignes à suivre pour l’élimination de ce produit : si le symbole d’une poubelle barrée
apparaît sur un produit, cela signie que ce dernier est soumis à la Directive Européenne
2002/96/EC. Tous les anciens appareils électriques et électroniques doivent être éliminés
séparément des déchets ménagers dans des points de collecte spécialisés. La bonne éli-
mination des appareils usagés permet d’empêcher les dommages qu’ils pourraient causer
à l’environnement et à votre santé personnelle. Vous pouvez obtenir de plus amples infor-
mations à propos de l’élimination des anciens appareils en contactant votre municipalité,
le service d’élimination des déchets ou le lieu où vous avez acheté le produit.

19
ISTRUZIONI PER L’USO (ITALIANO)
PRECAUZIONI E PREPARAZIONE
PERICOLO: Le batterie contengono acido corrosive e gas esplosivi - NON FUMARE e NON UTILIZZARE
amme libere o altre fonti di combustione vicino ad esse. In caso di contatto con l’acido della batteria, sciac-
quare immediatamente con abbondante acqua fredda. In caso di contatto con gli occhi, sciacquare immedia-
tamente con abbondante acqua fredda e consultare un medico. Tenere bambini e animali lontani dal procedi-
mento di carica delle batterie.
NEL CASO IN CUI, DURANTE IL PROCESSO DI CARICA, LE BATTERIE O IL CARICABATTERIA DOVES-
SERO RISCALDARSI ECCESSIVAMENTE, INTERROMPERE IL PROCEDIMENTO E FAR CONTROLLARE
LE BATTERIE DA PERSONALE QUALIFICATO.
ATTENZIONE: LE BATTERIE RIMASTE INUTILIZZATE PER LUNGHI PERIODI DI TEMPO POTREBBERO
NON FUNZIONARE A CAUSA DI ESAURIMENTO ECCESSIVO O DI SOLFATAZIONE. NON È POSSIBILE
RICARICARE CORRETTAMENTE TALI BATTERIE. NON UTILIZZARE QUESTO CARICABATTERIA CON
BATTERIE DI QUESTO TIPO.
NON UTILIZZARE MAI IL CARICABATTERIA IN SOSTITUZIONE DELL’ALIMENTAZIONE. IL CARICABAT-
TERIE NON DEVE ESSERE MONTATO SU UN AUTOMEZZO, NON DEVE ESSERE ACCESO NE’ COLLE-
GATO MENTRE ALTRI SISTEMI DEL VEICOLO (ESCLUSO IL SISTEMA DI ALLARME) VENGONO ALIMEN-
TATI DALLA BATTERIA.
NON METTERE IN MOTO IL VEICOLO DURANTE IL PROCEDIMENTO DI CARICA DELLA BATTERIA.
ATTENZIONE: · NON RICARICARE BATTERIE NON RICARICABILI!!!
· QUANDO SI CARICA UNA BATTERIA, NON FUMARE ED EVITARE LE FIAMME
LIBERE!!!
· IL LIQUIDO ELETTROLITICO È CORROSIVO. EVITARE IL CONTATTO!!!
Per garantire una dispersione rapida dei gas che si possono formare durante il procedimento di carica, svitare
il tappo della batteria ed evitare amme libere o scintille. I gas sono esplosivi. Alcuni caricabatterie contengono
componenti, come interruttori o relé, in cui si possono vericare scintille o ponti; di conseguenza, quando si
utilizza il caricabatteria in ambienti chiusi posizionarlo in un luogo adatto.
Smaltire le batterie difettose nelle ofcine o negli appositi punti di raccolta.
· non gettare le parti in metallo o PVC con i normali riuti domestici
· Proteggere l’ambiente
In caso di danni al cavo d’alimentazione, per la sostituzione rivolgersi al produttore, a un centro di assistenza
o a personale qualicato. Non manipolare da soli il cavo d’alimentazione – rischio di danni legati all’’elettricità.
Questo dispositivo non è adatto a essere utilizzato da persone (inclusi bambini) con capacità siche, senso-
riali o mentali ridotte, o con mancanza di esperienza e di conoscenze, se non sotto la supervisione o dopo
aver ricevuto istruzioni da una persona esperta e responsabile della loro sicurezza. i bambini devono essere
sottoposti a supervisione per assicurarsi che non giochino con il dispositivo. Alcuni caricabatterie contengono
componenti, come interruttori o relé, in cui si possono vericare scintille o ponti; di conseguenza, quando si
utilizza il caricabatteria in ambienti chiusi posizionarlo in un luogo adatto.
CONDIZIONI DELLA GARANZIA
1) la garanzia copre tutti i malfunzionamenti legati ai materiali del produttore. Il produttore garantisce due anni
di sostituzione gratuita (in parte o totale) dalla data di acquisto. Le spese di spedizione saranno a carico del
cliente.
2) la garanzia è valida solo dietro presentazione della ricevuta d’acquisto.
3) la garanzia non copre le riparazioni necessarie in seguito a incidente, smontaggio improprio, danni provo-
cati da cadute o colpi, utilizzo improprio o con tensioni superiori a quella indicata.
4) in nessun caso la garanzia comprende il diritto al risarcimento dei danni e a un rimborso.

20
IN CASO DI GUASTI
Contattare il proprio rivenditore, che provvederà alla restituzione del caricabatteria insieme a un numero RMA
da noi fornitogli.
INTRODUZIONE
Grazie per aver acquistato un caricabatteria Absaar HF-1212. Questo dispositivo è stato progettato per cari-
care batterie gel e AGM ricaricabili da 12 V (generalmente con sei celle da 2 volt – per informazioni dettagliate
rivolgersi al produttore della batteria), all’acido di piombo, che non richiedono manutenzione, con una capacità
no a 140Ah. Il caricabatteria, completamente automatico, è in grado di scegliere autonomamente la corrente
di carica. Per una maggiore sicurezza, il caricabatteria include alcune funzioni di protezione automatica:
· protezione dai cortocircuiti
· protezione dalla polarità inversa
· protezione dal surriscaldamento
· protezione dalla sovratensione
· controllo automatico della ventola
· Lo schermo LCD mostra lo stato del dispositivo, compresi carica, carica completata,
ricondizionamento della batteria e polarità inversa.
CARICA IN TRE FASI DELLA BATTERIA
Un processo multifase garantisce che la batteria riceva una carica ottimale:
1) corrente costante
2) tensione costante
3) carica di mantenimento
IMPORTANTI INFORMAZIONI DI SICUREZZA
Un utilizzo o un collegamento errato del caricabatteria HF-1212 può danneggiare il dispositivo, la strumenta-
zione elettronica di bordo o dare vita a situazioni pericolose per gli utenti. Leggere le istruzioni di sicurezza,
con particolare attenzione a tutti gli Avvertimenti della guida. Conservare il manuale per future consultazioni.
INDICE
Introduzione 20
Importanti informazioni di sicurezza 20
Caratteristische 21
Istruzioni per il funzionamento 22
Risoluzione dei problemi 23
Speciche tecniche 23
Table of contents
Languages:
Other Absaar Batteries Charger manuals